macOS Sonoma, the latest iteration in Apple's ever-evolving operating system lineup, has arrived to succeed the remarkable macOS Ventura. Packed with a slew of exciting features, this new macOS promises to take your computing experience to new heights. From stunning screen savers and versatile desktop widgets to video conferencing tools that redefine virtual meetings, Safari enhancements, and gaming updates that elevate your entertainment, macOS Sonoma is a comprehensive upgrade that enthusiasts and Hackintosh PC or Laptop users are eagerly anticipating.
For those who have chosen to tread the path of creating a Hackintosh, exploring the latest macOS is a thrilling endeavor. This guide is tailored specifically for you, eager adventurers looking to unlock the potential of macOS Sonoma on your PC and Laptop. Join us as we embark on a journey to install and experience the cutting-edge features of macOS Sonoma on your Hackintosh PC or Laptop, opening up a world of possibilities and innovation. Let's dive in!
How to install macOS Sonoma on PC and Laptop (Hackintosh)
In this guide, we will utilize two familiar tools, OpenCore and Virtual Machine, to assist you in successfully installing macOS Sonoma on your Hackintosh PC or Laptop, and here's why we've chosen these two tools:
- OpenCore: OpenCore is a versatile tool that facilitates the installation of macOS on both PCs and Laptops. It provides comprehensive hardware support, ranging from Graphic Cards to Wi-Fi. If you're considering building a Hackintosh with full OpenCore support, you can follow the instructions provided in the link below.
- Virtual Machine: Installing macOS on a PC or Laptop can be a challenging process, often involving multiple adjustments to EFI Bootloader and Config.plist files, requiring repeated attempts until macOS successfully boots. To streamline this complex procedure, it's highly recommended to use a macOS running on a Virtual Machine. You can use any macOS version, such as Monterey on VMware. The older the macOS version, the faster it runs on a Virtual Machine. This approach not only accelerates the process but also makes customizing your macOS Sonoma installation smoother and more efficient.
1. Download macOS Sonoma
There are two methods to download macOS Sonoma. The first option is to directly download the InstallAssistant.pkg file from Apple's server. You can do this through your web browser on either a Windows or macOS system. Once you have obtained the InstallAssistant file, copy it into your macOS Virtual Machine, and then open the file to proceed. Be sure to extract the InstallAssistant file after running it.
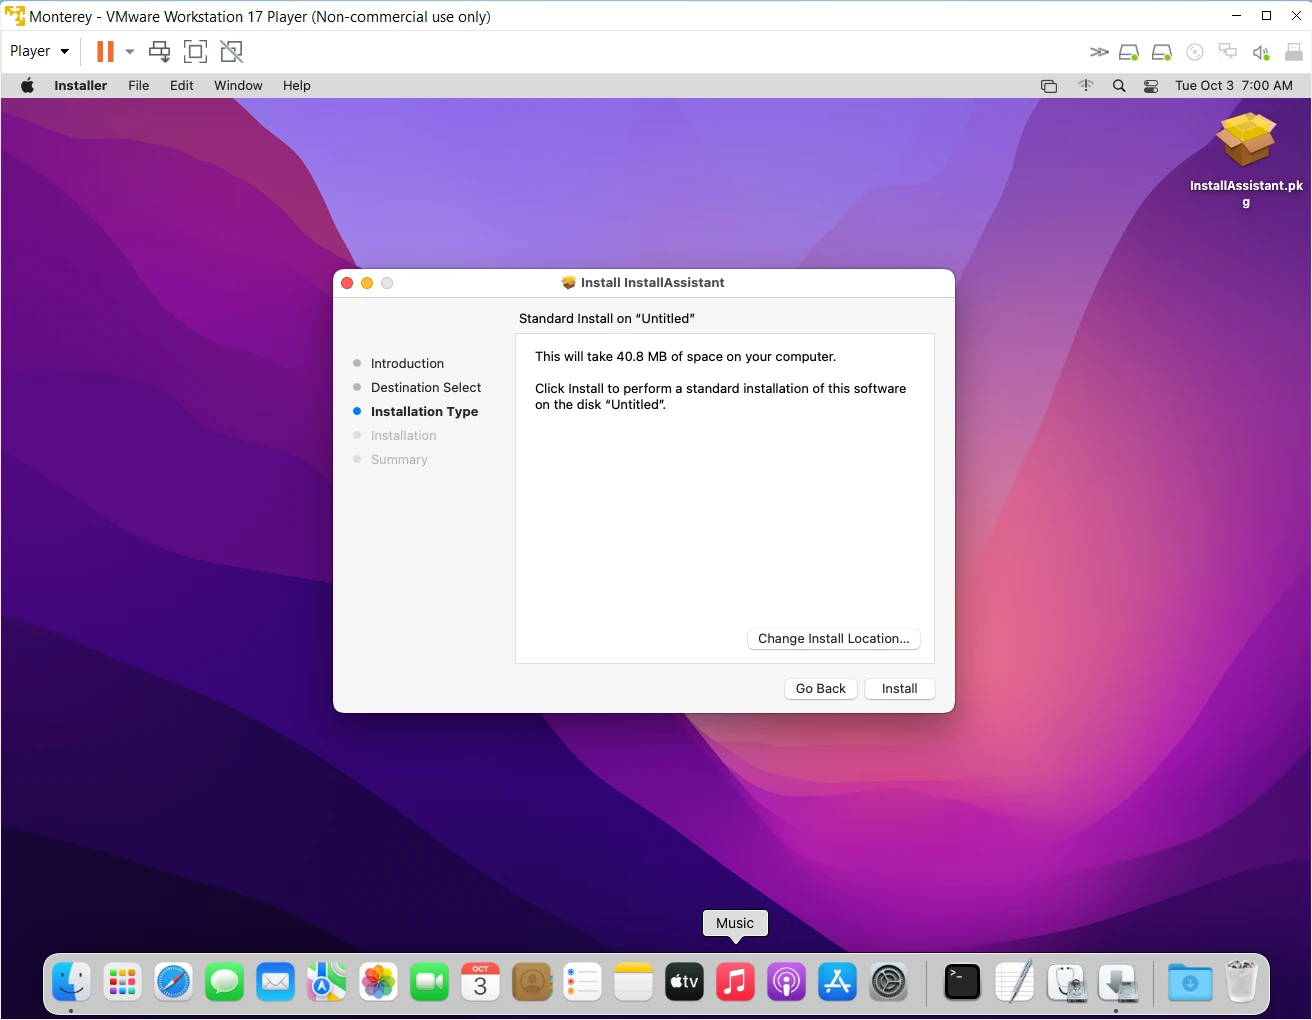
Extract Sonoma Final InstallAssistant file
Once the InstallAssistant file has completed its operation, you will find the macOS Sonoma installer in the Applications folder. We will use this file to create the macOS installation package.
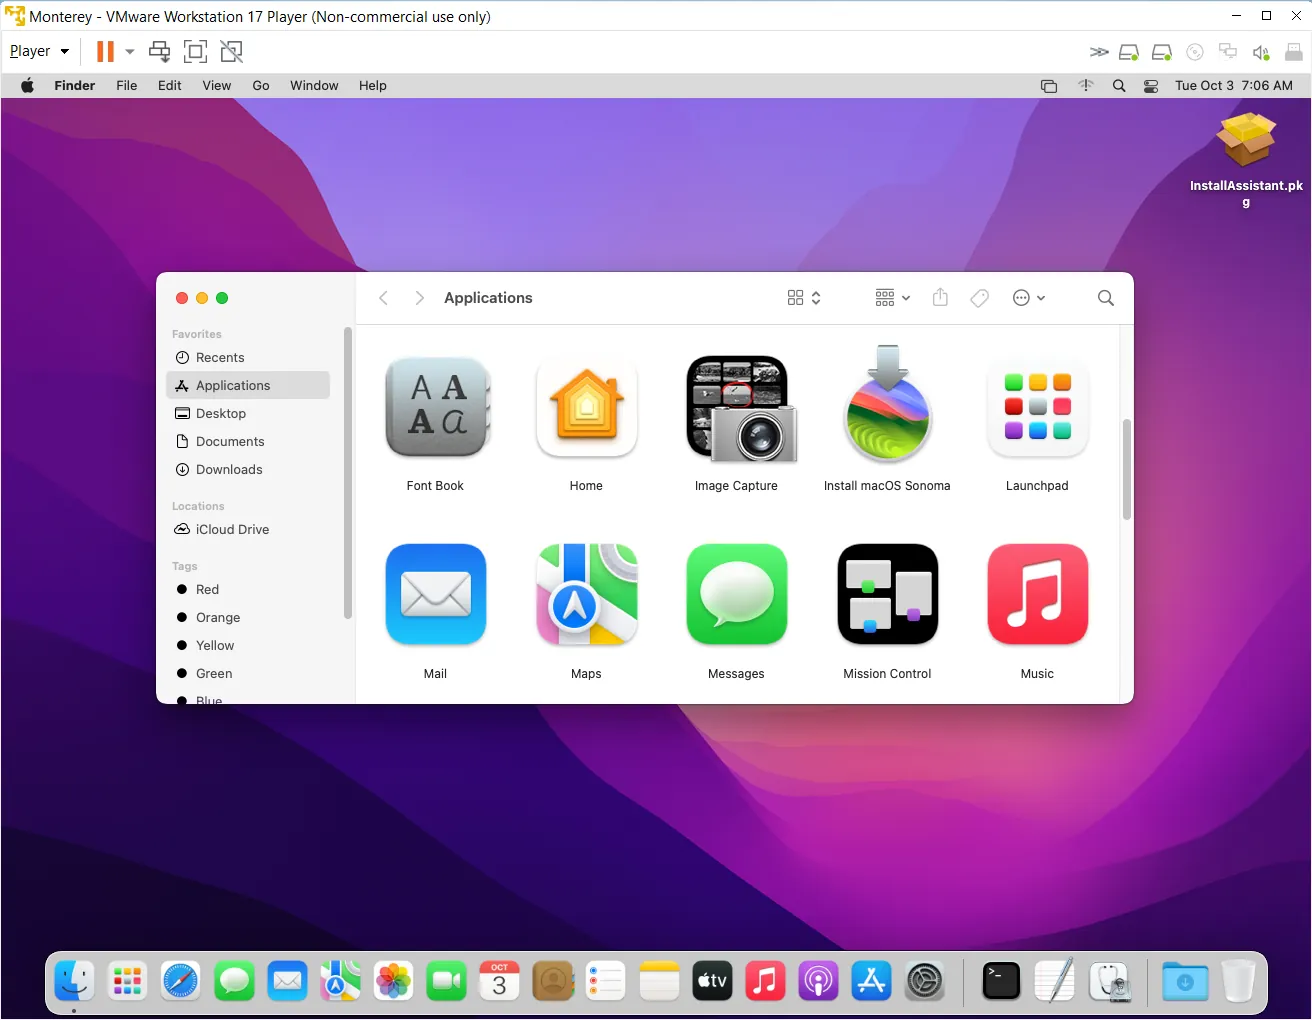
Install macOS Sonoma in Applications folder
The second method involves downloading macOS Sonoma directly from the App Store link within your macOS Virtual Machine. Please note that this method may take longer due to the typically slower Read/Write speeds of Virtual Disk.
2. Create macOS USB Installer
First and foremost, we need to reformat the USB drive to match macOS standards. You'll need to format it as "Mac OS Extended" with a "GUID Partition Map." The GUID Partition Map is essential for creating an EFI partition on the USB drive.
To change the format of the USB drive, open Disk Utility either through a Spotlight search or by navigating to the Applications > Utilities folder. Then, select your USB drive and click on the "Erase" button to delete its content and change the format as shown below.
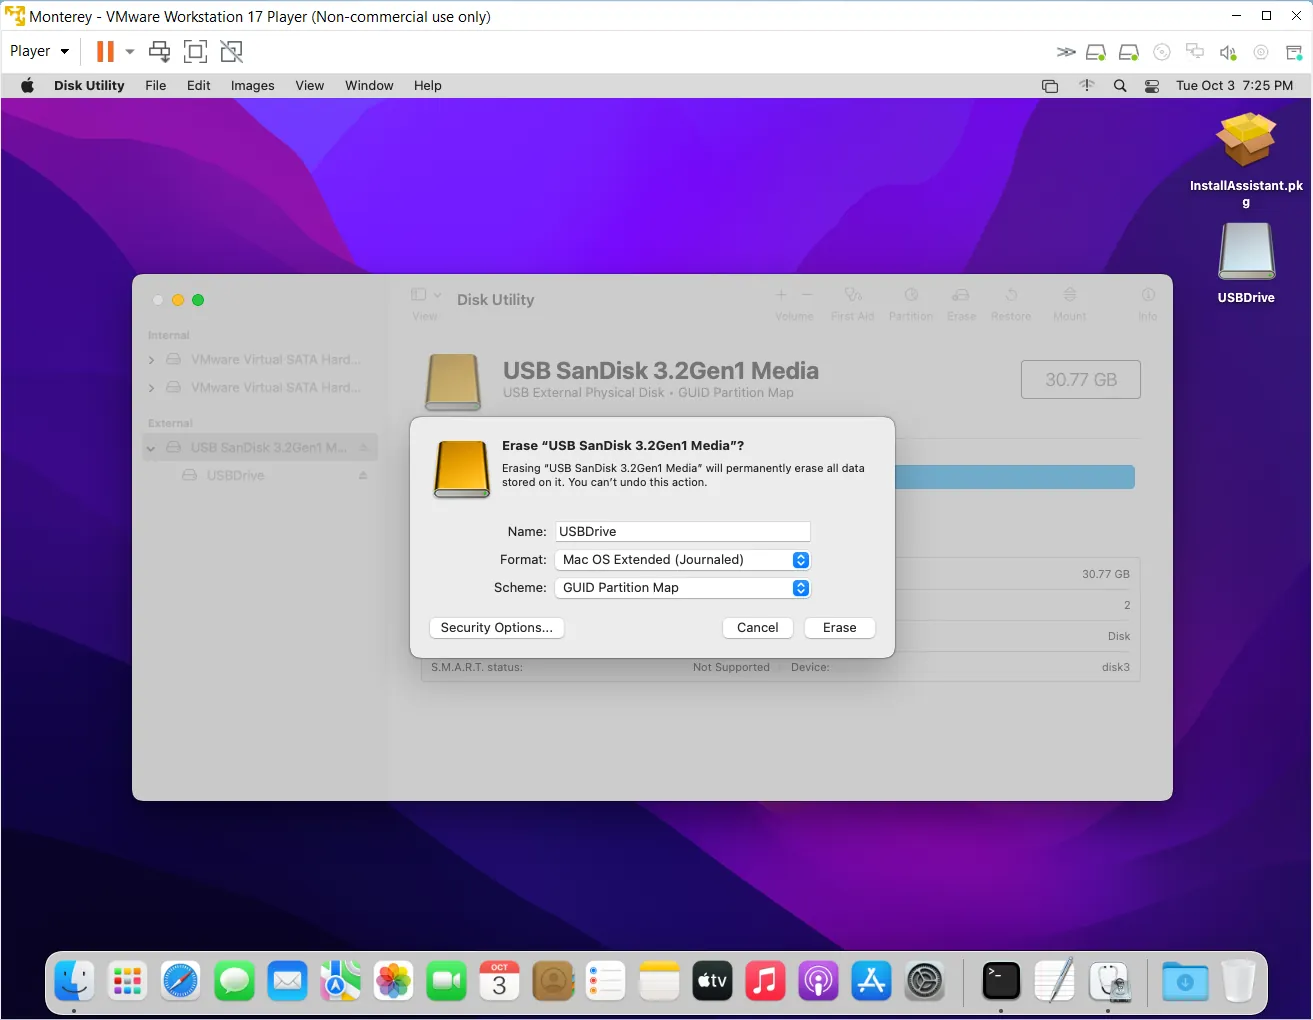
Format USB Drive in Disk Utility
Next, to create a macOS Sonoma installer on the USB drive, we'll need to use Terminal on macOS. To open Terminal, you can either use Spotlight search to locate it or find it in the Applications/Utilities folder and launch it from there.
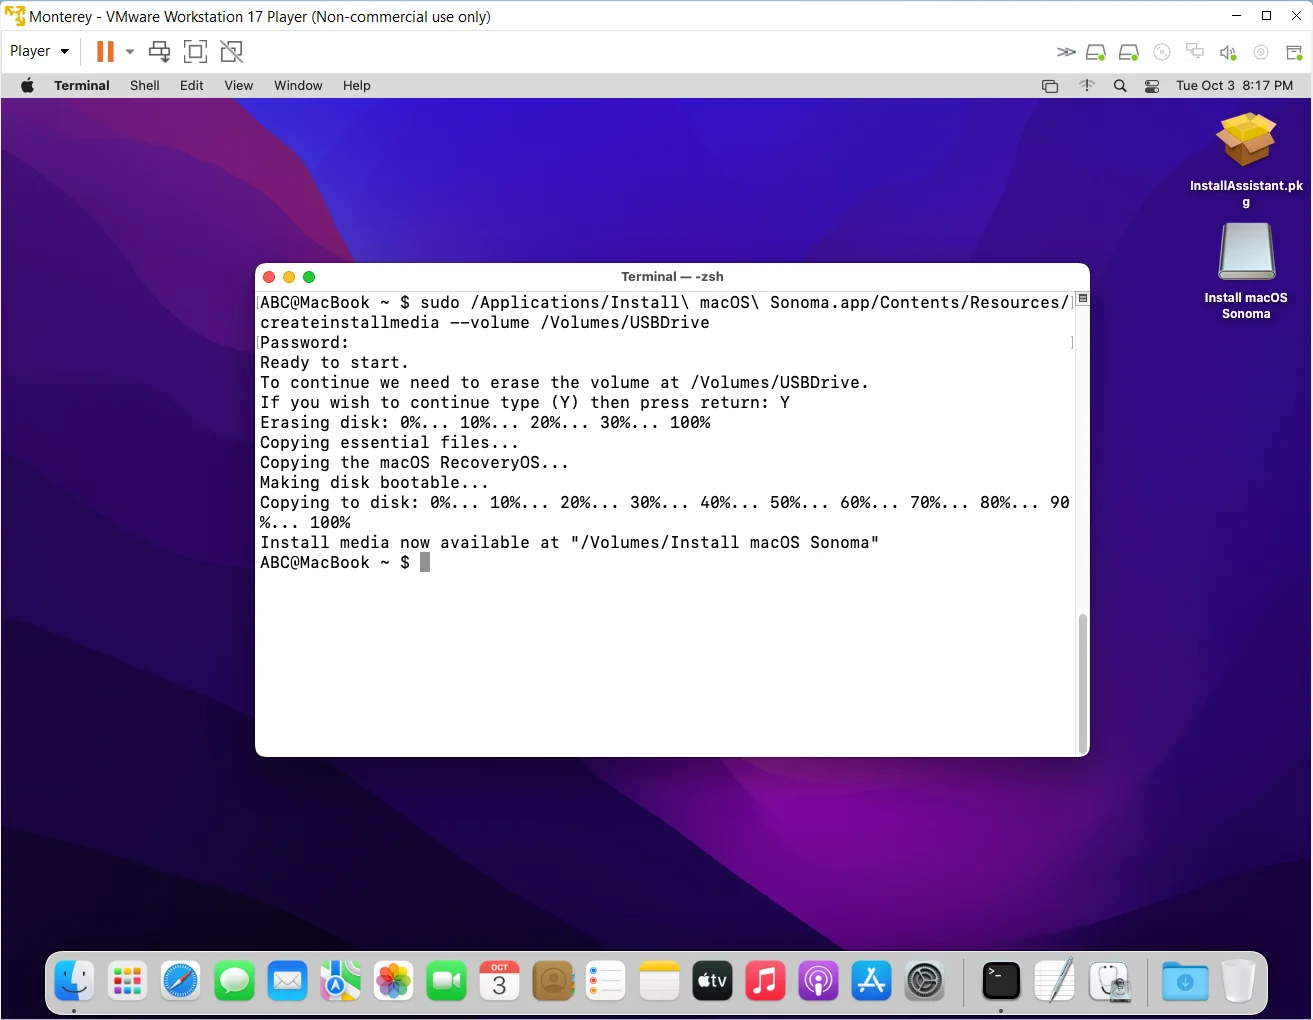
Create macOS Sonoma USB Installer
Once Terminal is open, use the following command. Please note that in this guide, the USB Flash Drive is referred to as "USBDrive." If you've named your USB drive differently, be sure to adjust the command below accordingly.
As we're using a command that starts with "Sudo," you'll need to confirm your macOS password for Terminal to initiate the macOS installation package creation process.
3. Mount EFI Partition.
Next, we need to create a Custom EFI using OpenCore. Since each PC or Laptop configuration is unique, custom EFIs are required, each with specific attributes tailored to the CPU, Graphics Card, and Kext for your system. These details are stored in the Config.plist file. To create a Custom EFI for your PC or Laptop, you can follow the detailed instructions provided here.
Once you have your Custom EFI prepared, the next step is to copy this EFI folder to the EFI partition of the macOS Sonoma Installer.
Continuing with Terminal from step 2, use the following commands to mount the EFI partition. First, utilize the "diskutil list" command to list all drives on macOS.
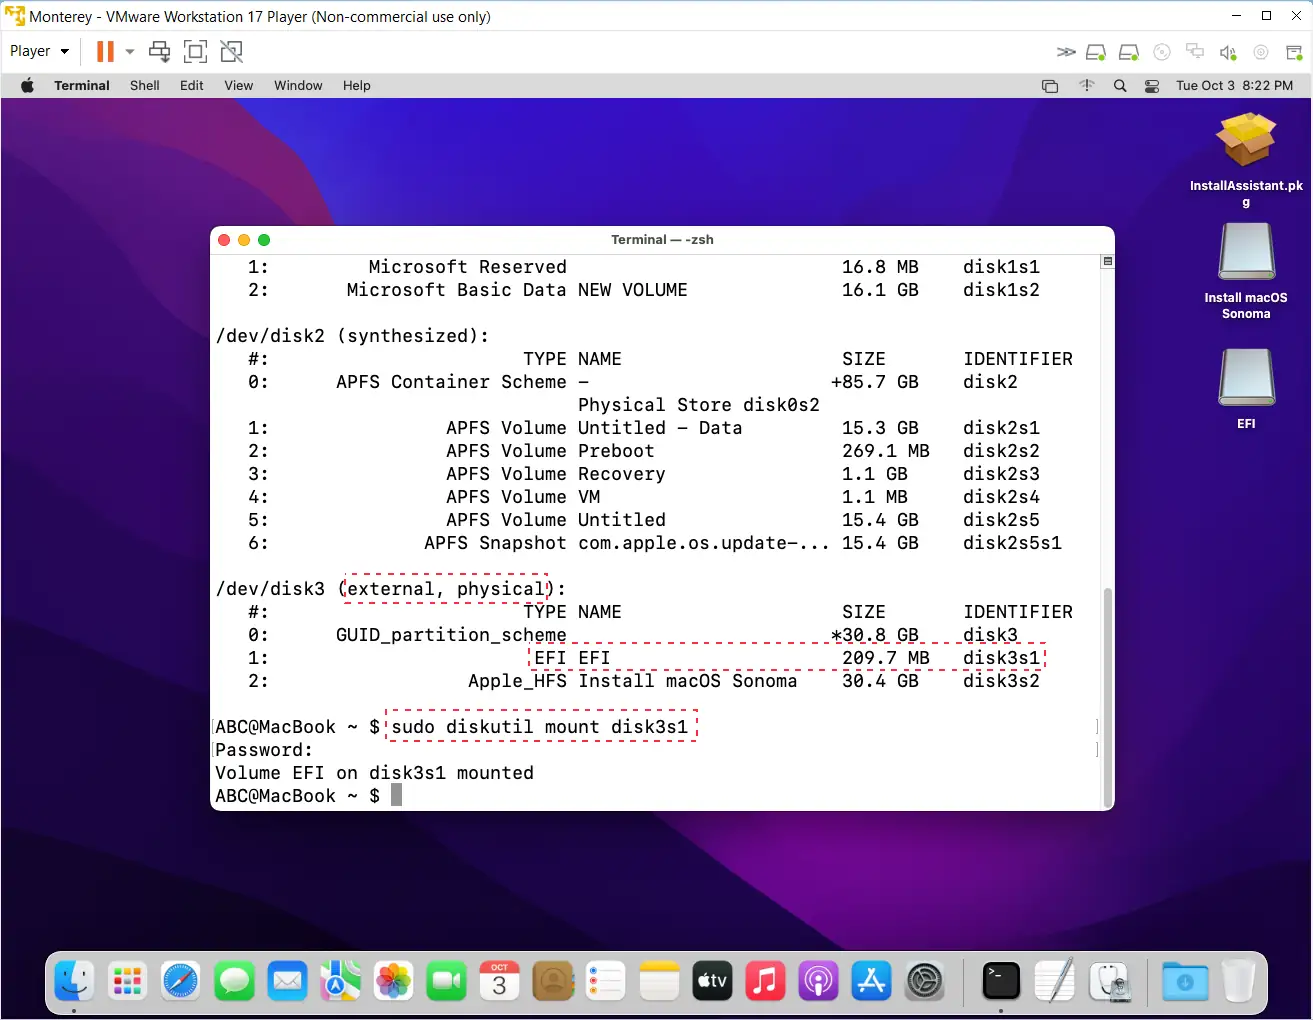
Mount EFI Partition with Terminal
Then, use the "sudo diskutil mount diskXsX" command, where X represents the ordinal number of your EFI drive. In the example below, the External drive is disk3, and the EFI partition is on disk3s1. Therefore, the command would be: "sudo diskutil mount disk3s1."
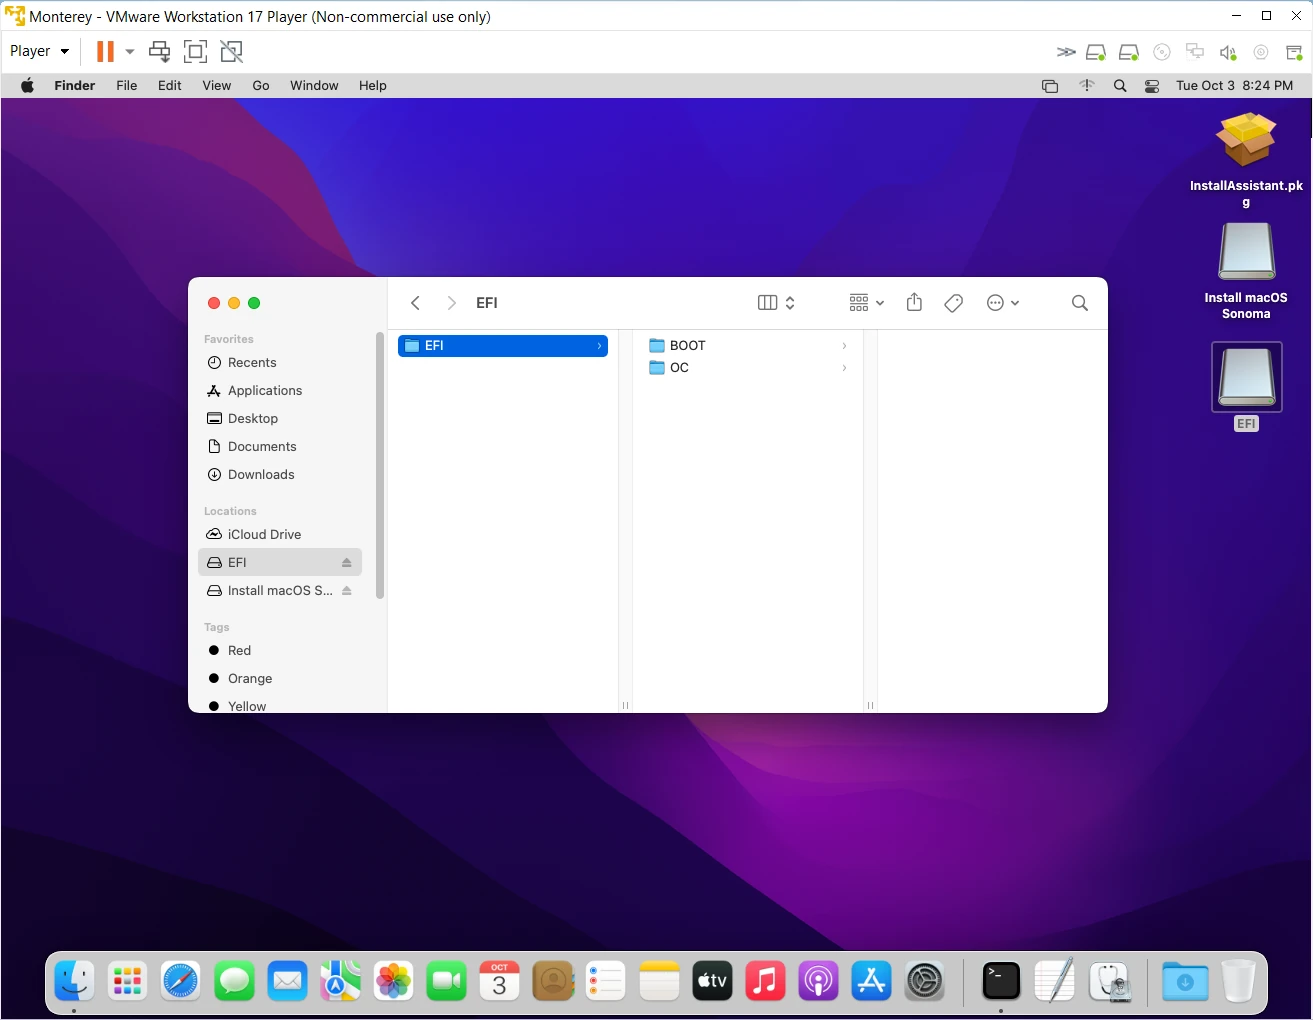
Move EFI Folder to EFI Partition
Once the EFI partition is mounted, simply copy your Custom EFI into this drive. Please ensure that the folder structure within EFI is correct before proceeding with the macOS Sonoma installation.
4. Boot to macOS Sonoma USB Installer
To initiate the macOS Sonoma installation process on your PC or Laptop, you'll need to restart your computer first. Then, press the ESC, F8, F9, F10, or F12 key to access the Boot Menu. Different manufacturers may have different shortcut keys for entering the boot menu; for example, Acer laptops often use F12, HP laptops typically use F9, and Asus laptops use F8. It's advisable to check the specific Boot Menu Key for your device before proceeding with this step.
Once you've accessed the Boot Menu, select the macOS Sonoma USB Installer to begin the installation process. If you encounter any errors during the booting into the boot menu, you can revisit step 3 to customize the Config.plist file in the EFI partition to address these issues.
5. Install macOS Sonoma on PC or Laptop
Next, access Disk Utility to create a new partition for macOS Sonoma. The macOS partition will coexist seamlessly with Windows partitions.
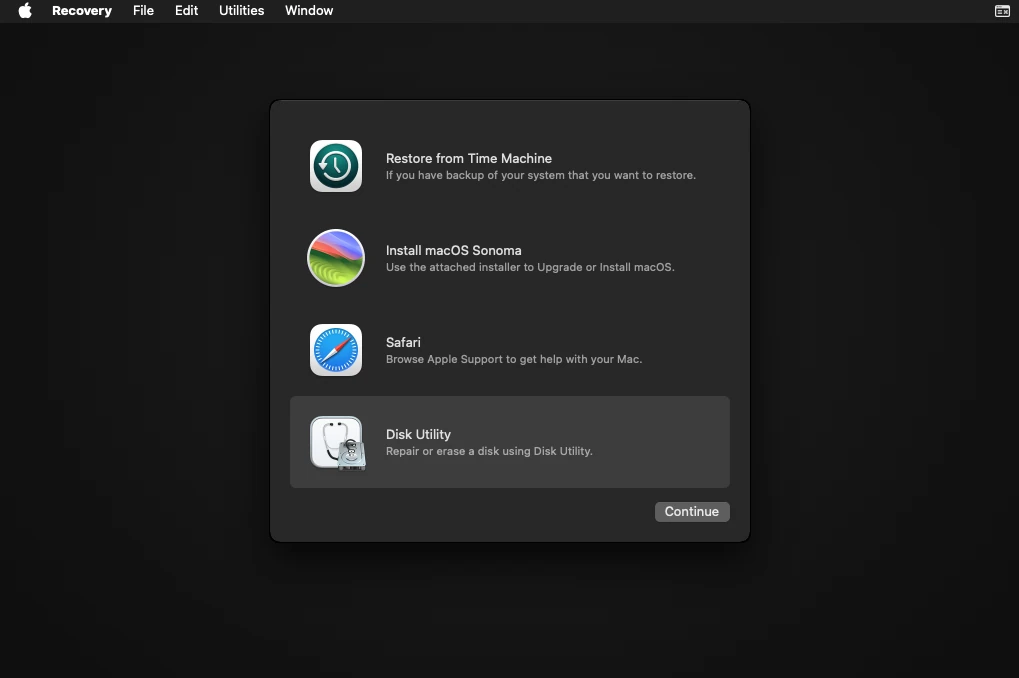
Open Disk Utility in macOS Sonoma Install Assistant
Afterward, select "Install macOS Sonoma" to initiate the macOS Sonoma installation. The installation process does not require an internet connection and typically takes anywhere from 15 to 30 minutes, depending on the performance of your computer.

macOS Sonoma on PC and Laptop
Once the macOS Sonoma installation is complete, you essentially have macOS Sonoma running on your PC or Laptop. However, some finishing touches are needed for your Hackintosh, as features like Audio and Wifi might not work, and you may be unable to adjust screen brightness. To address these issues, we will continue to provide more articles and guides at the link below to help you complete your Hackintosh PC or Laptop setup.



Leave a Comment