Android is one of the most common operating systems out there. It has proven to dominate the smartphone market but is yet to get its way into the world of PCs. This is not to mean that you cannot enjoy having an Android environment on your computer. You can do so using virtualization software.
There are many reasons why you would want to have the latest Android 8.1 Oreo on your computer. It could be that you are a developer and have decided to venture into Android apps. You will need an emulator to test the apps you develop. You can use virtualization software to create an Android device-like environment on which you can try out the application. Perhaps you are just curious what the Oreo has to offer. You can find out by running it on a virtual machine. Doing this should actually be the first step before any Android user upgrades their Operating System.
An Android virtual machine can be created using various virtualization software solutions available. There are many of them but only two have the very best features. These are VirtualBox and VMware. Their free versions are feature-laden while their paid versions make the impossible possible. Users get access to every feature of Android just like it works on a phone. Developers will appreciate the fact that they can create different Android device-like virtual machines so they can test apps on devices of different specifications. They will be able to easily create virtual machines with different RAM, ROM, and other specs so as to determine how the app will work on different Android phones.
VMware Player vs Virtualbox
Android 9.0 ISO or Android 9.0 Pie Virtual Image?
Installing Android 9.0 Pie on VMware Player (free)
Step 1: Install Vmware Player and Download Android Pie Disk ISO
Download and install the VMWare Player and Android Pie Disk ISO file for personal use choose the free version while advanced users will need the paid version that has more features to offer. Either way, you will need to head over to the VMware Player download page. Select what you want to download and click on the "download now" button.

To install the VMware you will need to navigate to where the downloaded file is located. The file to look for here has a .exe extension. Right click on it and choose "Run as Administrator". An installation wizard will guide you through the process. When done with the installation you will need to restart your computer before proceeding.
Step 2: Create a New Virtual Machine
Start off by clicking on the "Create a New Virtual Machine" button. Then click "I will install the operating system later". When the "Guest Operating System Installation" window comes up, choose to install the operating system later. Next, you will be required to select the guest operating system. Click on the radio button next to "Linux" and choose the version as "Other Linux 4.x".

Next are the name and location. Choose a name that is easy and sensible. "Android 9.0 Pie" would be a good choice. As for the location, specify where the virtual machine is to be stored. Then click "Customize Hardware" You can choose any size RAM and CPU. Click on the "Memory" menu and set the memory you would like to allocate to the VM. Choose over 1GB but do not exceed the maximum memory size that is recommended.
Under the hardware tab, click on "CD/DVD (IDE)" and on the small window that opens to the right, select to Use ISO Image file. Click on the Browse button and go to where the Android 9.0 ISO file is located. Select it and press the "Open" button.

Then select tab "Display" and enable "Accelerate 3D Graphics".

Confirm that they are accurate and click on the "Close" button. The virtual machine will be created within a short time.
Go to Network Tab in VMware and disable "Connect at power on"

Step 3: Install VMware Android 9.0 Pie
Click on the "Power on this Virtual Machine" option to start the installation process. A few seconds later a blue screen will appear. On this screen, select the "Advanced options". Next click "Auto Installation” to install android 9.0 in VMware

When the installation is done, right click on "CD/DVD icon" and select "Disconnect", then click "Reboot" the VM. As you reboot, you will see a black screen with writings on it.

Step 4: Boot with xForce Mode
Press "e" button to edit this command before booting.

Press "e" button again, and move the cursor to left-hand. Replace “quiet” parameter with “nomodeset xforcevesa”, then press “Enter” to save and press “b” button to boot.

Step 5: Enjoy the cool features of your VMware Android Pie VM
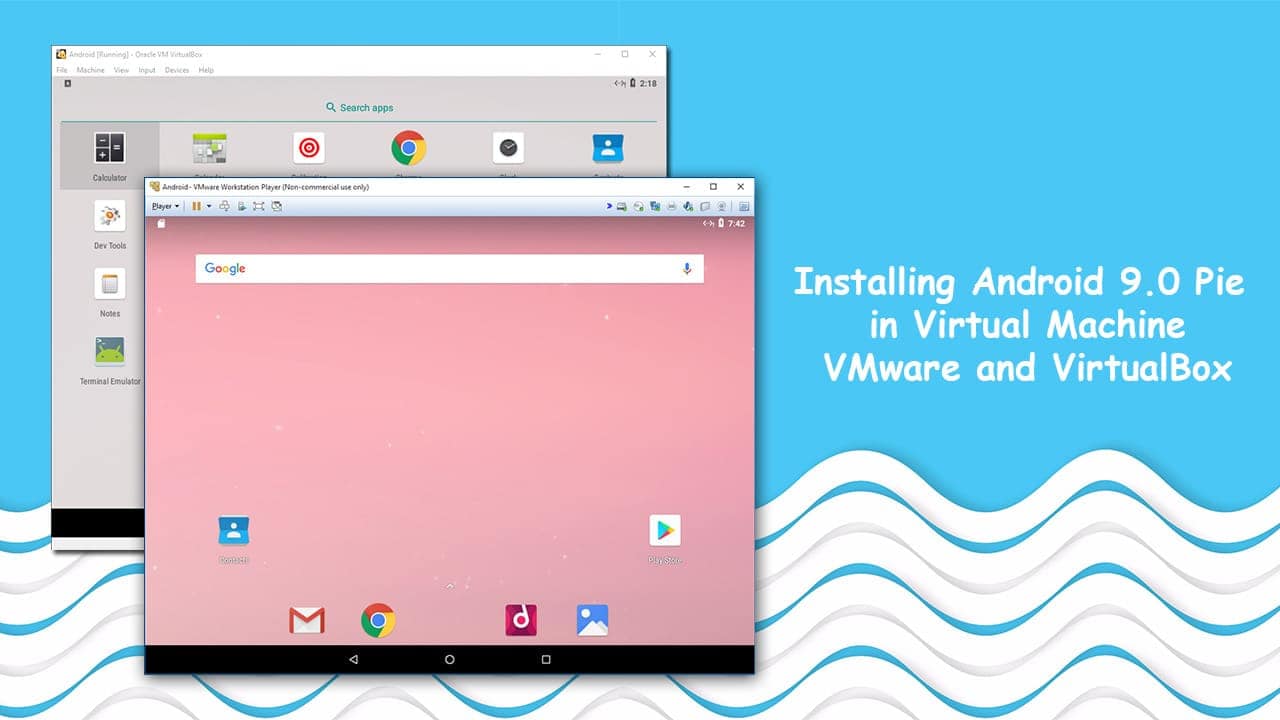
When the startup is complete, you will see a screen that resembles an Android phone’s. Click on "Skip" button to connect Wifi and create a new account.

You can now check out the cool features of the Android Pie. Download and install apps you love. Enjoy games, chat applications and much more on the new and improved Oreo; right on your computer! You are done and we congratulate you. Please do let us know if you face any problems.

To connect Internet Android 9.0 Pie on VMware, Click on Player - Removable Devices - Network Adapter - Connect. In Android 9.0 on VMware go to Wifi Settings and connect to "VirWifi" to connect VMware Network.

Installing Android 9.0 Pie on VirtualBox
Step 1: Install VirtualBox and Download Android Pie ISO File
Download all you will require In order to proceed, you will need to download two important files. One is the VirtualBox installation file that can be found at the developer’s official website. Second is the Android 9.0 ISO file. You can also opt for a disk image depending on what you prefer. Just ensure that the site from which you download is trustworthy.

Double-click on the .exe (on Windows) or .dmg (for MacOS) Virtualbox file and the installation process will start. This is very easy with prompts on the screen guiding you through the entire process. Follow these and you will be done in a few seconds.
Step 2: Create the Virtual Android Machine
Press the "New" button and the process of creating a new virtual machine on VirtualBox will be started. All you will have to do on each screen is making a few changes and press "Next".

On the next screen, you will be required to choose the name of the VM, its type and version. The name can be anything you want but the Type and Version have to be "Linux" and "Other Linux (64-bit)" respectively.

When prompted to choose the memory size, adjust it so it is 2048MB. This selects the amount of RAM the new VM will be using. It should be about 50% of what you have for the best performances. On the Hard disk window, choose to create the virtual hard disk now and select "VDI (VirtualBox Disk Image)", As for the storage on physical hard disk, choose "Dynamically allocated".

The remaining steps involve choosing the file size and location. The file size refers to the maximum amount of data the virtual machine can store on the physical hard disk. All done! Click on the "Create" button and be patient as your virtual machine is created.
Step 3: Edit the Virtual Android Pie Machine
Select the newly created Virtual Machine (shown on the left-hand side of the screen). Click on the "Settings" button located just above that. We need to make a few changes that will make this virtual machine work perfectly.

On the Storage panel, select "Empty" disk then click on the CD icon next to this. Browse to the location of the "Android Pie ISO" file, click on the file and click on "Open". This will be added to Storage Tree. Turn on "Live CD/DVD" button. Click "OK" to save the changes.
On the Display panel, increase the Video RAM to 256 MB and enable 3D Acceleration. Leave everything else unchanged.
Step 4: Install Android in Virtual Machine with VirtualBox
Select the your Virtual Machine and click on the "Start" button. This starts the VM; it is just like pressing the power button on your phone or computer. When it boots, you will see four options. Choose "Advanced Options". Select "Auto Installation – Auto install to specified hard disk". The installation process will start and will be over in a short time.

Step 5: Boot to xForce Mode
Press "e" button to edit the commands before boot to android 9.0.

Press "e" button again, and replace "quiet" with "nomodeset xforcevesa" then press "Enter" to save this commands. Press "b" button to boot with this command.

Step 6: Run Android 9.0 Pie in VirtualBox
After successful installation, click on "Skip" button to create a new account without Internet.

All that is left is now enjoy the Android Pie on your Mac or Windows PC!

To connect Internet in Android 9.0 Pie on VirtualBox, go to Wifi Setings in Android and connect to "VirtWifi".

Bottom Line
Creating an Android virtual machine on your computer is possible thanks to the leading free virtualization software. Whether you choose VMware or VirtualBox, the bottom line is that you will be able to operate Android 9.0 Pie on your computer. These virtualization programs are great and they will deliver a great experience. The best part is that there are free versions that are feature-laden. It will work so well you will regret why you had not tried it earlier. Give this a try and tell us how your experience was.


worked well to me ! thank you !
How can i connect the emulator to adb command ?
do i have to change the ” quiet” every time i restart the vm? is there a way i can save the apps i downloaded
After install first boot it looks good. after that it go into blank screen and wont display anything after boot. I have installed on vmware workstation.
You should use 8.1 version, because new version 9.0 is very slow on Virtual Machine. Enable “3D Acceleration” to fix your problem.
I’ve installed whatsapp on android but someone should send me a message so that i can launch my whatsapp by using notification panel.is there a way to create a shortcut of whatsapp on android desktop?
Is there a way that I can add an camera to the vm?
Sadly, no.
You need to install Vbox additions pack to use host cameras.
Do I have to write ‘nomodeset xforcevesa’ everytime I boot the machine?
yes brother everytime when open you need to write
i did all the steps but all it says is:
Detecting Android-x86… found at /dev/sda1
console:/ #
pls help me
ISO only seems to be a live console, does not install with oracle VM 6.0.14, requires reinstalling everytime it is opened and ONLY boots a console, no GUI
Hey,
when i power on my virtual machine again after 1 usage and shut down, its not opening
Hi. Do you use VMware or VirtualBox?
I don’t know about him but the same problem happens to me in vmware 15 pro. I have to go through all the process starting from the pressing ‘E’ part.
Has anyone figured out how to install vmware tools. I’ve messed around trying to install them via the terminal but can’t seem to get them installed. It is annoying as I can’t seem to change the screen resolution.
Found the solution!
You have to edit menu.lst file. Here is how:
boot in debug mode (usually the second option in boot menu)
when booting stops (for me it just hangs there with flashing cursor and without any prompt) enter mount -o remount,rw /mnt
enter cd /mnt/grub
enter vi menu.lst
configure the nomodeset xforcevesa parameter as mentioned and then reboot -f
Nice one, works like a charm. Thank you.
Perfect…It works 🙂
Nice! Great info that really should have been included in the post. To add further, for those that don’t know how to save edits and/or exit vi back to the cmd prompt…
Save: Press [Esc], type :w and press [Enter].Exit: Press [Esc], type :x and press [Enter]
Then typing reboot -f will do as intended without having to edit the boot parameter again.
in step 4
Replace “quiet” parameter with “nomodeset xforcevesa”, then press “Enter” to save and press “b” button to boot.
quite nor the command in the picture are there did i do something wrong?
Hi. Can you explain or give me a screenshot problem?
Detecting Android -x86… found at /dev/sr0
x86-64:/ #
replace the “quiet” with the above step indicated. The “quiet” comes back and will log you into shell
Hi. Step 4 ‘Boot with xForce Mode’ will help you fix this problem!
I don’t understand what you are telling me to do
I think the x86 versoin is bugged. Google play service crashes every time.
Hey there, thanks for the tutorial but I’m having issues on the first setup. My network settings are okay, but whenever I try the option “Set up as new”, I always get the message “Play Services has stopped.” and I can’t do anything at all.
Try the 64-bit version.
Whenever I try to sign in it says that google play services crashed and then it won’t sign in or do anything.
Hi. Check your Network settings!
Hi, same problem with Play Service Crash during first configuration. My networking settings are OK. I’m connected to the Virtual Wifi and and can naviguate with Chrome. But, I can’t use the Play Store. I’m in Belgium. Thanks for your help!
Hi Geil. I’ll check this problem!
help me for resolution screen 1920×1080 in vmware player 15
You have to go to the VM settings and go to display them check mark “Specify Monitor Settings” and “Stretch Mode” down at the Display Scaling also in display. Then also make sure that number of monitors is set to one and maximum resolution is set to 2560 x 1600. Plus, make sure that It isn’t set to free stretch down at the display scaling.
its not full screen when i tried it.other then that it works but pls send me help
android 64 bit on VMware 15
add the extra parameter ” video=1920×1080″ to the boot item
Hi, I followed your instruction to installed the oreo on vmware workstation. Installation is OK and I can get into Oreo.
The step: “Replace “quiet” parameter with “nomodeset xforcevesa”, then press “Enter” to save and press “b” button to boot.”
I have to do it every time.
Would you tell me the best way to save it permanently. I don’t need do it on next boot. Thank you.
Thank you! I’ll check this!
And he Never replied Again…
Sorry Kevin. Can I help you?
Thanks for telling me!
Hello, I found the solution in this:
I’ll copy the steps here in case the link will go dead for some reason.
– boot in debug mode (usually the second option in boot menu)
– when booting stops (for me it just hangs there with flashing cursor and without any prompt) enter mount -o remount,rw /mnt
– enter cd /mnt/grub
– enter vi menu.lst
– press Shift+a
– right under the first boot entry find the line starting with kernel initrd=/in (your line might look different; it depends on Android version; in general just find the line that starts with kernel)
– at the end of the line type vga=834 nomodeset xforcevesa
– press ESC then :wq – these commands will save the file and quit vi
– enter cd /
– enter umount /mnt
– enter reboot -f
Hi, Daczo,
Thanks for your help. It works great!
I also want to say “Thanks” to John for sharing to us.
Bye
After saving, it is displayed only
No camera available 🙁
Hi. Do you use VMware or VirtualBox?
Hi, is it possible to change the resolution over 1280×800? If yes, how? Thank you
Works like charm for VMWare. Thank you!
Thank you!
So, i did everything as shown. I’m on virtualbox, i did everything, and it just says android like its in a boot loop. i’be been waiting for 20 mins and it is still loading. i will make a update if it boots.
Hi. Can you explain? What is your processor?
I had the same problem, I had to adjust my settings because they were different from the ones stated in this article, and it worked. Just make sure that the virtual machine settings are the same as here
I’m using Vmware Fusion not the free version. I have found many tutorials for this, none work for me. I tried the Auto install and manual install following other tutorials. This one shows how to (e) edit in the boot menu, however I do not see the same writing as in this tutorial, mine says – “<dboot.selinux=permissive SRC=/android-8.1-r1" and that's it. So yeah, no clue how to get this Android running, seems to me all of these tutorials either work for older versions of VMware or I have no clue? I'm running 11.0.2
Hi. What is your problem? Give me a screenshot link?
You are at the end of the line. Use the arrow keys (specifically the left arrow) to scroll back.
mine says “x86_64:/#” and nothing else happen
Hi. Give me a screenshot link?
Did you do the step ´Replace “quiet” parameter with “nomodeset xforcevesa”´ ? Here, this replacement startet the GUI.
Thanks so much!
Thank you!
x86:/#
This showing
No Oreo 8.1
Hi. Give me a screenshot?
Hi John
I can’t save “nomodeset xforcevesa” parameters.
I need to change them when i restart my VM.
is there a solution ?
Thank you
Thank Gerald. I’ll check this problem!
I have found a solution on other web site :
After Android loads press Alt+F1 to see Android command line
Now mount sda1 block device and change GRUB menu.
mkdir /mnt/sda
mount /dev/block/sda1 /mnt/sda
vi /mnt/sda/grub/menu.lst
On vi press “i” to enable edit mode.
Then add “nomodeset xforcevesa” parameters to first menu row.
Press Esc to exit edit mode.
Then type “:w” and press Enter to write changes.
Type “:q” and press Enter to quit.
Type “reboot” and press Enter.
Thank you!
I have a problem.
PXE-MOF: Exiting Intel PXE ROM
Operating System Not found.
Hi Jams. Do you use VMware or VirtualBox? Check your Guest OS and boot with CD/DVD option in Virtual machine.
canot connect to wifi
Hi Alex. Do you use VMware or VirtualBox? Do you enable NAT network?