The new macOS 13 Ventura Final was released on 24th Oct, 2022 and fans are beyond excited to try the new features. These new features have transformed the way people use their Mac.
But fret not, there are quite a handful of workarounds to install macOS 13 Ventura on unsupported Macs. Using OpenCore Boot Manager, you can easily install macOS Ventura on some older Mac models.
What is OpenCore?
With each new announcement of the next macOS, Apple drops support for its older Mac models, even though many of them are capable of running the new macOS. This encourages developers to build tools and software that can run macOS even if it’s not supported by Apple.
OpenCore is a free and open-source boot manager that’s used to install macOS 13 on older or Unsupported Mac. This tool patches data onto your Mac’s which lets you install macOS 13 Ventura’s first beta version on your system.
OpenCore is also known as “boot manager” It installs new data such as SMBIOS, ACPI tables, and kexts (more commonly known as drivers for macOS). With the help of OpenCore, Boot manager will install on EFI partition with Opencore.efi file. When you turn on your Mac, Boot Manager will help you boot to macOS 13 Ventura on Older Mac.
OpenCore Supported Models
Please note that not all older Mac models will support macOS 13 because they don’t have the hardware to run it. Some older Macs will give you trouble with the GPU, mouse, keyboard, and other components. Other unpredictable problems may also arise if you have a Mac that’s fairly old.
The method explained in this guide will only work for the following models:
- Mac mini – Early 2009 or newer
- iMac – Late 2012 or newer
- Mac Pro – Early 2009 or newer
- MacBook Pro – Mid-2012 or newer
- MacBook Air – Mid-2012 or newer
- MacBook – Mid-2015 or newer
How to Install macOS 13 Ventura on Unsupported Mac
1. Download macOS 13 Ventura
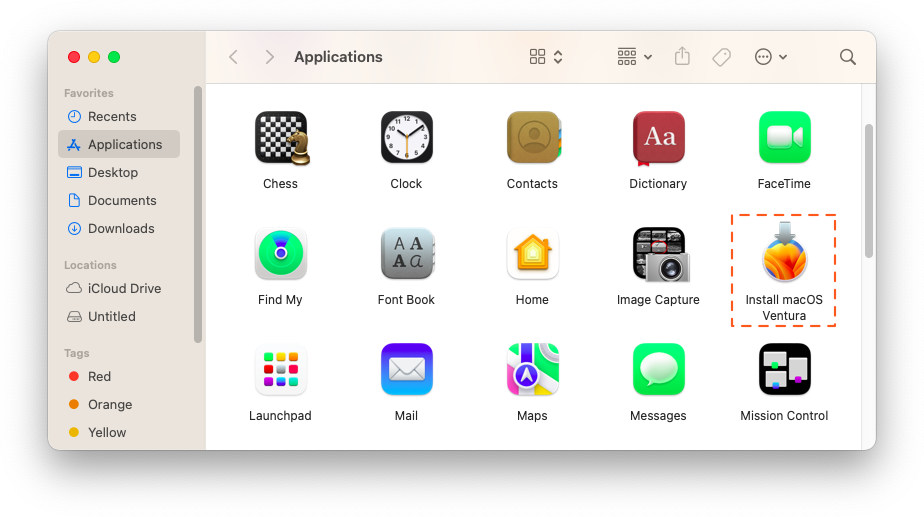
It is quite easy to download the macOS Ventura Final installer. You just need open your App Store and then search "Ventura" in order for you see its final version on this platform, which can be downloaded directly from there with one click of a button! The installer should be located in Applications folder after downloading successfully.
Click here to directly download macOS Ventura Final on App Store

2. Create macOS USB Installer with Terminal
For this step, you’ll need a USB that’s 16GB or more. This USB flash drive will be used as a boot installer for macOS. This step is mostly for advanced users because if you make any error while typing the commands, you could end up with error. If you’re not an advanced user, but still want to go ahead, please proceed with caution and double-check every command you type.
- Plug in your USB flash drive to the system. You can rename it if you want. For this guide, let’s name the drive “Installer”.
- Open Disk Utility in Applications > Utility. Click on View > Show all devices. Select your USB Drive and click on Erase button, Choose Mac OS Extended (HFS) and GPT partition.

- Open the Terminal app in Spotlight Search.
- Now write the following command in the Terminal app and replace the name “Installer” with whatever you named your USB flash drive.
- sudo /Applications/Install\ macOS\ Ventura.app/Contents/Resources/createinstallmedia --volume /Volumes/Installer --nointeraction

Press the enter key to run the command. You’ll be asked to input the admin password. Press enter again and your Mac will start creating a USB installer.
3. Install OpenCore Boot Manager for macOS USB Installer
Once you have created a macOS USB installer, you’re ready to use OpenCore Boot Manager to install macOS 13.
Step 1: Download OpenCore
The first step is to download the OpenCore Legacy Patcher GUI . Run OpenCore-Patcher.app to install the software.
Step 2: Setup SMC and Misc Settings
The Host Model is your Mac Model. Sometimes OpenCore Legacy Patcher will fail to recognize it, but you can check and change it in the “Settings” section.

In the next step, set up SMCBIOS to avoid errors related to SMC-version. You’re going to adjust the configurations of SMCBIOS. It contains a description of your Mac’s settings such as customization of the config.plist file on other boot loaders. In the SMBIOS settings, select new Mac to be able to install macOS on your system.

Misc Settings, this part isn’t too important as these settings are mostly related to updating macOS to the new version after the installation has finished. To learn more about installing new updates, please check the post-installation section at the end of this article.

Step 3: Install OpenCore Boot Manager
Once you’ve tweaked the configurations, you can click on Return to Main Menu to go back. Once you’re there, click on Build and Install OpenCore to start building. Once it’s finished building, click on Install OpenCore and select the macOS 13 Ventura USB Installer you created.

Then, click on the EFI partition and OpenCore will begin installing.

4. Boot with OpenCore macOS USB Installer
Now it’s time to boot OpenCore and macOS USB installer. Simply restart your system while holding down the Option key. Select the EFI Boot partition with the OpenCore icon.

Now click Install macOS to get to the installer screen. Note: If your system keeps going back to the setup screen after the first reboot, you can try turning it off and starting it again while holding the Option key.
5. Install macOS on Unsupported Mac
You can enter the Ventura InstallAssistant screen and install macOS on your older Mac system just like any other macOS. Here are the steps you need to follow:

- Click on Disk Utility to open it.
- In the Disk Utility section, click on the Erase tab and choose the startup volume, normally written as Macintosh HD (You can create a new partition for macOS).
- Now name the disk and select a format. If it’s an SSD disk, you’ll have to select APFS. If it’s a regular HDD drive, you can choose any format.
- Click Erase to format it completely and then go back to the InstallAssistant screen.
- Click on Install macOS Ventura and then click Continue. Select the disk you just formatted in the previous steps and the new macOS will begin to install.
- After the installation finishes, your Mac will restart automatically.
5. Install OpenCore on macOS Ventura EFI Partition
Don’t get too excited! There are still a couple of things left to do. After installing macOS Ventura on Older Mac, you have to install OpenCore boot manager in the EFI partition on macOS Ventura disk so you can boot macOS Ventura without having to plug in the USB device every single time you use your MacBook. This is what post-installation means.
Here’s how to do it:

- Download OpenCore Legacy Patcher again.
- Click Build and Install OpenCore to start building OpenCore.
- Once it finishes building, you can go ahead and install it on the internal drive.
- Select internal EFI Boot partition.
- Turn off your system and reboot it while holding down the Option key.
There you go. Now you won’t have to use the USB drive every time you boot up your MacBook. With the help of OpenCore boot manager, you can boot macOS Ventura on an older Mac system without running into any problem.
Sometimes, you might have to install “post install volume patches” to make sure that your older Mac model runs smoothly. Users with OCLP v0.4.4 will have to install volume patches every time a new macOS update is released. You’ll have to rebuild OpenCore with the latest version of OCLP to get the new updates.
To put it simply, macOS Ventura, the latest version of macOS which is packed with new features, is only available for newer Mac models but with OpenCore, it can be installed on older Mac as well. The only thing you have to do is make sure your Mac isn’t too old as there can be hardware problems, such as mouse or keyboard malfunctioning or GPU running slow.
The new macOS will have all the features of macOS Ventura on newer Mac models and you’ll be able to install new updates as well using OpenCore.
Featured Post:
macOS Ventura Slow? Fixes Here


Hi John,
Got a question, how do i get all the installed applications back on my iMac once having performed the procedure that is described above. On mij current iMac (27-inch, Late 2013) iMac14,2 Quad-Core Intel Core i5 3,4 GHz I am running Catalina 10.15.7 and I do use timemachine to make backups, but do you have a guideline to restore apps from there ?Or is there a smarter way of doing this.
Best Regards from Amsterdam,
Ingmar
Question about step 5. Install macOS on Unsupported Mac…the instructions say to use Disk Utility to Erase the startup volume, but in my case, i want to install Ventura on my existing startup volume with High Sierra on it (update High Sierra to Ventura, without erasing it). Can i simply skip the Disk Utility steps and just run the installer, installing it on the existing startup volume? -TIA
Yes, my friend. You can install Ventura on High Sierra Disk without format or Erase Disk.