Apple will release many new things at the WWDC 2022 event, such as iOS 16, iPadOS 16, watchOS 9, and tvOS 16. But, one thing that will get the most attention, especially from macOS users, is the new macOS 13 Ventura. We have created a step-by-step tutorial showing how to install macOS Ventura on VirtualBox on Windows PC.
What Is VirtualBox?
VirtualBox is open-source software that lets you create virtual machines to run different operating systems on a single PC concurrently. For example, you can run macOS and Windows concurrently by creating a virtual machine. With the VirtualBox tool, you can install Windows OS on macOS and vice versa. However, most users use the VirtualBox tool to install macOS on their Windows machines.
Some users also install Windows on VirtualBox on Mac to use Windows on Mac level specifications. In comparison, some use it to run non-compatible software and tools on Windows and Mac, such as xCode, etc. VirtualBox supports multiple operating systems, such as Windows, Linux, Macintosh, etc.
Enable Intel VT-x or AMD-V in PC
To install macOS 13 on Windows with Virtual Machine, your PC must support Intel VT-X (Intel Virtualization Technology) or AMD-V Standard. Your PC must support any of these to install virtual machines.
Head over to ‘Task Manager’ or press ‘Ctrl+Alt+Del.’ Then, move to the ‘Performance’ tab, then CPU, and check the lower right section. If you see the Virtualization option as Enabled, it means it is enabled and supports VT-X. If not, you need to ‘Restart’ your system, open the ‘BIOS’ setting, and enable the features from the ‘BIOS Features’ setting.
How to Install macOS 13 Ventura on VirtualBox on Windows PC
1. Download macOS Ventura Final
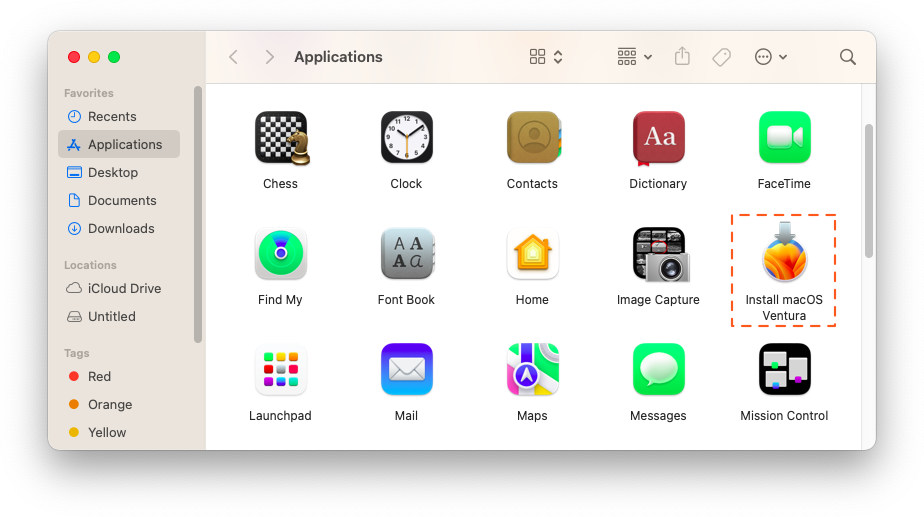
To install macOS Ventura on VirtualBox, all you need is the macOS Ventura installer. You can download it from either a Mac or Virtual Mac. The macOS Ventura Final can be downloaded from the App Store. Once you find it in search results, click Get and wait for downloading process to finish. The installer for macOS Ventura is called "Install macOS Ventura.app" and can be found in your Applications folder.
Quickly download macOS Ventura through the AppStore with this link.

2. Create macOS Installer ISO Image
The next step after downloading macOS Ventura is to create an ISO file containing the installer. This can be useful if you want install macOS on VirtualBox. Installing macOS on a Virtual Machine is often done with the help of ISO files. When downloading macOS, make sure you create one too. So, execute the commands mentioned below in the Terminal:

Create Simple UDTO Disk in Temporary Folder:
hdiutil create -o /tmp/Ventura -size 14079m -volname Venturaiso -layout SPUD -fs HFS+J -type UDTO -attach
Create macOS Installer Disk
sudo /Applications/Install\ macOS\ Ventura.app/Contents/Resources/createinstallmedia --volume /Volumes/Venturaiso --nointeraction
Unmount Disk Image, Rename and Move Ventura.iso file to Desktop
hdiutil detach -force /Volumes/Install\ macOS\ Ventura
mv /tmp/Ventura.cdr ~/Desktop/Ventura.iso
3. Install VirtualBox and Extension Pack
To install macOS 13 on the VirtualBox, you will need to install the latest version of VirtualBox and Extension Pack. You can easily download the VirtualBox and Extension Pack from their official website.

4. Create a macOS Virtual Machine
To install macOS 13 Ventura on VirtualBox, you need to create a new virtual machine in VirtualBox. After installing the VirtualBox, open it, and click on the ‘New’ button. Now, you need to create the same settings in your VirtualBox.
- Name: macOS Ventura
- Type: ‘Mac OS X’
- Version: ‘macOS High Sierra (64-bit)’
On the next screen, you select the memory size to at least ‘4096MB.’ The max you can set it to 60% of your RAM. You can select more if you want to.

Now, select the ‘Create a Virtual Hard Disk Now’ from the given options and select "VMDK" for Hard Disk file type. Then, select ‘Dynamically allocated’ for Storage. The next popup will ask you to choose the file location and size. So, select the file location. Then, choose the size to ‘120 GB.’ Click on the ‘Create’ button.

5. Configure Your New Virtual Machine in VirtualBox
You will need to configure the VirtualBox before installing the macOS. So, click on the ‘Settings’ icon, and open the settings. Then, head to the ‘System’ tab, and ‘Uncheck’ the ‘Floppy’ option. Also, ensure that the ‘Chipset’ option is selected to ‘ICH9’ and ‘Hardware Clock in UTC Time’ is disabled.
Now, head to the ‘Processor’ tab and ensure that the number of processors is set to ‘1.’ And the ‘Execution Cap’ is set to ‘100%.’After that, enable the ‘Enable PAE/NX’ option.

In the next step, jump to the ‘Display’ tab and set the ‘Video Memory’ setting to ‘128MB.’ Also, set the ‘Graphics Controller’ setting to ‘VMSVGA.’

After performing the above steps, head to the ‘Storage’ tab. Then, click on the ‘DVD’ icon, and open your Ventura.iso Image file, which you created in the second step in macOS Sierra.

Then, move to the ‘USB’ tab, and select ‘USB 3.0’, USB 3.0 Controller help you enable mouse and keyboard when install macOS. After adding it, click on the ‘OK’ button.

6. Configure Your Virtual Machine With Command Prompt
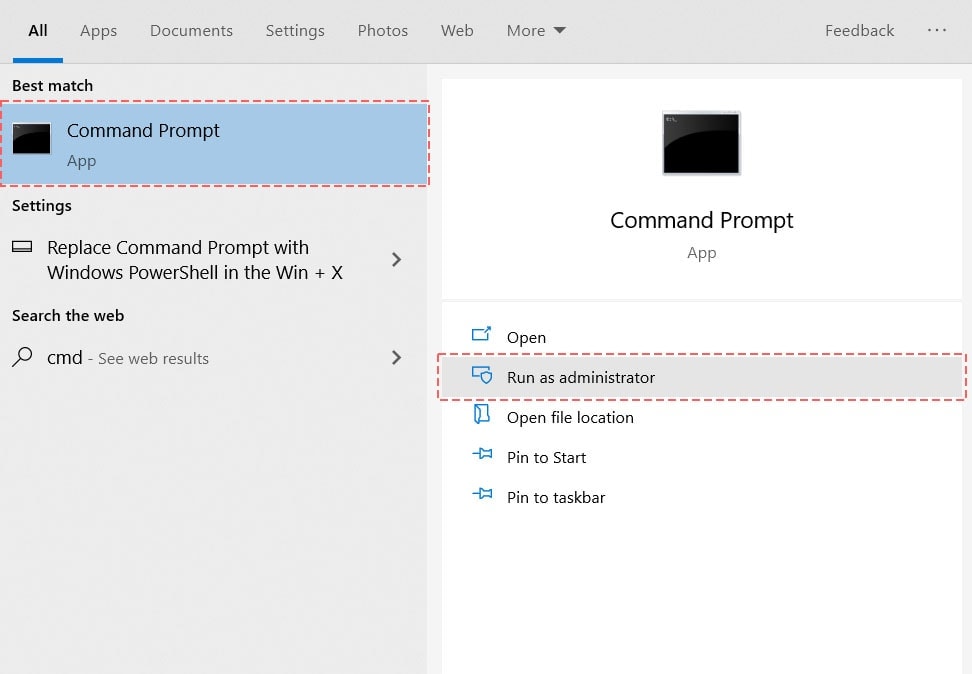
The next step is to configure your new virtual machines with Command Prompt. So, open the ‘Command Prompt’ in windows search as ‘Administrator.’

After that, enter the mentioned codes in the Command Prompt. You also need to change the "VM Name" with your virtual machine name. For instance, if you named your virtual machine: macOS Ventura. Then, replace "VM Name" with "macOS Ventura".
cd "C:\Program Files\Oracle\VirtualBox\"
VBoxManage.exe modifyvm "VM Name" --cpuidset 00000001 000106e5 00100800 0098e3fd bfebfbff
VBoxManage setextradata "VM Name" "VBoxInternal/Devices/efi/0/Config/DmiSystemProduct" "iMac19,3"
VBoxManage setextradata "VM Name" "VBoxInternal/Devices/efi/0/Config/DmiSystemVersion" "1.0"
VBoxManage setextradata "VM Name" "VBoxInternal/Devices/efi/0/Config/DmiBoardProduct" "Iloveapple"
VBoxManage setextradata "VM Name" "VBoxInternal/Devices/smc/0/Config/DeviceKey" "ourhardworkbythesewordsguardedpleasedontsteal(c)AppleComputerInc"
VBoxManage setextradata "VM Name" "VBoxInternal/Devices/smc/0/Config/GetKeyFromRealSMC" 1

Note: you need to close VirtualBox when run this commands. Close the ‘Command Prompt’ when the process completes, and head to the next step.
8. Install macOS Ventura on VirtualBox
Now, re-open the VirtualBox tool, and click on the ‘Start’ button to run your macOS virtual machine. After that, select the ‘Disk Utility’ option from the given options, and then click on the ‘Continue’ option.

After performing the above step, select ‘VBOX HARDDISK Media’, and then click on the ‘Erase’ option. You will now see a popup named Erase “VBOX HARDDISK Media” with some settings. Then, rename the drive to ‘macOS Ventura’ and select APFS and GUID Partiton Map. Click on the ‘Erase’ button, and close the ‘Disk Utility’ window when the process completes.

Then, click on the ‘Install macOS 13 Beta’ button and then ‘Continue.’ Then, select your macOS Disk. You will now see a new pop-up with a progress bar. You need to wait till the process completes. macOS Ventura will be installed on Virtual Disk on VirtualBox.

9. Install Guest Tool and Change Resolution
You have now installed macOS Ventura on Virtual on Windows PC. After installing macOS 13, you can install the Guest Tool on your Virtual Machine and open some advanced settings. You can check our detailed tutorial to know how to install the Guest Tool on macOS on VirtualBox. After installing the Guest Tool, you can make tweaks to your machine, such as change resolution, enter full screen mode etc. You can learn to do this with the help of the tutorial links attached below.
How to Change the Screen Resolution of macOS on VirtualBox
How to Install Guest Tool on macOS on VirtualBox
There you go! We have now installed macOS Ventura on VirtualBox on Windows PC. We hope you followed the steps correctly and perfectly installed the macOS 13 Ventura. If you face any issues while installing the brand-new macOS, you can leave a comment. We will get back to you with a solution. That’s all for this tutorial.


everything went smooth till installation, after that the machine kinds of boot loops and rests at a command line thing(sorry not a pro). can you suggest something?