In the ever-evolving world of technology, the need for adaptability and versatility is paramount. Whether you're a devoted Mac user seeking a lifeline in case of internet troubles or an intrepid explorer of the Hackintosh frontier, the ability to create a macOS USB installer on your Windows PC can be a game-changer. In this comprehensive guide, we will walk you through the process of crafting a macOS installer directly from your Windows machine, ensuring that you're well-prepared for any unexpected macOS reinstallation needs or eager to venture into the exciting world of Hackintosh.
This guide isn't just for those who are looking to reinstall macOS conveniently; it also caters to enthusiasts who wish to set up macOS on their Windows systems or delve into the intriguing realm of Hackintosh. We understand that the tech landscape is continually evolving, which is why our instructions are designed to support the latest macOS versions, including the cutting-edge macOS Sonoma.
What sets this guide apart is its thorough exploration of two distinct methods to create a macOS USB installer on Windows. We'll delve into the advantages and disadvantages of each approach, allowing you to make an informed choice that aligns with your specific needs and preferences. Whether you prefer the simplicity of one method or the flexibility of another, this guide has you covered. So, without further ado, let's embark on this journey to empower your Windows PC with macOS capabilities.
Option 1. Create macOS USB Installer on Windows PC
First, we'll start by downloading the latest macOS Basesystem. Following that, we'll create a bootable USB Installer with this Basesystem, which will allow us to either install macOS or use it for recovery and troubleshooting purposes.
The Basesystem essentially functions as the Recovery Mode. Reinstalling macOS from the Recovery Mode is a straightforward process, but it requires your computer to be connected to the internet. It's worth noting that if you're working with a Hackintosh, you'll need to ensure your Hackintosh is connected to the internet via an Ethernet connection, or you can use Wi-Fi or share your internet connection through a USB port in order to download the complete macOS installation package.
1.1 Download macOS Basesystem Image
To download macOS Basesystem, we'll utilize a tool provided by OpenCore. First, you'll need to download OpenCore by following the link below. Additionally, since OpenCore's tool is built with Python, you'll need to install the Python programming language using the instructions provided.
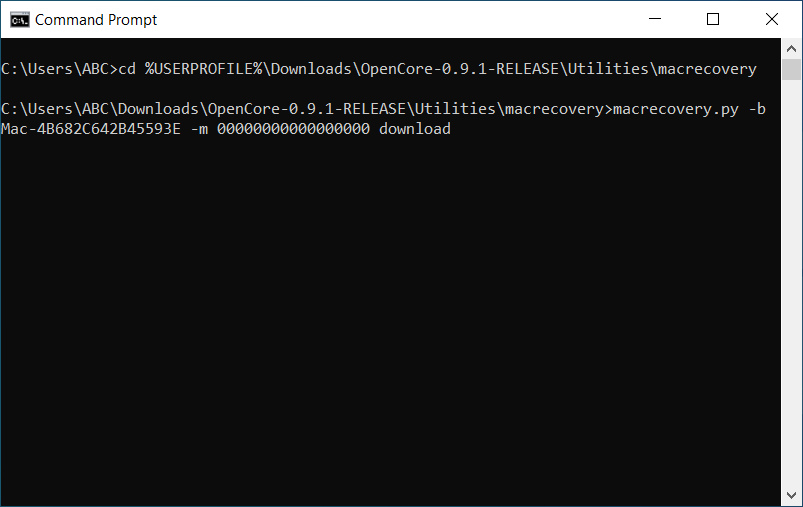
Next, open the Command Prompt (CMD) through Windows Search and use the following command to obtain the latest Basesystem. The current version is Ventura, and in the near future, you'll also be able to download Basesystem for Sonoma using a similar method.

You will need to adjust the command accordingly to version 0.9.1 or 0.8.1 to ensure its accuracy.
cd %USERPROFILE%\Downloads\OpenCore-0.9.1-RELEASE\Utilities\macrecovery
macrecovery.py -b Mac-4B682C642B45593E -m 00000000000000000 download
Once you've successfully downloaded Basesystem, the next step involves using a familiar software called Transmac. This software enables us to read and write macOS partitions on Windows. The good news is that you can try it out for free for up to 15 days to create your macOS USB Installer.

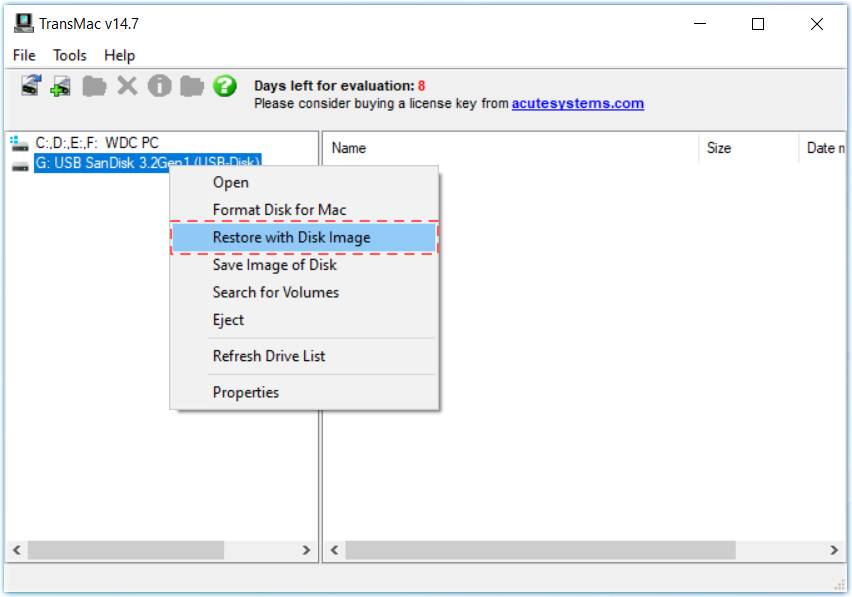
After installing Transmac, launch it and right-click on your USB Drive. Select "Format Disk for Mac" to convert the USB Drive's partition to macOS format.

Next, right-click again and choose "Restore with Disk Image." Select the previously downloaded Basesystem.dmg file to write the macOS installation onto the USB Drive.
With these steps, you're all set to use your macOS USB Installer. However, if you plan to install it on a Hackintosh or PC, there's one additional step to perform: creating an EFI partition and copying the OpenCore EFI files into it.
1.2 Create EFI Partion on USB Installer.
To start, initiate a search for "Create and format hard disk partitions" in the Windows Search bar, and open Disk Management. From there, select the 200MB partition on the USB Installer that you created in part 1 and click on "New Simple Volume."

Next, choose to format this volume with the FAT32 file system and label it as "EFI." Then, click the "Next" button to create this partition.

Once you've established the EFI partition, you can easily use File Explorer to copy your OpenCore EFI files into it, and you're all set.

Option 2. Use Virtual Machine to create macOS USB Installer
The second approach involves running macOS on a Virtual Machine, which simplifies the process of creating a macOS USB Installer without requiring an internet connection, resulting in a faster macOS installation.
Here's how you can do it:
- Set Up macOS on a Virtual Machine: Begin by setting up a macOS environment on a Virtual Machine. You can use any macOS version with virtualization software like VMware.
Download macOS Sonoma Final:
- Extract the macOS Installation Package: Run the InstallAssistant file to extract the macOS installation package into the Applications folder. In this guide, we are using the macOS Sonoma installation.

- Connect the USB Drive to the Virtual Machine: Attach the USB Drive to your Virtual Machine.
- Create the macOS Installer for the USB Drive: Open Terminal through the Spotlight search and execute the provided command to create a macOS Installer for the USB Drive.

sudo /Applications/Install\ macOS\ Sonoma.app/Contents/Resources/createinstallmedia --volume /Volumes/USBDrive --nointeraction
Replace ‘USBDrive’ with your USB drive’s name. Then, press the Enter key, and enter your administrator password to proceed further.
- Completing the Process: If you need the USB Installer for a Mac, you're finished at this point. However, if you require the USB Installer for a Hackintosh, there's one more step: Mounting the EFI Partition.

- Mounting the EFI Partition: To mount the EFI partition, use Terminal and execute the following commands:
diskutil list
diskutil mount disk2s1
- Once you've successfully opened the EFI partition in macOS, you can easily copy the OpenCore EFI folder into it.

These are two effective methods for creating a macOS USB Installer on a Windows PC. Each method has its own advantages and drawbacks, so choose the one that best fits your specific needs.


no efi partion
follow step 1.2 to create your EFI partition.