The name of the latest macOS, ‘Monterey’, comes from Monterey Bay. Apple is continuing its trend of naming its macOS releases after the terrain features in California. There are a lot of new features that come with the new operating system. Some of them are really exciting and useful for Mac users. Apple has really tried to impress a lot of users with the new features.
With Universal Control, you can use a single keyboard and mouse to interact with your Macs and iPads. You have to physically place the devices close to one another to be able to seamlessly use one keyboard and mouse to move across multiple devices. Apple has redesigned the Safari Browser and has taken all the tabs and blended them into the top bar and has changed the colors of the tabs based on the color of the website that you’re on. You can also take tabs and arrange them into groups so that you can pick a group and see relevant tabs under the group. For example, you can have groups for work, personal, news, travel, etc.
The macOS Monterey software update cannot write NTFS drives. NTFS has been used in Windows computers since 1993. Mac does not have the specifications to use NTFS drives. This has been the case for Mac software since its origin. There are ways in which you can write to NTFS drives on Mac running macOS Monterey. We will take a look at 3 methods of how you can do this.
How to Write to NTFS Drives on macOS Monterey
Method 1: Using Terminal to Enable Writing to NTFS Drives
You can write to NTFS drives on your Mac running macOS Monterey using Terminal. You need to add a line of code and some simple instructions to enable NTFS writing on Mac.
1. Open Terminal by going to Applications > Utilities > Terminal.
In the Terminal, type the following code:
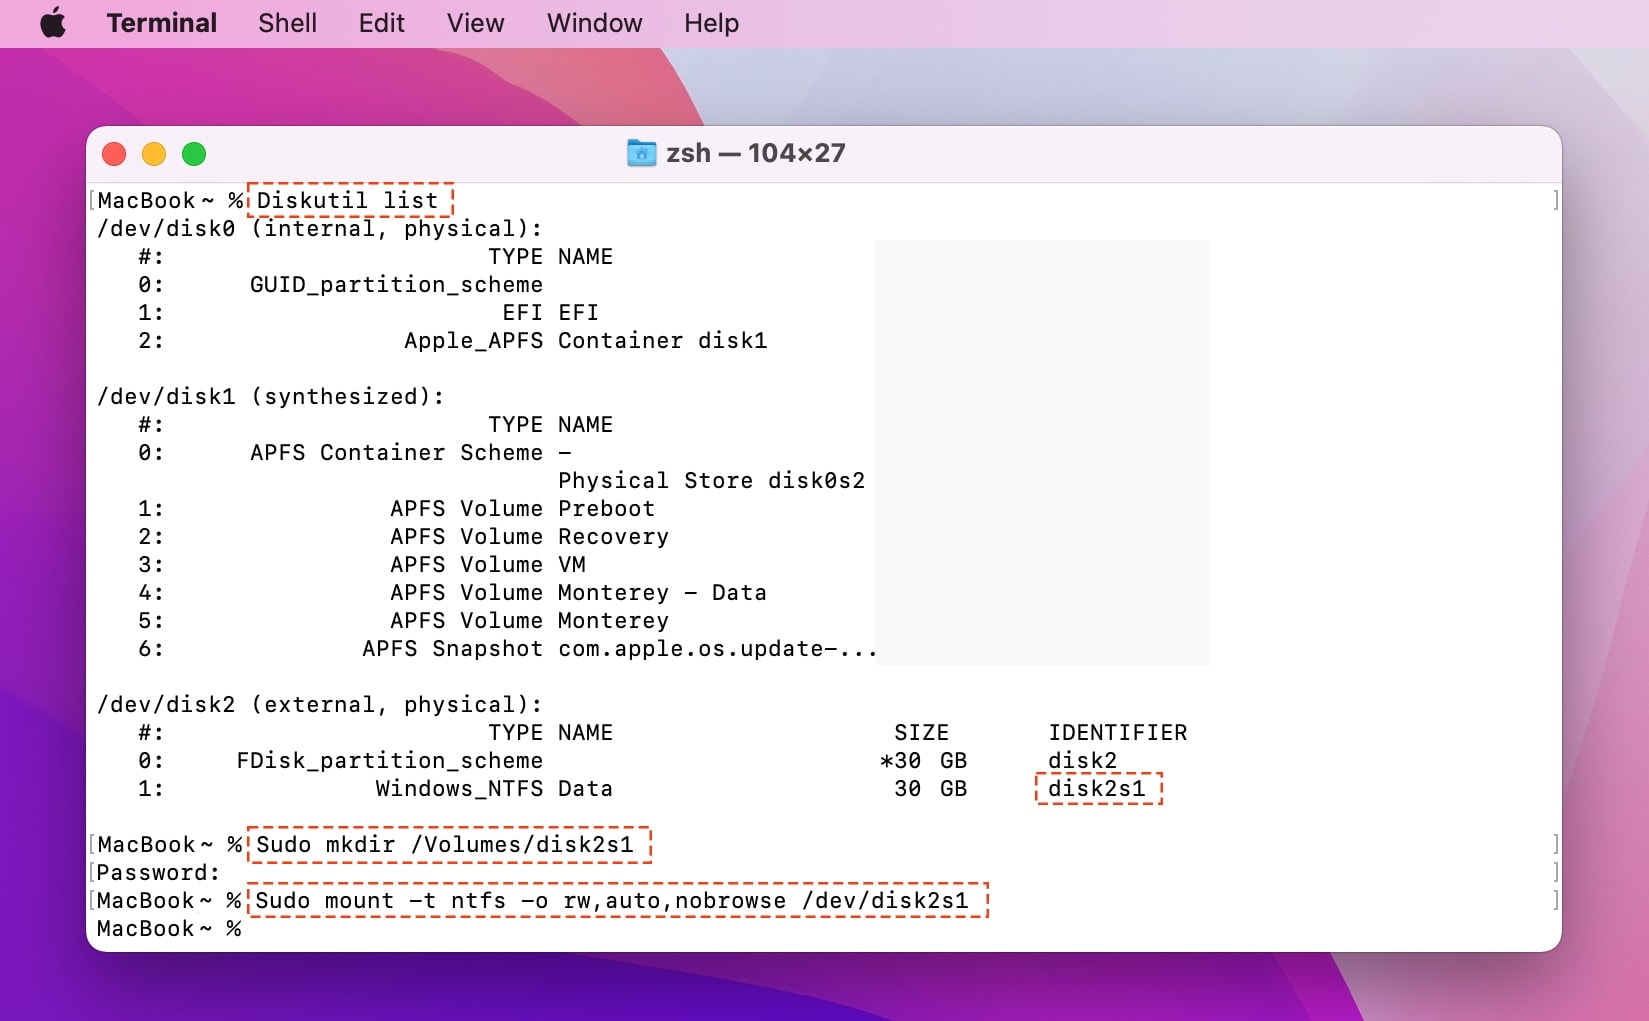
Diskutil list
Sudo mkdir /Volumes/disk2s1
Sudo mount -t ntfs -o rw,auto,nobrowse /dev/disk2s1 /Volumes/disk2s1
Replace the “disk2s1” section with the Indentifier of your NTFS drive. For this example, we will name “disk2s1”.
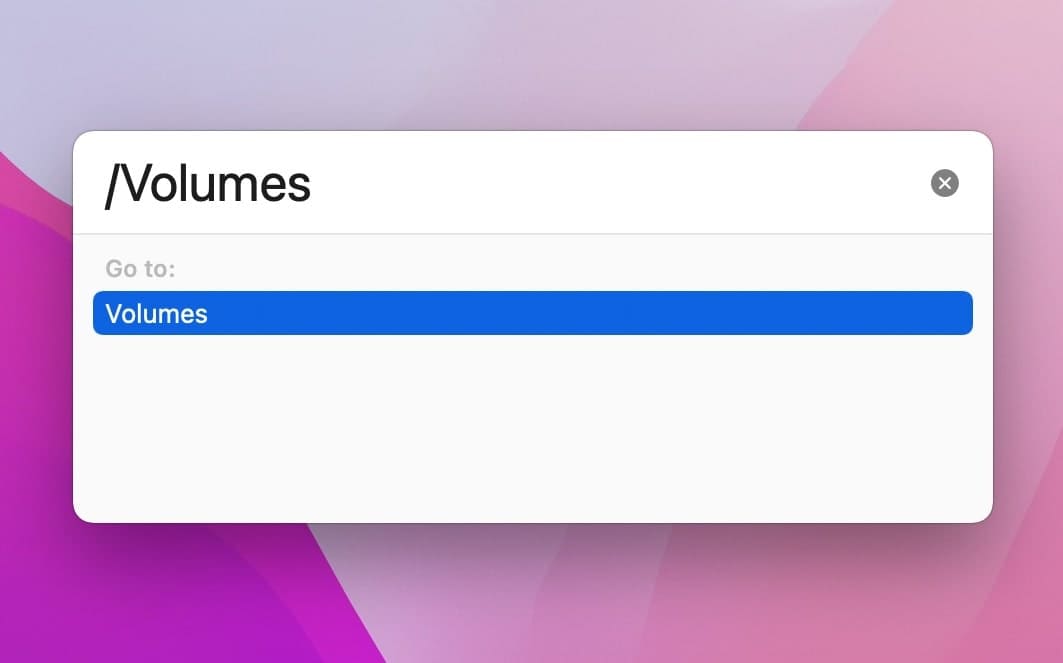
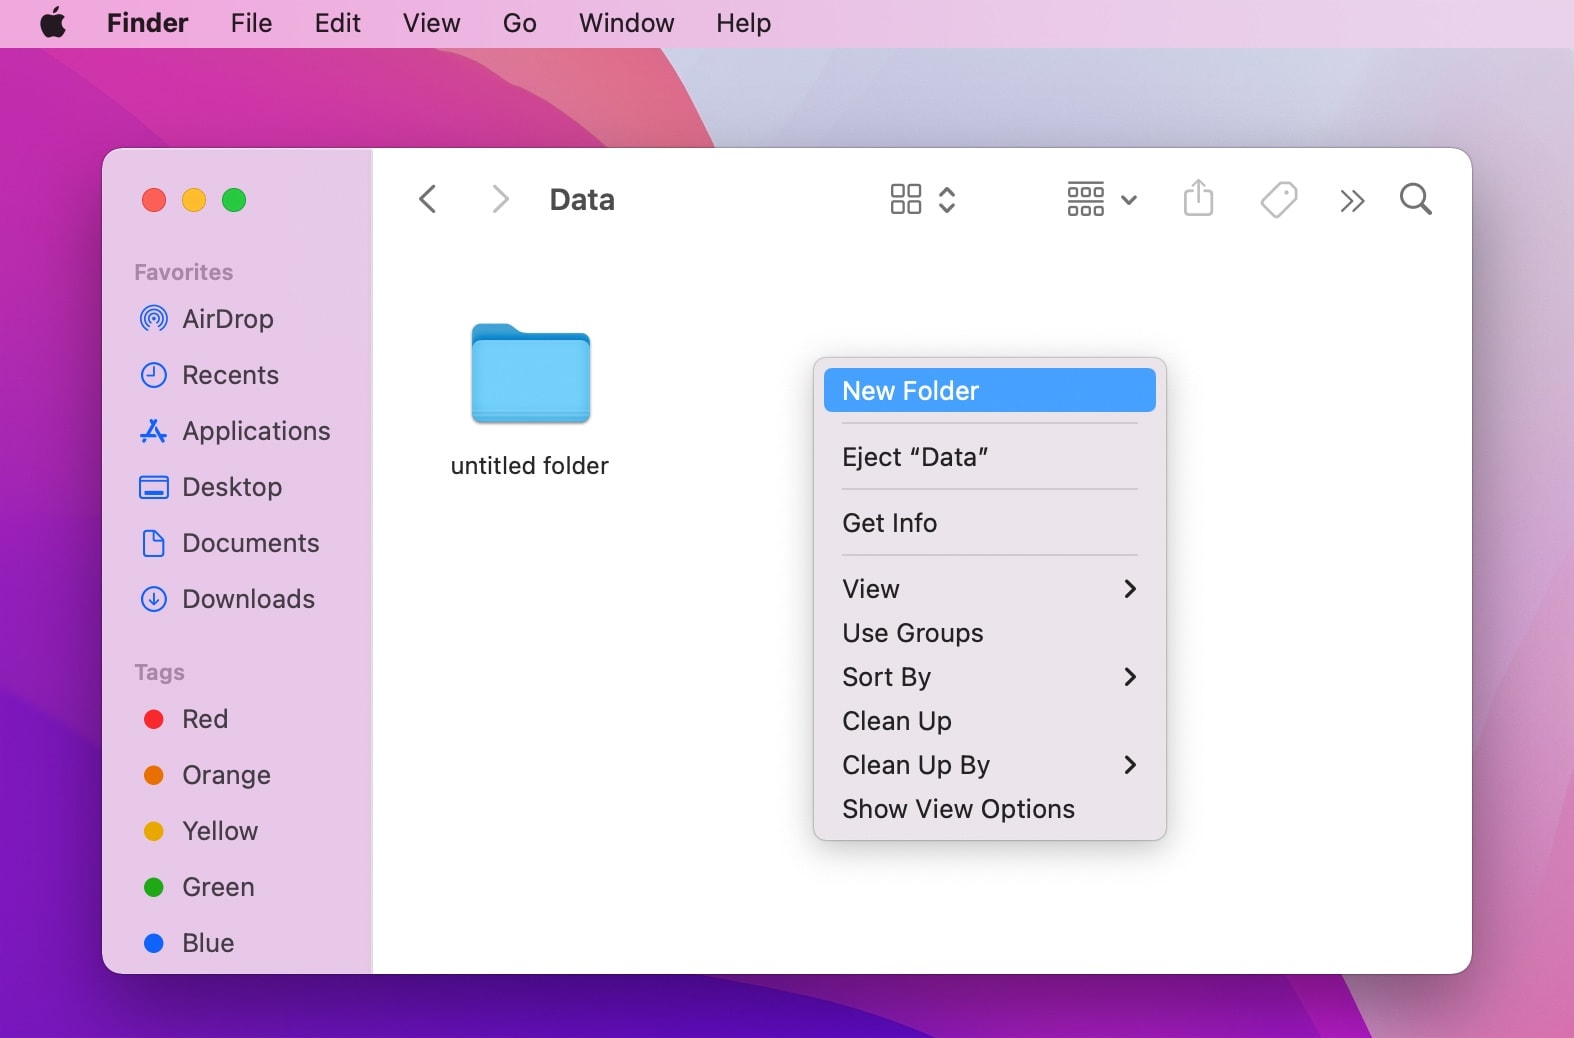
2. To open the files and the USB drive, click on "Go" then "Go to Folder" and type "/Volumes" in the search box. You will be able to access the NTFS files and read/write them in the way you want.
Method 2: Using Third-party NTFS Drives
NTFS for Mac by Paragon Software is an easy solution to read and write on NTFS volumes from your Mac. It is simple and effortless to use. With a 3-step process, you can read and write files from NTFS-formatted HDD, SSD, and Flash Drive.
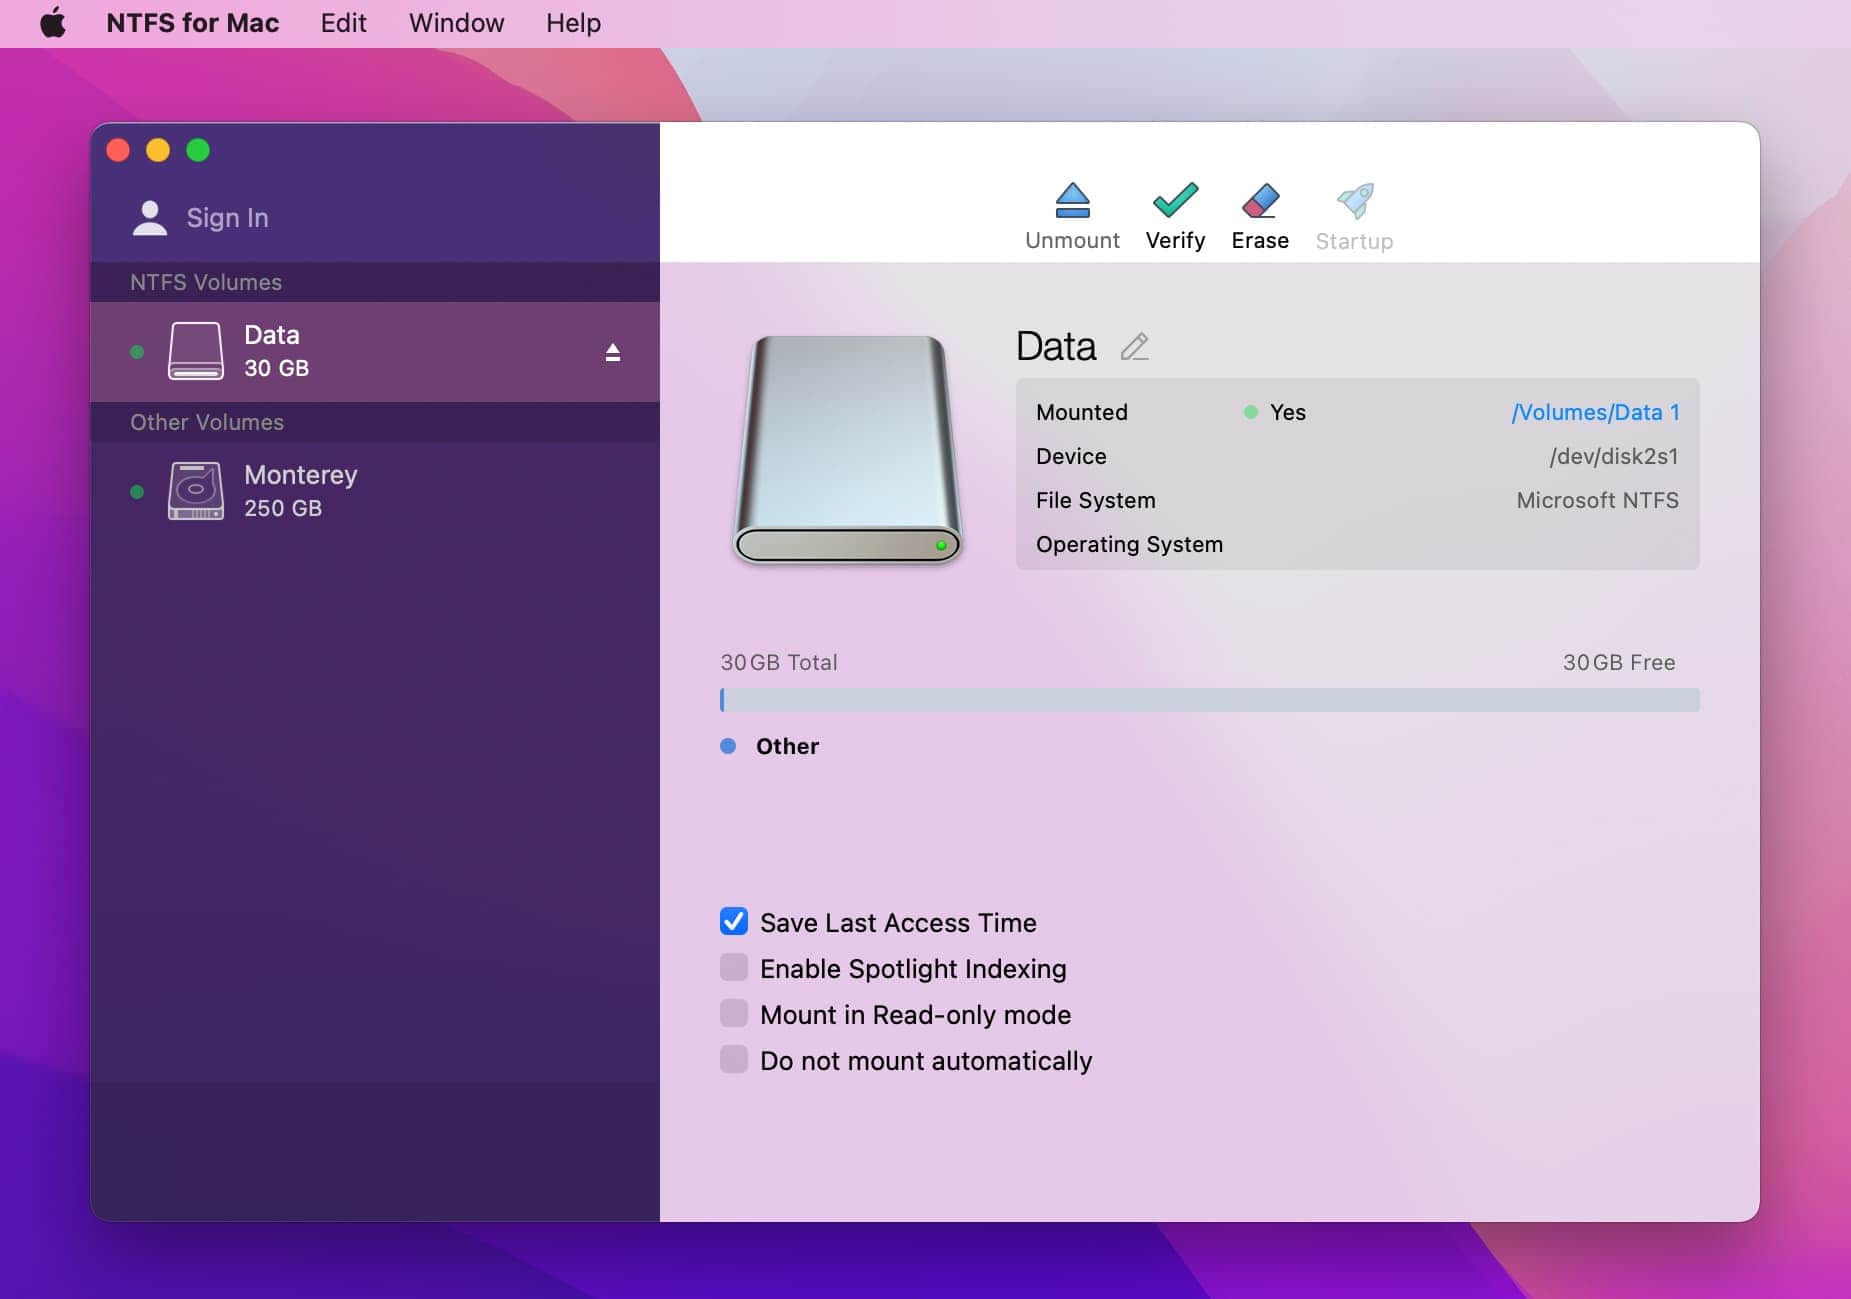
Step 1: Download and install the NTFS for Mac by Paragon Software on your Mac.
Step 2: Go to “System Preferences” then enable “Full Disk Access”.
Step 3: Open NTFS for Mac, The NTFS-formatted drives connected to your Mac are available in the Finder.
Now, you can click on the NTFS for Mac menu bar and access all your Microsoft NTFS drives to perform the common operations like mount, unmount, and verify. The wonderful user experience and advanced options of Microsoft NTFS for Mac by Paragon Software make it easy to read and write files on NTFS drives.
Method 3: Change NTFS Drive Format to exFAT (erase all files)
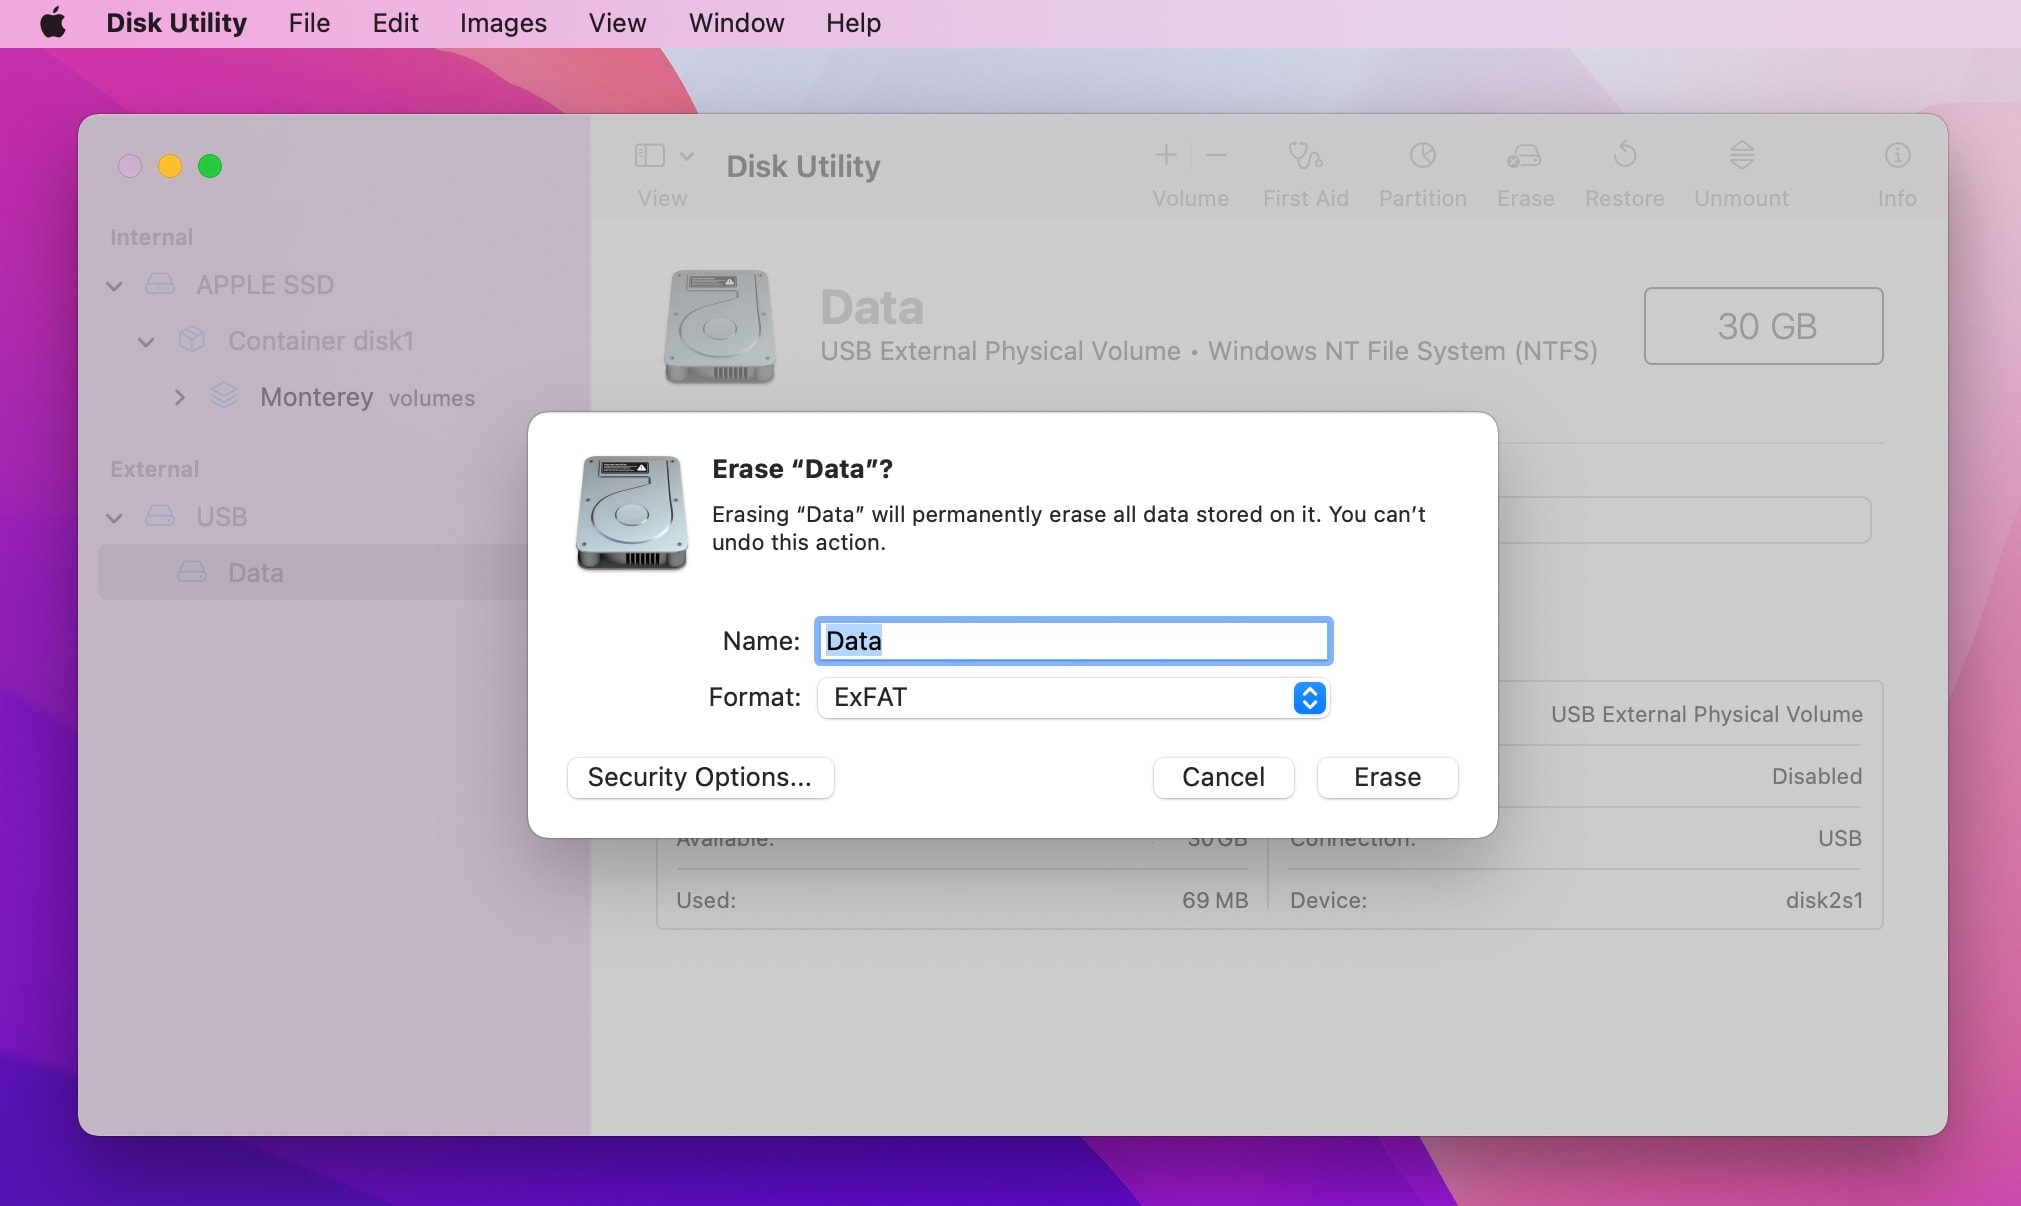
macOS and Windows support read and write on exFAT formatted drives. All you have to do is change the formatting from NTFS to exFAT to access the files in the drive.
This method is the easiest among all methods to access NTFS files on Mac. To change the formatting of an NTFS drive, open Disk Utility on your Mac. Select the drive you want to format and click the “Erase” tab on the top menu. Choose “exFAT” for Format from the Format drop-down box and click “Erase”.
These workarounds will enable you to write NTFS drives on macOS Monterey. If you’re looking for the easiest option, you can change the NTFS format to exFAT and your files will be ready to use. Or, you can use third-party NTFS solutions like Microsoft NTFS for Mac by Paragon Software to effortlessly read and write files from NTFS-formatted drives.



thanks man! FIRST method work perfectly on my monterey!!! thank you so much!
The built-in method worked perfectly! A few commands in terminal and poof, it works! Thanks!