During the WWDC23 event, Apple unveiled a new version called macOS Sonoma, which serves as a successor to macOS Ventura. This latest release introduces a fresh interface and numerous sought-after features that macOS enthusiasts have long been yearning for. However, it's important to note that macOS Sonoma is currently in its Beta Dev stage, which means it may not support the installation of certain software and could present some usage errors. Nonetheless, if you're eager to explore macOS 14 Sonoma, this guide will provide various methods for installing it on your Mac.
List of Macs compatible with macOS Sonoma
As with previous macOS versions, not all older Mac models will receive support for updates with the release of macOS Sonoma. This measure is taken to ensure that your Mac performs at its best with the latest version. Below, you will find a list of Mac models that are capable of installing macOS Sonoma.
- iMac 2019 and newer
- iMac Pro 2017 and newer
- MacBook Air 2018 and newer
- MacBook Pro 2018 and newer
- Mac Pro 2019 and newer
- Mac Mini 2018 and newer
- Mac Studio 2022 and newer
How to Install macOS Sonoma
There are two main ways to install macOS Sonoma: upgrading directly from older versions such as Ventura or Monterey to macOS Sonoma, or performing a clean installation of macOS using an external USB drive. Each method has its own set of advantages and disadvantages, which we will delve into in more detail in the section below.
Option 1. Install macOS Sonoma with Software Update
The first method involves installing macOS Sonoma through the Software Update feature. This allows you to upgrade from older versions, such as Ventura, to macOS 14 while keeping all your data and software intact. Although this method is relatively easy to follow, there are some drawbacks to consider. Certain software may not be compatible with macOS Sonoma, potentially causing conflicts and slowing down the system.
To upgrade to macOS 14 Sonoma Final, follow these steps:
- Go to System Settings and select "Software Update." The system will automatically search for macOS Sonoma Final.
- Click on "Upgrade now" to initiate the download and installation process of macOS 14.
Alternatively, you can directly download macOS Sonoma using the InstallAssistant.pkg file from the Apple server or Mac App Store:
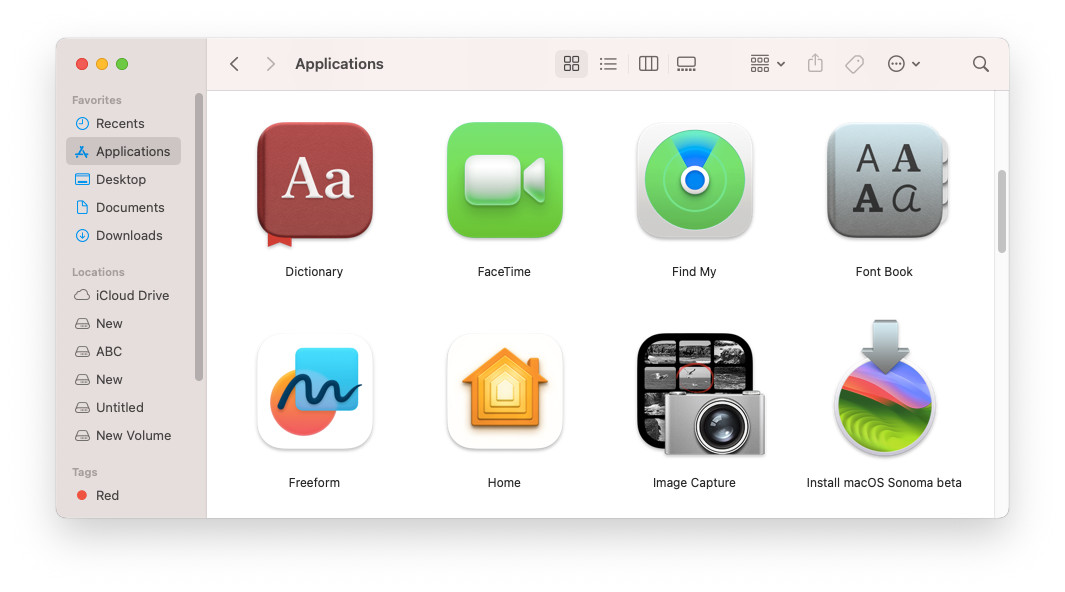
After downloading or extracting macOS Sonoma using the InstallAssistant file, you can locate it in the Applications folder as "Install macOS Sonoma.app." This installer can be used for Option 2, which involves performing a Clean Install of macOS 14.

Option 2. Clean Install macOS Sonoma with USB Drive
Clean Install macOS Sonoma involves creating a macOS Sonoma installation on a USB drive and using it to install the operating system. It's essential to understand that this method will erase all data and software on the Macintosh disk partition. Therefore, it's crucial to back up your data to an external disk before proceeding.
Since macOS Sonoma is a Beta version, it's advisable to create a dedicated disk partition specifically for macOS Sonoma. You can utilize the Disk Utility software located in Applications/Utilities to create this additional partition. Once created, you can proceed with the installation process and dual boot with older macOS Version.
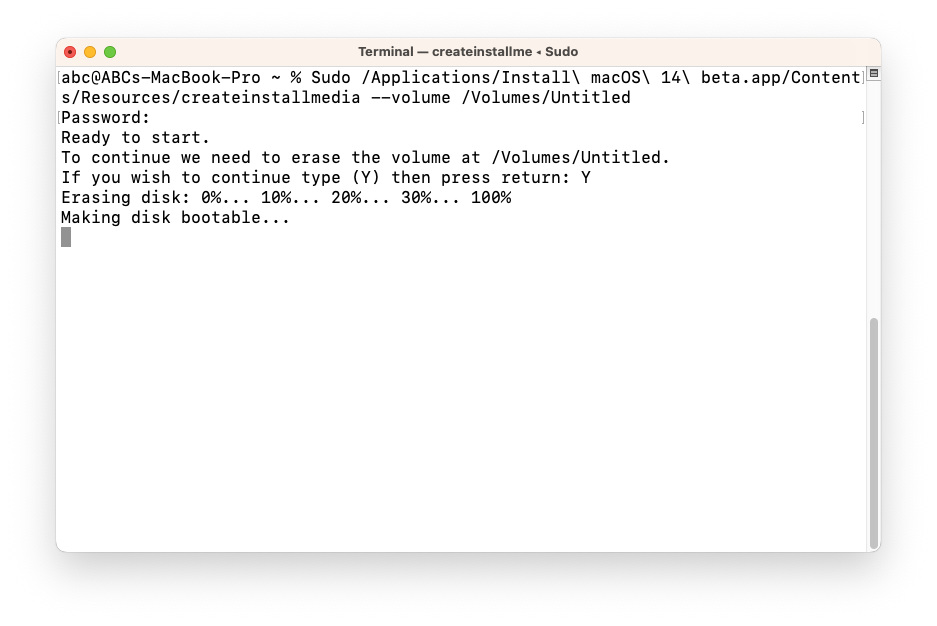
To create a macOS Sonoma USB Installer, you need to use the Terminal application. You can access Terminal through the Spotlight Search and then execute the provided command to create the macOS installation.
sudo /Applications/Install\ macOS\ Sonoma.app/Contents/Resources/createinstallmedia --volume /Volumes/Untitled --nointeraction
Replace ‘Untitled’ with your USB drive’s name. Then, press the Enter key, and enter your administrator password to proceed further.

After successfully creating the macOS Sonoma installer on the USB drive, restart your Mac. For M1/M2 Macs, hold down the Power key, while for Intel Macs, press and hold Option key. Next, select Startup Disk and choose the macOS Sonoma USB Drive Installer to initiate the macOS Sonoma installation.
Please note that an internet connection may be required during the installation process for macOS Sonoma to download or verify system-related components. Therefore, it's recommended to connect to Wi-Fi whenever possible.
These are the two primary methods for installing macOS Sonoma on both Intel and M1/M2 Macs. It's important to consider that each method has its own advantages and disadvantages, so choose the one that best suits your needs.


Leave a Comment