macOS Sonoma is the next version that replaces macOS Ventura. While macOS Sonoma introduces new features, it unfortunately does not provide built-in support for NTFS, which is a popular file system used in Windows. This creates challenges for new users transitioning from Windows to Mac, especially when their data is primarily stored on NTFS partitions.
In this guide, we will explore the steps to utilize NTFS Drives on macOS Sonoma. Moreover, we will rely on free and open-source tools that make it easy to access and work with NTFS Drives on Mac.
How to Write NTFS Drives on macOS Sonoma
Our guide is divided into two sections. In the first section, we will explore how to use Terminal commands to enable Read/Write access for NTFS partitions on Mac, with a particular focus on macOS Sonoma. In the second section, we will leverage Apple's Shortcuts application to create a program that streamlines the usage of Terminal commands for NTFS drives on Mac, regardless of their location.
Option 1. Using Terminal to Enable Read/Write NTFS Drive
1. Install HomeBrew
To enable NTFS drive support on Mac, we need to utilize two Linux applications: MacFuse and NTFS-3G-Mac, both of which are freely available. However, since Linux applications often require command-based installations, we will need to use Homebrew, a package manager for Mac that simplifies the installation of NTFS-3G-Mac.
To install Homebrew, we first need to install Command Line Tools.Use the following terminal command to download and install XCode Command Line Tools:
xcode-select --install

Once you have installed Command Line Tools Xcode 5 beta, you can proceed with the following two commands to install HomeBrew and establish a connection to the application libraries.
/bin/bash -c "$(curl -fsSL https://raw.githubusercontent.com/Homebrew/install/HEAD/install.sh)"
brew tap gromgit/homebrew-fuse

2. Install NTFS-3G-MAC
NTFS-3G-Mac comprises tools that enable the usage of NTFS on Mac. This tool facilitates the utilization of MacFuse extensions and kexts.
After successfully installing Brew, you can proceed with the installation of NTFS-3G-Mac by executing the following command.
brew install ntfs-3g-mac

3. Install MacFuse
MacFuse consists of multiple extensions, similar to drivers on Windows, which enable Mac to recognize NTFS drives. Currently, you can install MacFuse using a user-friendly interface, and you can download MacFuse from this link.

During the MacFuse installation process, you may encounter a prompt that requires granting permission for the extensions in the System Settings of macOS Sonoma. This is a security measure implemented to ensure the safety of your Mac. Please select the 'Open System Settings' option.

In the System Settings, navigate to Privacy & Security and click the 'Allow' button. Lastly, it is crucial to restart macOS Sonoma after completing these steps to ensure the proper functioning of MacFuse extensions before proceeding to step 4.

4. Enable Write NTFS Drive on macOS Sonoma
To begin, open Terminal on your Mac. There are various ways to access Terminal: you can use Spotlight search or go to Applications > Utilities. Once Terminal is open, you can utilize the following commands to enable the write feature for NTFS partitions on Mac using NTFS-3G-Mac.

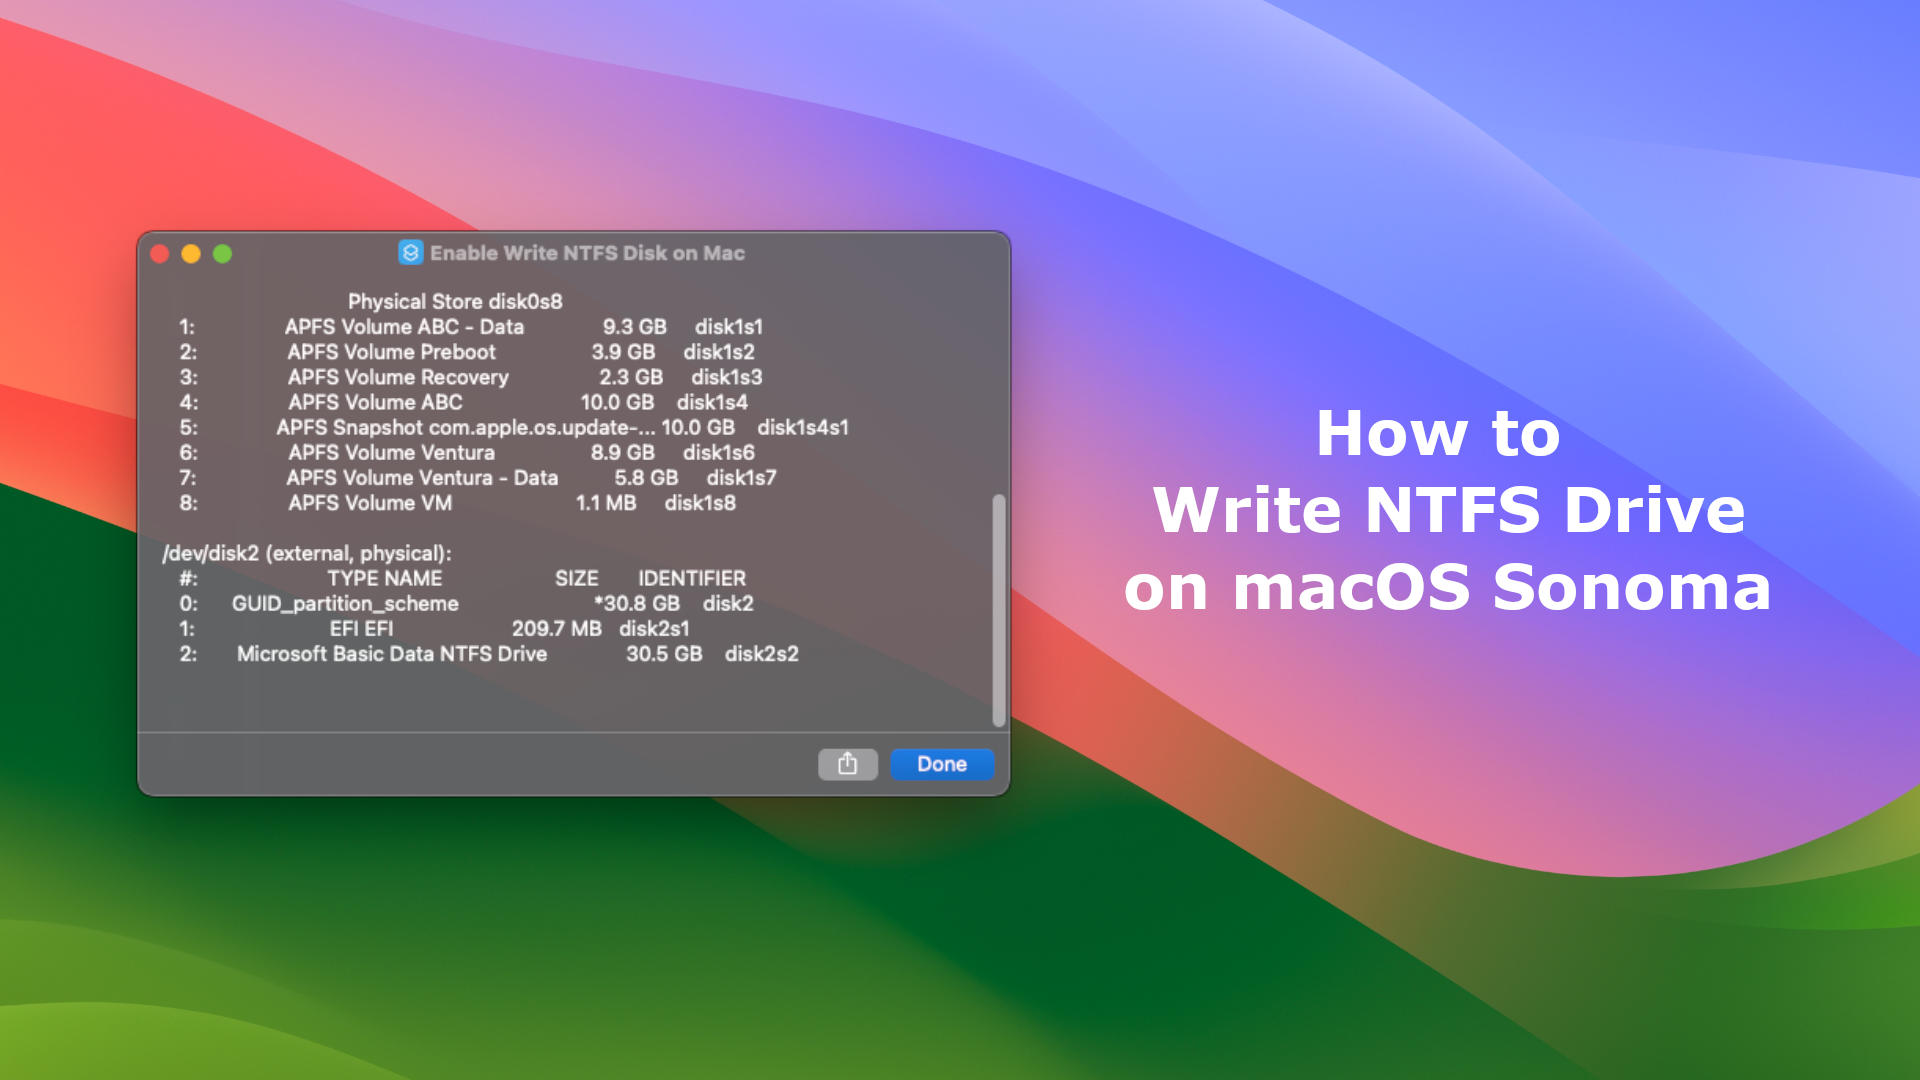
Firstly, we need to find the Disk Identifier Number of your NTFS drive. The Disk Identifier Number will be in the format of disk0s2, disk2s2, and so on. In this guide, my NTFS drive has the number Disk2s2. Please substitute the appropriate Disk Identifier Number that corresponds to your drive. Please note that some commands require administrative privileges (sudo), so you will need to confirm by entering your password.
List NTFS Disk in Terminal
Diskutil list
Unmount NTFS Disk
diskutil unmount /dev/disk2s2
Create a Folder in /Volumes with named NTFSDrive
sudo mkdir /Volumes/NTFSDrive
Mount NTFS Disk and enable Read/write permision:
- Intel Mac:
sudo /usr/local/sbin/mount_ntfs /dev/disk2s2 /Volumes/NTFSDrive - M1/M2 Mac:
sudo /opt/homebrew/sbin/mount_ntfs /dev/disk2s2 /Volumes/NTFSDrive
Open NTFSDrive Folder
open /Volumes/NTFSDrive
Subsequently, you can conveniently utilize your NTFS drive with full Read/Write functionality. However, this method also has a downside: you need to execute these commands in Terminal each time you connect a new NTFS drive. Remembering all these commands can be difficult. Therefore, we will delve into an additional option: using the Shortcuts app on Mac to create a user-friendly application that simplifies the usage of NTFS drives.

Option 2. Using built-in Apple Shortcuts App
Shortcuts is a built-in app by Apple that has evolved from Automator since the macOS Monterey version. It enables users to effortlessly perform repetitive tasks on their Mac by creating customized workflows, allowing them to arrange actions to suit their specific needs. Hence, using Shortcuts to Read and Write NTFS drives on Mac is quite straightforward. In this guide, I will explain how to create the simplest Shortcuts task, which can then be tailored to individual preferences.
Please note that before using Shortcuts to Read and Write NTFS drives on your Mac, you must first install MacFuse and NTFS-3G-Mac following the steps provided in Option 1. Shortcuts simplifies the execution of the commands in step 4, making the process quicker and more user-friendly.
To get started, you can locate the Shortcuts app using Spotlight search or by navigating to the Applications > Utilities folder. Then, create a new Shortcut and utilize the search function to find the appropriate actions and content, as demonstrated in the image below:

Task | Contents | Note |
|---|---|---|
Run Shell Script | diskutil list | Cell |
Show Result | Shell Script Result | right click and select "Shell Script" |
Ask for Input | Text: Select NTFS Disk | Cell |
Choose from Menu | Menu 1: Enable Read/Write NTFS | Cell |
Menu 1: Enable Read/Write NTFS | ||
Run Shell Script | diskutil unmount /dev/Provided Input | Input: Provided Input |
Menu 2: Unmount NTFS Drive | ||
Run Shell Script | diskutil unmount /Volumes/NTFSDrive | Cell |
After creating the Shortcut, you can enable the "Pin in Menu Bar" or "Use as Quick Action" options to easily access and run the Shortcut from the Menu Bar or as a quick action in Finder.

When executing the Shortcut, a window will appear displaying information about the drives on your Mac. Select the Disk Identifier Number corresponding to your NTFS drive. The Disk Identifier Number will have a name like disk2s2 or any other number depending on the number of drives you have.

Next, you will encounter two menus with distinct options. The first menu allows you to activate the Read/Write feature for the NTFS drive, while the second menu restores the original settings.

After selecting a menu option, the NTFS drive will be mounted, and you can utilize it like any other partition on your Mac. This guide has been thoroughly tested on macOS Sonoma and has proven to work effectively. Option 2 builds upon the steps outlined in Option 1, so it is important to familiarize yourself with Option 1 before utilizing Shortcuts to create a simple program for enabling Read/Write on NTFS drives.
Our instructions provide comprehensive and unique guidance on the internet, ensuring that you can successfully Read and Write NTFS drives on macOS Sonoma. If you encounter any issues during the installation process, kindly leave a comment below, and I will promptly assist you.


Hey there,
Thank you for the article
I’m stuck just after installing Homebrew, I try brew tap gromgit/homebrew-fuse and I get
zsh: command not found: brew
During installation I also got Warning: /opt/homebrew/bin is not in your PATH.
Instructions on how to configure your shell for Homebrew
can be found in the ‘Next steps’ section below.
I did try export PATH=”/opt/homebrew/bin:$PATH”
echo $PATH but nothing changed
Any idea ? Mac os 14.2.1
Please help!
This is awesome article and really work! Thank you very much! )))
But, I stuck with Shortcut creation/completion. It gives me an error that terminal require a password and I do not know how to configure it.
Hi , I have a problem with this command:
sudo /opt/homebrew/sbin/mount_ntfs /dev/disk6s2 /Volumes/NTFSDrive
Terminal says; command not found!?
Any suggestions?
Many thanks,
Andy
i had the same problem
homebrew not be added to the PATH during installation
use this
export PATH=”/opt/homebrew/bin:$PATH”
echo $PATH
hello,
I suggest replace /usr/local/ with /opt/homebrew/ for silicon M1/M2
per brew doc, “Where Homebrew installs software. /usr/local by default for macOS Intel, /opt/homebrew for Apple Silicon”
Thank you! Updated!