Microsoft released its newest operating system, Windows 11, to the general public on October 5, 2021. The latest release has something new and exciting for Microsoft Windows users. Windows 11 comes with features and tools that improve user experience and maximize productivity. The more consistent and beautiful design has been optimized for screen space to allow more focus and attention. Performance-enhancing features, window layout options, support for Android apps, Xbox tech for gaming, and multi-monitor functionality are a few reasons to be excited about the latest Windows operating system.
If you’re a Mac user who wants to try out the new Windows 11, you can go ahead and install it on your Mac with a virtual machine. Even a free virtual machine like VirtualBox is sufficient to run Windows 11 on Mac. However, you have to note that VirtualBox only works if you’re an Intel Mac user. If you’re an M1 Mac user, you’ll need Parallels Desktop to install Windows 11.
What is a Virtual Machine?
A virtual machine (VM) is the virtualization/emulation of a physical computer using a software. Since VMs are based on computer architectures they can run programs and provide the functionality of a physical computer within a “host” computer.
For example, a Windows 11 virtual machine can run alongside macOS on a Mac. There are many use-cases for running virtual machines including testing applications in a safe and sandboxed environment.
Since virtual machines run separately from the host computer, you can perform tasks considered risky on the host computer. This includes testing various systems and accessing virus-infected documents. The applications and software that run inside virtual machines cannot affect the host computer.
You can either choose to use a free virtual machine such as VirtualBox or use a paid virtual machine such as Parallels and VMWare Fusion on your computer.
Free VirtualBox for Intel Mac
VirtualBox is a general-purpose, powerful x86 and AMD64/Intel64 virtualization tool. It allows you to run virtual machines on your physical computer without reinstalling the operating system. The OS and applications running inside the virtual machine act like a separate physical machine.
VirtualBox is a free, open-source product that can be downloaded by anyone. You can install it on your computer to run isolated tests on different virtual machines without worrying about affecting your host operating system.
You can run various guest operating systems inside VirtualBox. The virtual machines can run Windows, macOS, Linux, Solaris, FreeBSD, and other operating systems. There are VirtualBox guest additions that include system applications and device drivers to improve performance and usability.
How to Install Windows 11 on Mac with Free Virtual Machine
You can run Windows 11 on Mac with VirtualBox. Follow the steps below to run Windows 11 on Mac with a free virtual machine.
1. Download Windows 11 ISO
You need a Windows 11 ISO image to install the latest Windows OS on your free virtual machine. You can download a Windows 11 ISO from the Microsoft website. Follow the instructions below to begin the download.
- Go to Windows 11 ISO Download Page
- Select Windows 11 in the “Download Windows 11 Disk Image (ISO)” drop-down menu
- Select the language and click on Confirm
- Click the download button to download the Windows 11 ISO file
2. Download and Install VirtualBox
You have to download and install VirtualBox for macOS. Follow the steps below to install VirtualBox.
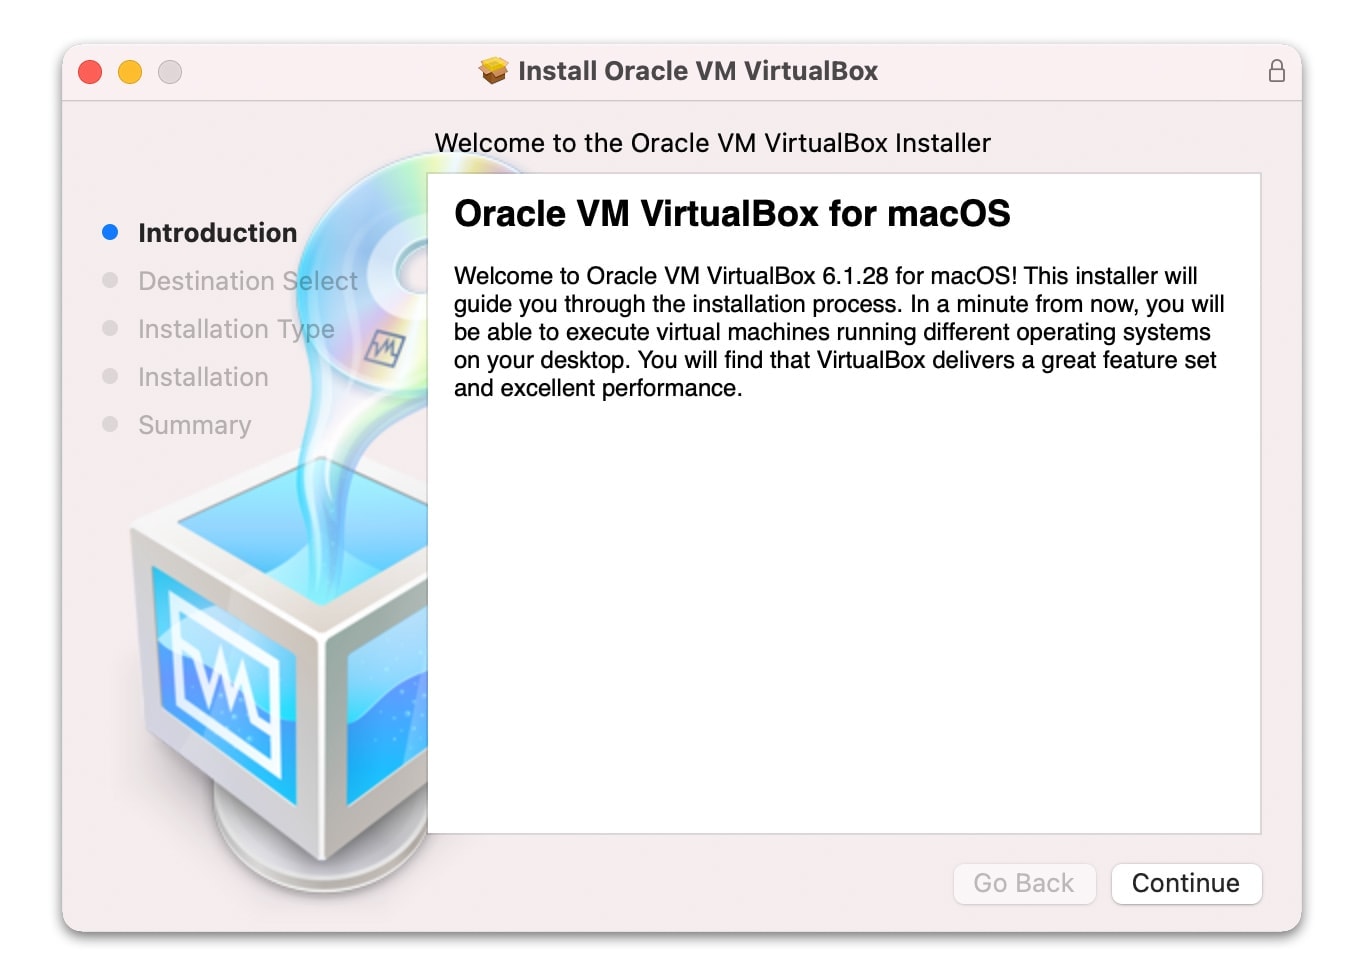
- Go to the VirtualBox website
- Visit the Downloads section and choose Mac Version
- Once the VirtualBox DMG file is downloaded, double-click on it to install it.
3. Create a New Virtual Machine
When you’ve installed VirtualBox on your Mac, you can go ahead and create a new virtual machine. The process is straightforward and you can follow the steps below.
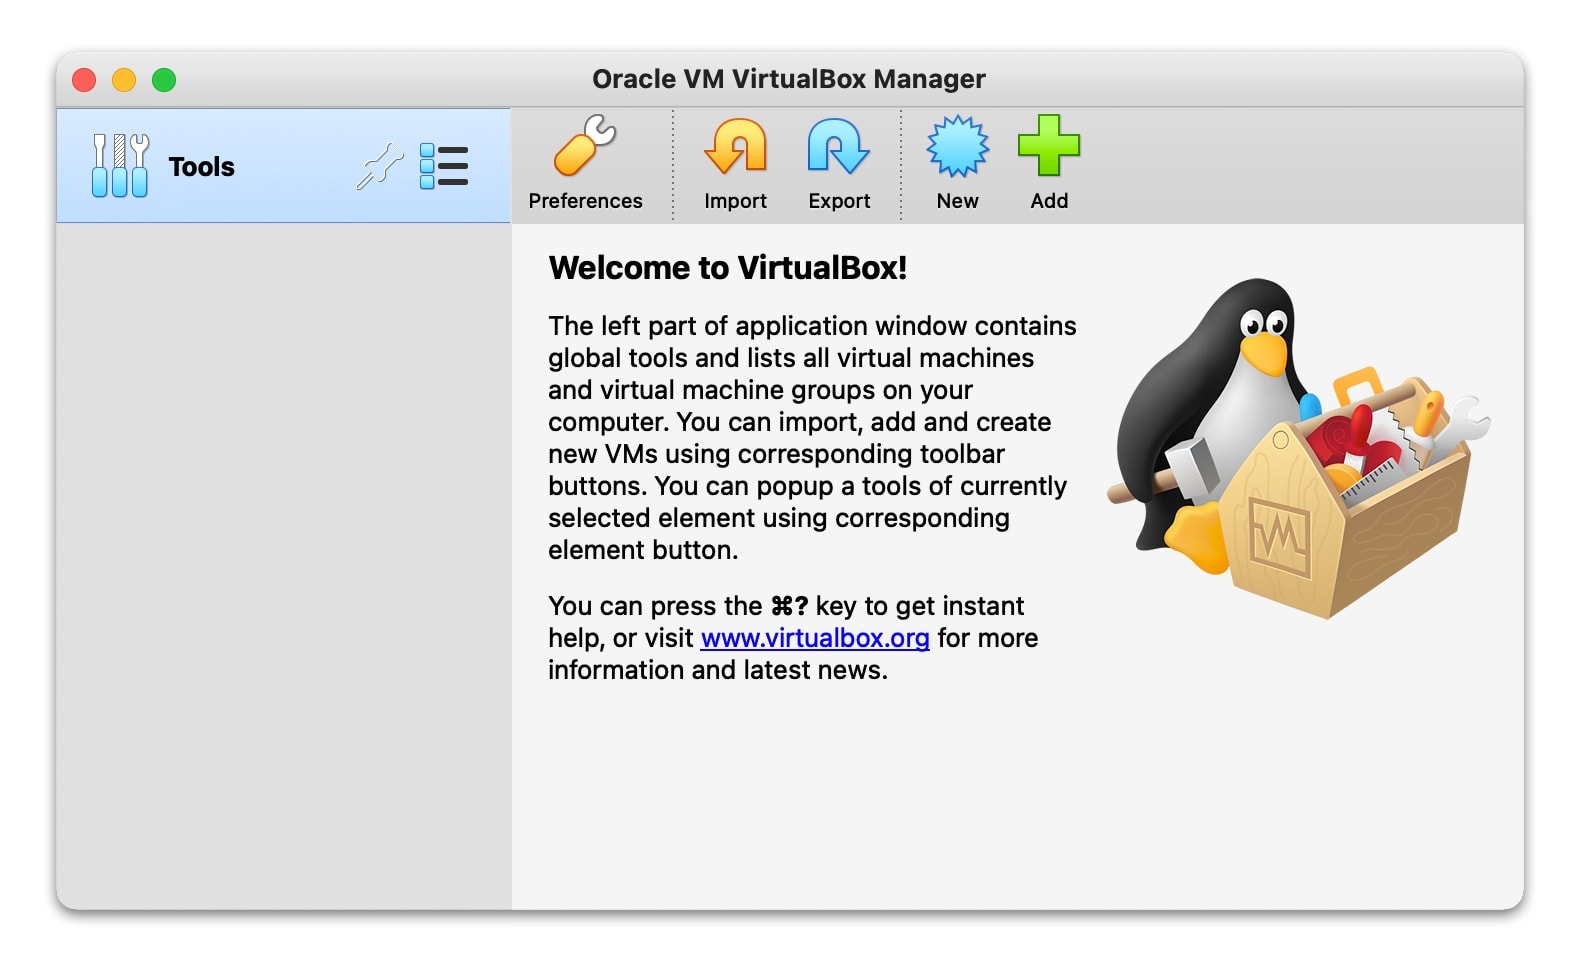
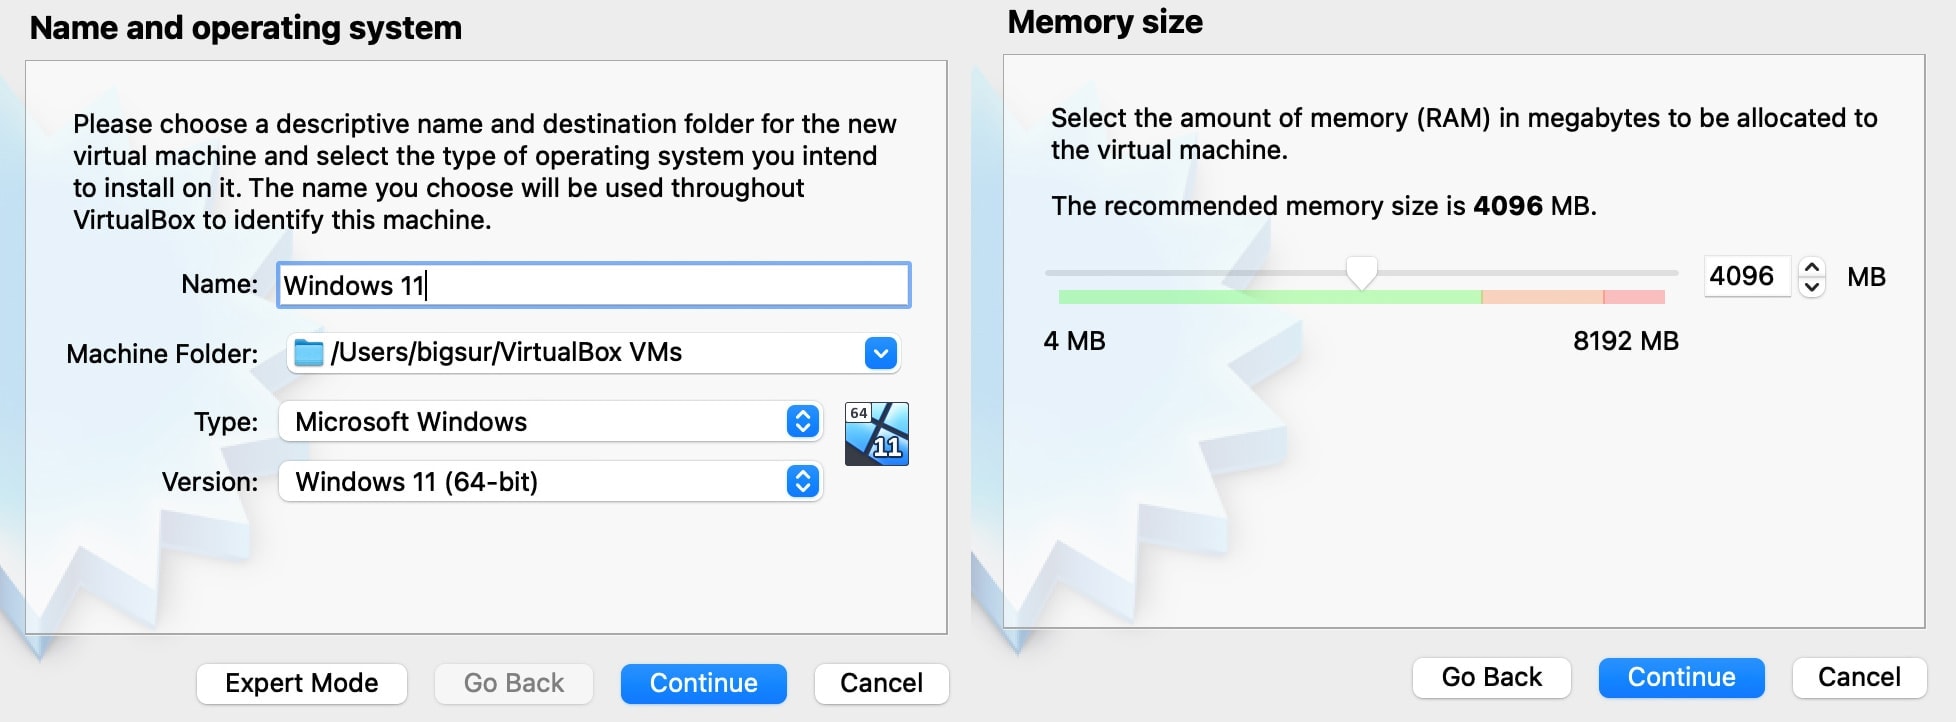
Step 1: Launch VirtualBox and click on “New” to create a new virtual machine. Select Windows Version and determine how much memory you need to allocate for your virtual Windows PC. Windows 11 needs at least 2GB of memory.
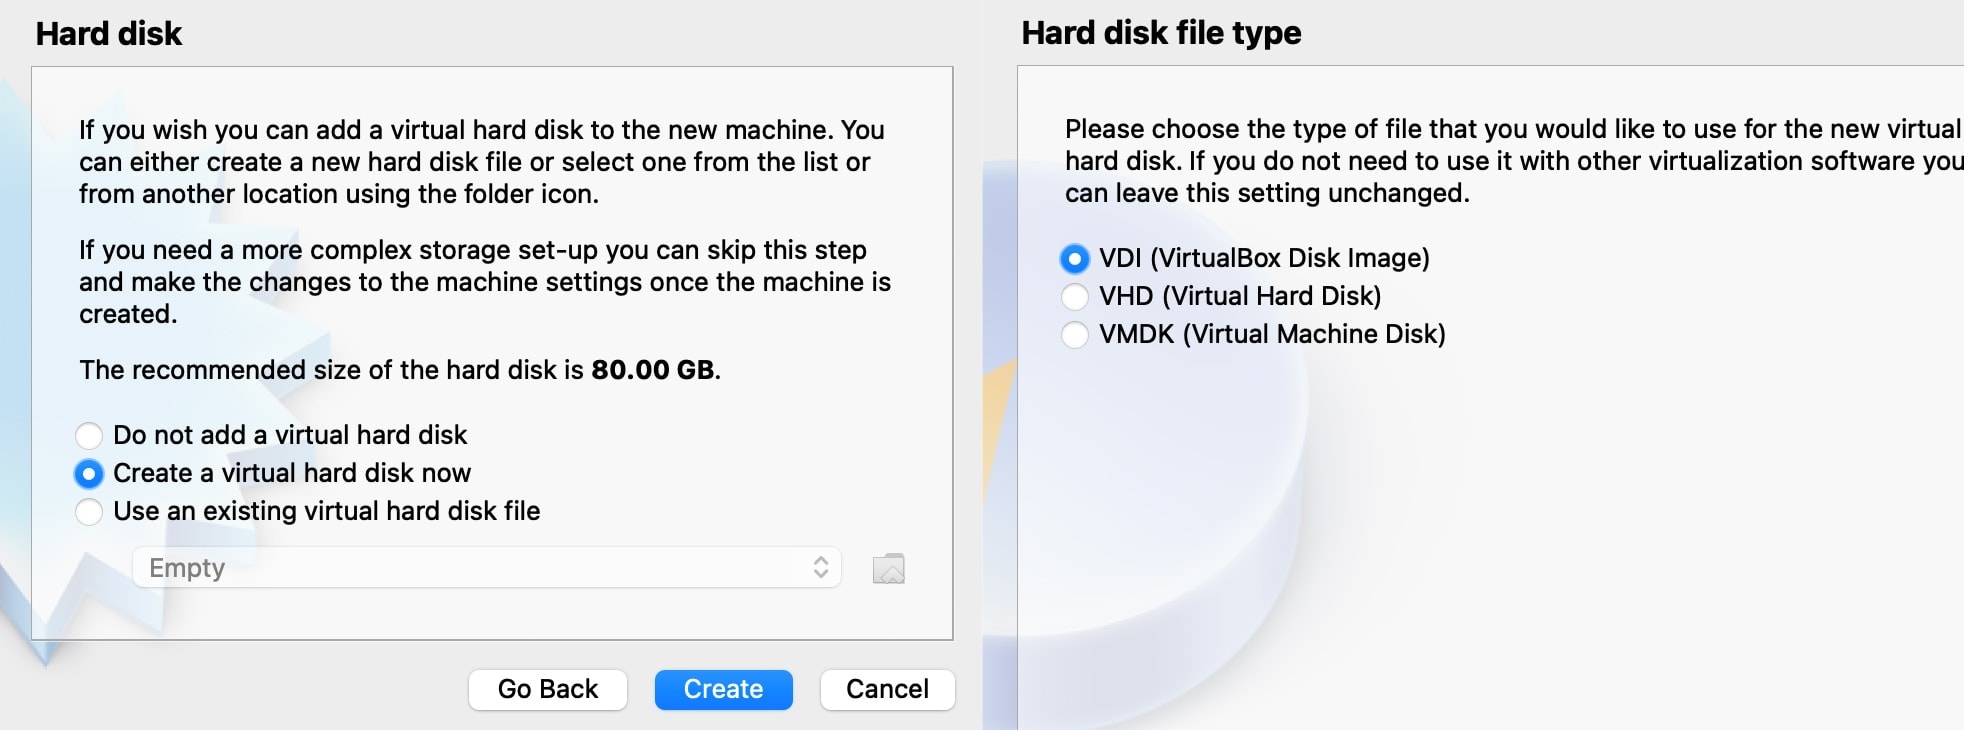
Step 2: Choose “Create a virtual hard disk now” and choose VDI as the hard disk file type and click Continue.
Step 3: Select “Dynamically allocated” in the next dialog box and choose the file location and size of the hard disk and click Create to create a new virtual machine
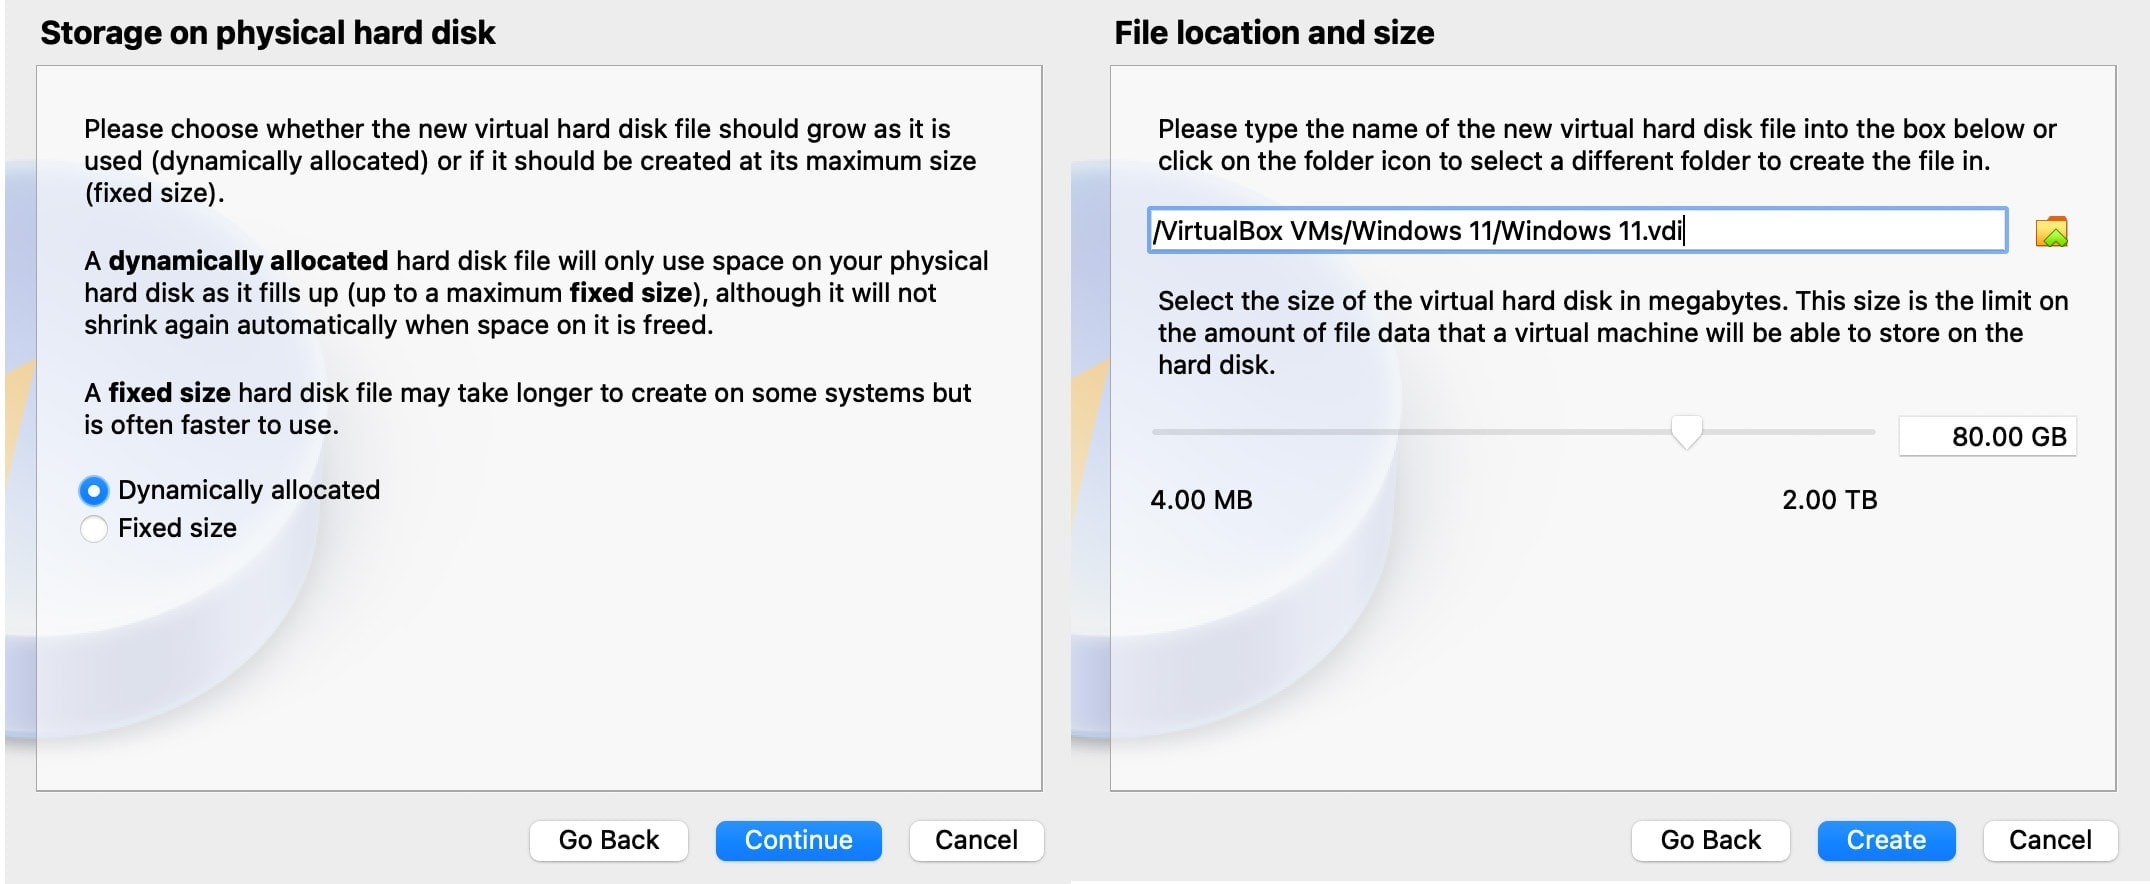
4. Add Windows 11 ISO Image to VirtualBox
You need to add Windows 11 ISO image to VirtualBox. You can see various settings for the new virtual machine you’ve created on the right-hand pane. Follow the steps below to add Windows 11 ISO image.
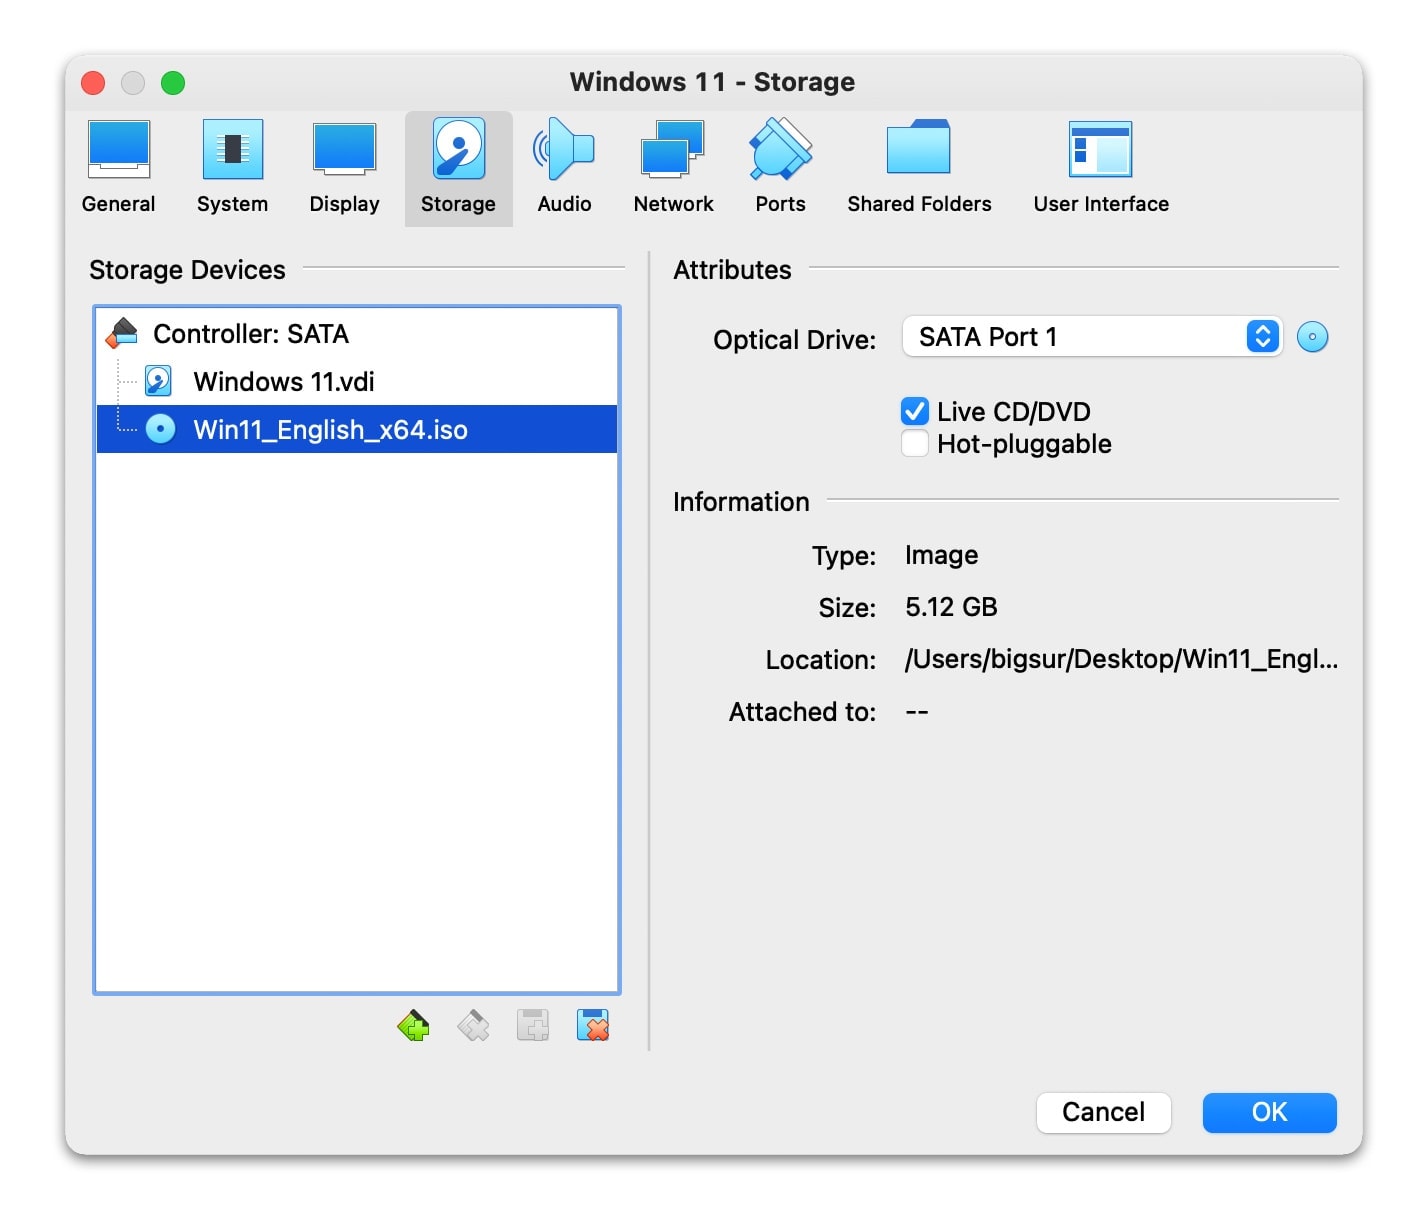
Step 1: Choose your Windows 11 Virtual Machine and click on "Settings" button. Under Storage, select the Live CD/DVD icon and include the Windows 11 ISO image file.
Step 2: Click on OK to finish.
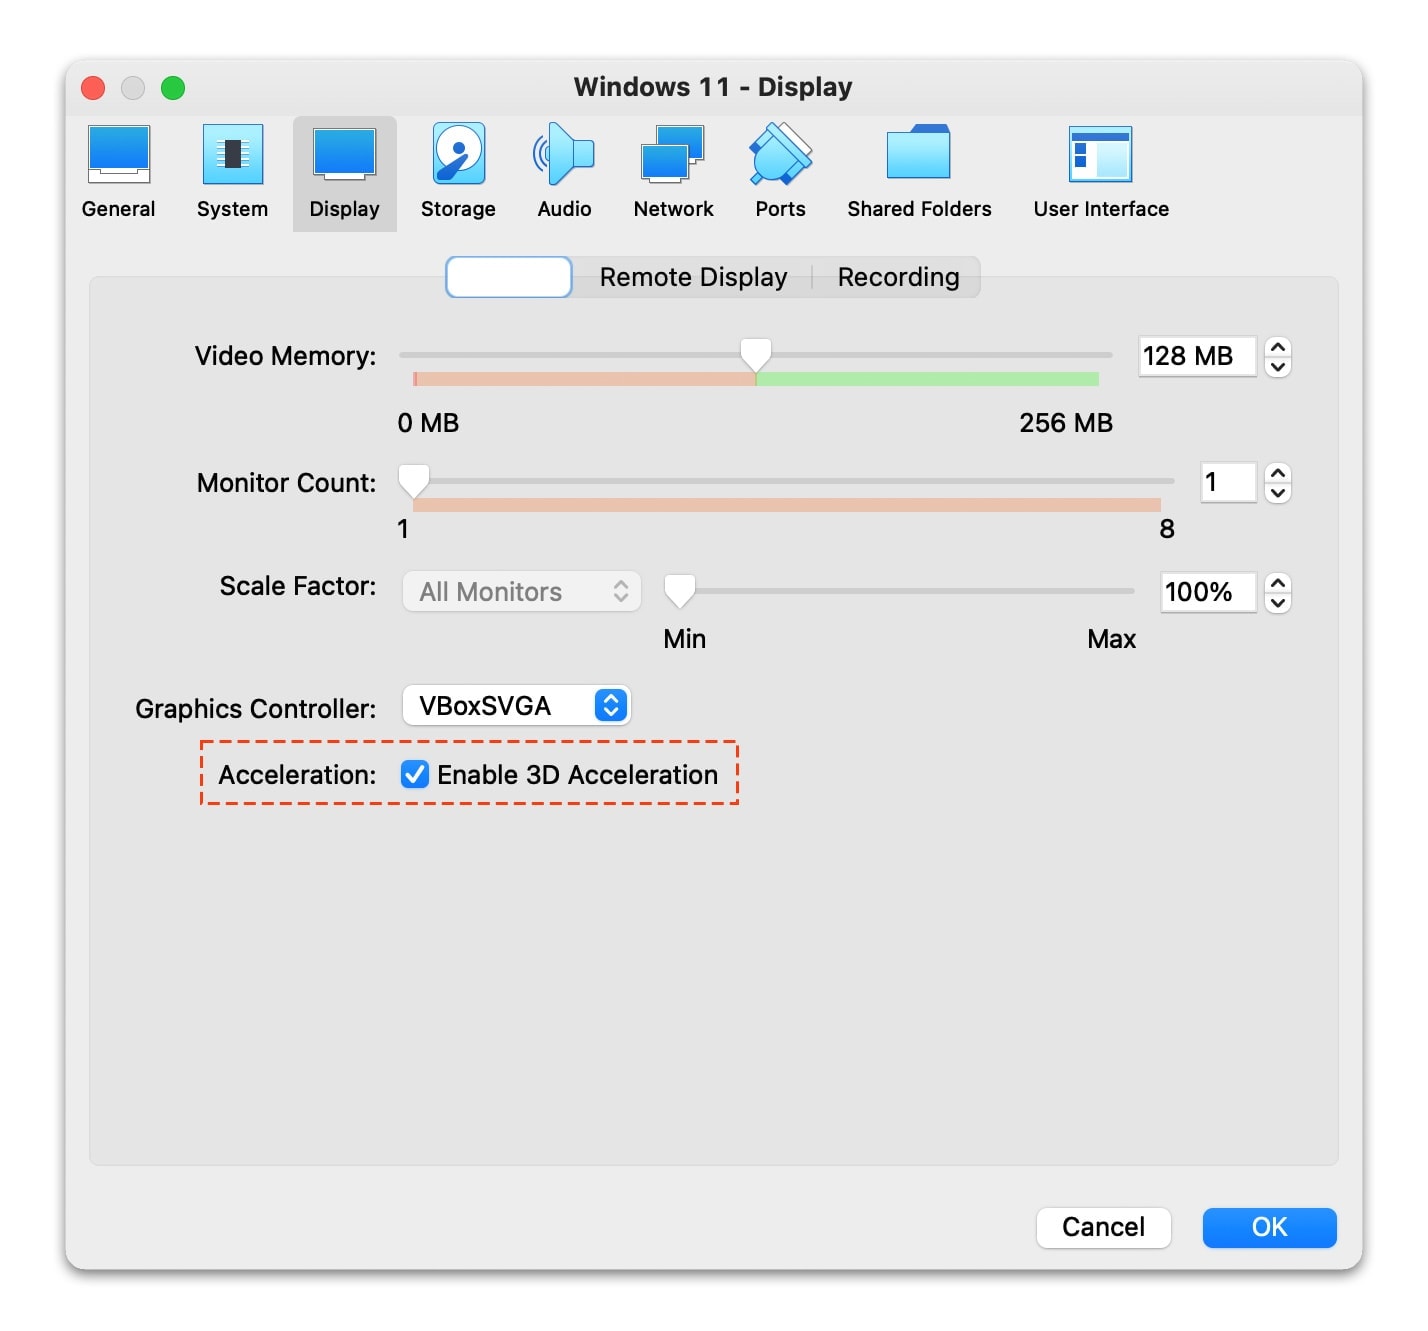
5. Enable 3D Acceleration
Under Display Tabs, choose to "Enable 3D acceleration" and click OK button.
6. Install Windows 11 on VirtualBox without TPM 2.0
Start the new virtual machine you’ve created by double-clicking on the menu on the left or by clicking on the green icon inside the VM console. And press "Enter" button to Boot the setup using the Windows 11 ISO Image.
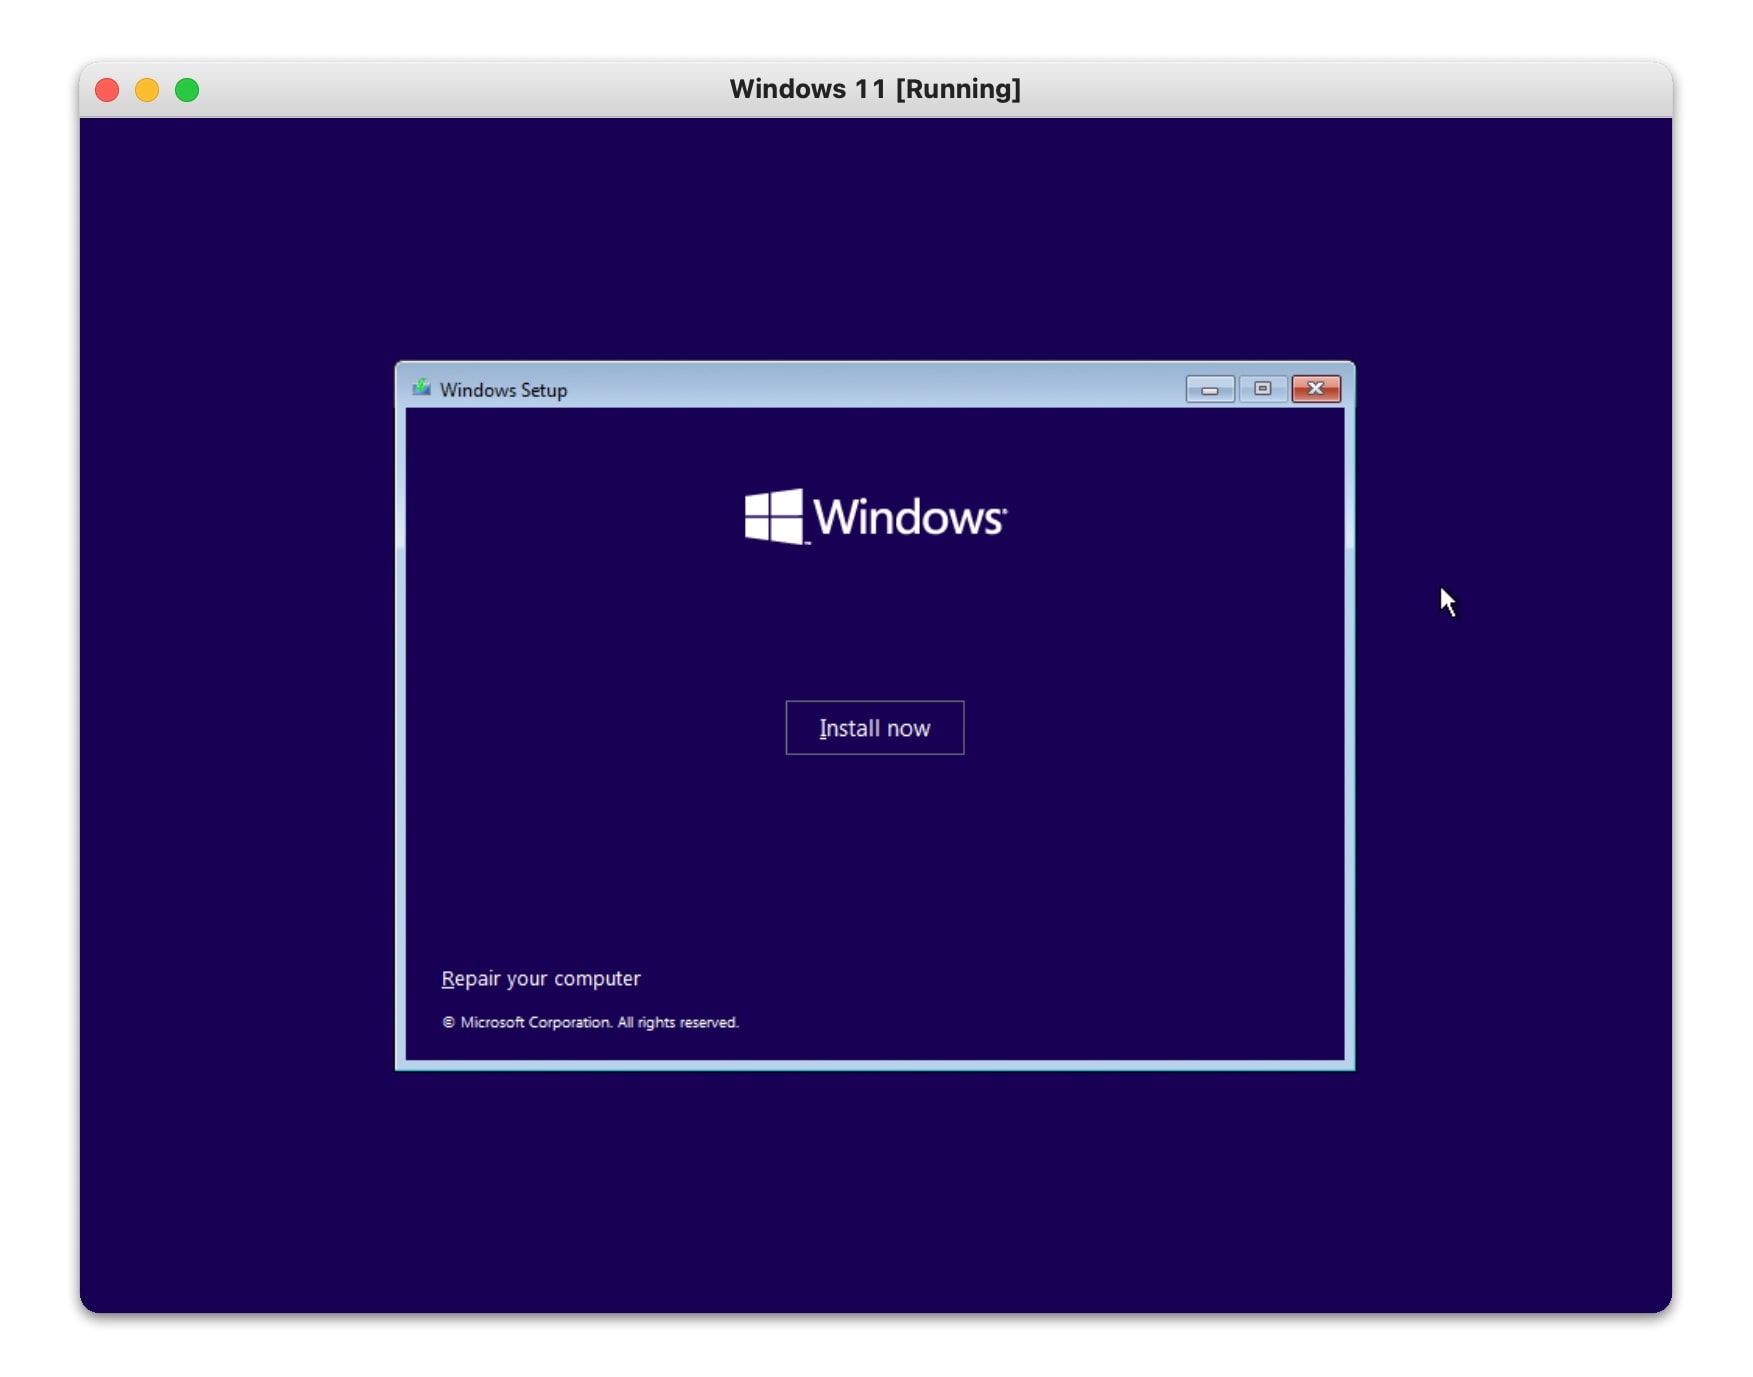
Step 1: Press "fn+shift +F10" to Open CMD in Windows 11 Assistant.
Step 2: Type: Notepad to Open Text Editor.
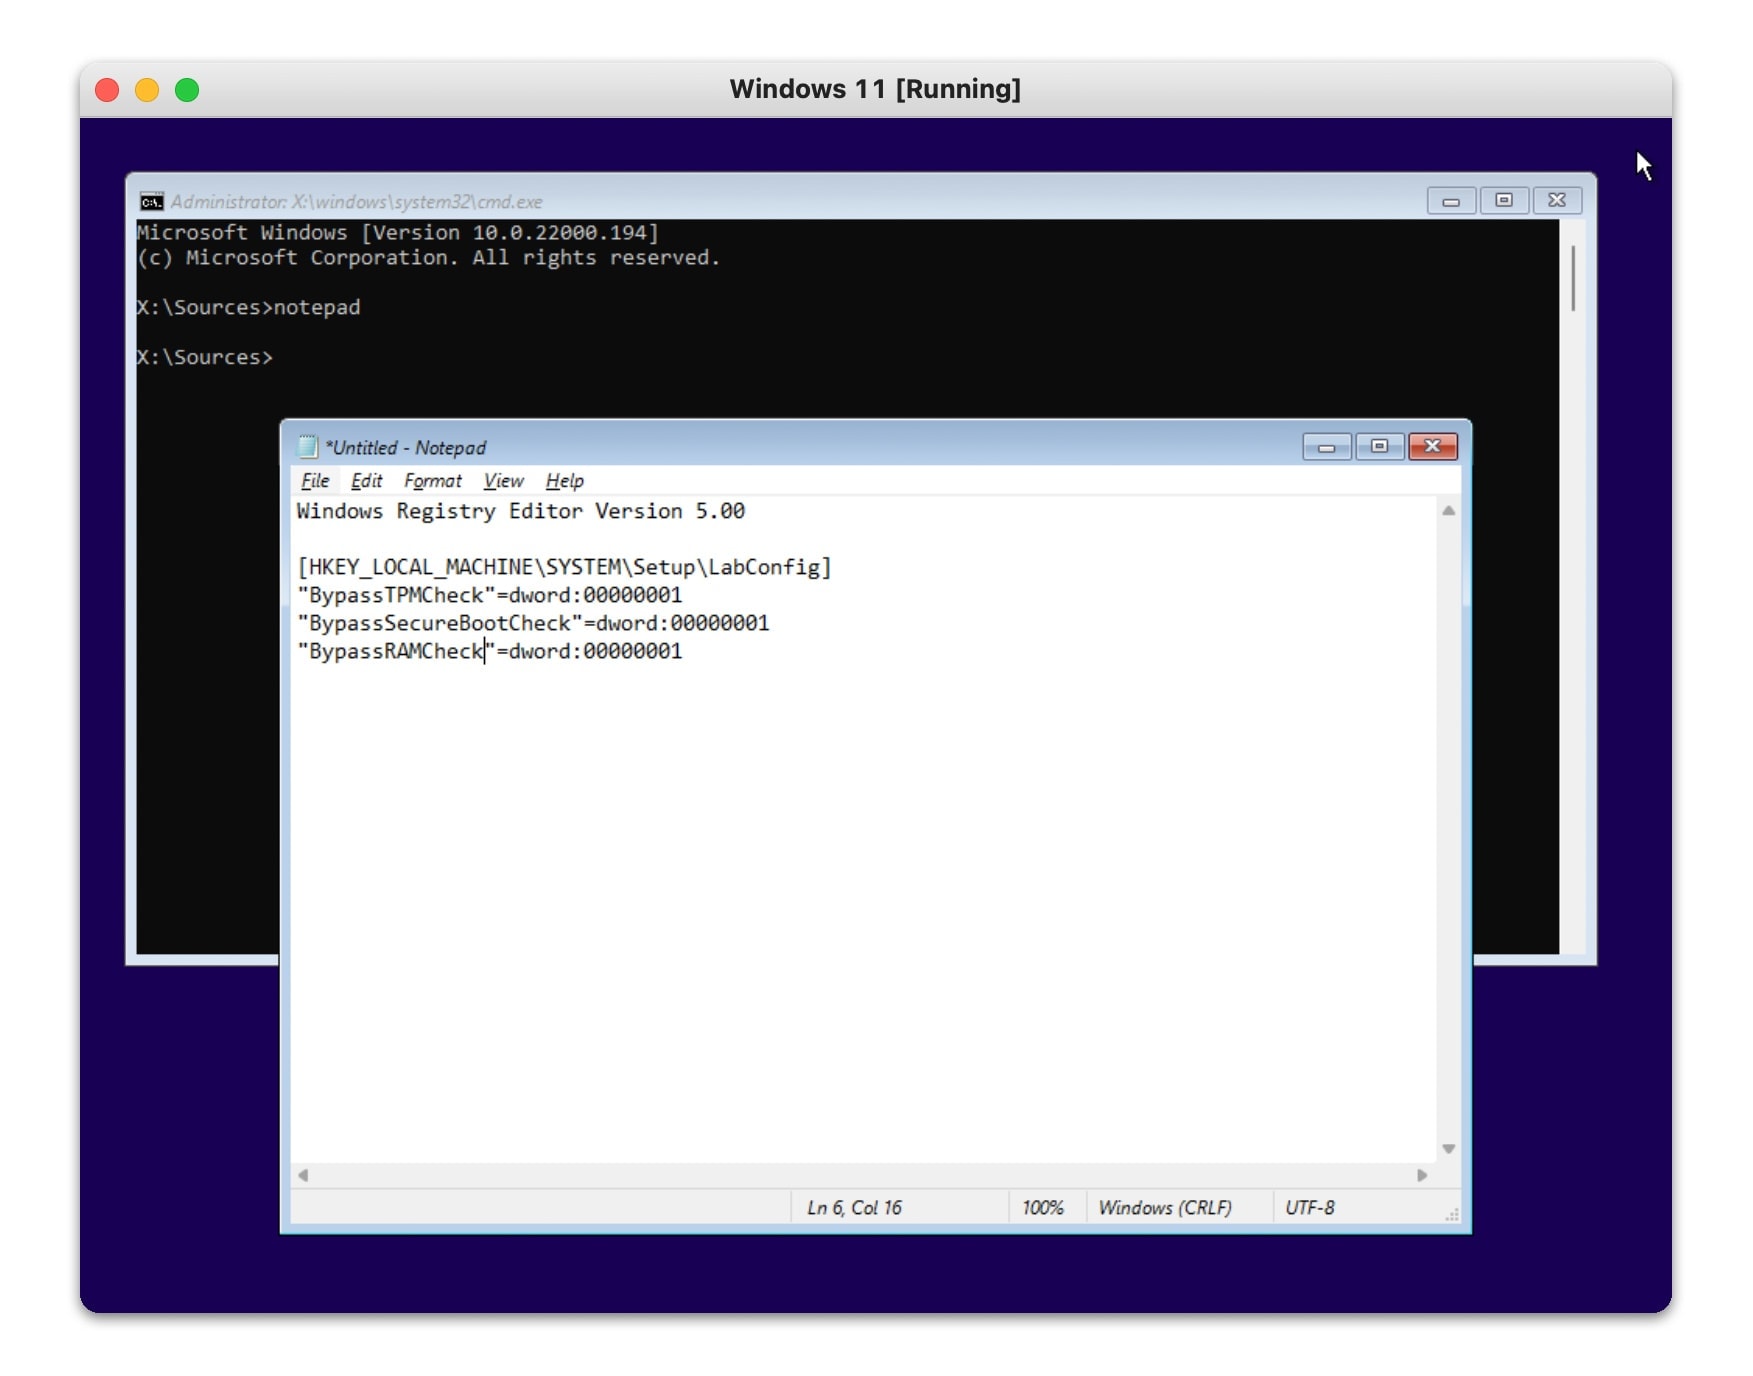
Type this code to create a bypass TPM file:
Windows Registry Editor Version 5.00
[HKEY_LOCAL_MACHINE\SYSTEM\Setup\LabConfig]
"BypassTPMCheck"=dword:00000001
"BypassSecureBootCheck"=dword:00000001
"BypassRAMCheck"=dword:00000001
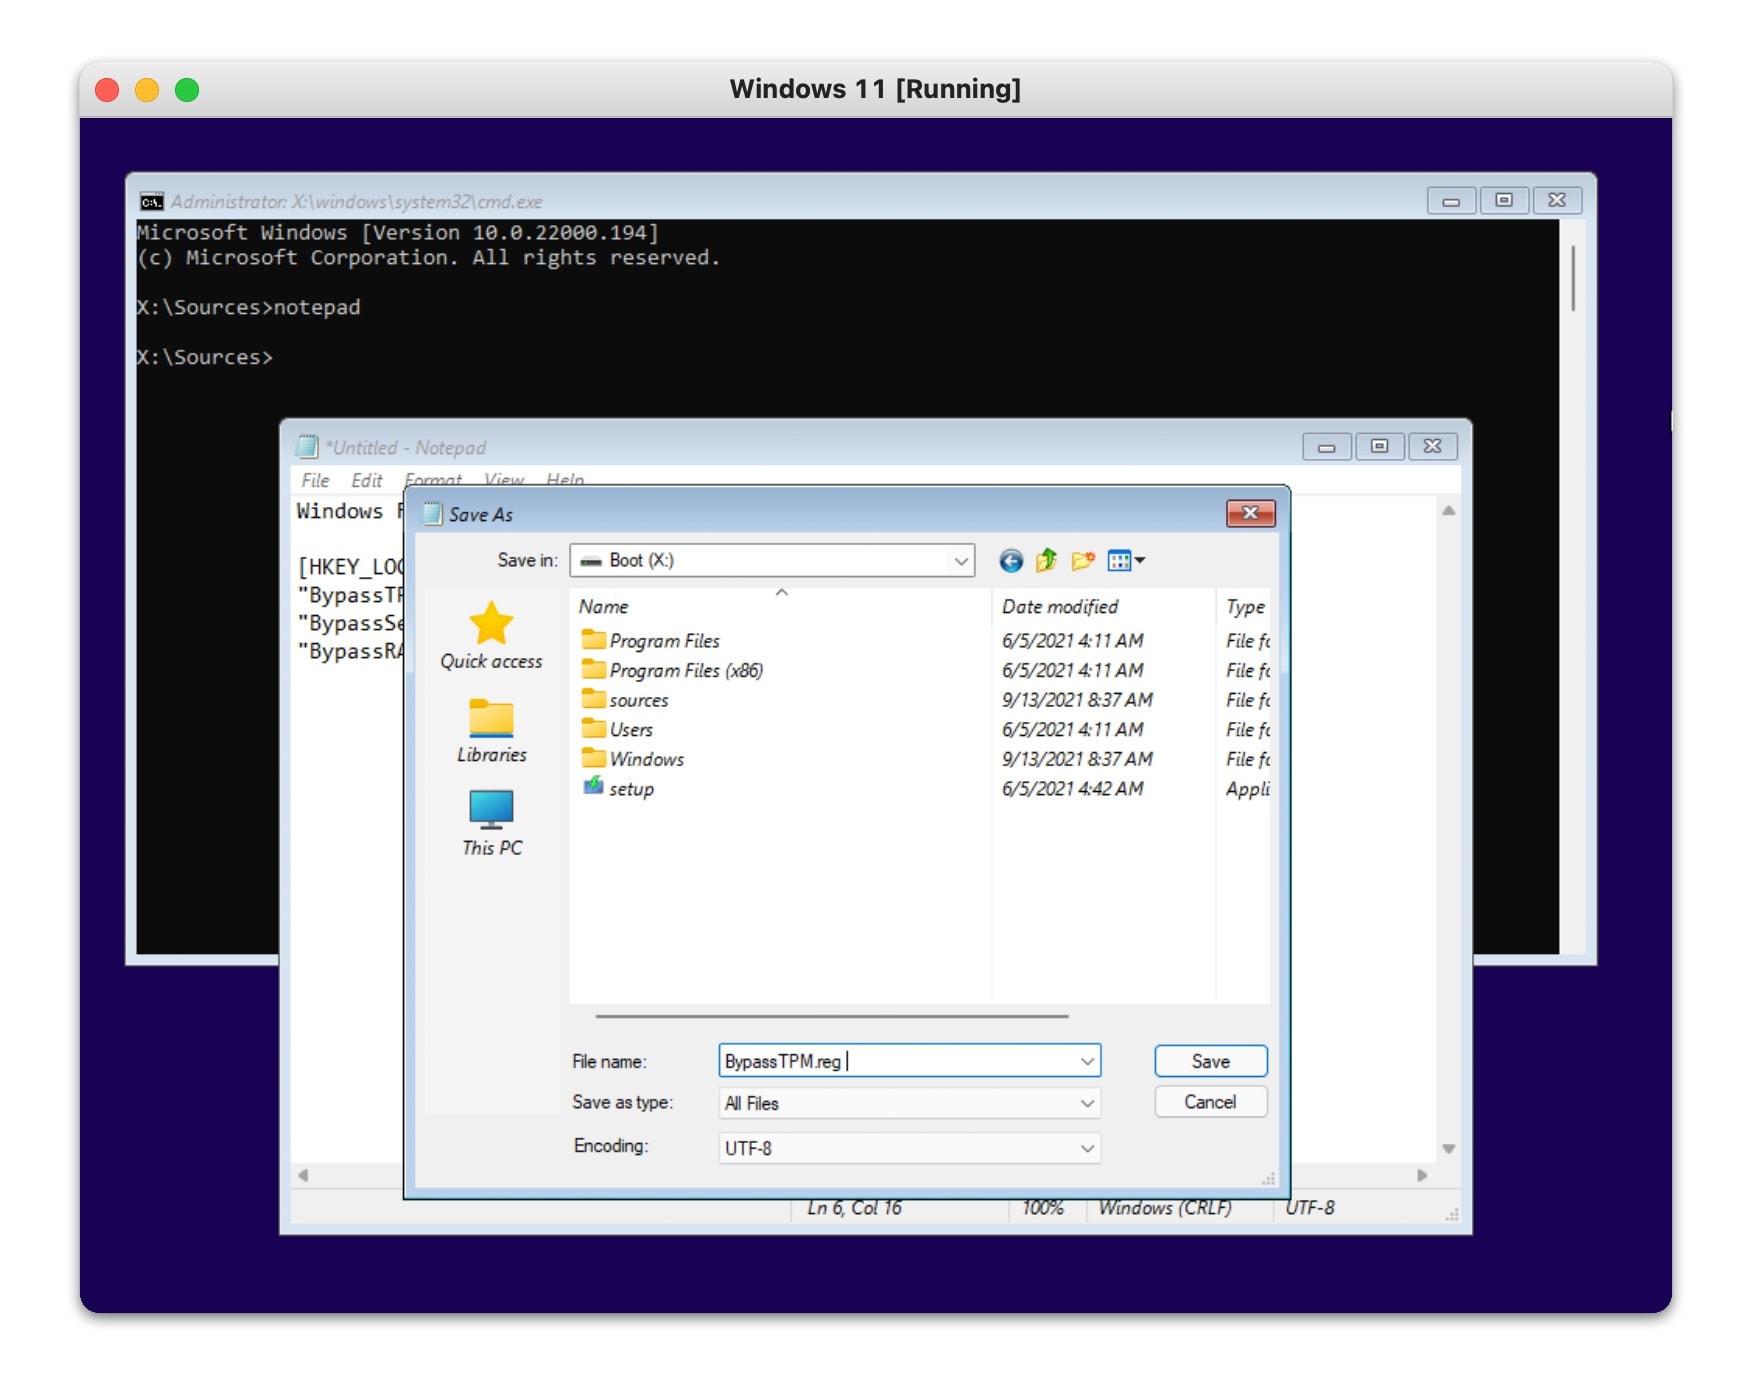
Step 3: Click on File and Save as, go to Boot partition. and Set "All Files" in "Save as type" and "File Name" is "BypassTPM.reg".
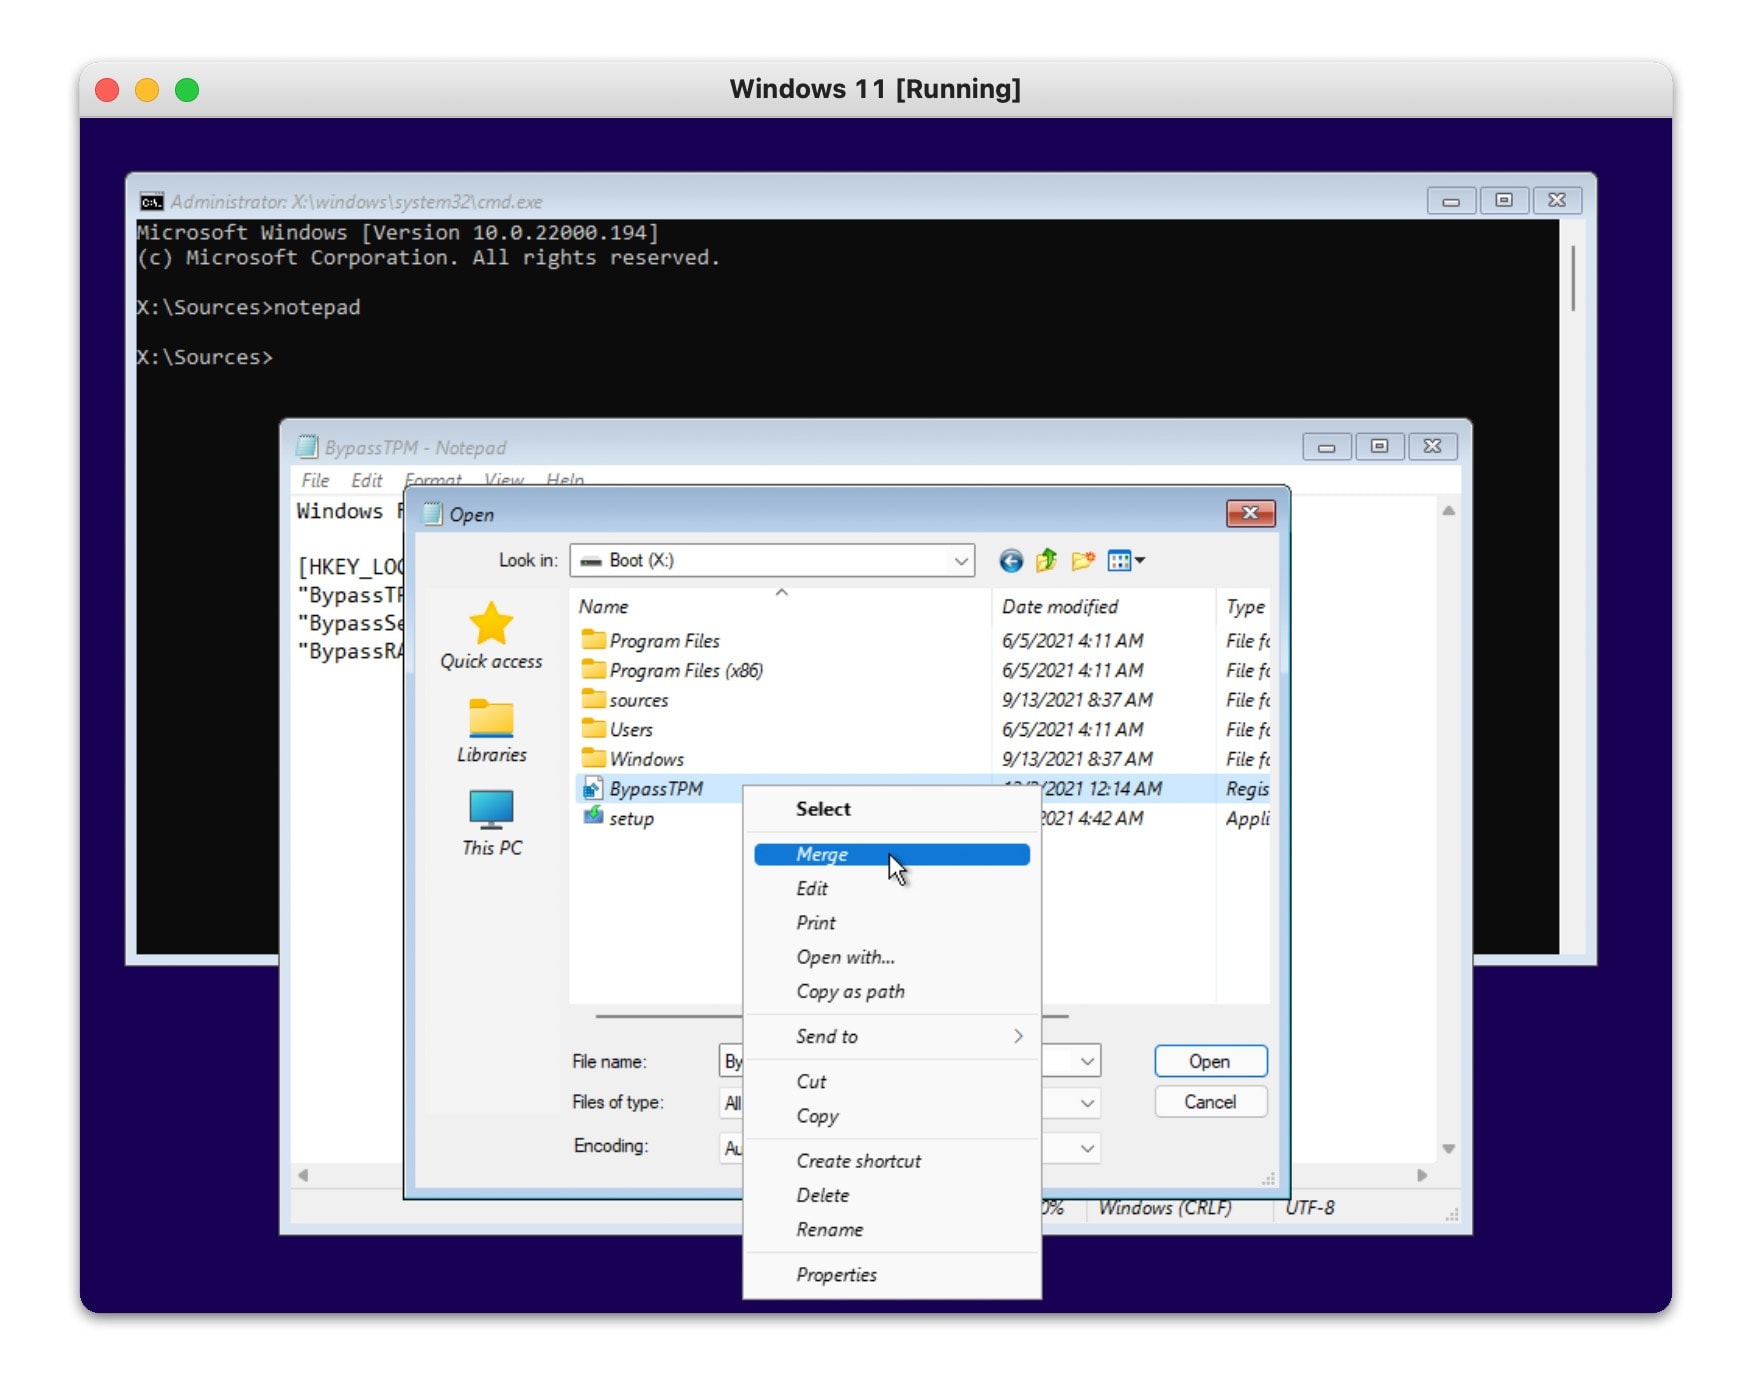
Step 4: Click on File and Save as again, right click on BypassTPM file and click "Merge" to run this file. Then close Notepad and CMD.
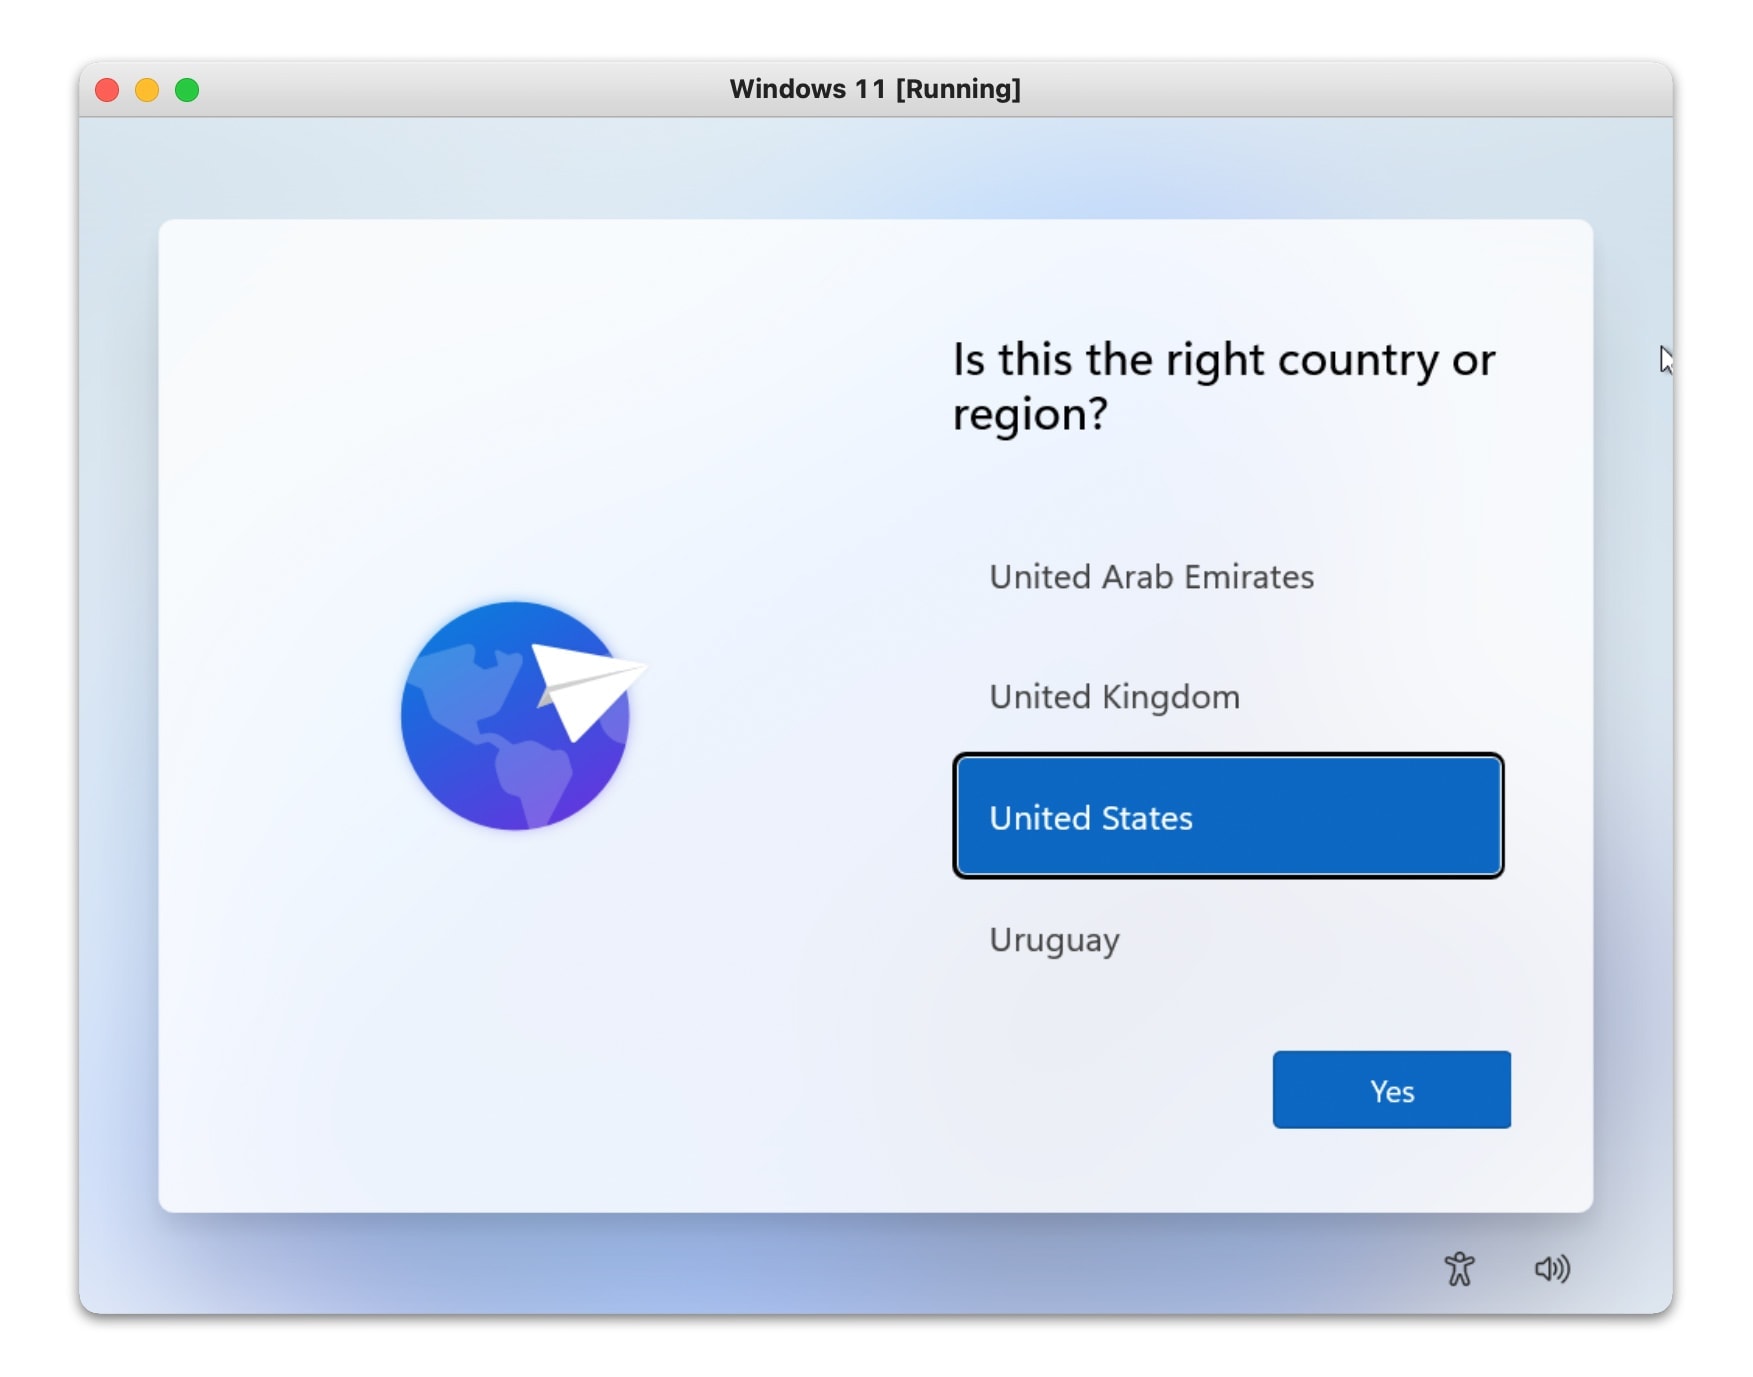
7. Install Windows 11 and Create a new Account
Go through the installation wizard and complete the setup to have a fully functional Windows 11 PC running on a virtual environment on your Mac.
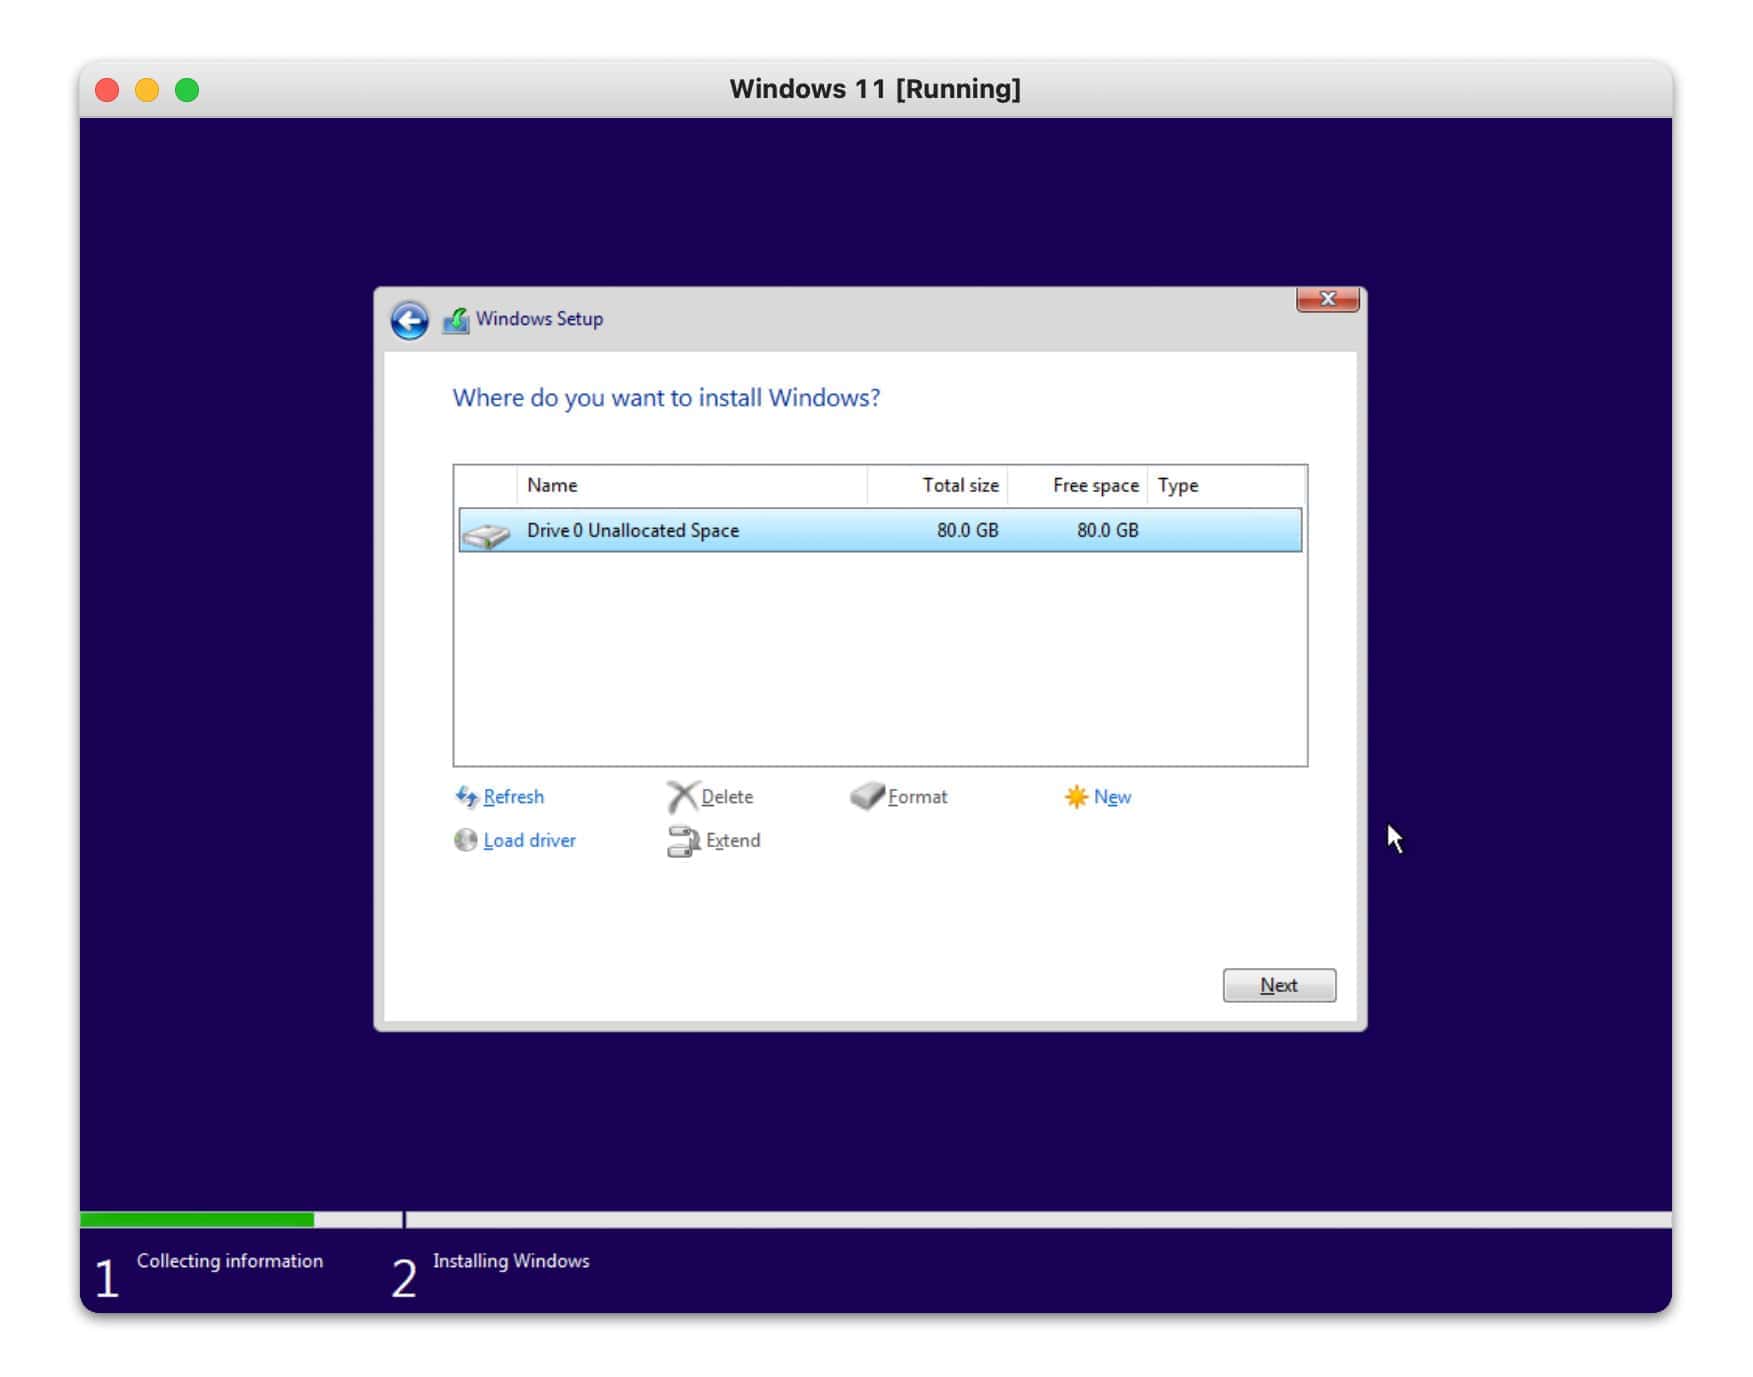
Connect your Virtual Machine with Internet to create a new Windows 11 account. Click on "Devices" > "Network" > "Connect Network Adapter"
8. Installation of Guest Tools
You should install the guest installation from VirtualBox once the installation of Windows 11 is completed. Start the virtual Windows PC. On the Devices menu, click Install Guest Additions. Open "CD Drive" in Windows 11 and click on "VBoxWindowsAdditions" to install guest OS tool.
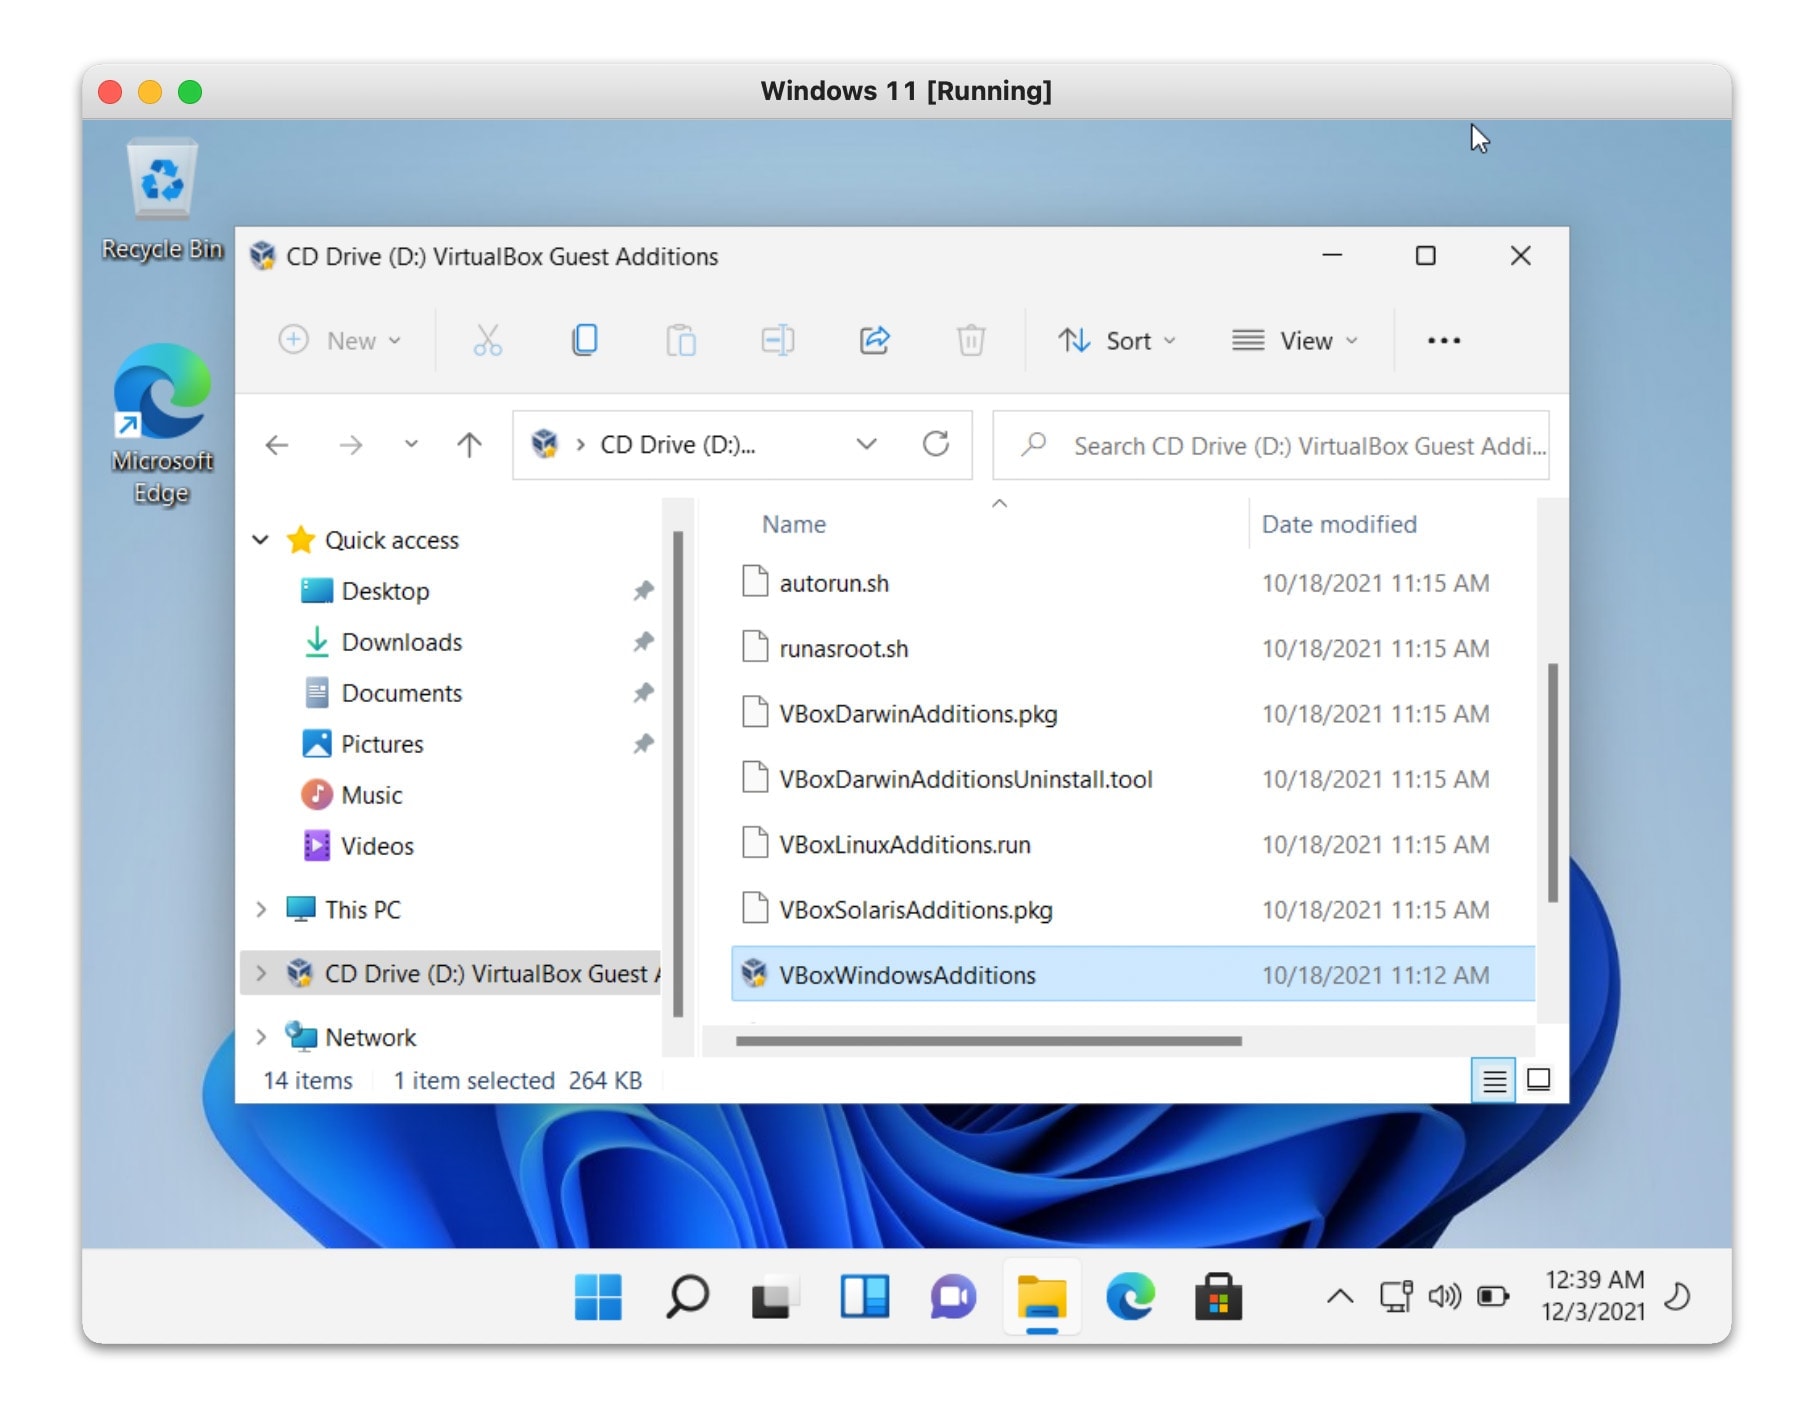
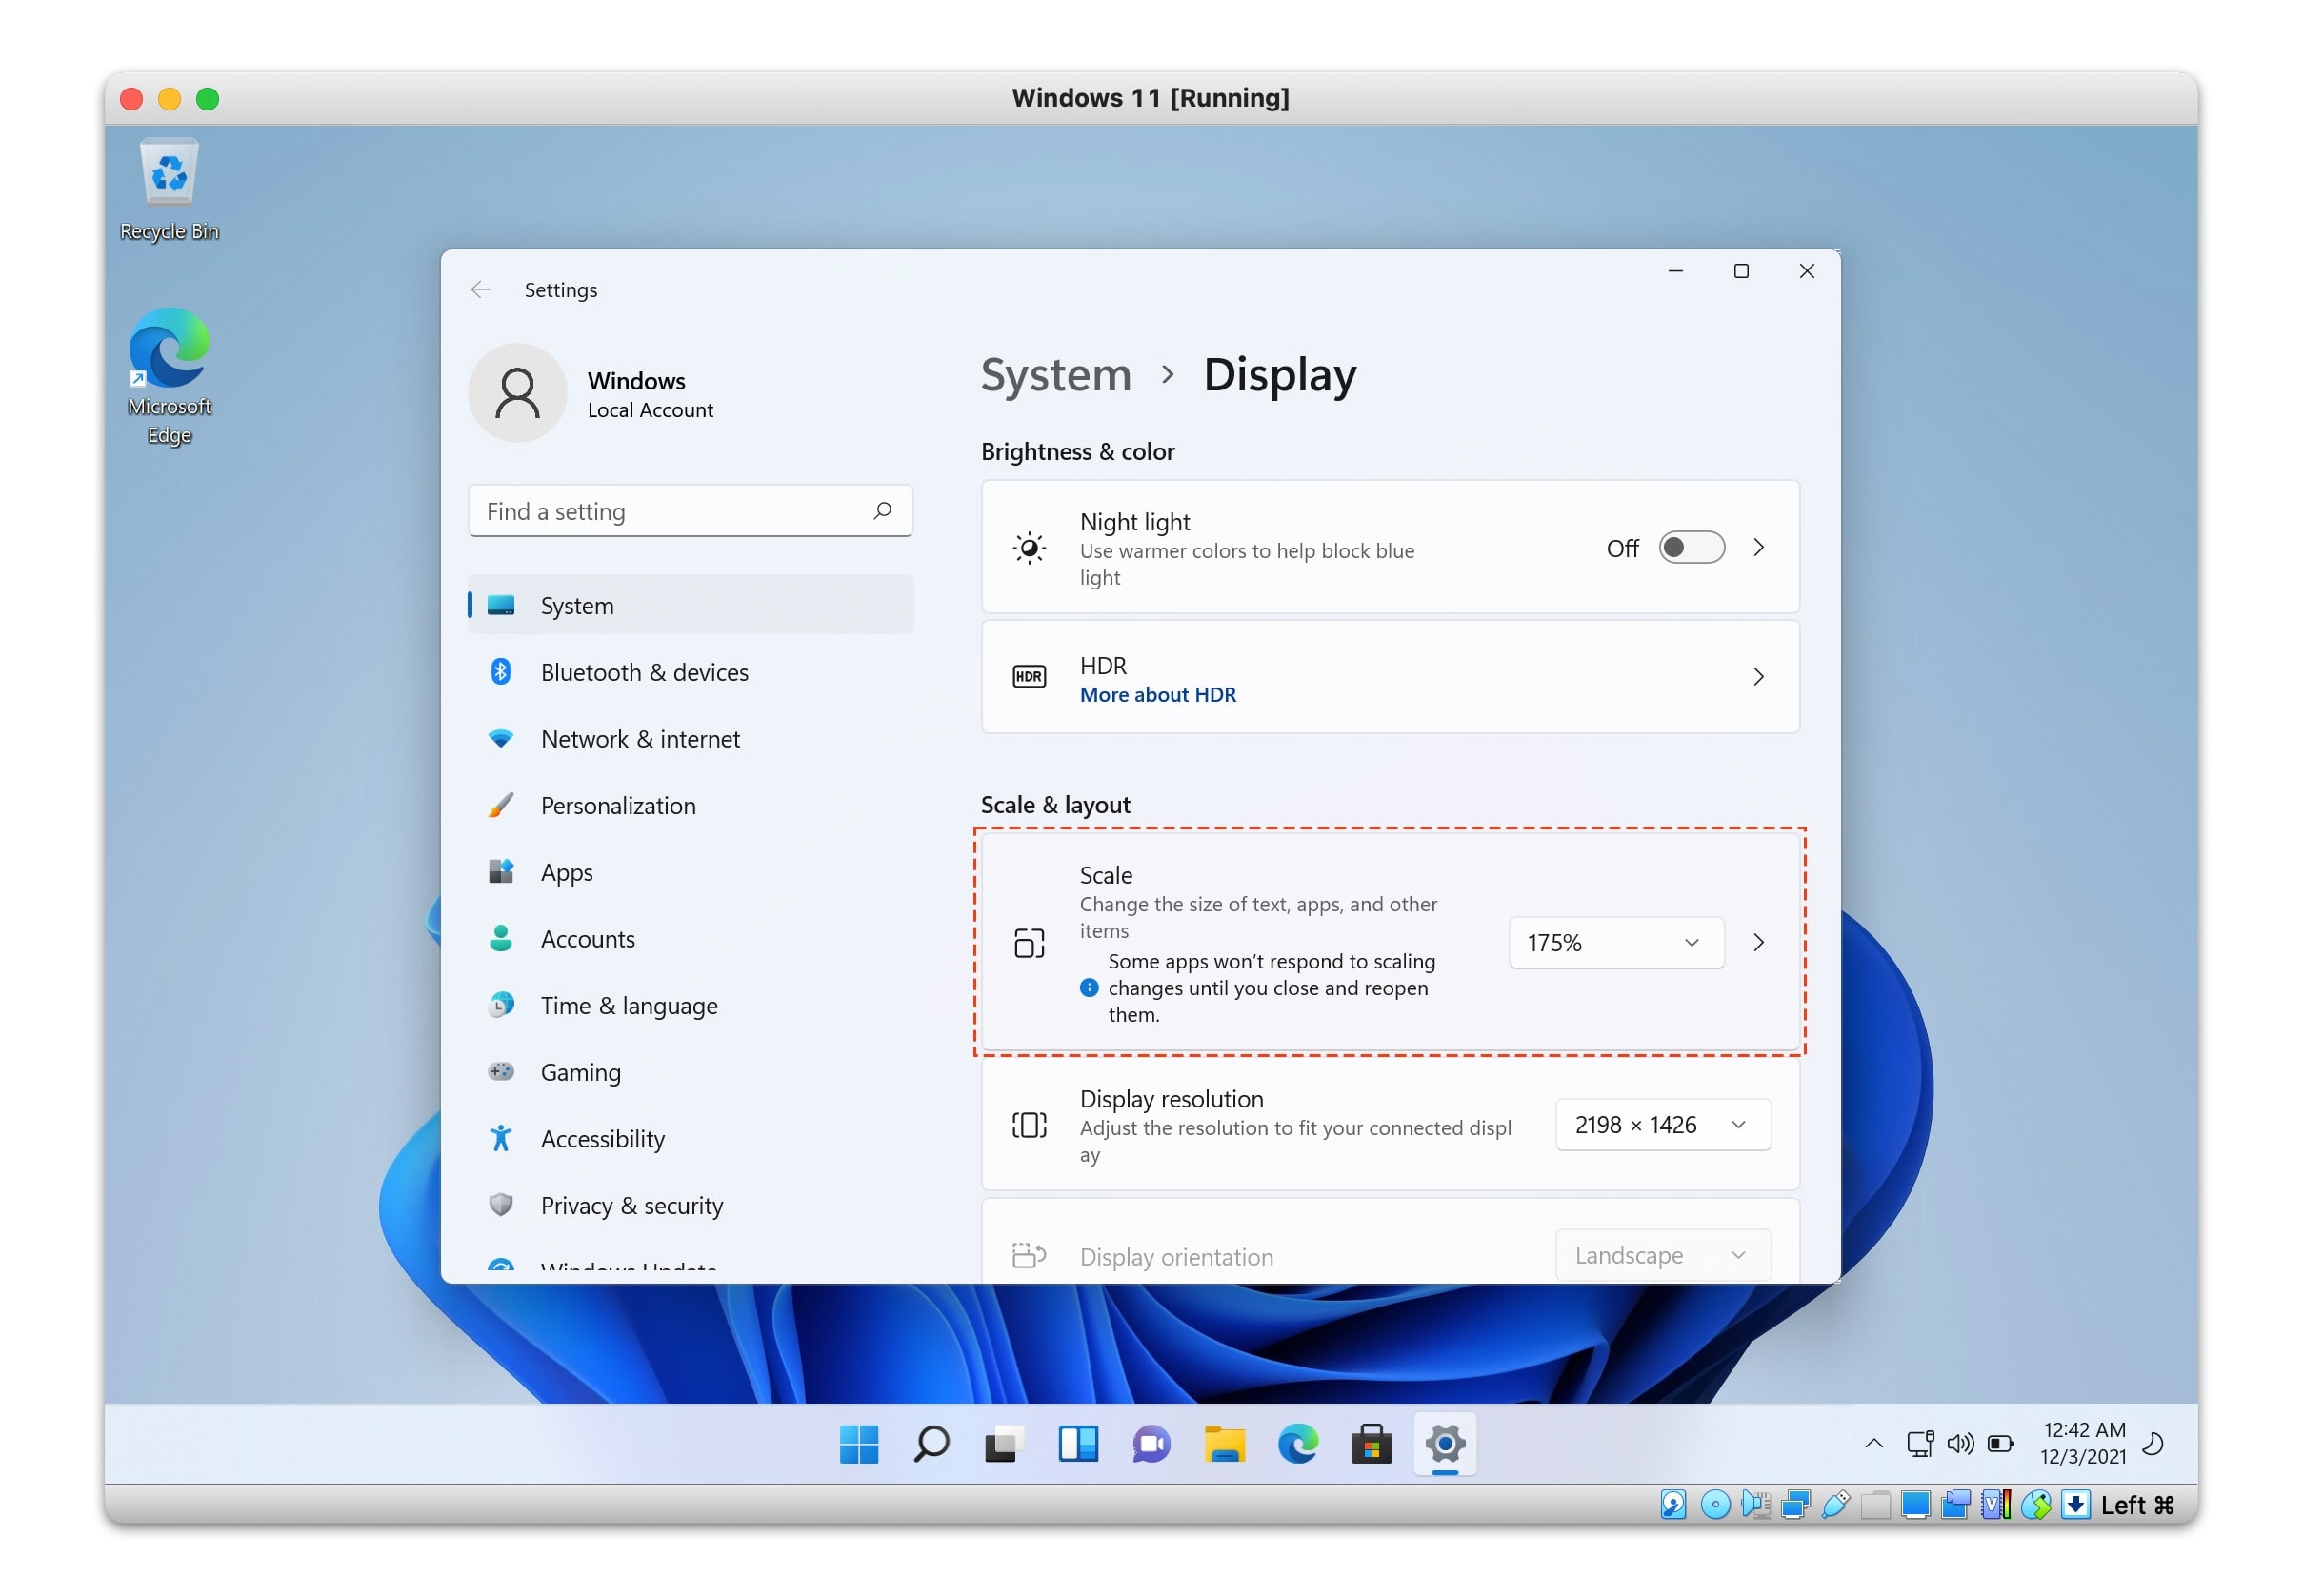
Once the process is completed, you’ll have Windows 11 fully installed on your Mac. You can go to Display setting and change the size of Text and App.
A free virtual machine like VirtualBox allows you to seamlessly test various programs on a separate environment on your Mac. You don’t risk the chance of damaging your host computer when you’re running programs and applications in a virtual environment. Virtual machines are extremely convenient for developers and users who want to run various applications on different operating systems.



Leave a Comment