macOS Sonoma is a new version of the operating system that has been developed based on improvements from its predecessor, macOS Ventura. In terms of user interface, there are no significant differences compared to Ventura. However, macOS Sonoma introduces some noteworthy advancements, such as the ability to have dynamic, moving lock screen wallpapers and the inclusion of widgets that can be placed on the desktop screen. Additionally, there are several enhancements in Safari and improved interactivity during live streaming. It's important to note that macOS Sonoma is currently in its early testing phase and may encounter some issues during usage. Nevertheless, Mac users, particularly those interested in exploring new features, are eager to experience macOS Sonoma.
When it comes to installing macOS Sonoma, there are a few options available. Many users opt to directly upgrade from older versions, although this approach may expose them to potential errors and glitches that exist in the Beta version. These issues could have an impact on your work. Another option is to install macOS Sonoma on a separate partition of a Mac, requiring the use of an External USB Installer containing the macOS Sonoma setup.
Therefore, in this guide, we will walk you through the process of creating a macOS Sonoma installation on an External USB Drive, as well as provide you with the essential steps to utilize this USB Installer effectively.
How to create macOS Sonoma USB Installer
1. Download macOS Sonoma
There are multiple methods available for downloading macOS Sonoma. The first option involves joining Apple's Beta or Developer program and acquiring the macOS Sonoma download through that channel. The second option is to directly download macOS Sonoma using the Installassistant file from Apple's server. The Installassistant.pkg file contains the packaged macOS Sonoma installer, utilizing the common pkg file format typically used for macOS applications.
Download macOS Sonoma Final:
2. Extract macOS Sonoma Install App
To extract the macOS Sonoma installer, all you need to do is open the InstallAssistant.pkg file and follow the provided instructions. The extraction process should only take a few seconds.

After the InstallAssistant file has completed its execution, navigate to the Applications folder. You will find the "Install macOS Sonoma.app" file located there, which serves as the macOS Sonoma installation package. In the following step, we will utilize this installation package to create a USB Bootable Installer for your Mac.

3. Create macOS Sonoma USB Installer
To create the macOS installation package, you will require a USB 3.0 with a capacity of 16GB or more. Begin by connecting your USB to your macOS device. Next, we will use the Terminal application on your Mac to execute a series of commands.
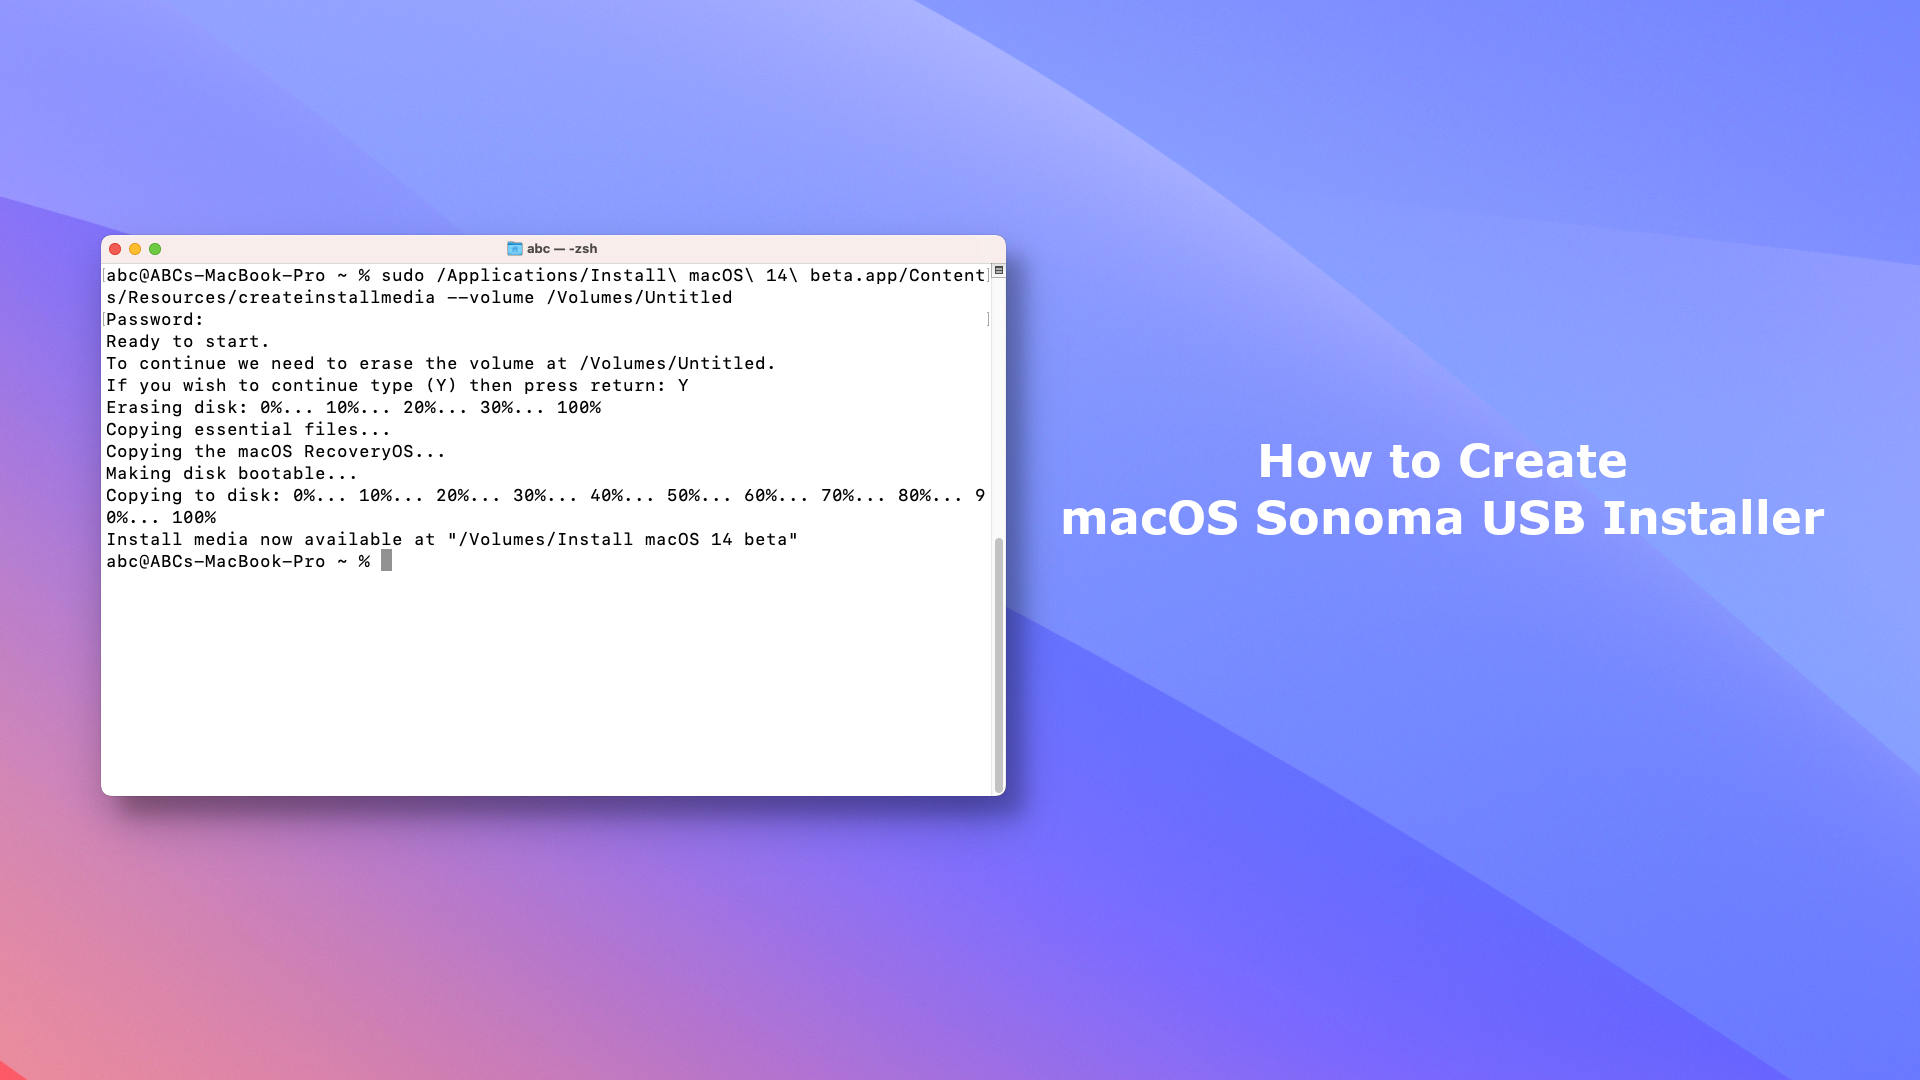
To open the Terminal, you can utilize the Spotlight search function or access it directly through the Applications/Utilities folder. Once the Terminal is open, input the following command to generate the macOS Sonoma installation package.

sudo /Applications/Install\ macOS\ Sonoma.app/Contents/Resources/createinstallmedia --volume /Volumes/Untitled --nointeraction
Let's start with the "sudo" command, which requires admin privileges. You will need to confirm with your password in order to run Apple's createinstallmedia tool successfully. Please note that in my case, the External USB Drive is named "Untitled," so make sure to substitute it with the actual name of your USB Drive.
Once you execute the command, please be patient for a few minutes as Apple's createinstallmedia tool works to create a reliable macOS Sonoma installation package on the USB Drive.
Using the macOS Sonoma USB Installer is a relatively simple process:
- For M1/M2 Macs, start your Mac and hold the Power button. Select "Startup Disk" and then choose "Install macOS 14 Beta" to initiate the macOS Sonoma installation.
- For Intel Macs, start your Mac and hold Option key. Select the USB Installer to install macOS Sonoma.
It is important to note that backing up your data is advisable to avoid any errors during the installation process. If you wish to create a dedicated partition for Sonoma, it is also a straightforward procedure. Access the Disk Utility and click on the Add button to create a new partition with a preferred name. Afterward, you can install macOS Sonoma without impacting your current operating system or installed software.
As you can see, the process of creating a macOS Sonoma installation on a USB Drive is relatively simple. Keeping a USB Installer on hand is a wise choice, especially if you frequently need to install new software or perform installations. This ensures that you have a reliable solution in case your computer encounters any issues or if you have limited access to a strong internet connection for downloading the approximately 12GB macOS installation package.


Leave a Comment