The 18th major release of macOS is the macOS Monterey, there are many new features that make it a successful operating system. Some of the really exciting features to look out for in macOS Monterey are Universal Control, Live Text and Shortcuts. One feature in particular is Erase Contents and Settings which we will be showing you how to use today!
To download macOS Monterey, you can use the Terminal or App Store. In this tutorial we will learn how to download older version of macOS Monterey using Terminal or use the AppStore in order get the latest one.
And then we will learn how to install macOS Monterey on your Mac. There are many ways of doing this, but in order for you the best results possible it's important that once again. Here I'll show 3 different methods: Direct Update, Clean Install macOS and Erase all content and settings .
Download macOS Monterey
Option 1: Direct Download macOS Monterey with Terminal
To download specific versions of macOS such as 12.4, 12 5 or even earlier releases you'll need to use Terminal. The command line tool “terminal” is a built-in feature on Macs that allows users easy access downloading patches for upcoming software updates from Apple's servers.
To open the Terminal, either use Spotlight search or go to your Applications>Utilities folder and launch Terminal there. In the Terminal, type ‘softwareupdate --list-full-installers’ to list all version of macOS.
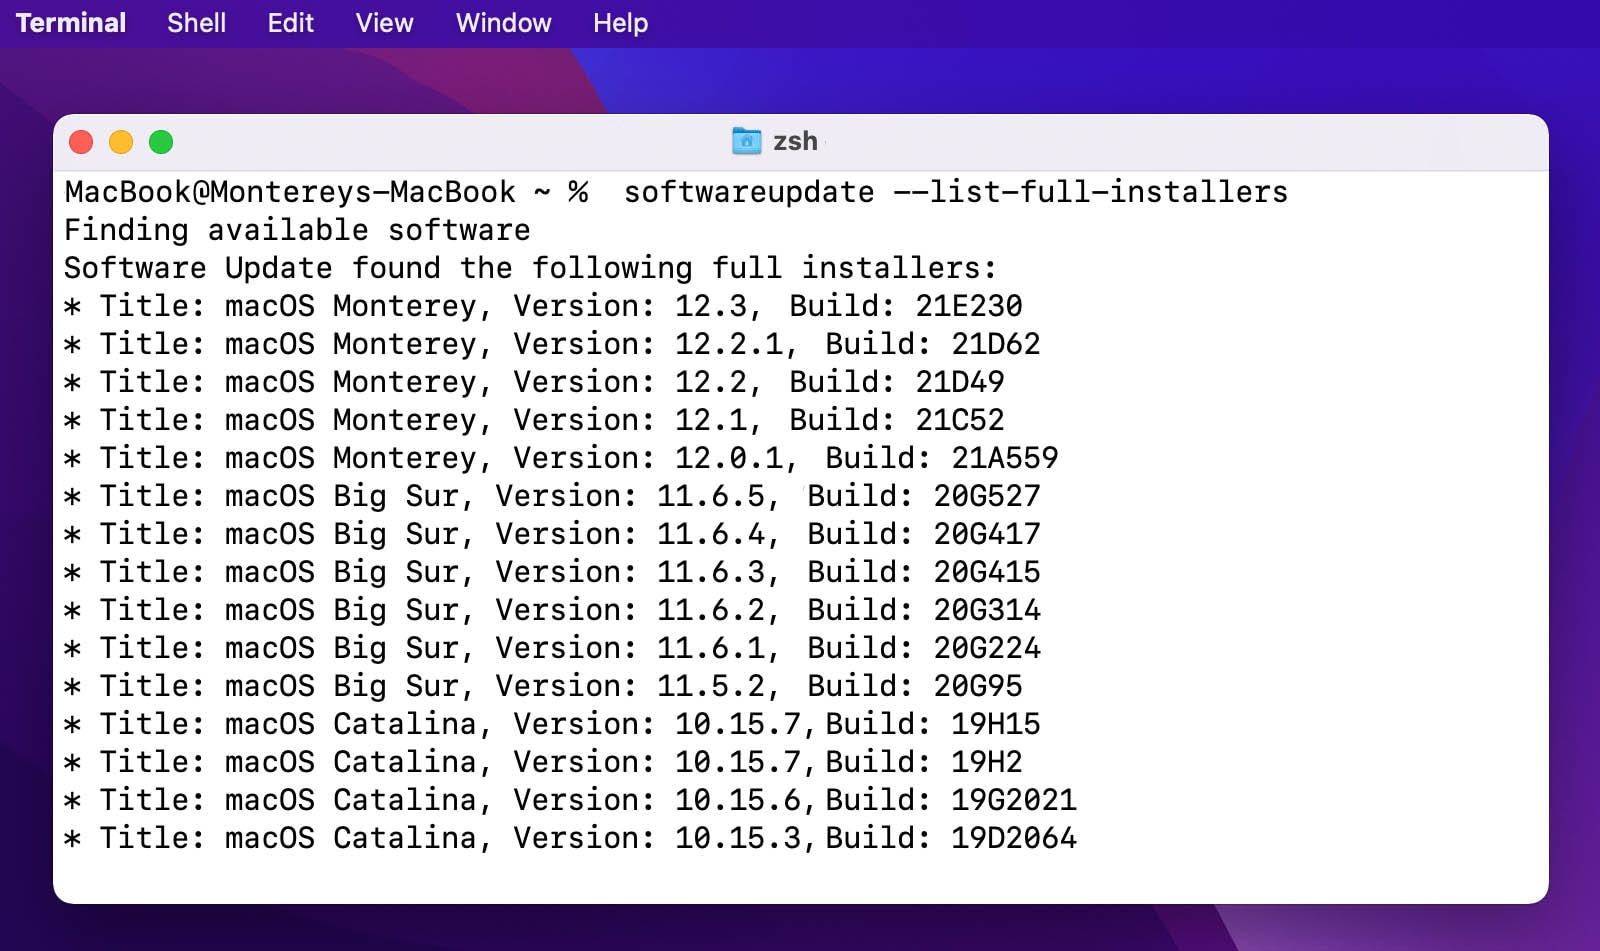
Type this commands to download macOS 12.6 Monterey: ‘softwareupdate --fetch-full-installer 12.6’.
Once you execute the mentioned command, it will start searching for available macOS Versions. Once found and downloaded onto your device, view them in their respective folders under "Applications" folder.
Option 2: Download macOS Monterey with AppStore
Monterey is now available for download so downloading it on the App Store will be simple. Head over to the App Store, and search for the ‘Search’ icon in the navigation menu. Type ' macOS Monterey' in the 'Search Bar' and press the 'Return' key.
Get your free macOS Monterey with AppStore link here.
How to Clean Install macOS Monterey
The three ways to install macOS Monterey are as follows, if you have already installed the macOS Monterey on your Mac. You can use "Erase All Content and Settings" feature to reset macOS back to factory settings with no data or programs stored within.
Second option would be known as upgrade your older macOS version to the new one with just a few clicks. All of your settings and software will be saved automatically during installation, so there's no need for you do anything else!
The third way is to Clean Install macOS Monterey, you need create a USB Bootable and then proceed delete the current partitions in order install newest version, but this will delete all data on your Mac. It's more difficult and you won't be able recover any of it with ease.
Option 1: Erase all Content and Settings
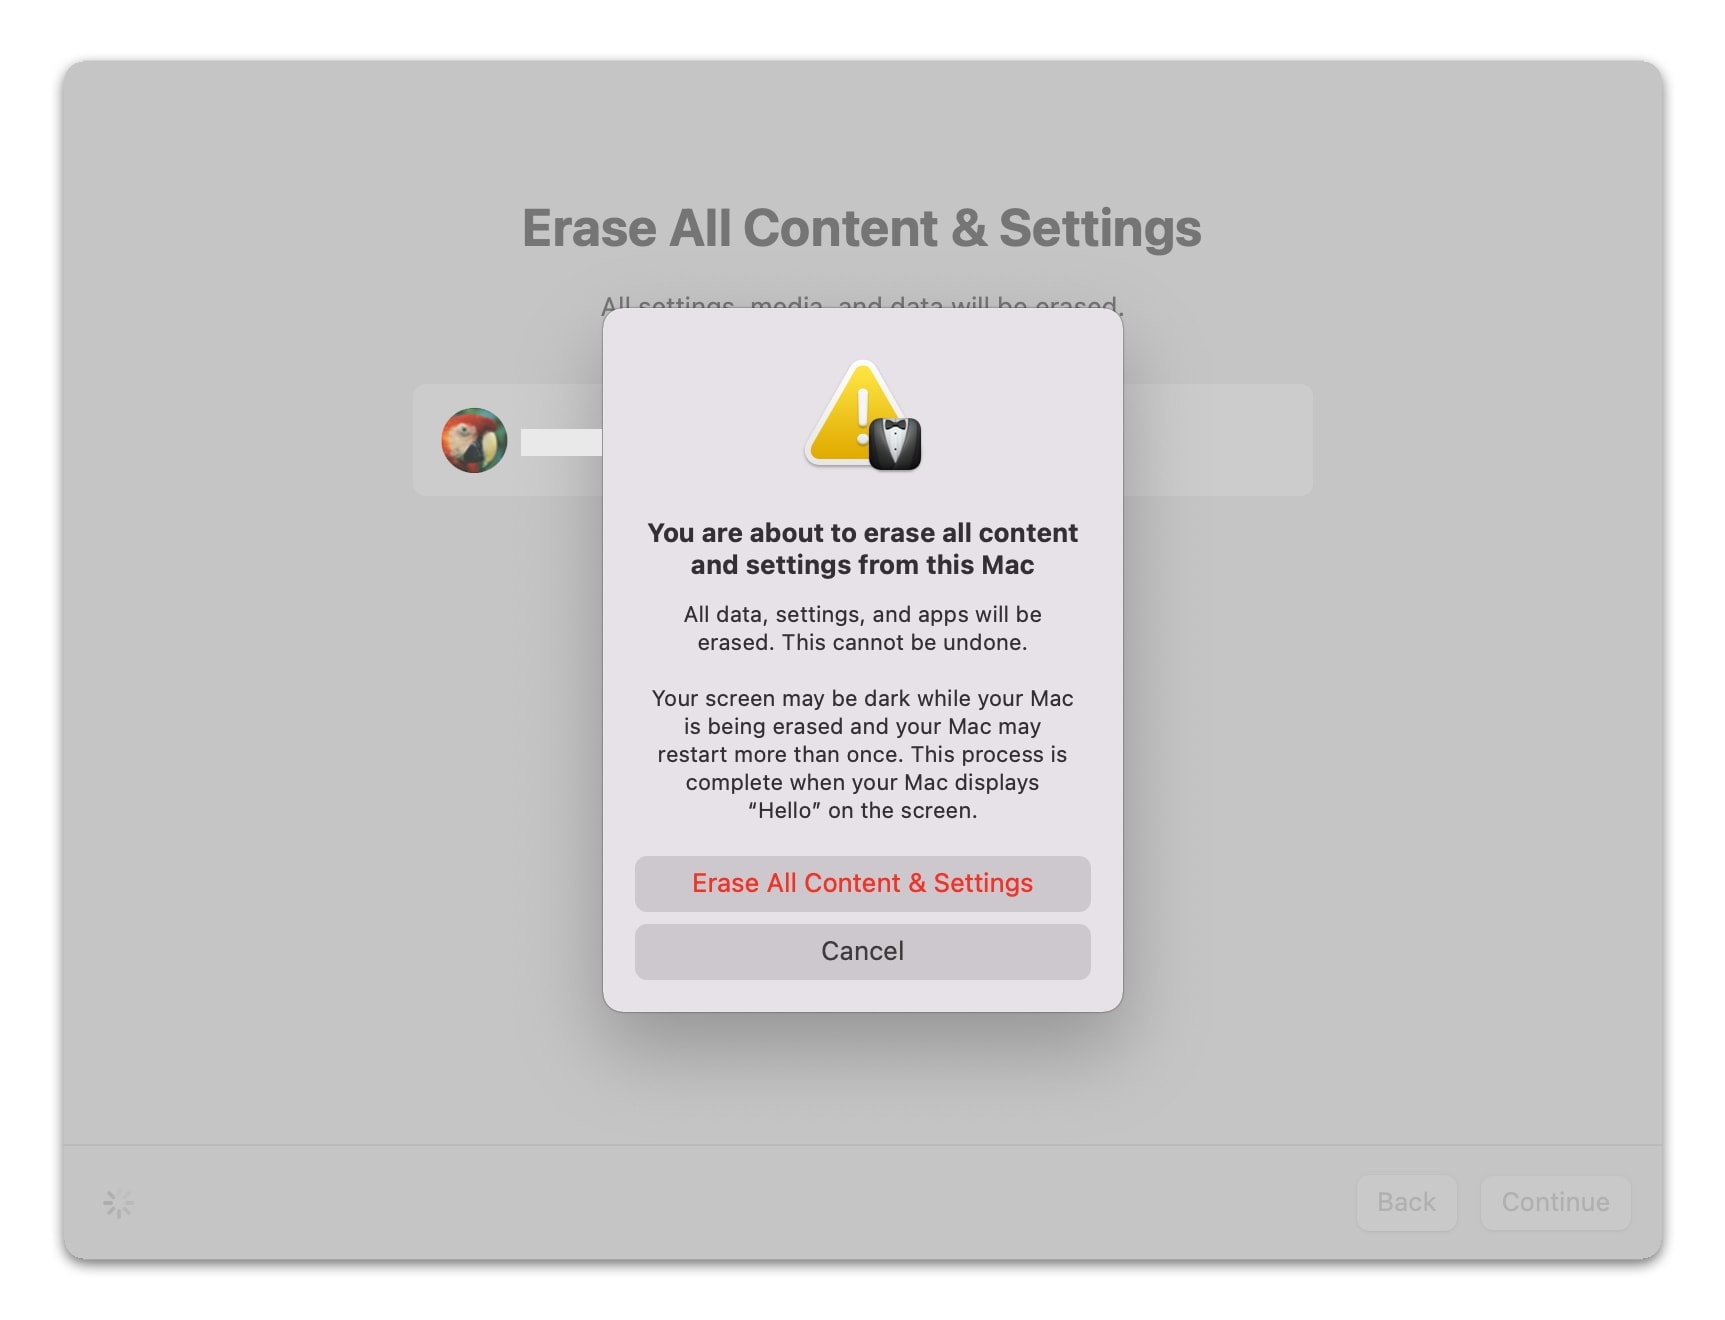
Erasing all your data is a great way to make sure you don't have any copies of what was on your device. The feature only works for Apple silicon Macs and Intel Macs with the T2 security chip. When you enable Startup Security, your Hard Disk will be encrypted so that no one except for those with the correct password can access it. This feature requires a T2 and M1 chip-enabled.
Erase all Content and Settings doesn't require a reinstallation of macOS Monterey and it's just deleting personal data, applications. When you want to erase all of your data on macOS, don't panic! First go into System Preferences and select Erase All Content And Settings. Make sure that the macOS stays connected while doing this process as it will need access for confirmation purposes- which can only happen with internet connection.
Option 2: Clean Install macOS Monterey
Here are some things you need to know before clean install macOS Monterey. The installation will use an USB external disk and wipe your current macOS partition, so make sure these two points:
- Backup all that you need with one easy step! You can store it on a flash drive or external SSD, so there's no risk in case something happens.
- Some people have Macs that don't allow them to boot into external disks. To check for this, you need to enter Recovery mode (Command + R or Hold Power Button) and select "Utilities > Startup Security Utility."
Step 1: Create a macOS Bootable USB
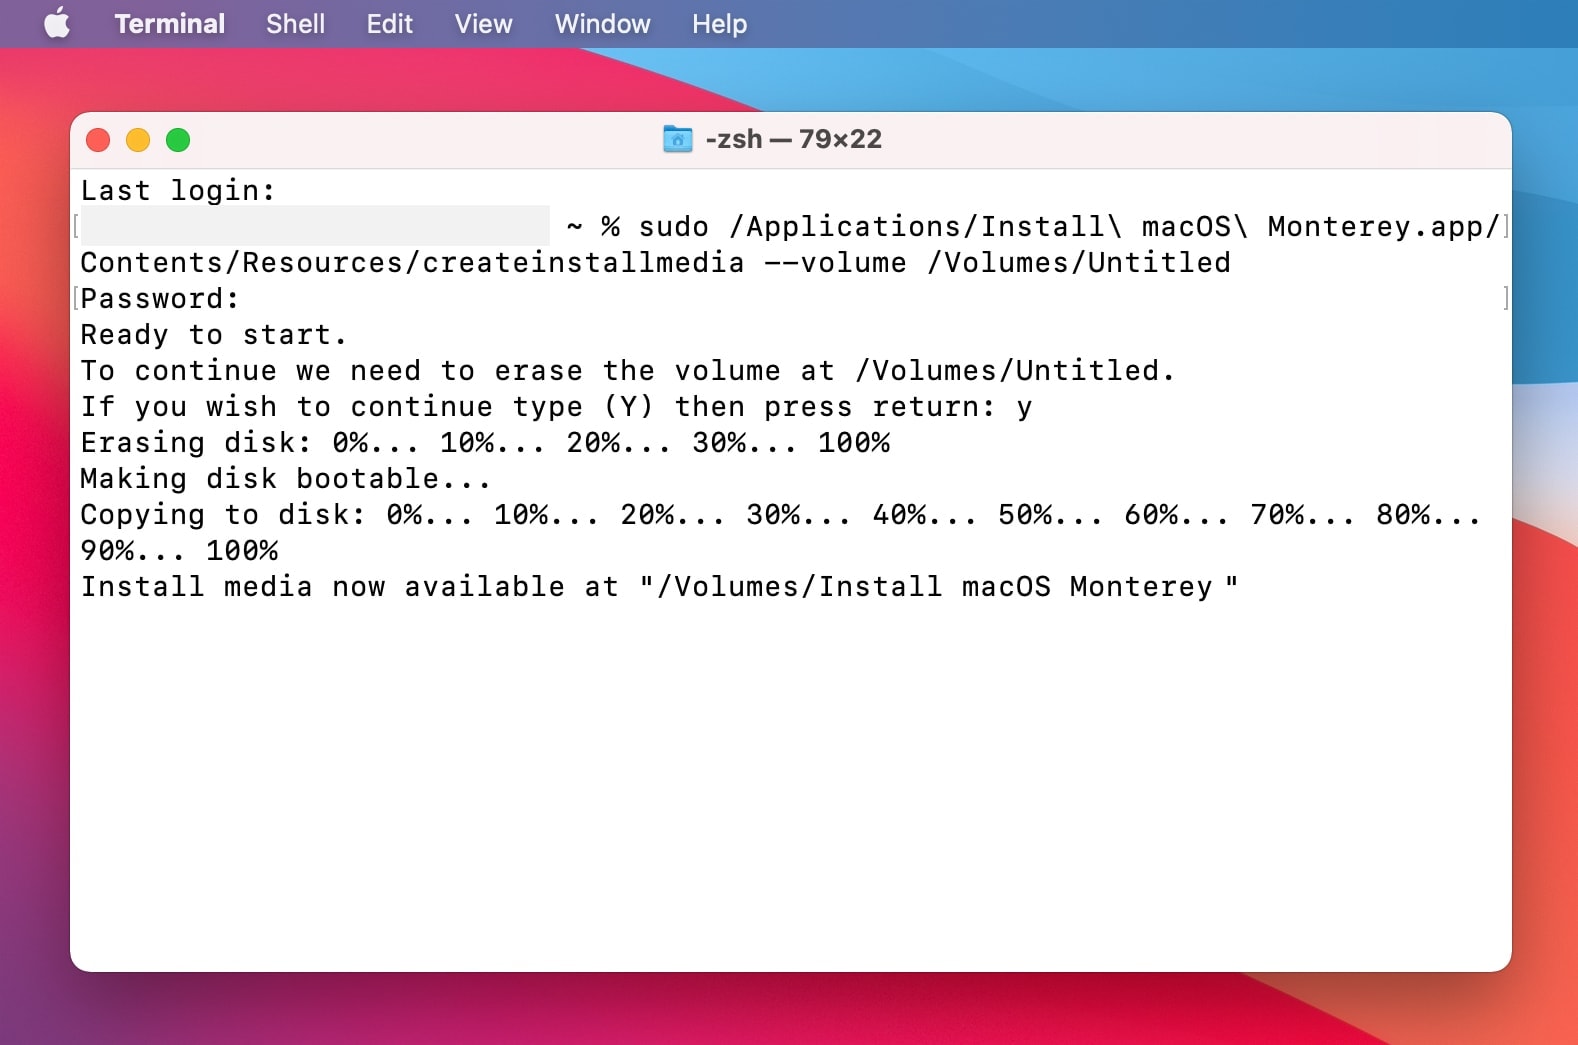
Now, you have to turn the USB drive into a bootable device. The simplest way to do this is by using Terminal. Go to Applications > Utilities > Terminal. Type in the following command:
macOS Monterey 12.6
sudo /Applications/Install\ macOS\ Monterey.app/Contents/Resources/createinstallmedia --volume /Volumes/Untitled
Step 2: Boot to macOS USB Bootable
After you have a macOS USB bootable, Connect the USB drive to your Mac.
- For Intel Macs, you need to hold the “Option” key during start until the boot selection menu appears and select macOS Monterey Bootable USB.
- For Apple Silicon Macs, you need to hold the “Power” button during the start until the boot selection screen appears then select your USB Installer
Step 3: Clean Install macOS Monterey
In the macOS Recovery/Utilities screen, choose “Disk Utility” from the options
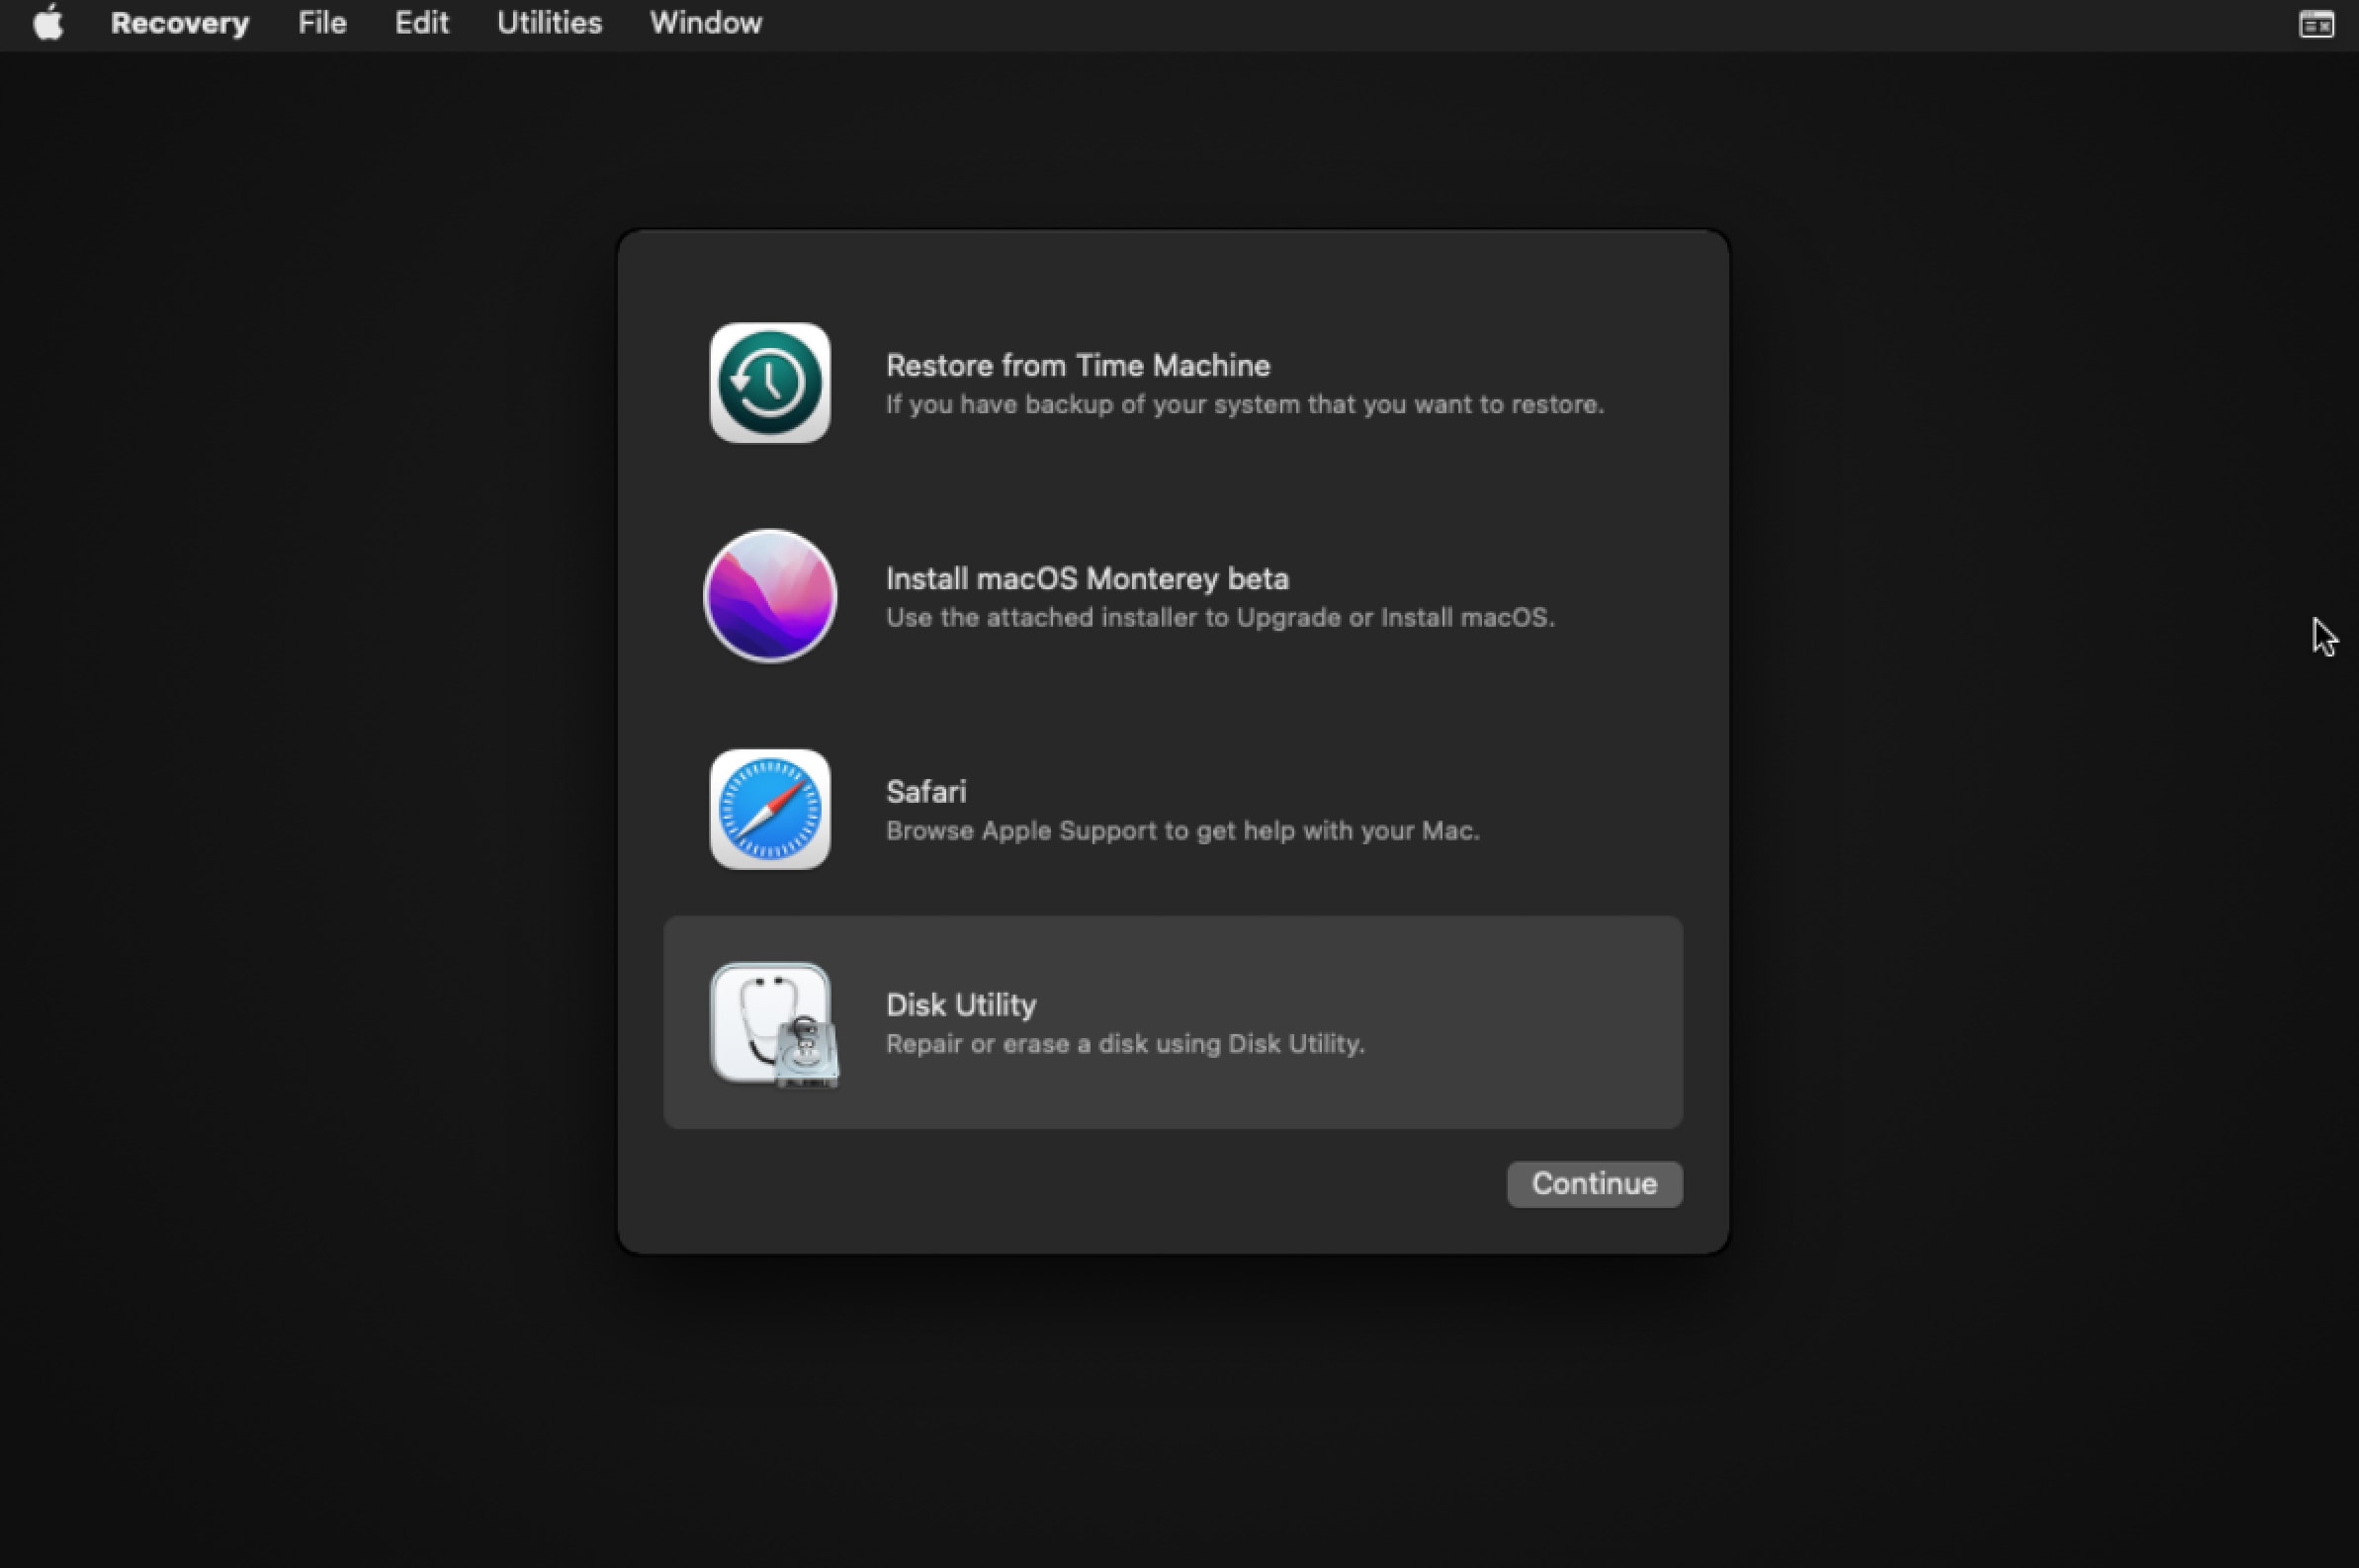
In the Disk Utility screen, click on View > Show All Devices.
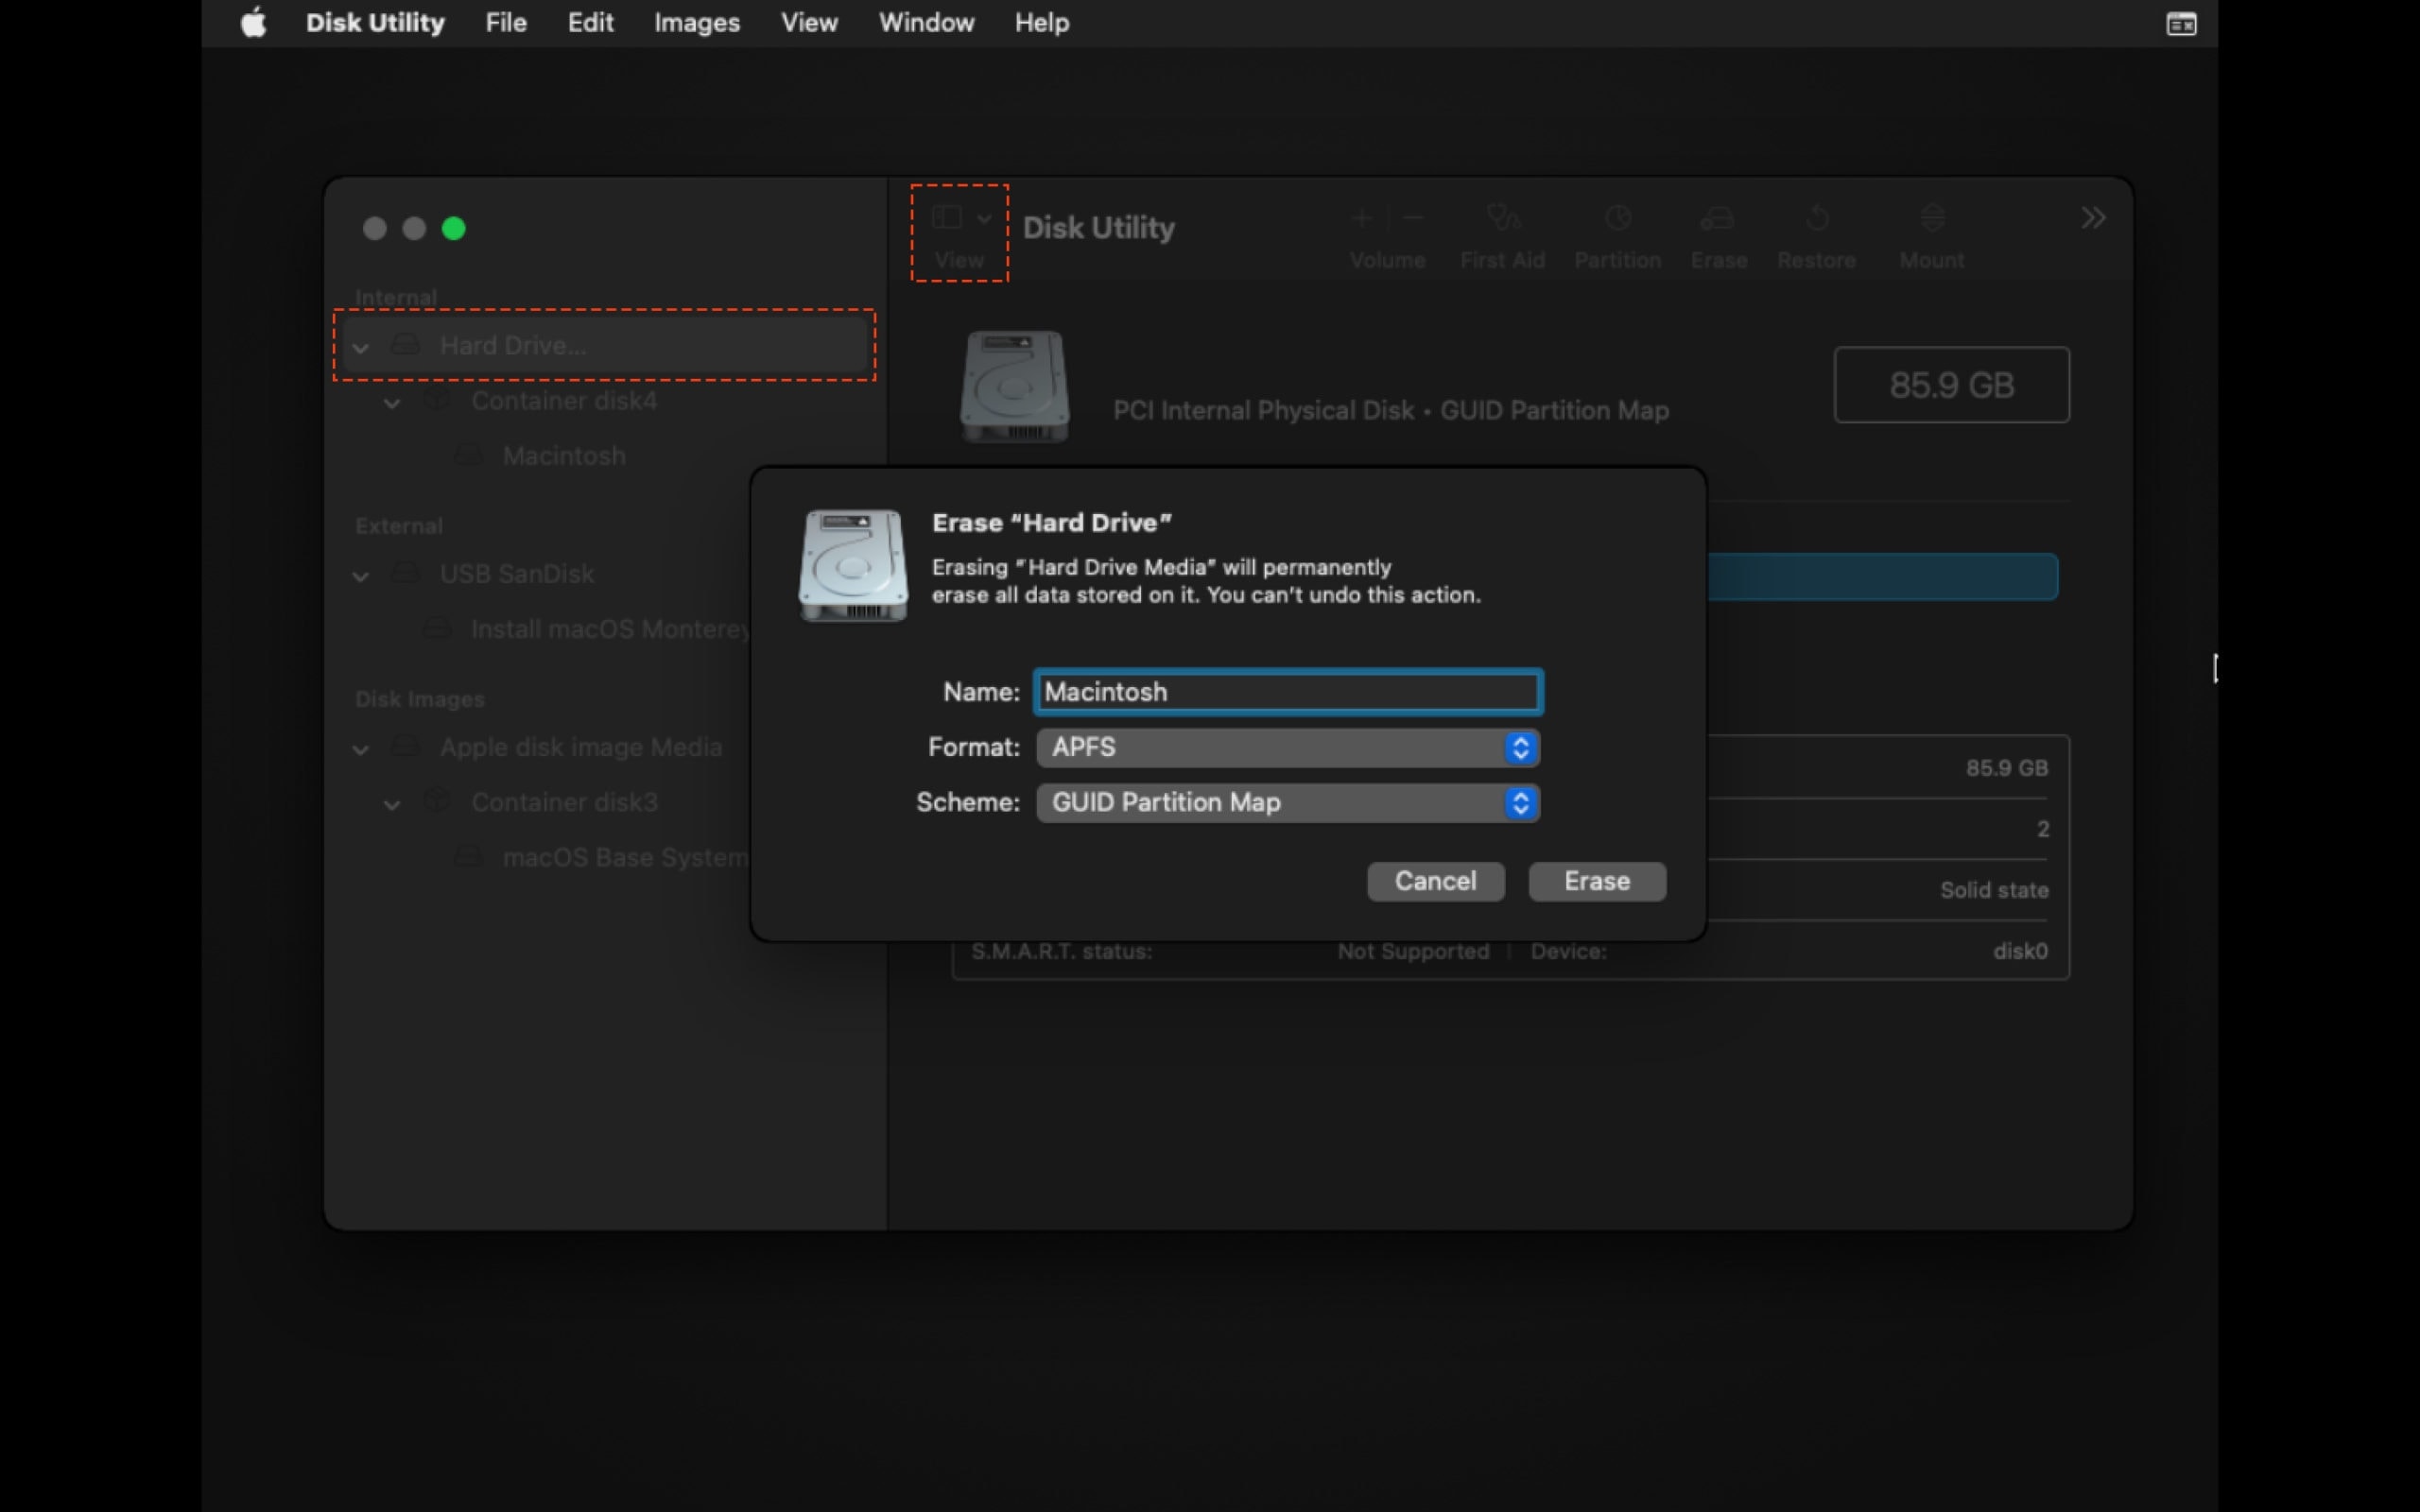
Select the hard drive. Choose a disk name of your choice and go to “Format” and choose APFS as the file system and GUID Partition Map for Scheme. Now, click on “Erase”. This will erase all the data on your Mac permanently.
Quit Disk Utility when disk formatting is completed. In the macOS Utilities screen, select “Install macOS Monterey” from the options.
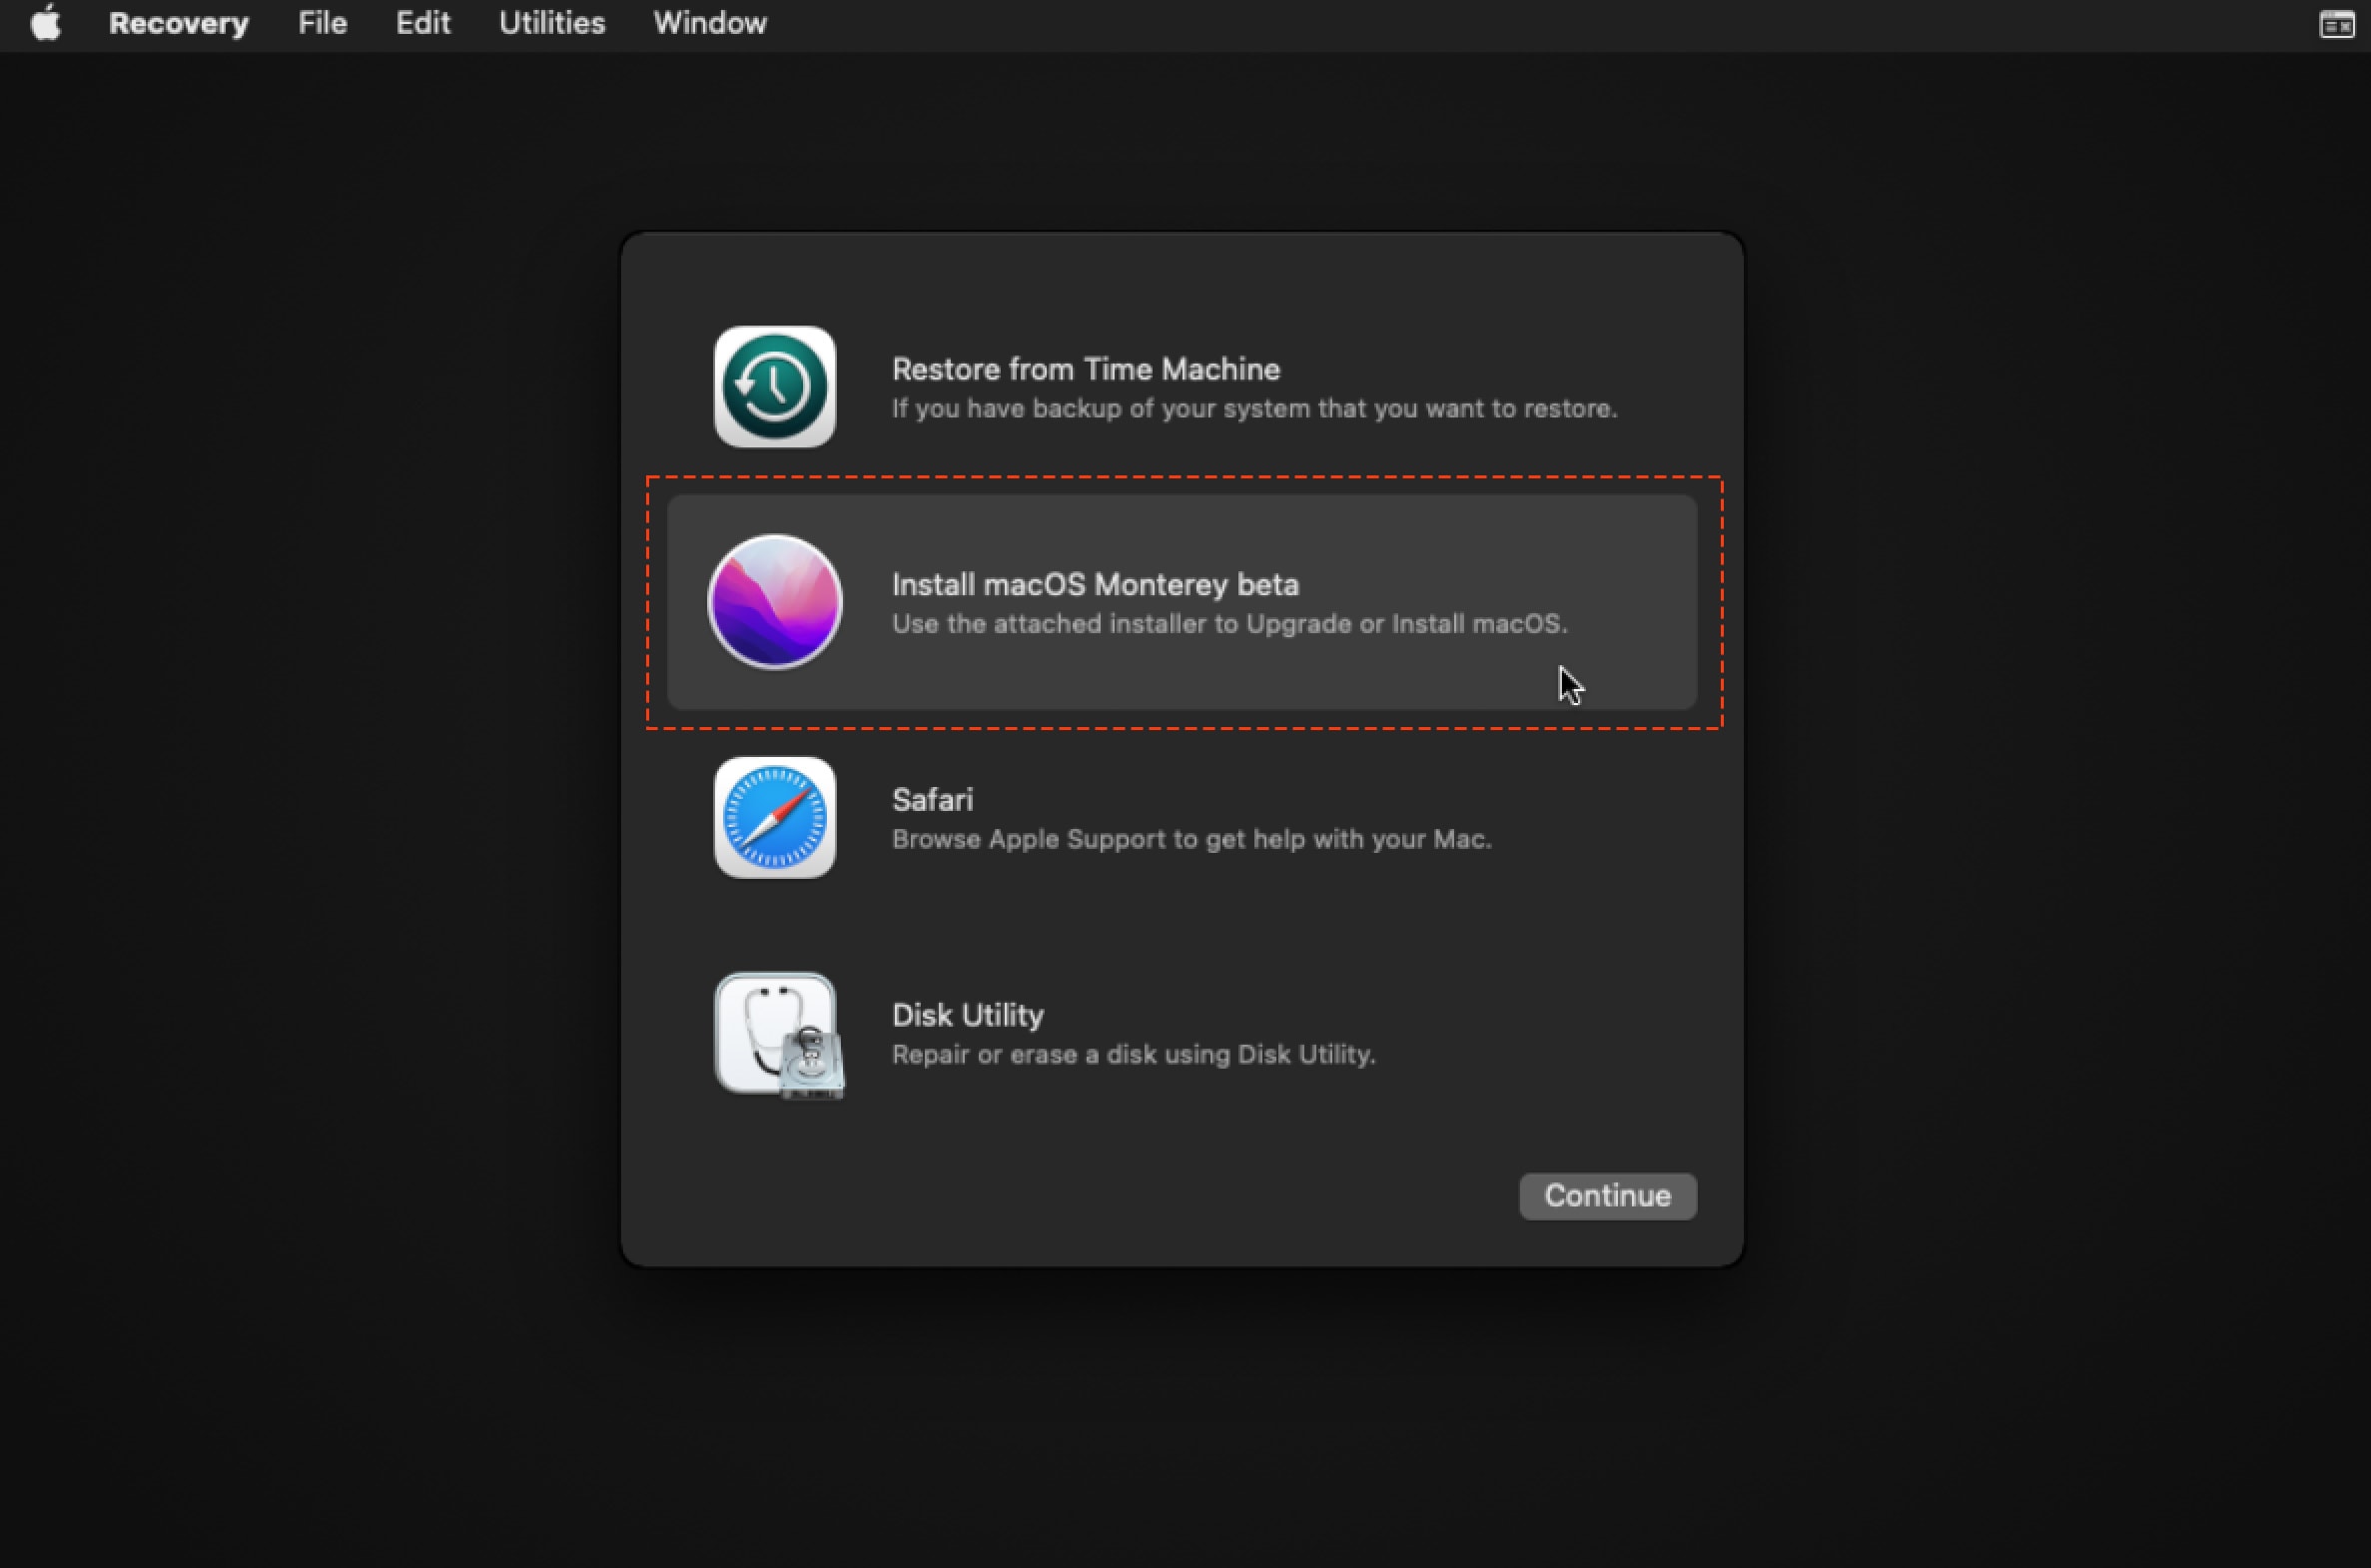
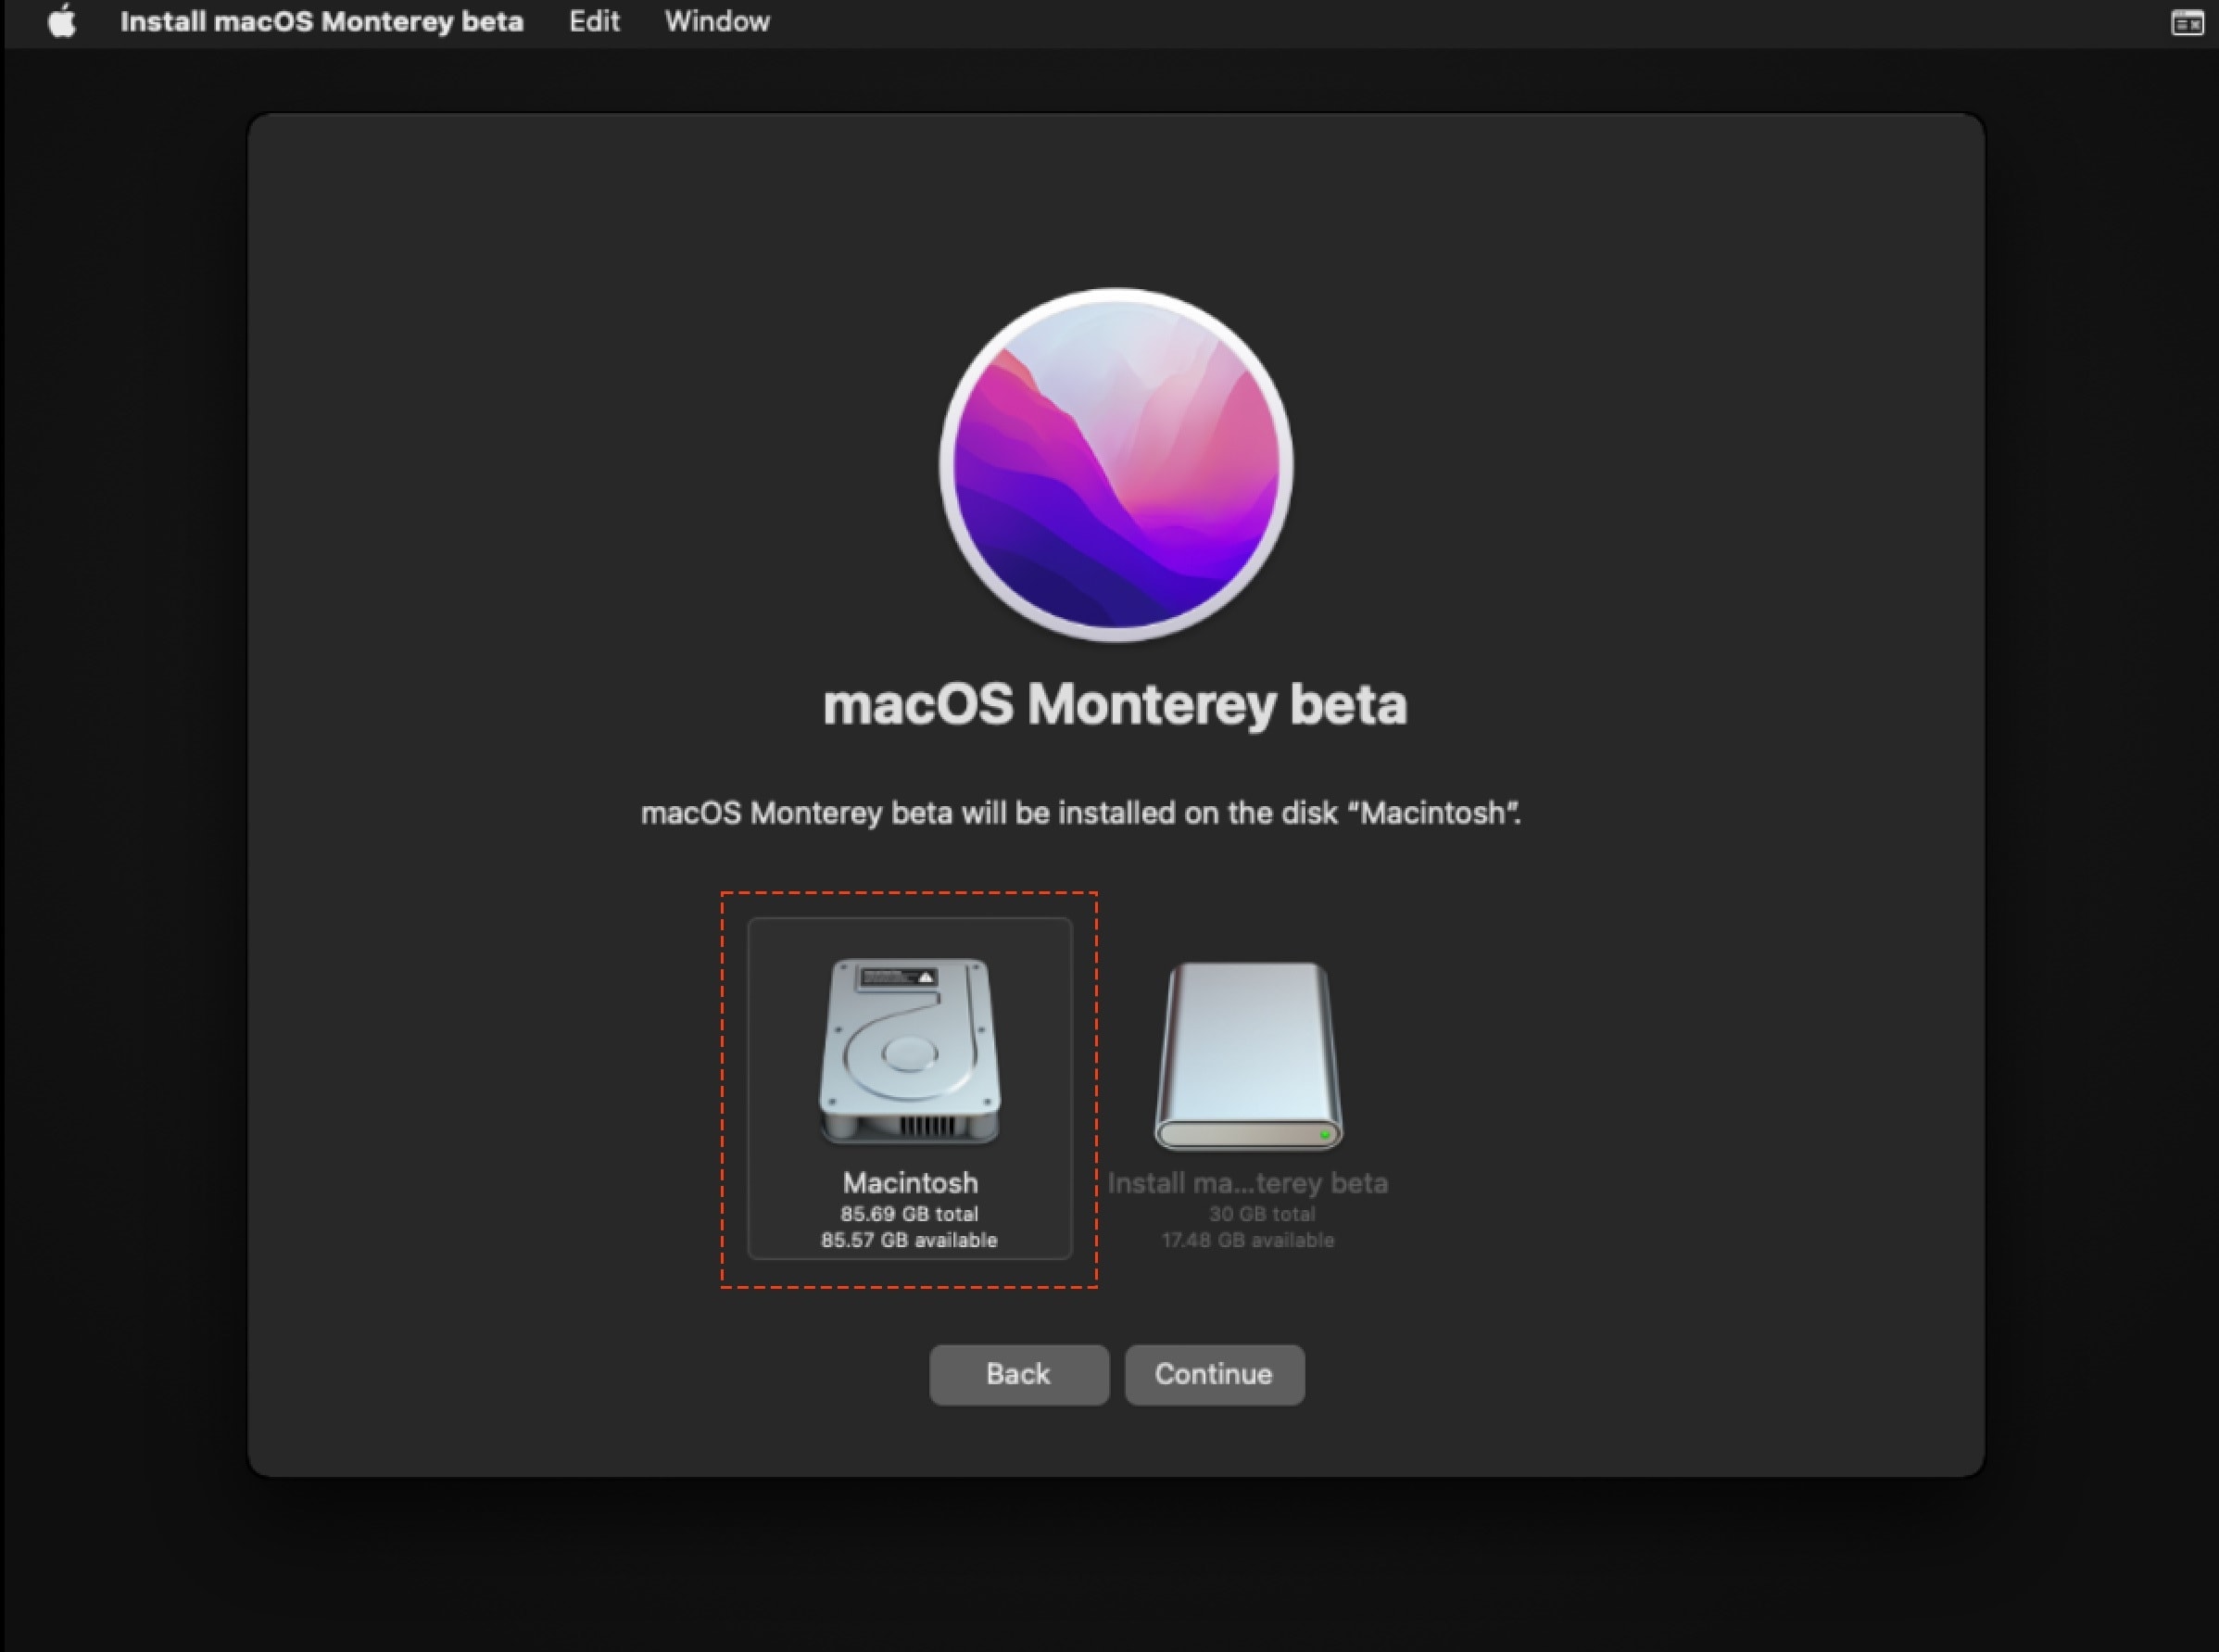
Choose the destination disk to install macOS 12 Monterey and click on “Install” to install a clean version of macOS Monterey.
While the clean installation process is ongoing, do not interrupt it. Your Mac may reboot automatically during the process and you have to wait some time for the process to finish.
Once the installation has finished, your Mac will boot into a fresh version of macOS 12 Monterey. You can either transfer your old data back or proceed to set up your Mac as a brand new device with the latest operating system.
You have to understand that a clean install of macOS 12 Monterey is effectively the same as factory resetting or reformatting your Mac. You can now check out all the interesting features offered by Apple with the latest operating system and test for yourself whether you really like the new additions.


Leave a Comment