
Hello and welcome to this tutorial where you will learn how to speed up macOS Sierra 10.12. The new OS from Apple often slows down after a while of being in use with the RAM and CPU performance affected. This can be attributed to the memory being full and thus the OS has little space to operate in or the OS being tasked with working on several processes at a go. Opening apps seems to take forever and logging in takes longer than usual. This can be very irritating to say the least. If you have been experiencing this do not worry.
All you need is to learn the changes you need to make to the Mac and you will be happy with the speed. I will guide you on how to do this.
[adrotate banner=”15″]
1. Using the Activity Monitor to Remove Apps taking up too many Resources
The CPU and RAM are the most important resources in your Mac and need to be used appropriately for the computer to perform normally. However there are some programs that do not follow this and take up too many resources. Using the Activity Monitor you can be able to know what these programs are and close them so the resources are allocated to the programs you need to use.
To open the Activity Monitor, you have two options; from the utilities folder app or click on Launchpad. From here, select the CPU section. Look at the applications taking up too much CPU and click on “Force a process quit” to close the application.

Go to the memory section and click on the tab titled “memory pressure” at the window’s bottom. You will be able to see the apps using up too much memory space here. Green color means none is using too much than necessary but a red color should warn you that the app needs to be removed.
Closing these apps will solve the problem in the meantime but for a permanent solution to the problem, update the apps to the newest versions that work best in Sierra and remove those you do not use.
2. Reduce the Transparency and Motion
macOS Sierra comes with great Eye Candy effects that make the OS look great but these come at the expense of slowing the Mac especially if used with old hardware. With the transparency enabled a window uses up many resources for it to open and the more windows opened at a time the slower the Mac becomes.
Another feature that greatly reduces the speed of the Mac is the motion type effects which are found in many places that zoom and zip around including Mission Control.
By disabling the transparency and motion, the resources that would have been used to actualize these will be used to open and run important applications hence speeding the Mac up. How can you do this?
1. From the Apple menu, go to System Preferences and choose “Accessibility.”
2. Go to Display settings.
3. Spot “Reduce motion” and “Reduce Transparency”. Check the boxes next to each. Exit System Preferences.
The most obvious change will be that the windows, sidebars, title bars and UI elements will look different due to the reduced transparency. Animations throughout the MacOS Sierra will also be reduced. On the brighter side though, the Mac will be operating at a much faster speed.
3. Manage Startup Items
When many applications launch when the Mac is switched on this means a painfully slow startup and a slow operation. To speed up macOS Sierra you need to manage these startup items. To do this:
Go to “System Preferences” , Click on “Username & Groups”.
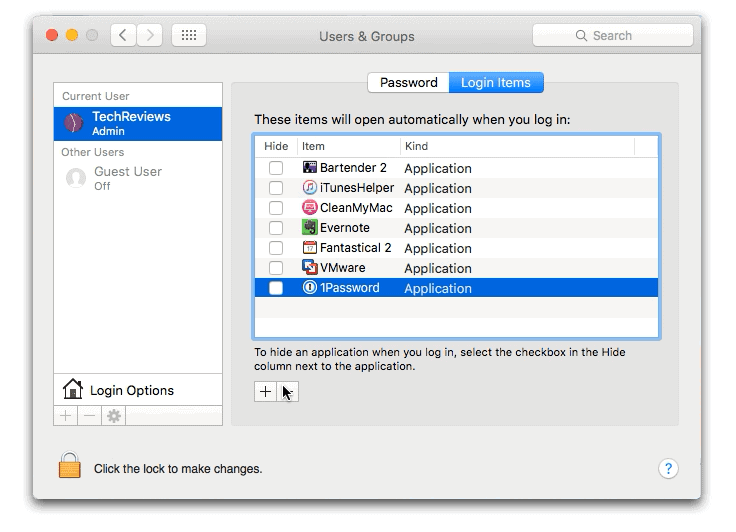
In the Login Items list, select the program you would like to stop from launching on startup and click on the “-“ button. Be advised that it is wise to leave the antivirus among the startup items.
With fewer applications launching at the same time as the Mac, the booting process will be faster and you can start using the Mac within a short while. The apps you actually need running will be able to do so faster.
4. Use Optimized Storage
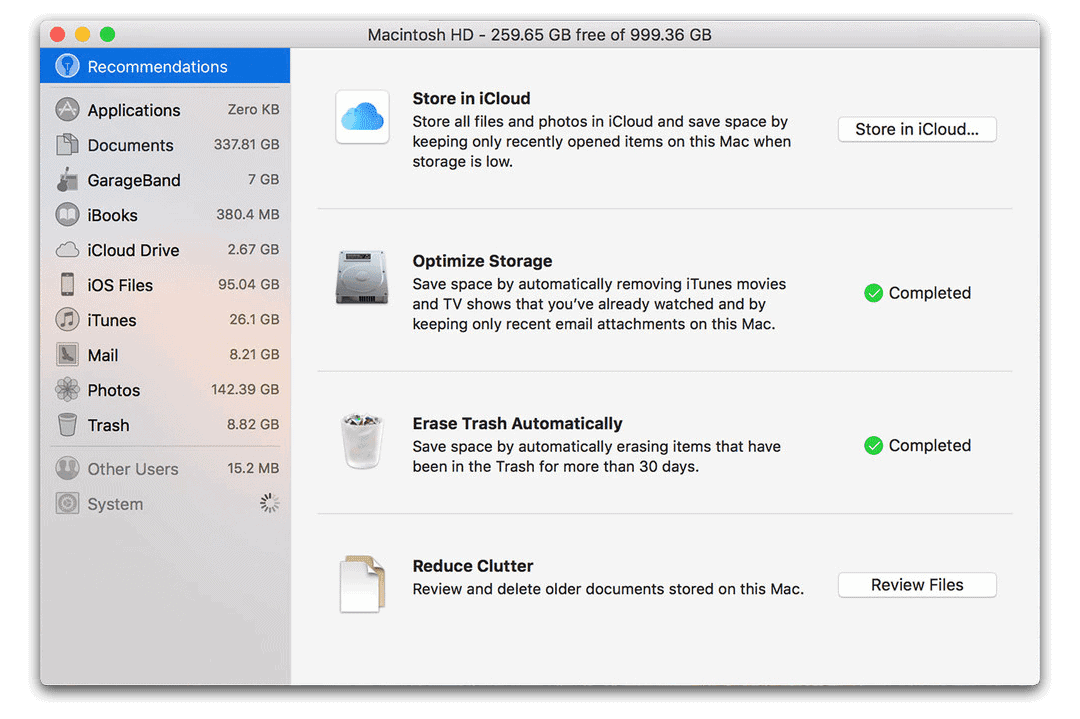
This is a cool update that is available in macOS Sierra. It works to free unused disk space and clean files so that you have enough space in your Mac to carry out what you need to do. This leaves a Mac that works much faster.
Optimized storage organizes the files in categories and then removes those you do not seem to be using from the Mac’s storage and stores them in iCloud. These are any unused, unread and idle items ranging from images to old presentations to apps to mail attachments.
When you enable this you will be getting prompts requesting authorization to clear the cache, memory, logs, duplicate downloads and other memory tags.
How can you activate this fantastic feature? Simple!
Go to the Apple Menu then About this Mac’ then Storage’ Here you will see a color-coded representation of how the memory in the Mac is being used. We are interested in the white section called Purgeable. This contains old files that you can save to cloud, delete or optimize storage. Click on “manage.” From the options choose Optimize Storage and click on “Optimize.”
5. Remove Apps from System Preferences
When applications are installed they tend to install extra apps or features known as System Preference panes. When this application is uninstalled, the preference panes are left in the computer taking up the precious memory space and play a role in making the Mac slow.
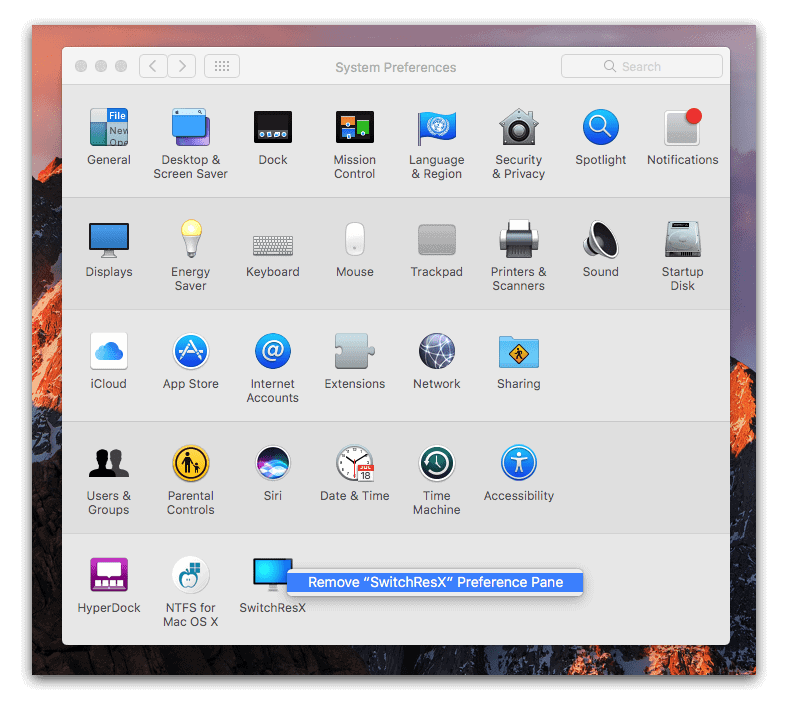
The simple solution to speed up macOS Sierra whose sluggish speed is due to these system preference panes is to uninstall them. To do this:
1. Point to the preference pane icon and right click on it. A list of preference pane apps will be seen.
2. Select the one you want to remove and click on the “Remove” button. This sends it to the Trash.
3. Empty the trash to get rid of the preference pane app forever.
6. Update the Apps you are using in the Mac
Updated applications tend to have an improved performance. They are more compatible with the Sierra and are likely to run smoothly and fast when opened in the Mac. Other than the boost in speed, software updates come with better security and fewer bugs. For these reasons it is important to ensure that all the applications you use in the macOS Sierra are updated and you use only the latest versions.
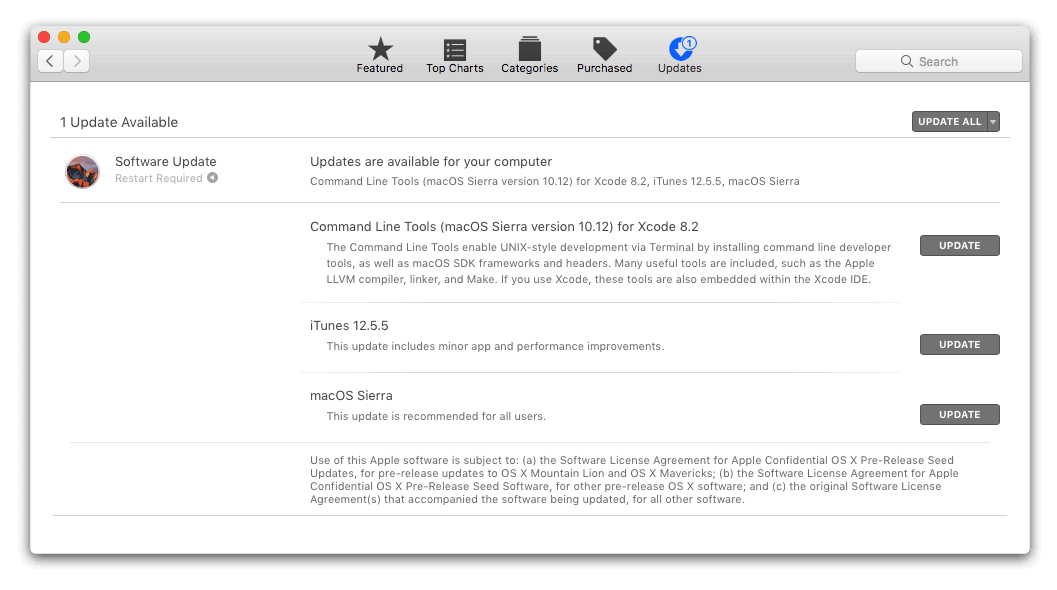
To find updates, open App Store and click on “Updates” in the toolbar. You will find the updates of all the apps you have in the computer. Download these and install them and your Mac will be faster when running the updated apps.
7. Use Disk Utility to Diagnose and Repair Disk
There are many issues you can experience with the file system or disk in your Mac that you need to solve. The good news is that macOS makes it easy to solve these issues with Disk Utility feature.
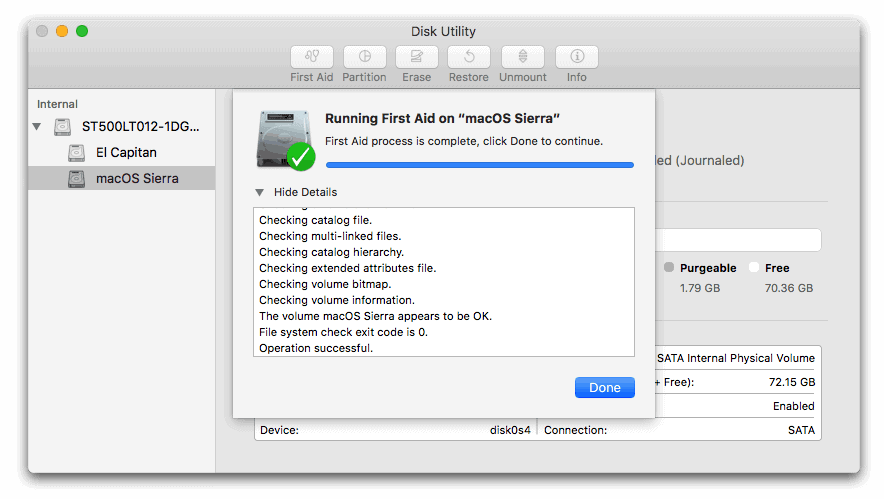
Disk Utility allows you to make correction in any issue affecting the disk. From multiple apps quitting unexpectedly to corrupted files to external devices malfunctioning, you will be able to solve with Disk Utility. You can check what issues there are and then solve them using this application. Just follow these steps:
1. In the Applications folder open the Utilities folder then open Disk Utility.
2. Choose the startup disk from the list of volumes.
3. Click on the First Aid tab.
4. Click on “Run.”
The Mac will check the disk for errors and automatically fix them. This will result in a fast Mac that operates smoothly without any performance issues. Even the errors that had not caused harm are tackled at the early stages and bigger problems avoided.
8. Clear Caches
A cache is a small file that is retained on the hard drive so as to be reused. In MacOS Sierra different applications create their own caches and there are caches that are controlled by the system. An example is a web browser where web pages are cached and when that website is visited again, it is read from the hard drive instead of being redownloaded. This way the browser operates faster.
The problem with caches is that they take up memory space especially since some apps create too many caches. This results in slowing of the Mac and the caches end up being more of a pain than a gain. The good news is that you can actually clear these caches.
To view the user caches, open the Go To folder by clicking on Command, Shift and G keys on the keyboard simultaneously. Type “~/library/caches/” You will see a list of the caches and most probably they will be taking much of your computer’s memory space. Among the largest caches will be those belonging to web browsers like Safari and apps like Spotify, iTunes and Google Earth. Delete these caches. They will be recreated as you continue to use the apps but in the meanwhile you will have a Mac that is faster. You can go back and delete the newly created caches later.
9. Reset SMC and PRAM
The System Management Controller (SMC) and Parameter RAM (PRAM) are among the most important parts that determine how fast the processor works. With continuous use these can become corrupted and will cause the Mac to slow. A common occurrence is after an update. You need to reset the SMC and PRAM from time to time.
To reset SMC without the risk of data loss:
1. Shut down the Mac.
2. Unplug the power cable and wait for at least 15 seconds. Plug the cord back in.
3. Hold down Left Shift + Option + Control + Power Button at a go for 10 seconds. Release and the computer will boot as usual but this time with the SMC reset.
To reset the PRAM:
1. Shut the Mac down and let it remain like that for a few seconds.
2. Press the Power Button and immediately press Command, Option, P and R keys simultaneously. Hold them down till you hear the beep sound that indicates the Mac is restarting. Release the keys.
With the SMC and PRAM reset you can be sure that the Mac will now gain a speed boost.
10. Reinstall macOS Sierra 10.12
For some people, the reason why MacOS Sierra is slow is due to a problem with the installation of the operating system. To solve this problem and others you need to reinstall the MacOS Sierra. I know that you will still want to have your personal files, apps, documents, pictures and data after the reinstallation and therefore will show you a way to reinstall MacOS Sierra without losing these files.
Here is how you can speed up MacOS Sierra by reinstalling it:
1. Just to be safe, back up the Mac using the Time Machine.
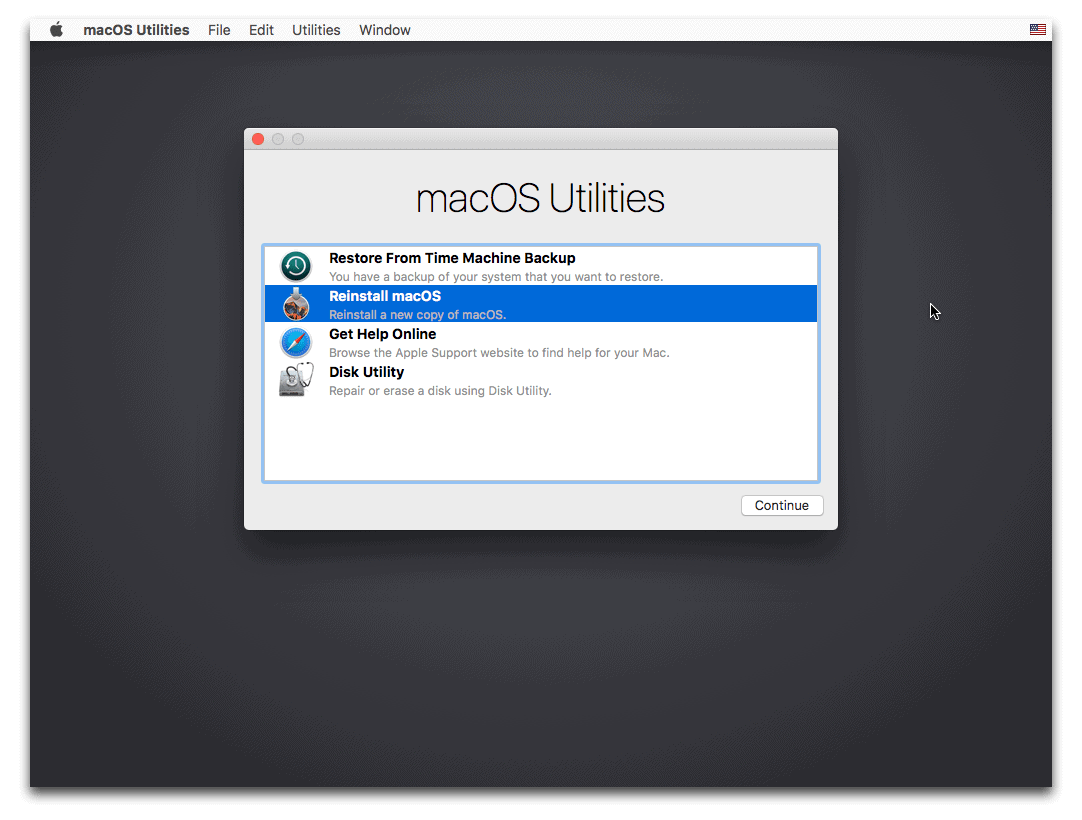
2. Reboot and listen for the boot sound. Immediately you hear it, hold the Command and R keys on the keyboard simultaneously. The Mac will boot into Recovery Mode.
3. Go to the MacOS Utilities screen and choose “Reinstall MacOS.” Click on “Continue.”
4. On the setup screen that appears follow the prompts. On the drive selection screen select the name of the hard drive where you want the MacOS Sierra to be installed. Click on “Continue.”
The MacOS Sierra will be installed and the Mac will reboot. With this method only the system software will undergo changes. All personal configurations, applications, user files and account will be preserved just as they were before the re-installation.
There you have it, 10 Quick ways to speed up MacOS Sierra. These will surely help you have a speed boost in how your Mac operates. The Mac has all it needs to boost its speed you just have to know the right buttons to press and change to make. I just taught you how. Just follow the guidelines and you will have a macOS that is faster.


Leave a Comment