When it comes to the question of how to partition a hard drive Windows 10, there is a free tool that the operating system comes with. This is known as Disk Management which is quite useful and helps users to partition hard disk drives without the need to reboot the computer. After partitioning the hard drive, you will then be able to resize and even delete the partitions as you wish; all this without having to spend any money. Wondering how you can do this? Here is a guide.
Opening Disk Management
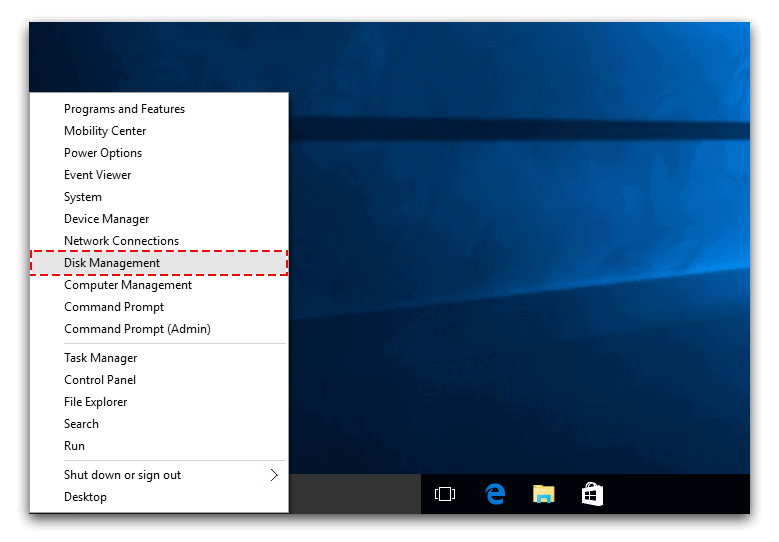
There are two ways to open the Disk Management utility.
Option 1: Point to the bottom left the corner or the Start Button with the mouse and right click. This opens the Quick Access Menu. Choose “Disk Management.”
Option 2: Open the Cortana. In the search field, type in words “Create and format hard disk partitions.”
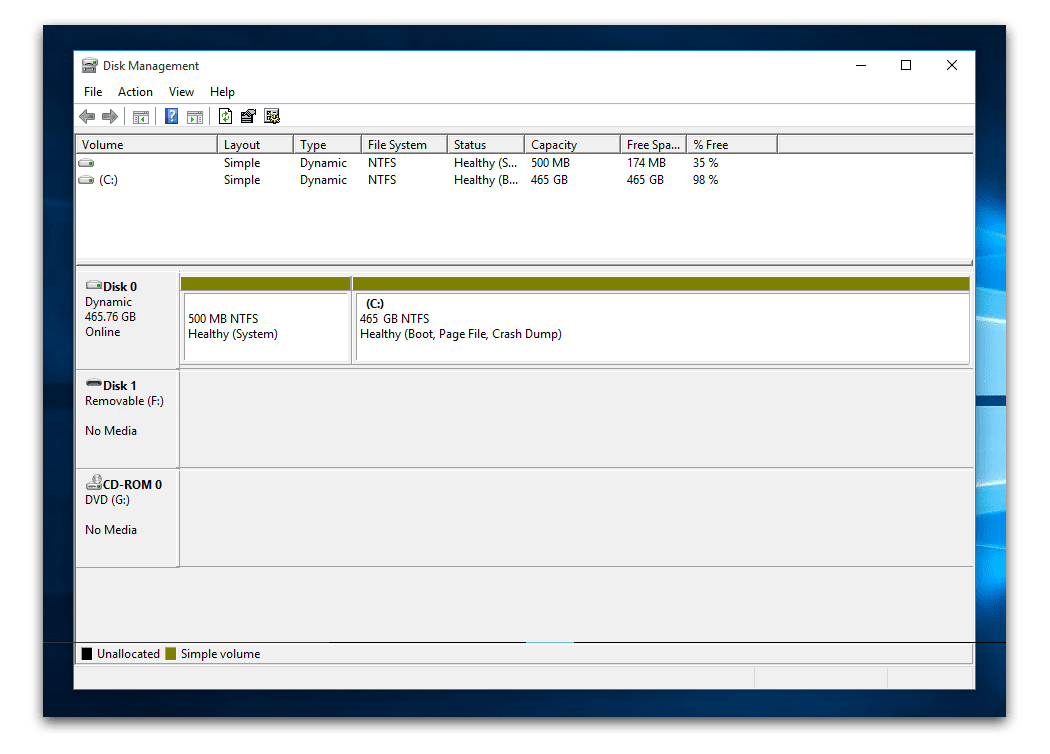
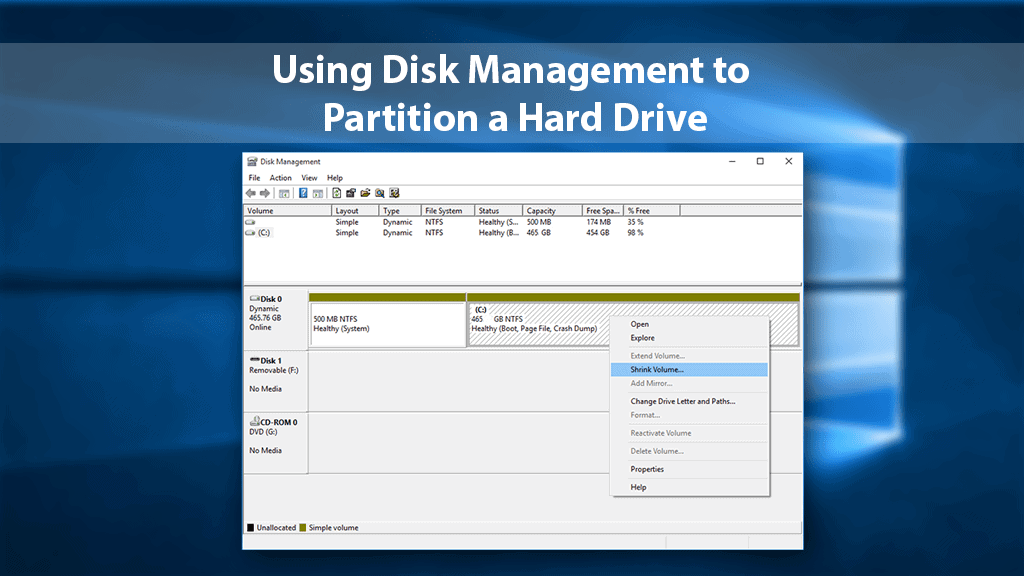
Once the Disk Management utility is open, you will be met by a window that has the disk information on the right. The name, size and type of each disk will be indicated. It is important to note that you can only partition disks that are in formats supported by Windows. These are FAT16, NTFS and FAT32. Others will only be seen but cannot be manipulated.
Resize and Create new Partition without losing Data
Resizing a partition
You can be able to resize existing partitions as you wish. However, not all disk partitions can be resized. You can only shrink a partition that has enough free space and extends one that has unallocated space. To do this:
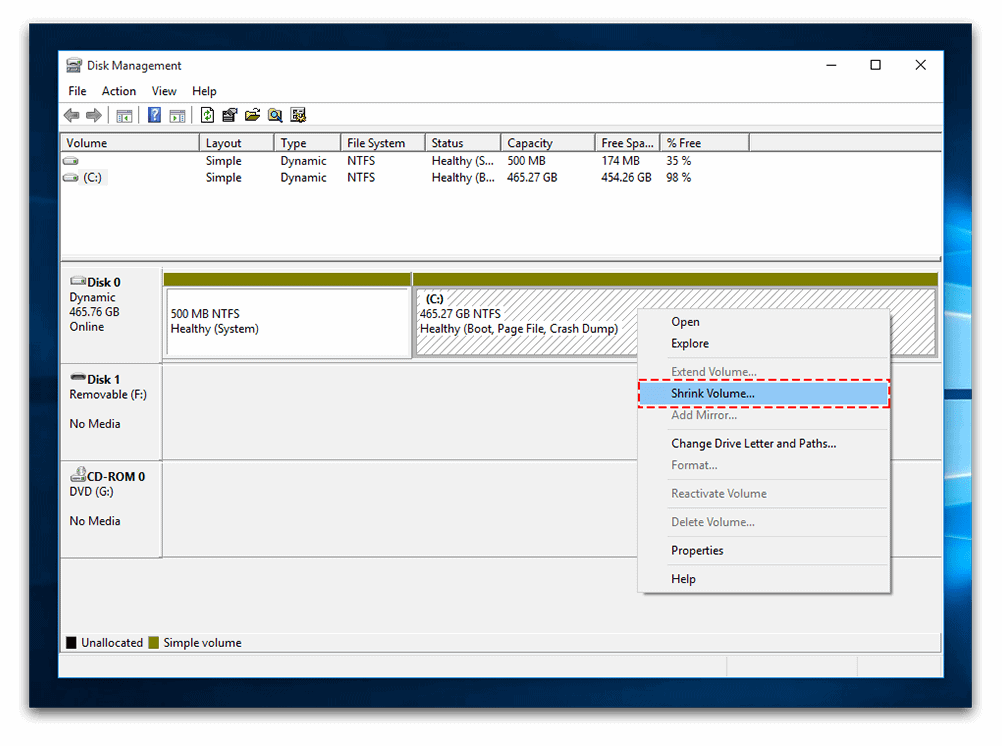
1. Right click on the drive and select “Shrink Volume” depending on the action you wish to undertake.
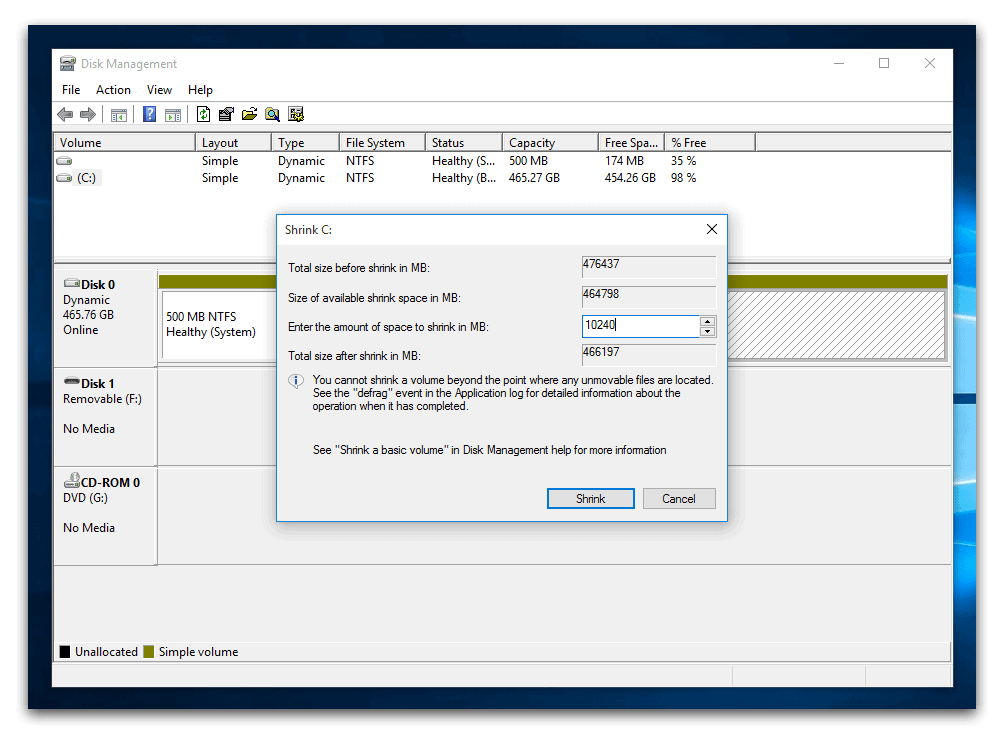
2. Enter the amount of Space to shrink then Click on “Shrink.”
You will be taken back to the Disk Management Utility main window. Here, you will be able to see that the changes have been affected.
Creating a partition
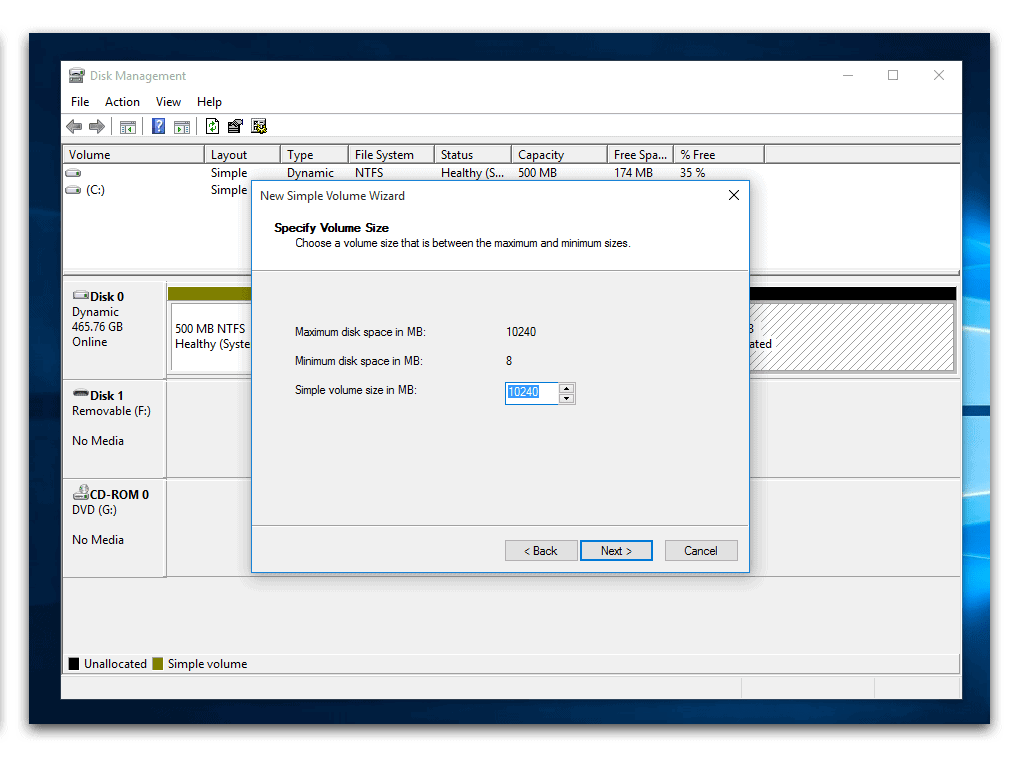
After shrinking a partition, you can now use this space to create a new one. The unpartitioned space will be highlighted and labeled “Free Space” or “Unallocated.” To create a partition in this free space proceeds as follows:

1. Tap and hold (in touchscreen devices) or right click on the free space. Select “New Simple Volume.” The New Simple Volume Wizard will be opened.
2. Click/tap the “Next” button.
3. Specify the size of the partition when prompted to do so.
4. Choose from the three options you will be given. These are “Assign a drive letter”, “Mount in an empty NTFS folder” and “Do not assign any drive letter or drive letter. Select “Assign a drive letter” then Click “Next”.
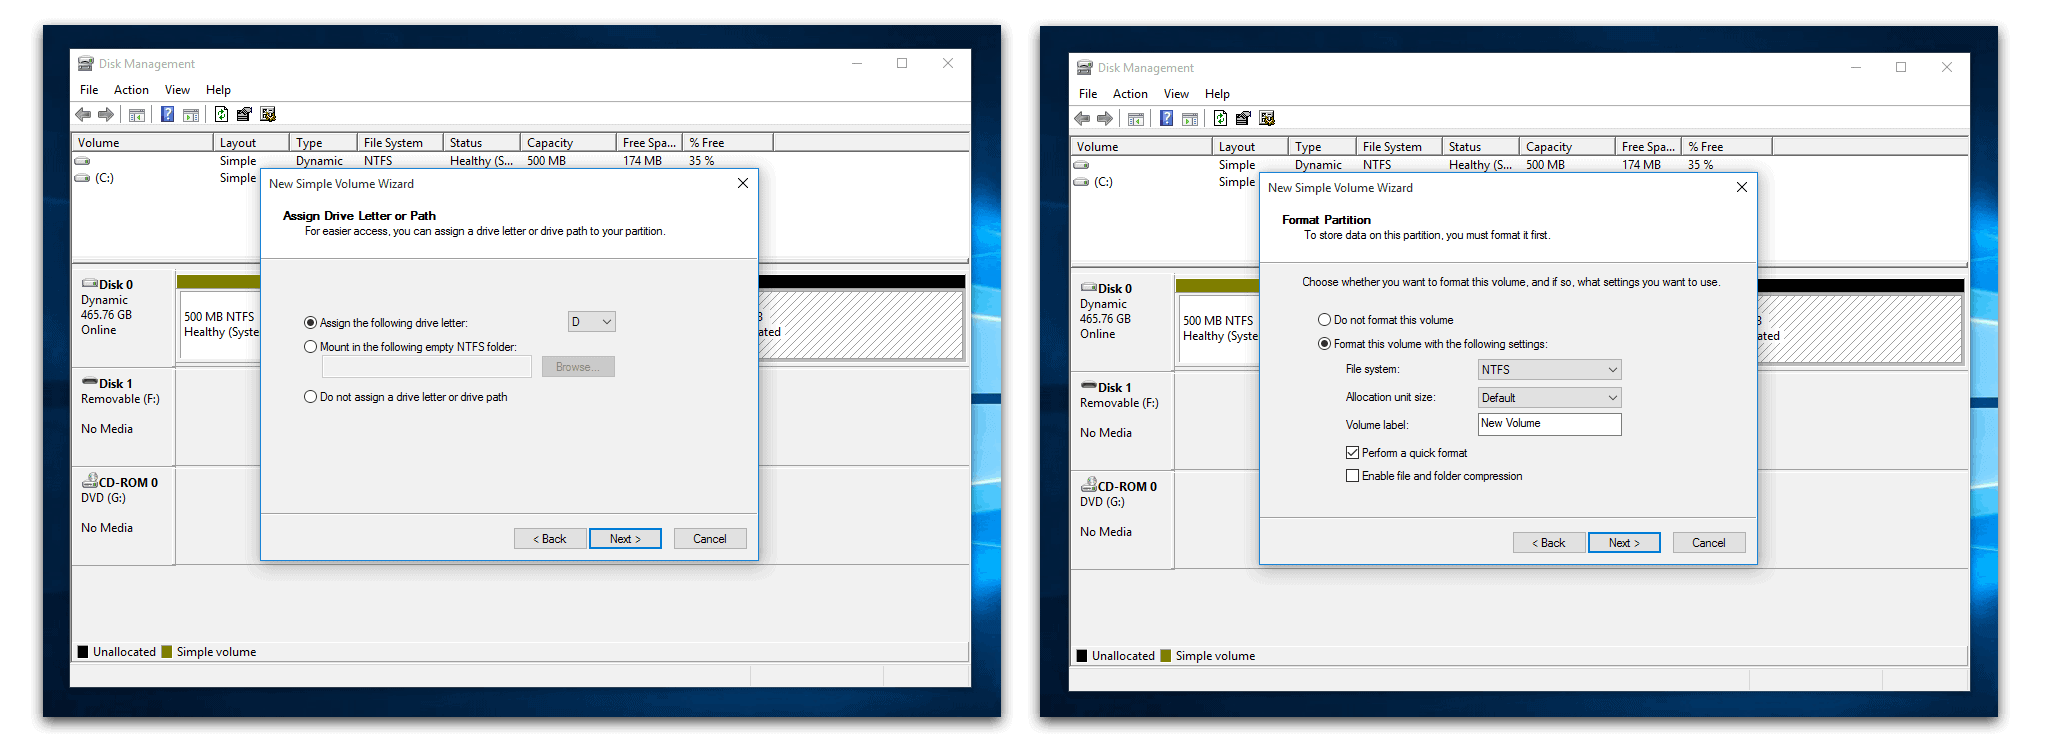
5. Choose how you wish for the drive to be formatted. NTFS is the better option since it is the formatting that is the default file system in Windows. It is more secure, fault tolerant and high performance.
In the Disk Management utility page, you will see the formatting process going on which will typically take a few seconds.
Formatting a partition
You can format any partition in the PC. That is, you can erase everything from the drive to make it clean. To do this:
1. Right click on the partition.
2. Click on “Format”. Confirm that you understand that all files will be lost and click on “Format”.
You should only format partitions after a backup or when you are sure you do not need all the data in the drive.
Delete and Extend Partition
Deleting a partition
There will come a time that you will need to delete a partition. This may be so as to create space to extend another partition or create the partition again with a different file system or size.
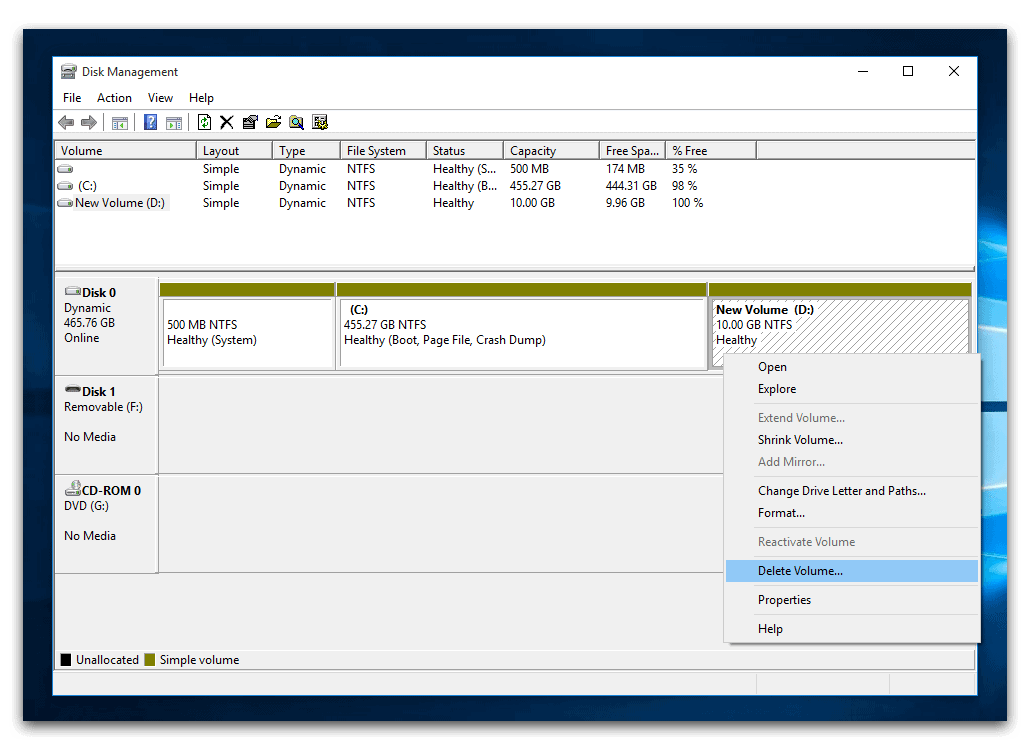
To remove a partition:
1. Right click/tap and hold on the partition.
2. Click/tap on “Delete Volume”.
Extending a partition
This will help you increase the size of an existing partition. In order to do this, you need to have free or unpartitioned space just after or before the partition to be extended. To carry out this action, you need not format the partition first.
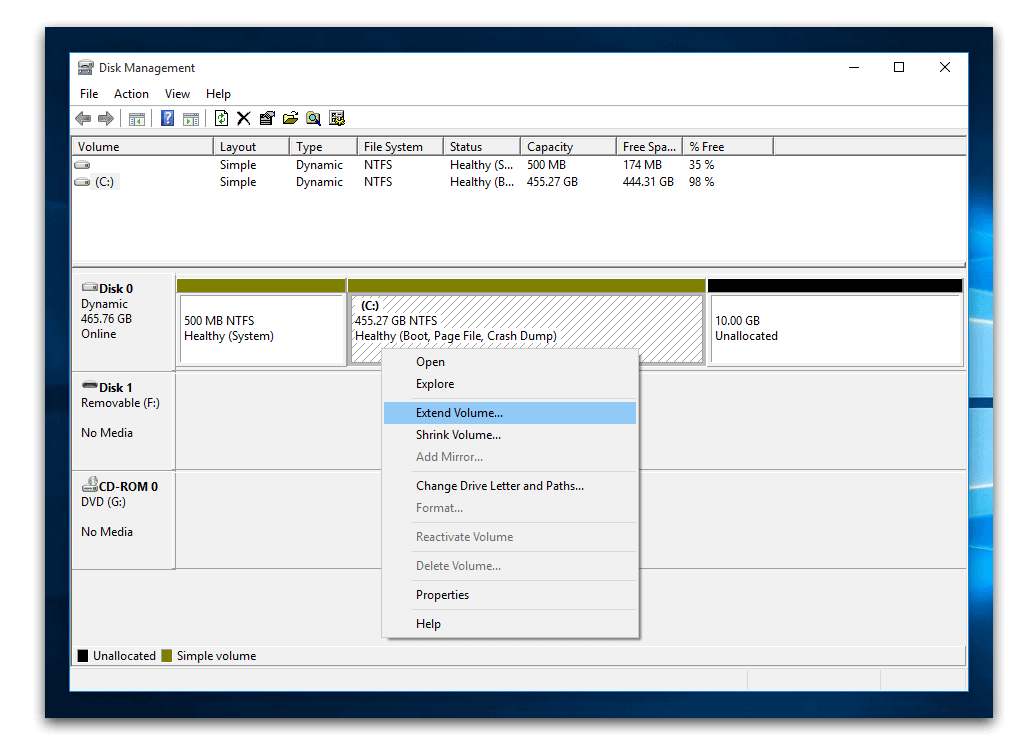
To extend a partition:
1. Right click/ tap and hold on the partition.
2. Select “Extend Volume”. The Extend Volume Wizard will open.
3. Follow the prompts making the necessary decisions and you will be able to extend the partition.
Thanks to the Disk Management utility available on Windows 10, partitioning hard drives and managing the partitions created has become easier. This is one of the most powerful free disk utilities available all thanks to Microsoft.


Clearly shows all steps define, the unpartitioned space will be highlighted and labeled “Free Space” or “Unallocated.”
al momento de crear la nueva particion me manda una advertencia (la operación elegida convertirá los discos básicos seleccionados en dianamicos) le doy en continuar y me sale un error.
Hi. Can you give me a screenshot? You can’t convert Boot disk (EFI System).
This does not explain how to get Win 10 to recognise the space which is formatted as space to execute an update
Nice. Concise and to the point. Wish I saw this 2 hours ago.
Thank you!
the best help thank you
Thank you!