
Are you a new user of macOS Sierra and are relating everything to Windows? Then taking screenshots may be one of the things you are struggling with. Here is an excerpt to help you print Screen on macOS Sierra.
You must have noticed that the Print Screen button common in keyboards meant for use with Windows OS is missing in macOS Sierra keyboards. The reason for this is not clear but most probably is that it is to simplify the keyboard. This however does not mean that you cannot print screen that is take a screen shot of what is shown on the screen. You actually can do this in more ways than one.
In macOS 10.12 Sierra printed screen is referred to as screenshots or screen captures. These are usually taken using a combination of keyboard keys. These result in either one of two results; printing screen to a file on the desktop and copying it to clipboard. The only difference is the combination of the keys.
1. Print Screen on macOS Sierra To Be Saved on Desktop
Unlike the “Print Screen” button on Windows which only allows person to copy the entire desktop image in one shot, the macOS 10.12 gives you the freedom to capture only what you need. You can select what you want by pressing the “Command” key combined with “Shift” key and a number key to determine what you want. Here are the exact details on how to go about it:
Taking a screenshot of the entire screen:
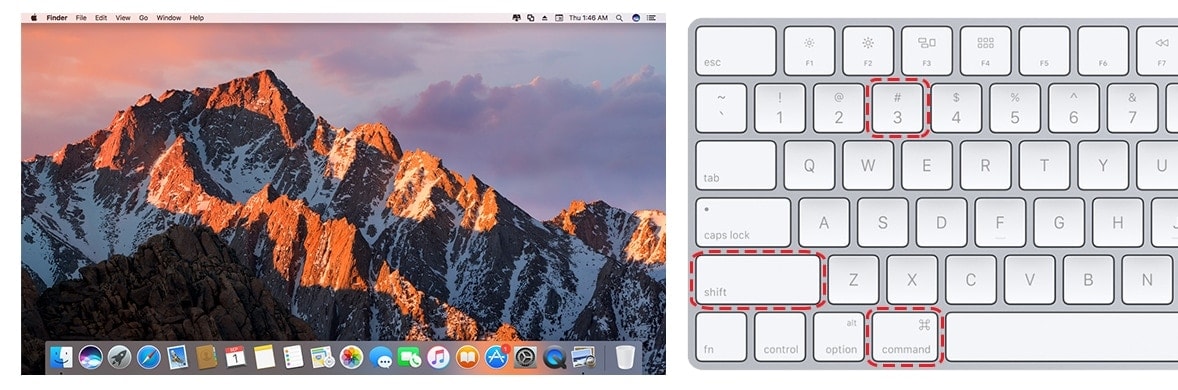
Press Command + Shift +3 on the keyboard. This allows you to take a screenshot of the whole screen which is saved as a file on the desktop. If you are using several monitors then images of all screens are taken and saved on desktop.
Taking a screenshot of a particular area of the screen:
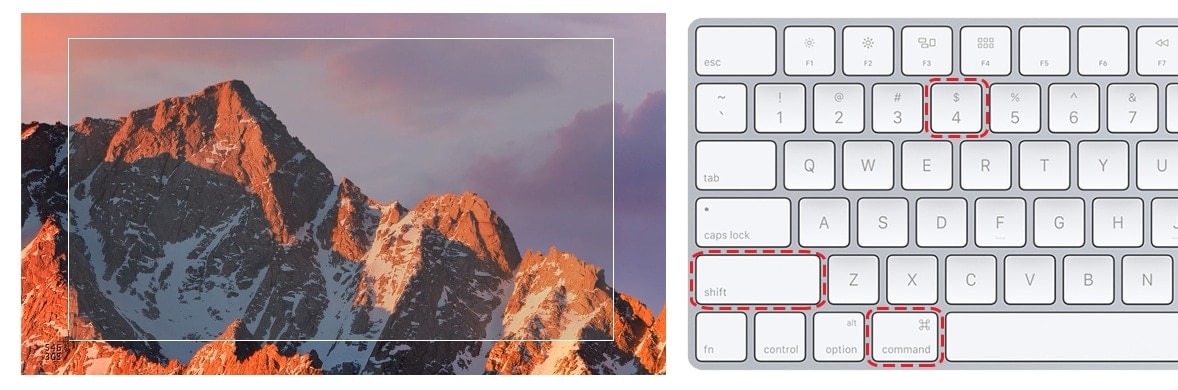
Press Command + shift + 4 on the keyboard. A rectangular selection box will appear where you can specify the area you want to screenshot.
Taking a screenshot of a window:

Press Command +shift + 4 key combination then Spacebar key and click on the Window you want to take a screenshot of. Only this will be captured and the image saved as a file on the desktop.
The approach of saving the screen shot on the desktop saves you the time you would have spend pasting the shot on another software then saving it like is the case with Windows “Print Screen” button. The latter can also be done if that is what you want.
2. Printing Screen To Be Saved on Clipboard
With this feature the screenshot you take will be saved to clipboard and can be pasted to wherever it is that you want. This is particularly useful if you want to use the shot as a part of creating a document or share it in an app. It functions just like in Windows using the “Print Screen” button.
Just like with the previous option, you can be able to choose which part of the screen it is you want to take a shot of depending on the number keys you use. Below are the details:
Taking a screenshot of the entire screen:
Press Command + Control +Shift + 3 on the keyboard. This will take a shot of the entire screen (or screens) and copy it to clipboard.
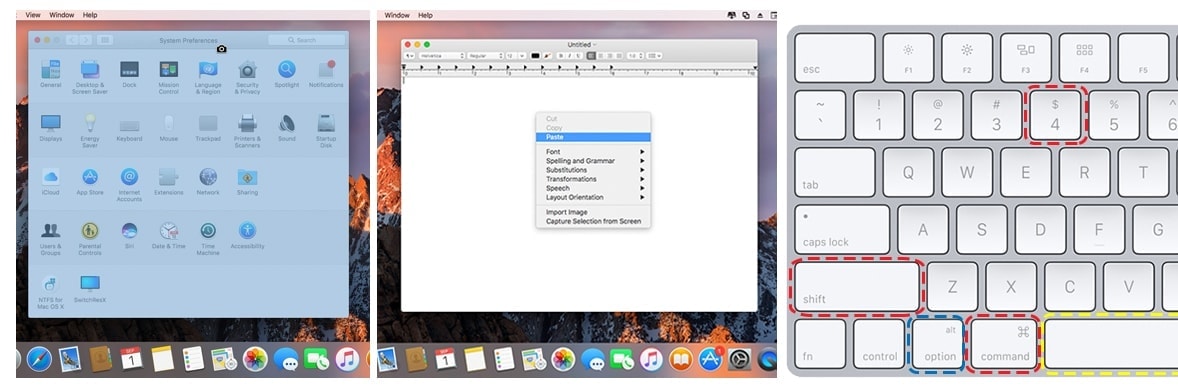
Taking a screenshot of a particular area of the screen:
Press Command + Control + Shift + 4 keys on the keyboard. Select the area to screenshot using a rectangular drawing box. This will be saved to clipboard.
Taking a screenshot of a window:
Press Command + Control + Shift + 4 key combinations, then press spacebar key and click on the window you want to screenshot. An image of the window will be copied to clipboard.
To simplify this, if you want to print screen to save to the desktop as a file, you combine Command Key with Shift key and a particular number key to specify the part of screen to be printed. To copy to clipboard, simply add the Control key to the combination. Remember that all the keys separated by a plus sign in the above instructions should be pressed simultaneously.
Though taking a screenshot with a Windows OS is somehow easier (the pressing of a single button) with macOS Sierra, you are able to only capture an image of what you need. All that is needed is to combine several keys and you are done.


Unlike the “Print Screen” button on Windows which only allows person to copy the entire desktop image in one shot, …
Not true. Alt-PrintScreen captures the active window only.
Thanks Kim. Yes. Alt-PrintScreen!