Partitioning a hard drive means that one physical hard drive or SSD drive is divided into several volumes. These storage volumes are independent of each other. They will appear as separate volumes in the Finder and can be formatted separately. They can also be used for different purposes. You can even install another operating system like Windows on one partition while the primary one still runs on macOS Sierra.
Another reason why you may want to partition your hard drive is to use one partition for Time Machine Backup. The problem with this is that the storage space in the partition to be used for backup needs to be at least twice that of the partition that has the macOS Sierra. This means that the macOS will have very little space.
Having a backup in the same storage as the as the material to be backed up is also a bad idea because in case of any damage to the disk you may not be able to recover the files from the backup. The best choice is to backup on a separate disk.
No matter what your reason to partition a hard drive on mac is, you can do this simply using the Disk Utility app. This is available free of charge on all macOS Sierra operated computers. By using this application you will not only be able to partition a disk but also modify the drive and even carry out repairs whenever necessary.
Here is a guide on all you need to know about partitioning a hard drive in a macOS Sierra
Creating a new partition
1. Click on “Applications” then “Utilities” and click on “Disk Utilities”. This will launch the Disk Utility app.
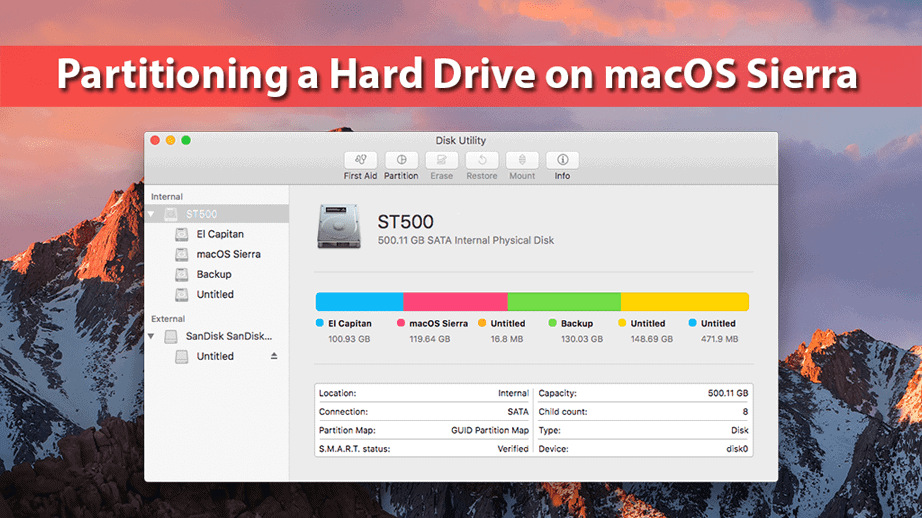
2. Look on the left side of the window. You will see a breakdown of how drives are partitioned. The first drives at the top are physical hard drives whereas the volumes branching from these are drives within the parent drive. Select the hard disk you want to partition.
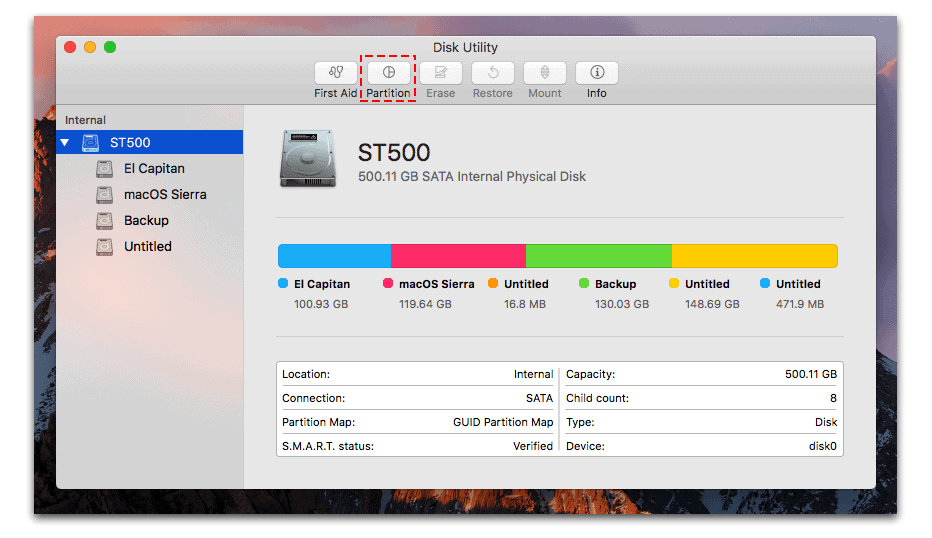
3. Click on the “partition” button and then click on the + button. This adds a new partition in the drive you chose.
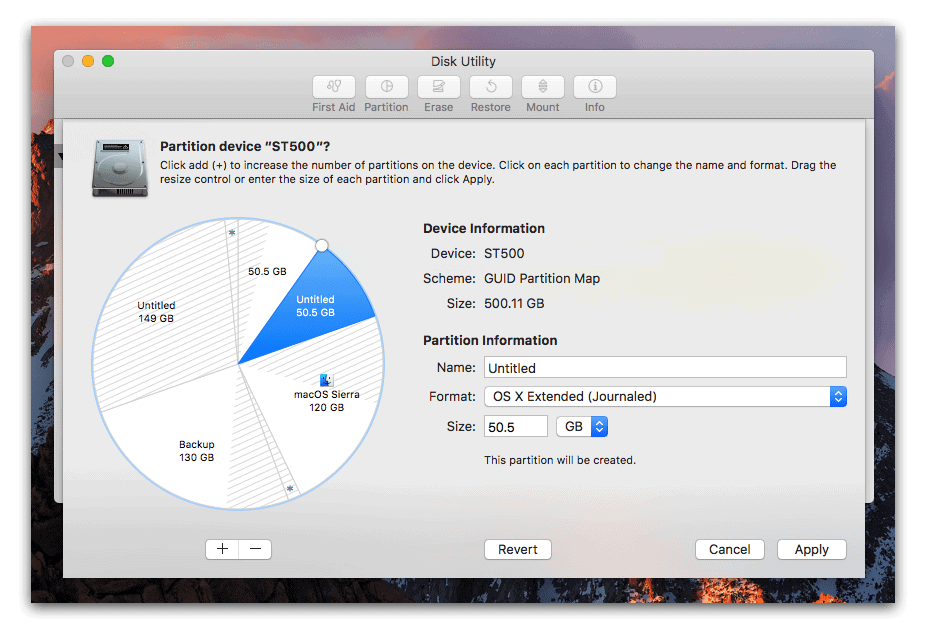
4. Specify the name of the new partition and choose a format type. In the Size Box, type in the new size of the partition in GB. Manually enter the capacity of the new partition or drag the slide bar in the partition map. Click Apply.
The newly created partition will now be visible on the Finder and you can use it as you wish. It is just like any hard disk. You can format, mount and even eject it. In a new Mac, you can create a partition even when the operating system is yet to be installed. To do this:
1. Boot the mac and press Command + R.
2. It will boot into recovery mode. From the options click Disk Utility and open it. Proceed as per the above steps.
Fixing Disk Problems
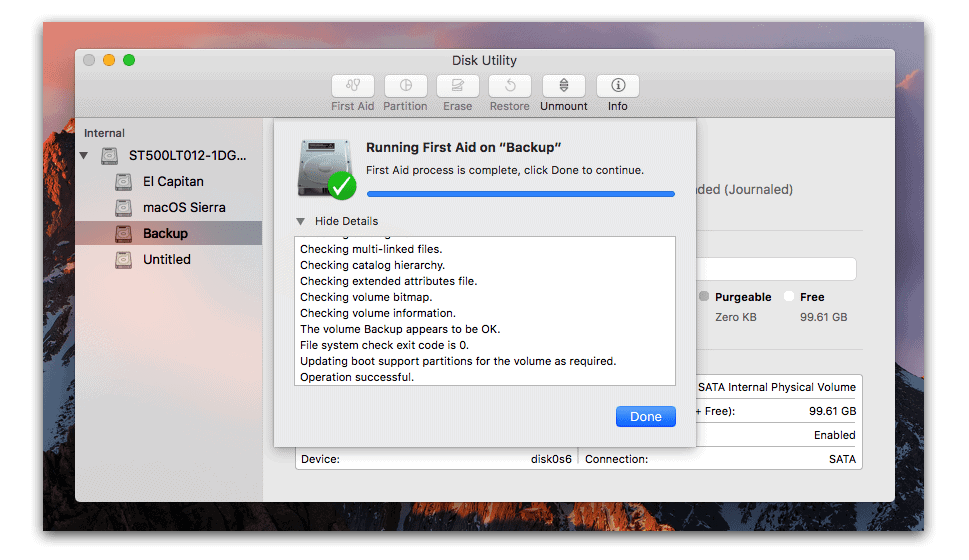
There are some issues you may run into when using your hard disk partition. These will often necessitate repair. With Disk Utility you will be able to easily repair a disk and solve other issues. Just use the “First Aid” tab.
Fixing Disk Problems
There are several buttons on the tab that you can use to make fixes. You will be able to repair the disk, verify the disk permissions and repair disk permissions. Just choose the appropriate button.
Setting up RAID
With the RAID option supported by Disk Utility you can be able to stripe, mirror and concatenate your data. You can be able to combine disks and partitions as you wish. Click on “File” then select “RAID Assistant”.

RAID 1 sets up mirroring. The data you write will be stored in each partition for reliability in case of any data losses. RAID 0 on the other hand sets up triping, that is, alternating disk writes between one drive and the other so that the speed is fast. When a drive fails in this case the data is lost.


Leave a Comment