Windows 11 was released by Microsoft on October 5, 2021, as the successor to Windows 10. The new operating system has many easy-to-use tools allowing you to maximize your productivity and enhance your experience. The optimized screen space is built for focus and attention. The world’s most popular desktop operating system has upgraded to a beautiful and more consistent design. The performance-enhancing features, Android apps support, window layout options, and multi-monitor functionality make the latest Windows OS a treat for users.
What is TPM and Why You Need It Before Installing Windows 11?
When Microsoft released Windows 11, there were system requirements for running the new operating system. Along with the hardware requirements was something new known as TPM.
TPM stands for Trusted Platform Module which is a secure cryptoprocessor to secure a computer with an integrated cryptographic key. It is essential to prevent hackers from taking over your computer and installing malicious software and accessing private data. TPM is necessary to run Windows 11. Microsoft has announced that the requirement will lead to a more secure Windows experience for users.
While software security is easier to implement, hackers can manipulate it and modify the code to exploit the device. Sensitive information is at the risk of attack and hence hardware security is preferable to secure information. Since hardware security is hardcoded, the cryptographic keys cannot be modified by attackers unless they know the exact keys in advance.
The hardware security helps protect computers from common attacks and highly targeted attacks like ransomware attacks. TPM requirement elevates hardware security and enhances the trust among customers. The TPM chip communicates with other security systems including facial recognition and fingerprint reader to allow user access. Individual programs such as Google Chrome, Firefox, and Microsoft Outlook will use TPM for security.
You can check whether your device has a TPM in a few ways. The first way is a simple two-step process.
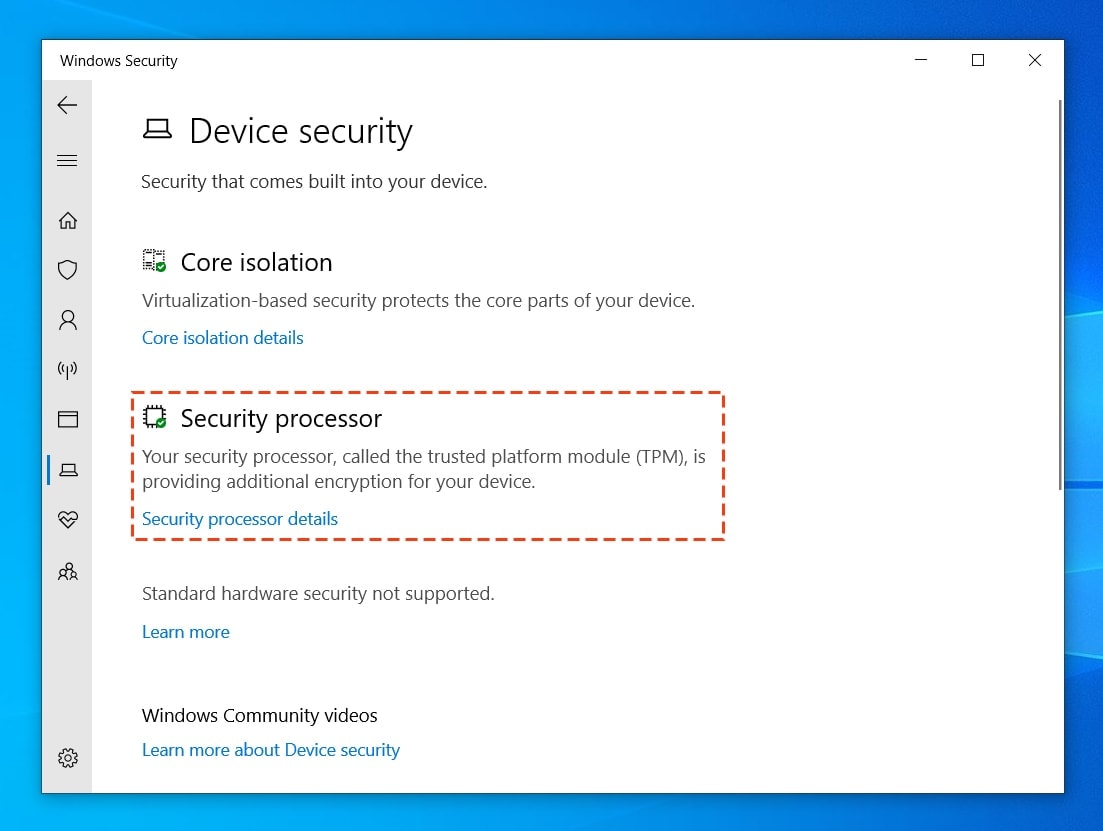
Step 1: Click on the Start Menu and search for Windows Security
Step 2: Click on Device Security on the left column. A new window will appear that shows whether your device has a TPM. If you see a checkmark next to the Security Processor icon, you know that you have a TPM installed. If not, you don’t have a TPM.
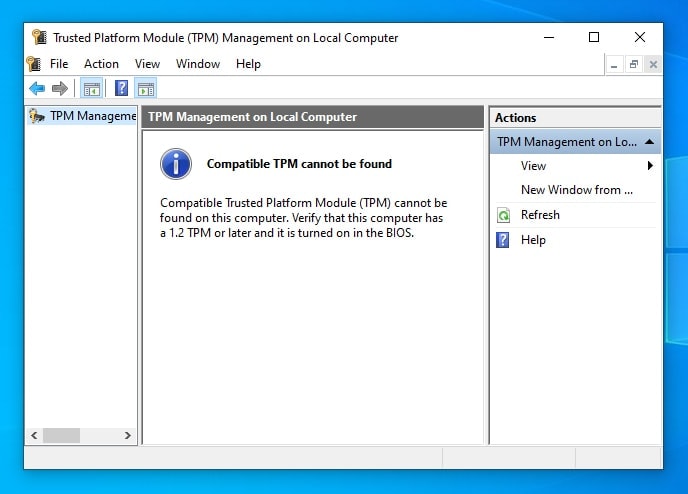
Another way to know whether you have a TPM installed on your device is to open Run and type in tpm.msc and press Enter. The Trusted Platform Module management window will open and if it says, “Compatible TPM cannot be found”, it means that your computer does not have a TPM required for running Windows 11.
If you have a modern CPU built after 2014, there is a good chance that you have a TPM. If you have a TPM, you can enable it from the BIOS. The process differs from manufacturer to manufacturer and usually involves accessing the BIOS menu during system startup by repeatedly pressing the Delete key and looking for the TPM selector in advanced menus.
How To Upgrade To Windows 11 For Free
You can upgrade to the latest Windows 11 operating system for free if you have an existing Windows 10 license. There are three options available when it comes to upgrading to Windows 11 for free.
1. Windows Update
Just like you upgrade to a new version of Windows, you can upgrade to Windows 11 by checking for updates on your computer.
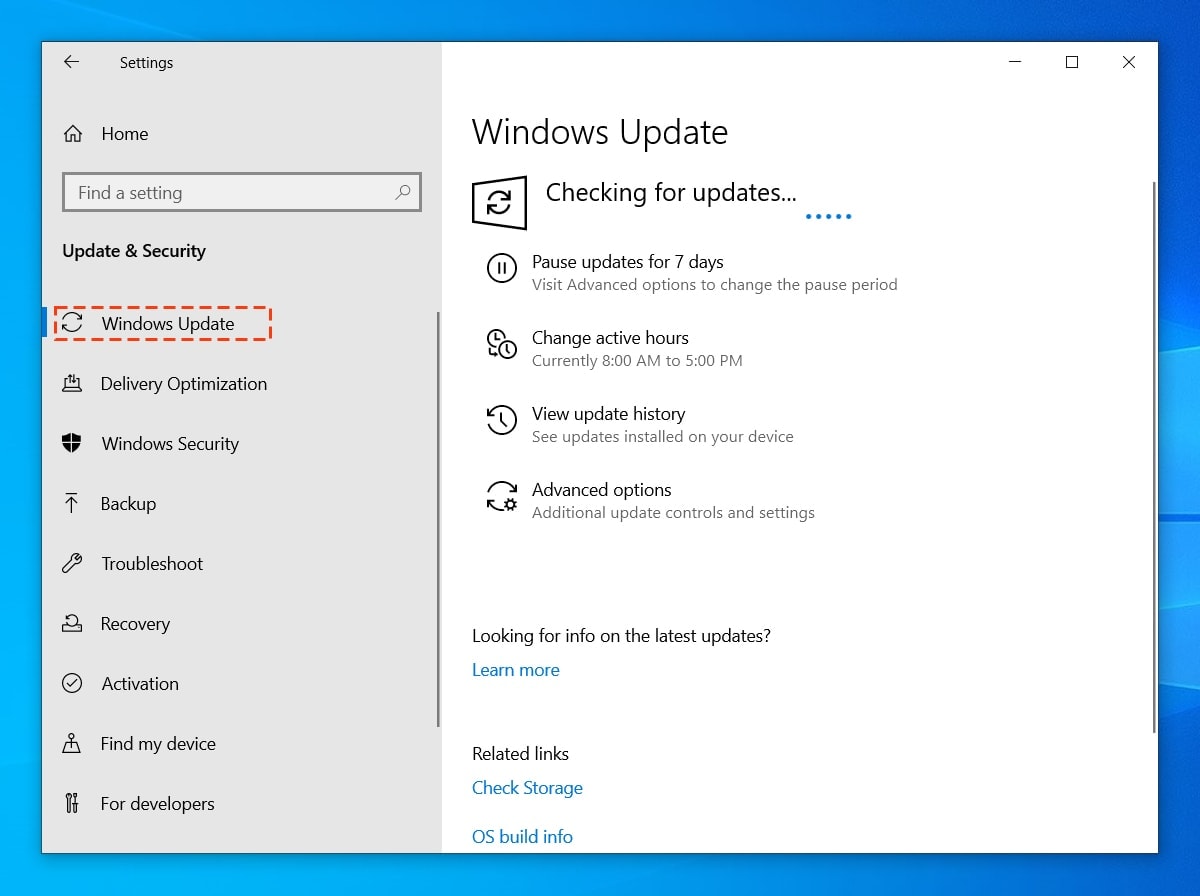
Follow the steps below to get the latest Windows 11:
Step 1: Click on the Start Menu and select Settings.
Step 2: Go to Update & Security > Windows Update.
Step 3: Click on “Check for Updates” to see if your computer is compatible to run Windows 11.
If your computer meets the requirement for Windows 11 installation, you’ll see the option to update to Windows 11. Click on Download and install the latest operating system.
Since the rollout of the new operating system is slow, it can take months before you are able to upgrade to Windows 11 through the Windows Update route.
2. Windows 11 Install Assistant
The simplest option to instantly install Windows 11 on your computer is to download the Windows 11 Installation Assistant. Before you download, make sure you double-check a few things:
- Your PC must meet the hardware requirements to run Windows 11.
- You need an active internet connection to download and install Windows 11.
- You must have a valid Windows 10 license.
- You should be running Windows 10 version 2004 or later.
- You need to have the PC Health Check app on your computer.
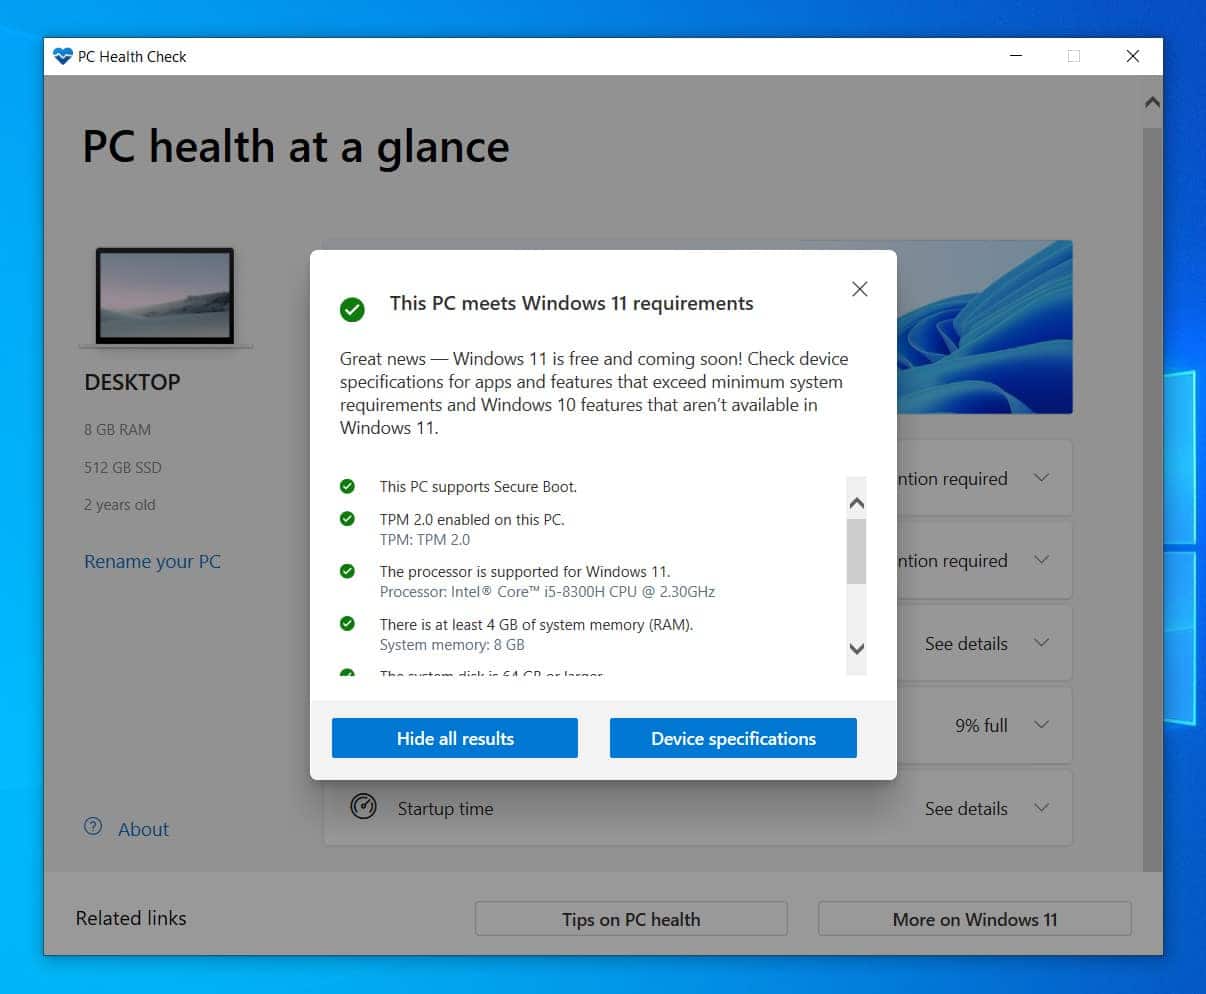
Follow the steps below to install Windows 11 with Windows 11 Installation Assistant:
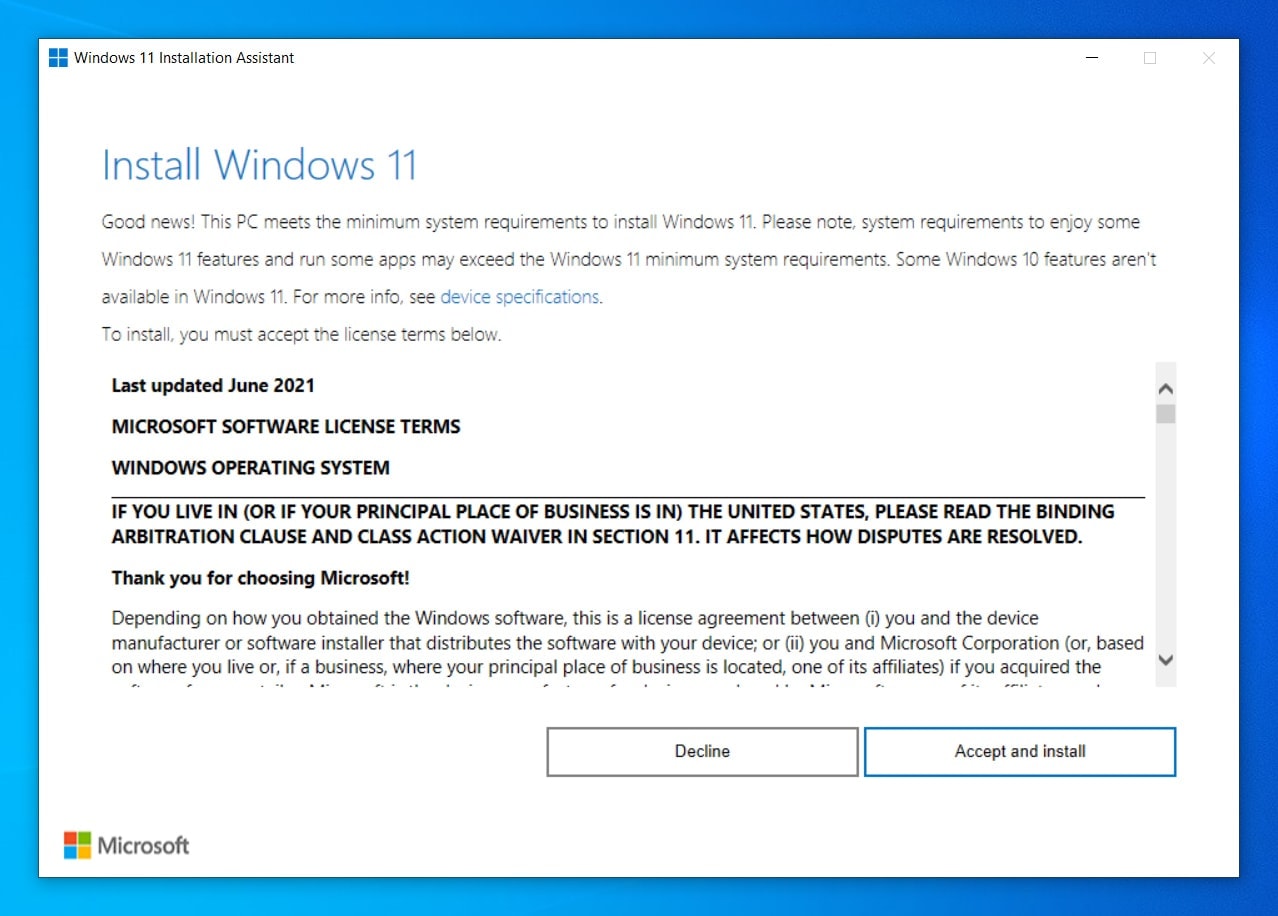
Step 1: Visit the Microsoft website and download the Installation Assistant.
Step 2: Double-click on the setup file to run it.
Step 3: Click on Accept and Install.
Step 4: Let Windows 11 download from the official source.
Step 5: Click on Restart Now. Your computer may restart several times during the process of installing Windows 11.
3. Clean Install Windows 11 From ISO Image
To download the Windows 11 ISO, follow the steps below:
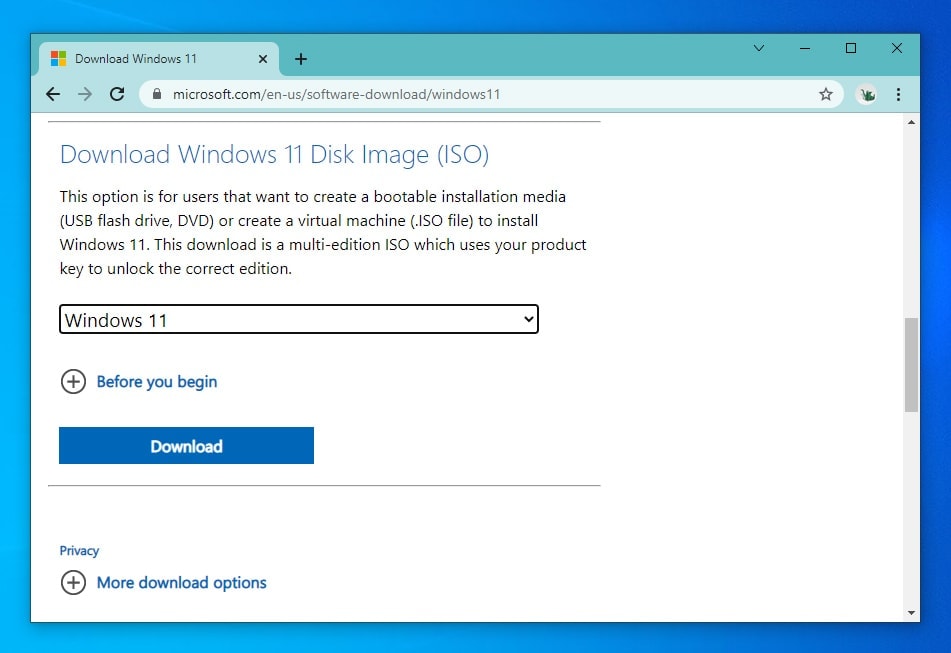
Step 1: Go to the Windows 11 ISO download page.
Step 2: Select the version of Windows 11 you want to download from the Select edition section at the bottom of the page. Choose the version that matches the Windows 11 Insider Preview channel you signed up for.
Step 3: Select your language and click the Download button
After downloading the Windows 11 ISO image, you need to burn it to a bootable USB flash drive. While there are many tools to create a bootable ISO, we will use Rufus for creating a bootable Windows 11 flash drive.
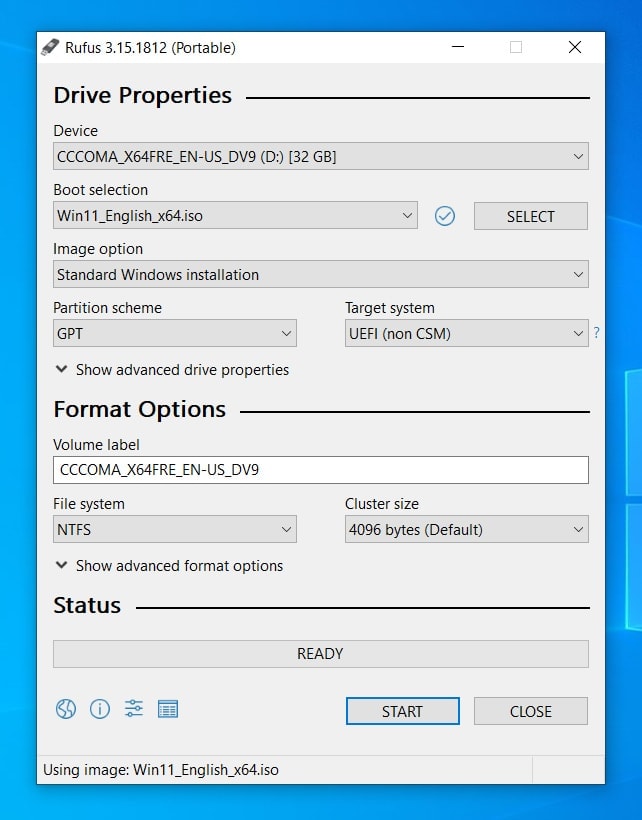
Follow the steps below:
Step 1: Launch Rufus.
Step 2: Click on the Select button and choose the Windows 11 ISO file from the stored location.
Step 3: Select GPT in Partition Scheme and UEFI in Target system.
Step 3: Click Start to burn the ISO image to the flash drive.
Now, you have a bootable USB flash drive to install Windows 11 on your computer. You can follow the steps below to install Windows 11.
Step 1: Turn on the PC and enter the Boot menu (press "F9", "F10" or "F12" repeatedly).
Step 2: In the Boot menu settings screen, choose the option to boot from a USB drive. Your computer will reboot and launch the Windows 11 installation process.
Step 3: Click on Install Now when the Windows 11 installation process begins. Click on Custom in the next screen to continue with the clean installation. You can input the product key later after installation.
Go through the Windows 11 setup options to configure your new operating system. Once the installation process is complete, you will have the latest Windows 11 installed on your PC.
Before you install the latest operating system, make sure your computer meets the requirements to upgrade to Windows 11 for free. While there is an open-source script to force-install Windows 11, bypassing the TPM check, we recommend you not do it. Microsoft will not provide updates or future support when you force-install Windows 11.



Leave a Comment