It happens often that Mac users delete files accidentally and are left wishing that they could undelete or restore the files. The big question is; is there a way to recover deleted files on Mac? Though MacOS Sierra and other operating systems by Apple do not have an “undelete” tool it is actually possible to recover such files. Here is how:
Look in Trash
Deleted files go to the Trash and remain there until the trash is emptied. If you deleted a file and are yet to empty the trash then you are lucky. All you have to do is open the Trash app and restore the file from there.
Restore using Time Machine
If you are wise and have been using the Time Machine Backup then file recovery will be easier for you. With Time Machine you can be able to backup the files in network locations, AirPort Time Capsule devices and external drives. Whichever it is that you opt for you will be able to recover deleted files or at least previous versions of the files.
To recover files using Time Machine:
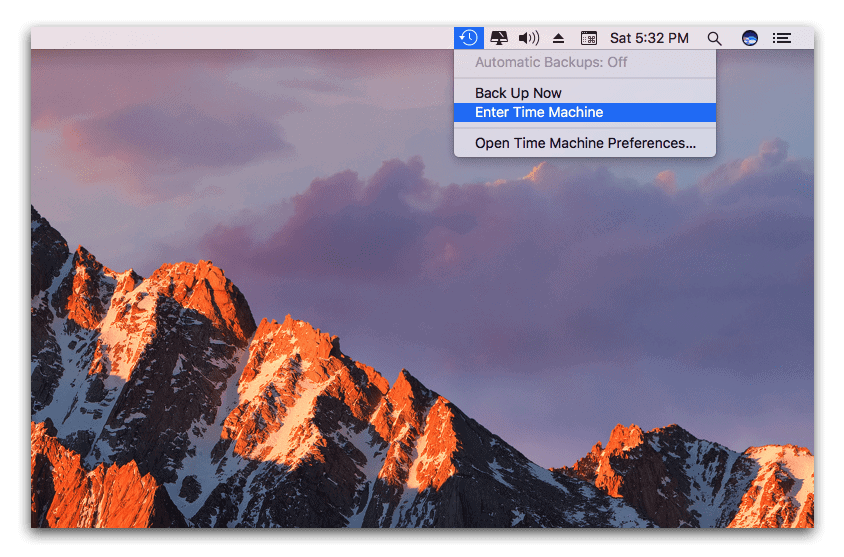
1. On the menu bar, click on the Time Machine icon. Select “Enter Time Machine.”
2. At the bottom right corner, specify the date and time you would like to go back to. This is the time when the file was in the computer. Click on “go back in time.”
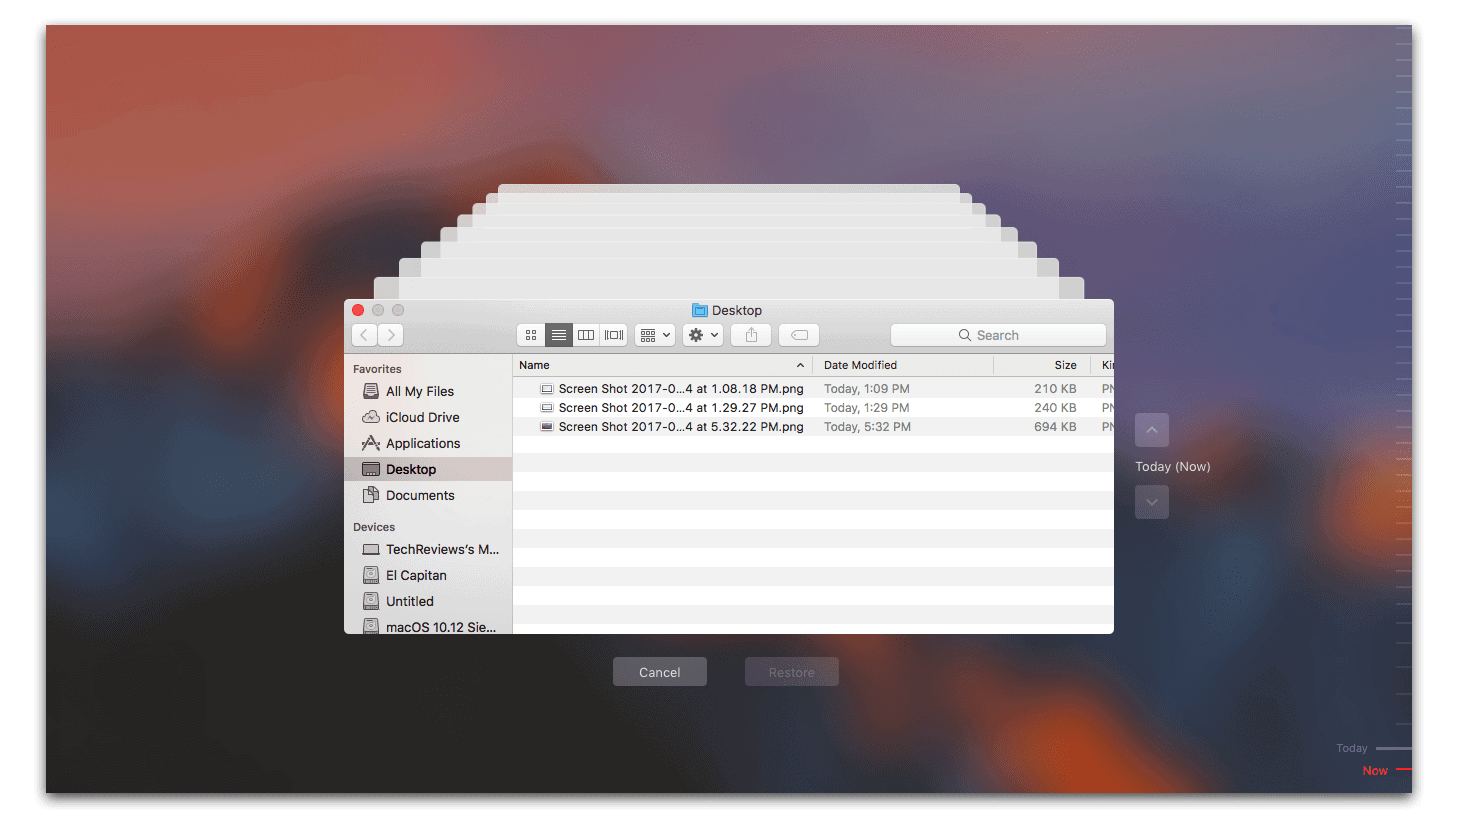
3. You will see a list of the files stored in the computer at the specified time. Those that had backed up in an external hard drive are pink in color while those backed up in the Mac’s internal storage are white in color.
4. To preview a file, select it and press the spacebar.
5. To restore it click on the “Restore” button.
Using a Data Recovery Program like Disk Drill
Third party software can come in hand when all else fails. The best choice is Disk Drill 3 which allows users to recover deleted files in macOS Sierra. There are also many other factors that determine the ability to recover data deleted from hard drives. These include time elapsed since the file was deleted, the drive activity and the type of encryption used in the hard drive. That said, note that Disk Drill 3 will help you recover files from a wide variety of hard drives ranging from external ones to internal ones.
Even files deleted from solid-state drives (SSD) can be recovered using this software. It is however important to note that files deleted by the TRIM command cannot be recovered using this or any other software. Once data is deleted using this command it is permanently gone and cannot be recovered.
A new Mac comes with SSD drives whose TRIM function is automatically enabled. Third-party SSD drives may or may not be TRIM enabled. You can always change the settings.
This should not make you lose all hope though. DiskDrill can actually help you recover files deleted by TRIM function so long as you had the Guaranteed Recovery enabled. All you have to do is ensure this feature is enabled in the SSD drive’s settings. What Guaranteed Recovery does is that it creates an invisible copy of a file before it is removed from Trash. This invisible copy is preserved and it is what DiskDrill will recover. With this feature activated you will be able to recover files deleted on SSD drives even with TRIM function.
The next question on your mind must be how you can use this program. Here are the steps to follow:
1. Download the free Disk Drill 3 software and launch it. If you are attempting to recover files from an external hard drive connect it.
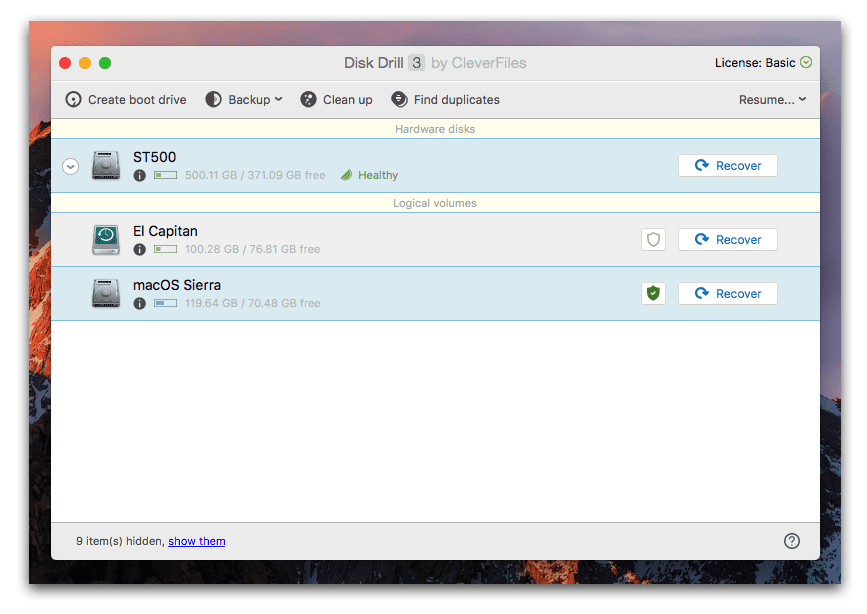
2. Choose the disk you would like to recover files from. Click on “scan.” This will take some time just be patient.
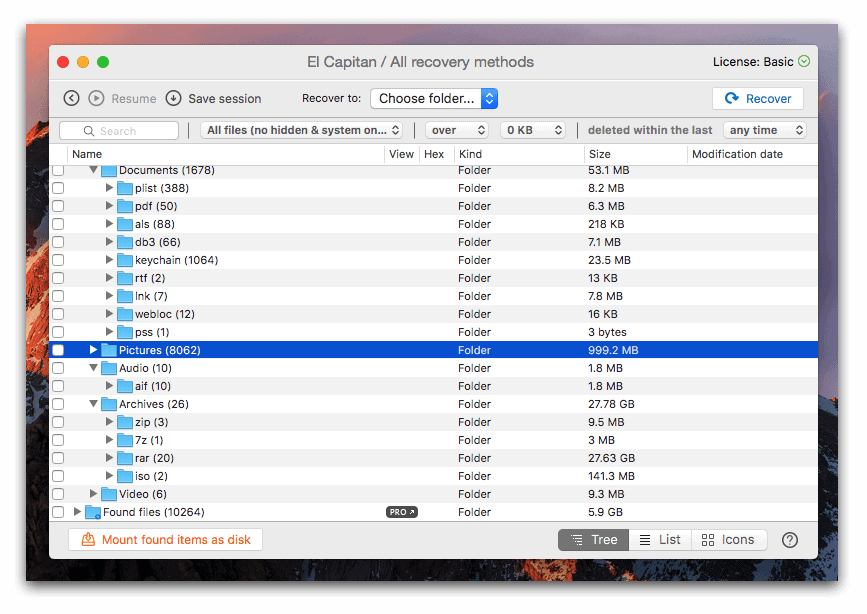
3. Can you see the files you wish to recover? You can now use the software to restore the files. Just click on “Recover.”
You will have the restored files stored in the directory you specify within a short while. The main reason why people love this program is that they do not have to pay before they are sure that the software will help them recover what they are looking for.


Leave a Comment