The new update by macOS is the macOS 11.0 Big Sur software update. It is meant to create a more beautiful interface that users interact with, along with increasing the speed and function of compatible machines.
Big Sur brings with it the biggest update to the search application Safari, interface changes to the Messages app, and several other superficial enhancements. The thing with the macOS Big Sur software update is that it is beta software, meaning that the software developers are essentially releasing this younger version as a test run, to see where the software prevails and where it falls short of expectations.
So now, you are probably wondering if this software update can let you mac read and write NTFS, and how to write NTFS drives in macOS Big Sur.
The issue is, the macOS 11.0 Big Sur software update can’t read NTFS drives. Mac Softwares typically struggle with NTFS drives because of their origin. NTFS was used in Windows computers since the early 90s as a proprietary filing system. It is still used in Windows computers and software updates today.
However, Mac does not provide the necessary specs to use NTFS drives in an open-source format. This means that to allow all of their systems and macOS software past, present, and future to fully utilize the open-source NTFS drives, they would have to pay a massive licensing fee to a major competitor, Windows.
This is why Mac computers and software cannot write or read their own or imputed NTFS drives. They would rather have their customers do a little bit more work than pay into a competitor’s software that not every Mac user needs or even wants.
But you do! So let’s get into how you can write to NTFS drives in macOS Big Sur!
How to Write NTFS Drives into macOS Big Sur
In this section, we will discuss the ways that you can write NTFS drives into your mac while having macOS Big Sur running.
1. Enable Mac Writing to NTFS Drives Using Terminal in Big Sur
The second method involves working more closely with your mac computer and the software that you already have available, in this case, most likely macOS 11.0 Big Sur. For this method, you will be using some light code work that will be provided in the instructional section below.
Even though there is a line of code and some fancy clocking around, do not feel worried at all. It is very simple and even folks who have no clue how to code can do this!
Follow these instructions to enable Mac NTFS writing drives in Terminal:
1. First step you need eject USB Drive on Windows.
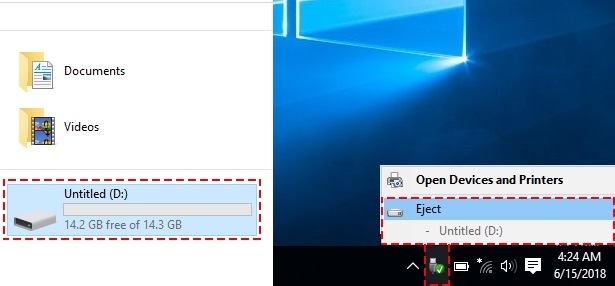
2. Label the NTFS drive you want to use with a one-word name.
3. Launch a Terminal open by pressing Command and the Space Bar at the same time. Type “Terminal” and hit the enter key. You can also open Terminal by going into Applications, then to Utilities, and finally, Terminal.
4. Once you are in Terminal, type the following line of code:
sudo nano /etc/fstab
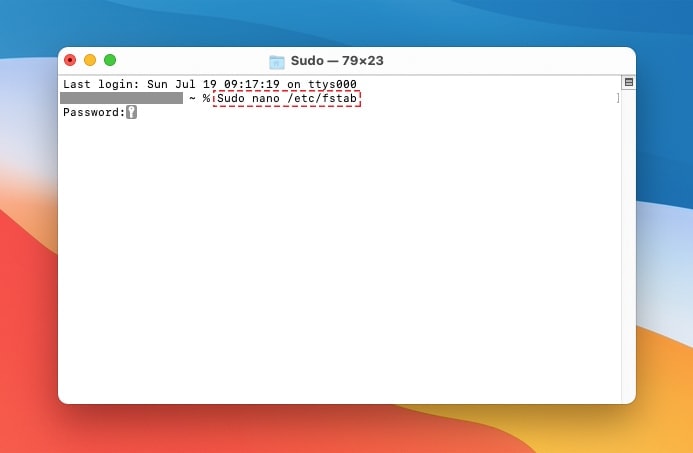
Next, add this code “LABEL=NAME none ntfs rw,auto,nobrowse” to terminal, and replace the section “NAME” with the name of your USB flash drive with the NTFS drive you want to use. In this example, we will use “Data” as the file name. Below is the coding.
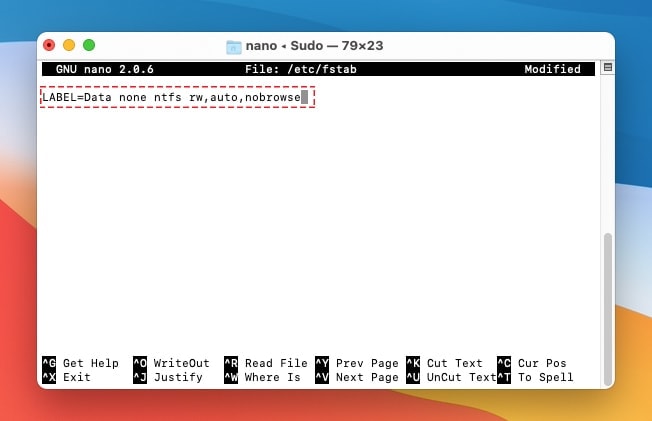
Select the Control key and the letter “O” key to save this new file, press “Enter” and then press both the Control key and the letter “X” key to close the GNU.
5. Unplug the flash drive and then reconnect the flash drive to the USB flash drive port.
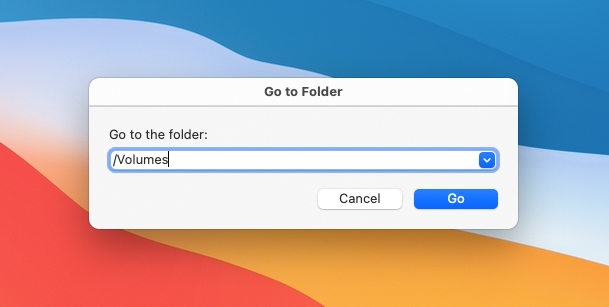
6. To access the files and the drive, click on "Go" then go to the folder tab. Type in "/Volumes" into the search box. Now, you should be able to access the NTFS files that are on the drive and change or use them in any way you want.
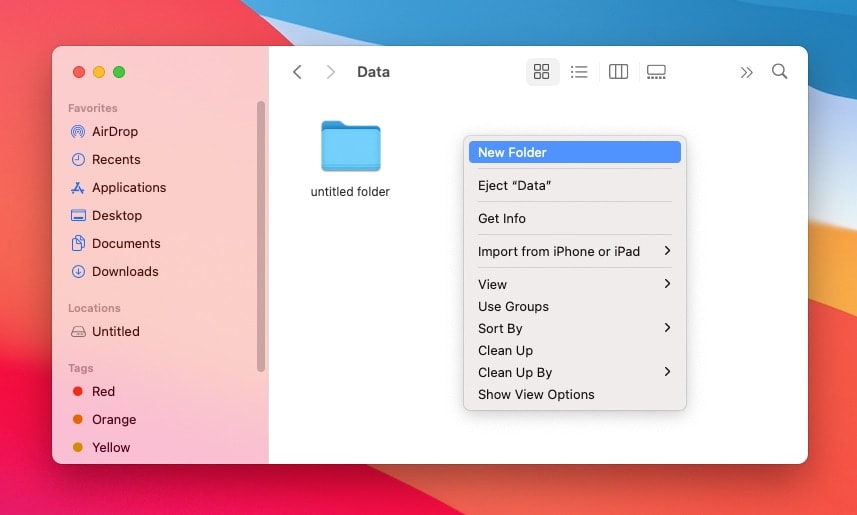
To remove or undo any changes that you have done, open the nano editor using the same method as the instructions above read, and delete the lines of code that you input. This method of undoing the actions might work, but also may not work. It depends on the chance that the code had not fully logged into the system or saved.
If you are lucky, it will delete and the coding that you had previously done will be undone. If it does not delete the lines, or the lines of code are deleted but the actions are not undone, you will have to find alternative methods of removing them or undoing the actions you did.
2. Third-Party NTFS Drives
One way to get your Mac computer to read and write NTFS drives is to utilize the benefits of a third-party app or NTFS drive. This means that you essentially add a processor onto your computer that can process, read, and write NTFS files such as HDD, SSD, or flash drive with Windows formatting or features.
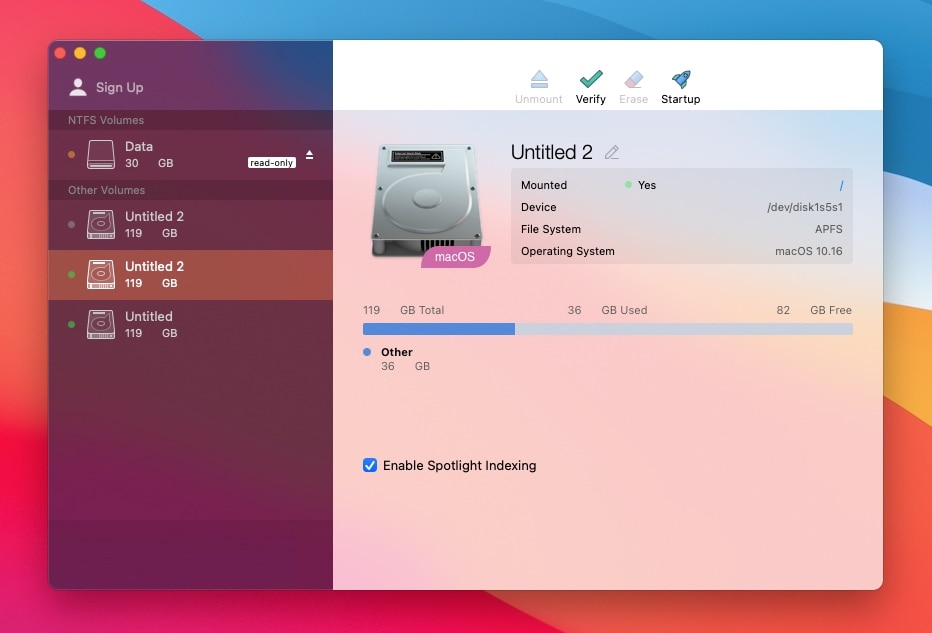
A great third-party app to use is Mircosoft NTFS for Mac by Paragon Software. This app allows you to edit, copy, move, delete, and read NTFS files from your Mac computer. It is super fast and has a really easy interface so you do not get confused during the process.
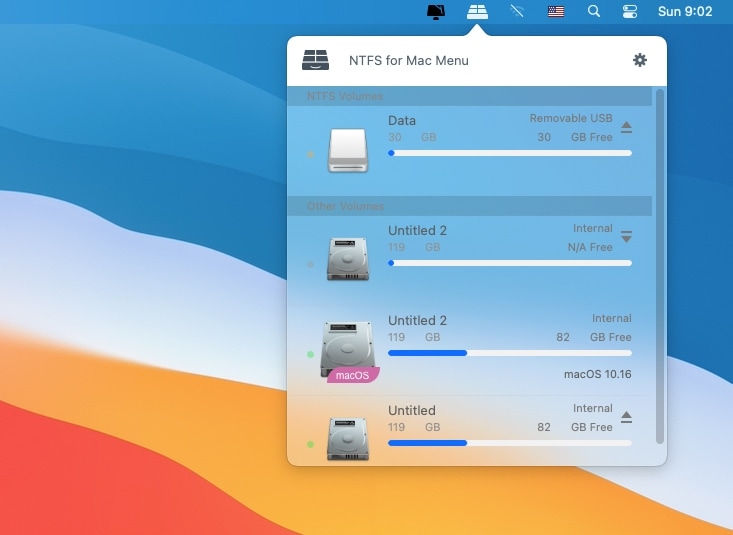
This method is one of the most common because it is super easy and Paragon Software is so accessible.
Paragon Software is now only being sold at $19.95 with a 10 day free trial.
3. Change the Format of the NTFS Drive to an exFAT
The final method is the change the formatting of the NTFS drive. Both macOS and Windows systems allow their users to read and write on drives formatted for ExFAT. This is probably one of the easiest ways to get your NTFS files onto a Mac for use since it is super easy.
All that you must do is change the formatting of your NTFS drive in your Windows PC or have whoever is giving you NTFS files change the format before they give them to you. Simply change the format from NTFS to ExFAT and immediately, the files are ready for use.

To do this, open the Disk Utility on your Mac. To find it quickly, use the Spotlight search bar. Then, pick the drive you want to format and select the erase tab in Disk Utility. Finally, select ExFAT from the drop menu, and hit erase.
Good luck and thank you for reading!



Thanks for your really helpful guide.
Does it work on M1 chipset as well?
I’m concerned of messing everything up with coding, if not perfectly compatible with my M1 mac.
Thanks for your help!
Did it on my McBook Air M1 and it worked fine…
The only thing is that my external drive appeared just once on the desktop and in finder.
When i need to access it now i have to use the disk manger utility…not very convenient.
Thanks anyway for the how to, you’re the only one i found saying that third party software is not mandatory.