If you’re a Mac user and want to install Windows OS, you have to use Boot Camp, a utility that comes with Mac to let you switch between macOS and Windows OS. It helps you download drivers and create partitions to install Windows on Mac. However, Boot Camp doesn’t support the latest Windows 11 OS and hence you need another way to install Windows 11 without Boot Camp.
In this tutorial, we will see how we can install Windows 11 on Mac without Boot Camp. By following the tutorial, you can also install older versions of Windows OS.
Download Windows 11 ISO
A Windows ISO image lets you clean install Windows on your computer. ISO files are disk images to create bootable USB drives and discs. They are also used to boot a virtual machine. Microsoft is offering a free upgrade for all Windows users. Meanwhile, you can skip the product key part during the installation of Windows 11 from the ISO file.
The easiest way to download the ISO file is directly from the official website. Follow the instructions below to download the Windows 11 ISO.
Step 1: Go to the Windows ISO download page.
Step 2: Select Windows 11.
Step 3: Click on Download.
Step 4: Select the language and Click on the download button.
How to Install Windows 11 on Mac without Boot Camp
1. Create Windows Bootable USB Installer
You need to create a Windows 11 bootable USB installer. A flash drive is needed for this and you need to follow the steps below:
Step 1: Format Bootable USB Drive
Format your USB Bootable drive with Master Boot Record (MBR) Scheme and exFAT partition.
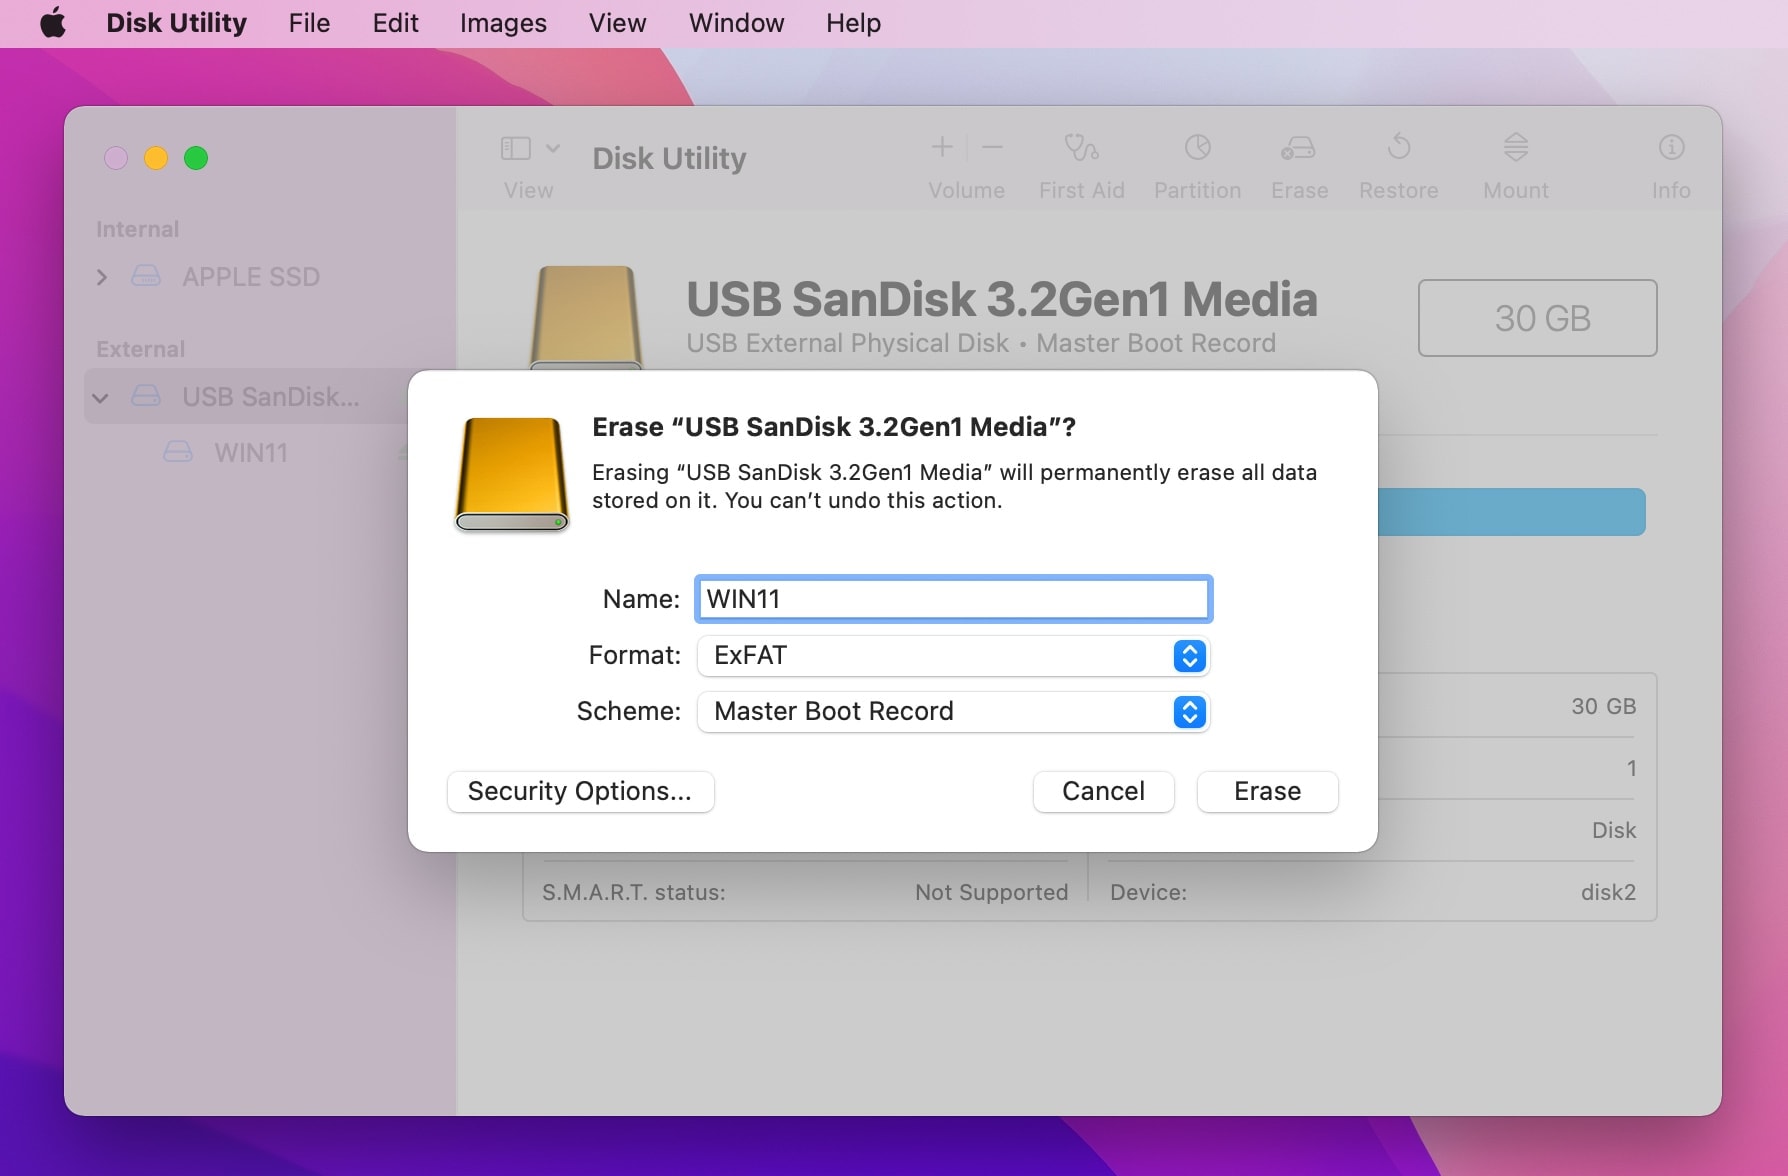
- Open Disk Utility, go to Application > Utilities > Disk Utility
- Click on View > Show All Devices
- Choose the Windows USB Bootable and click on Erase
- select MBR and Click the Format menu and choose the exFAT.
- Enter your Windows USB drive
- Click on erase button.
Step 2: Mount Windows 11 ISO
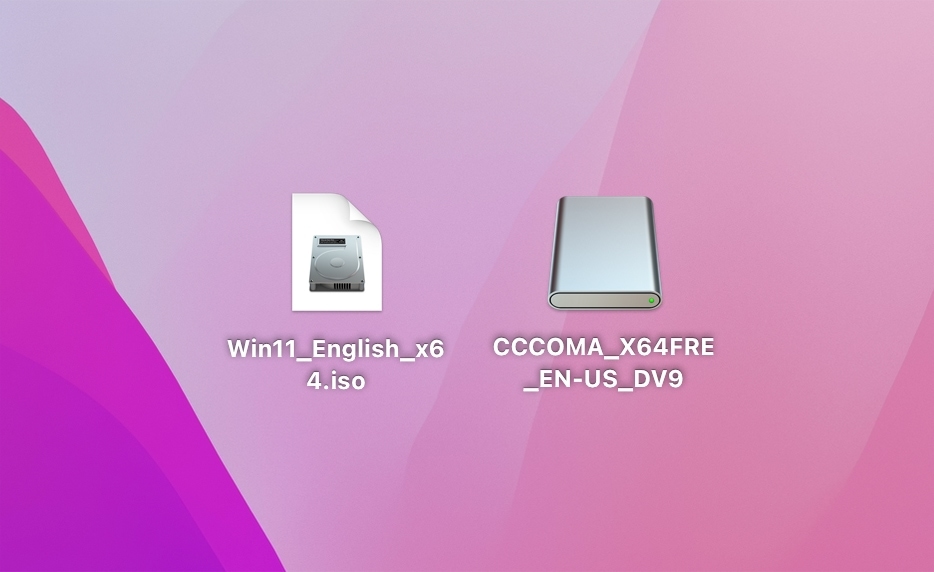
Double-clicking on the Windows11.iso file to mount this image to your Mac.
Step 3: Create Windows 11 Bootable USB Installer
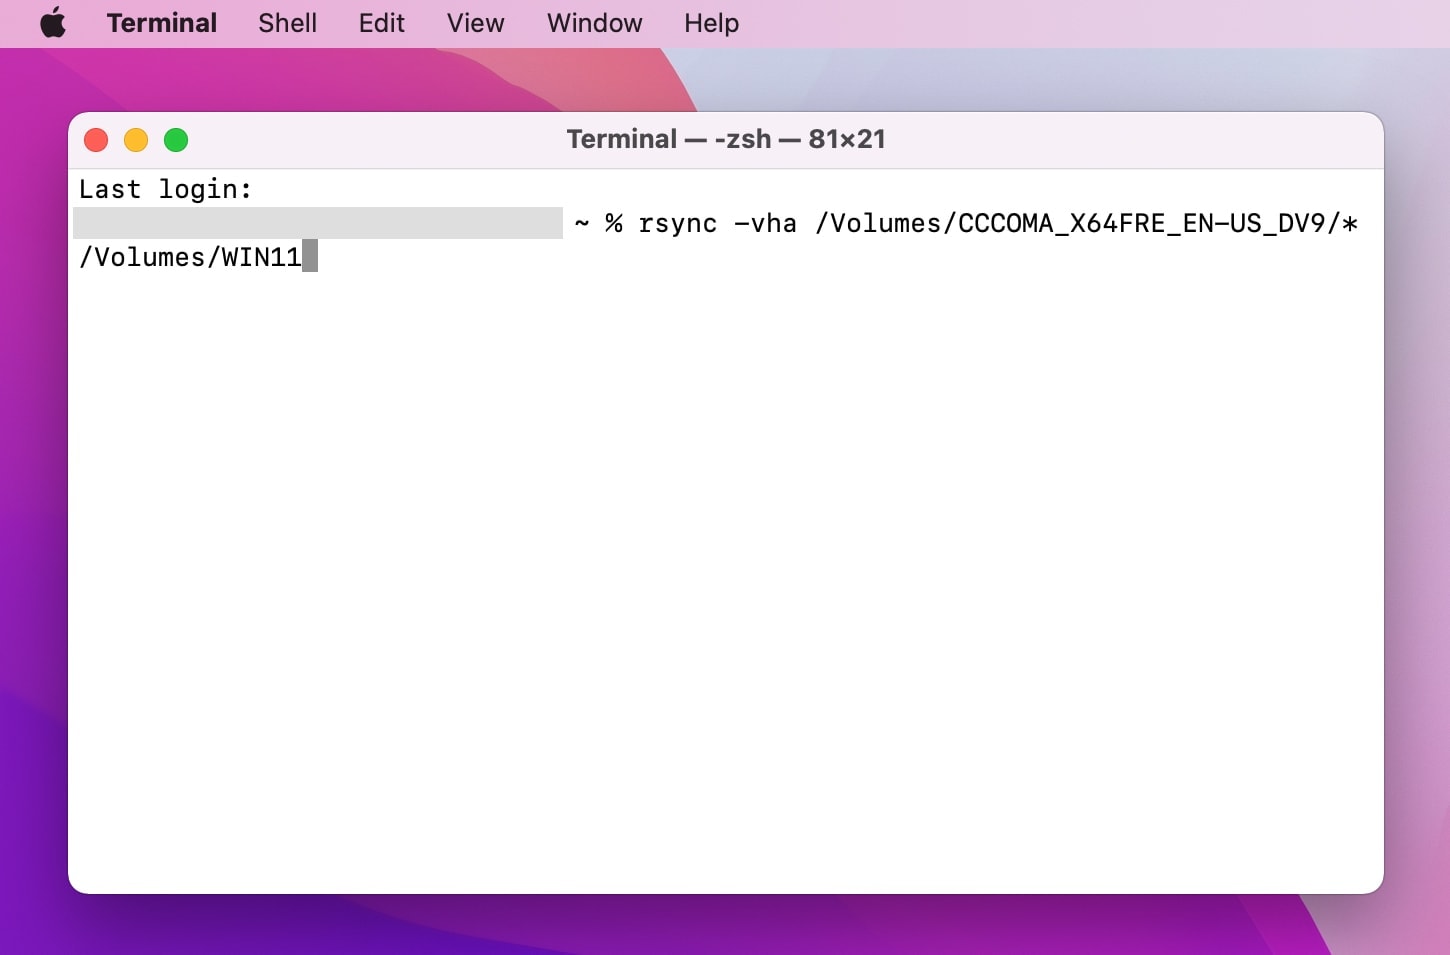
You can use Terminal in Mac to create a bootable Windows USB Installer. To open Terminal. Go to Application > Utilities > Terminal or open macOS Spotlight and search "terminal". Use this command to create Windows Bootable USB.
2. Create Windows Partition on Mac
Step 1: Open Disk Utility by navigating to Application > Utilities> Disk Utility. Click on the Show button and select Show all Hard Disk.
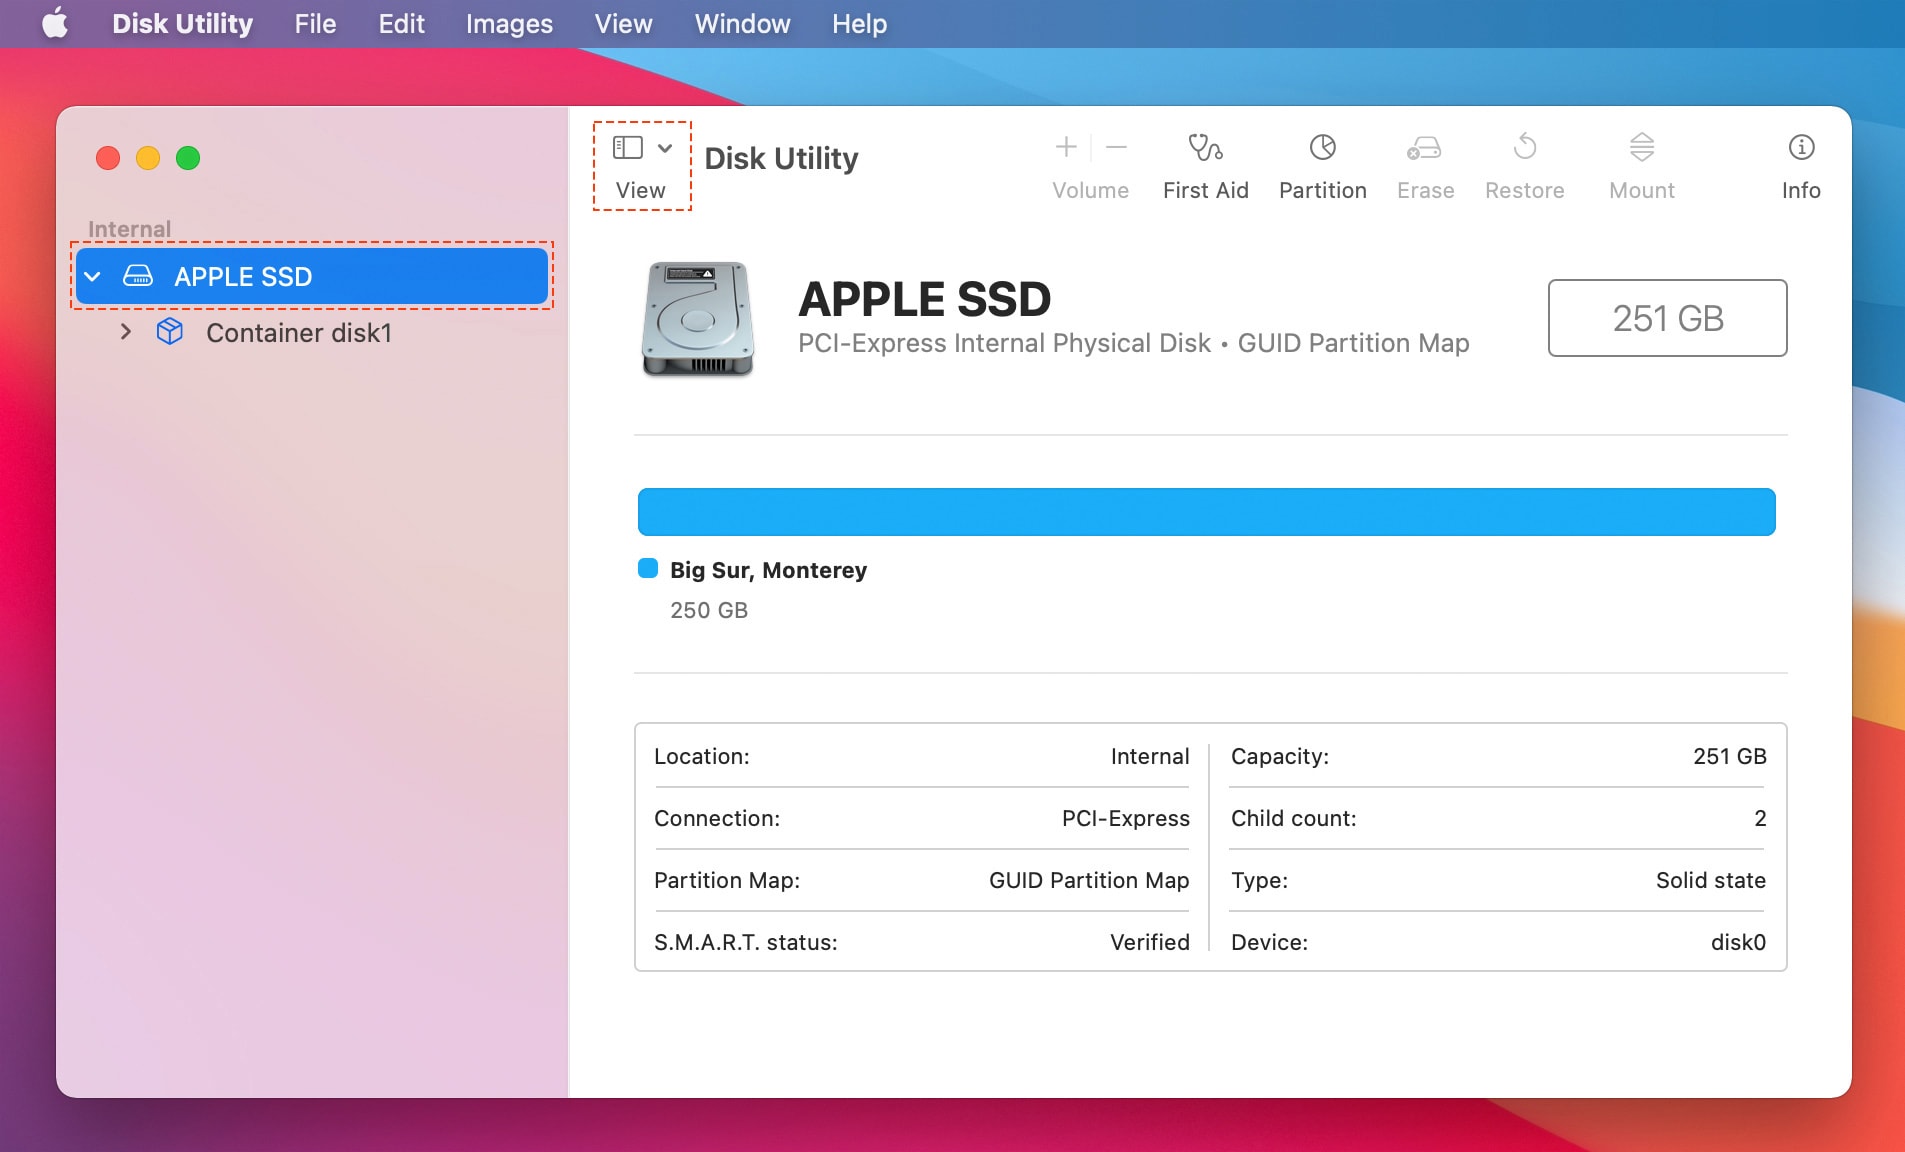
Right-click on Apple SSD Hard Disk and select Partition. Click on the “+” icon to create a new partition.
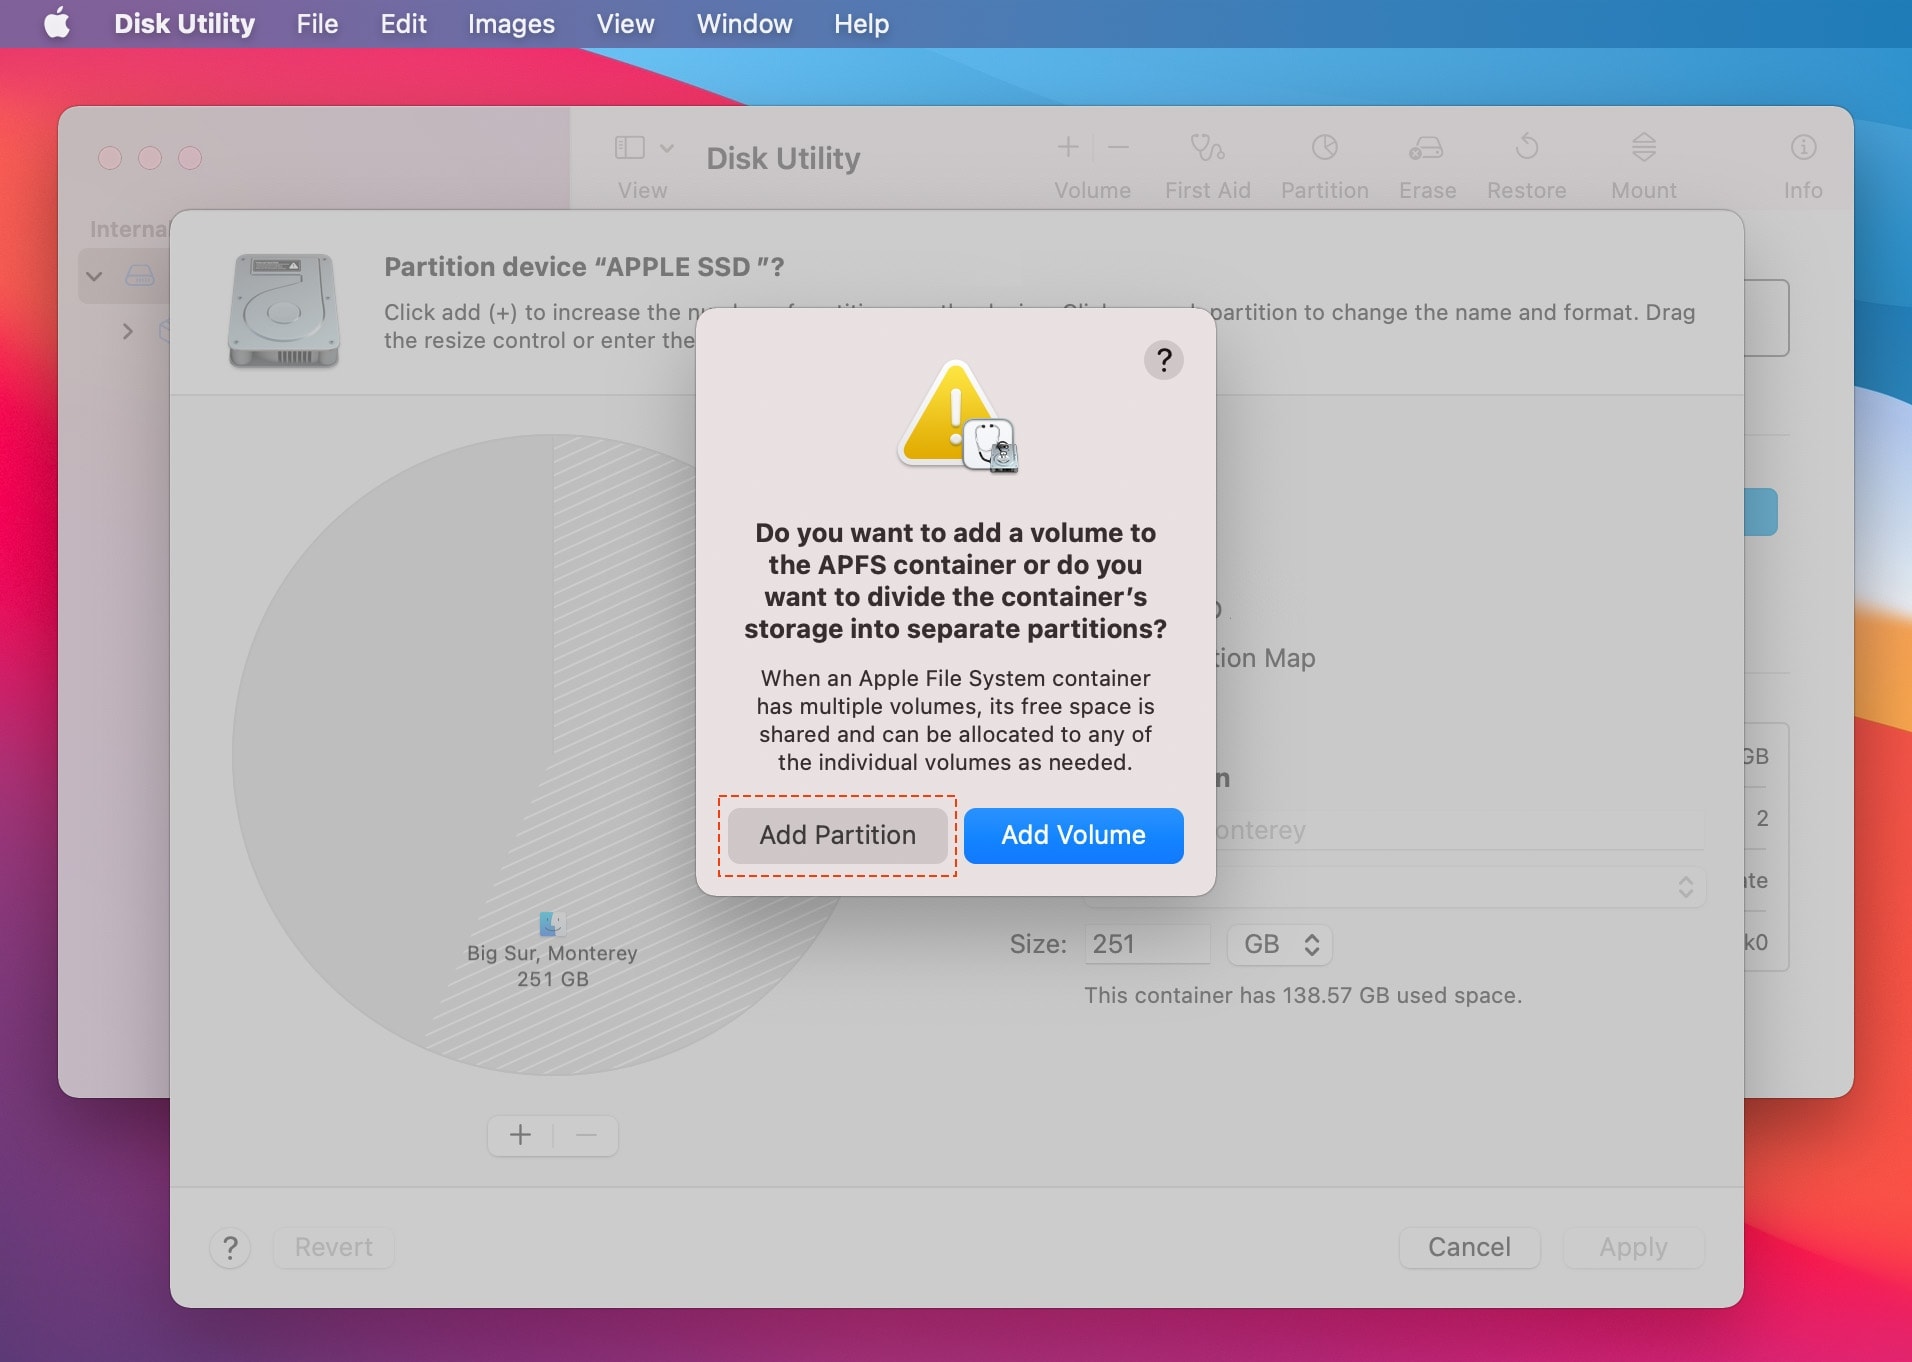
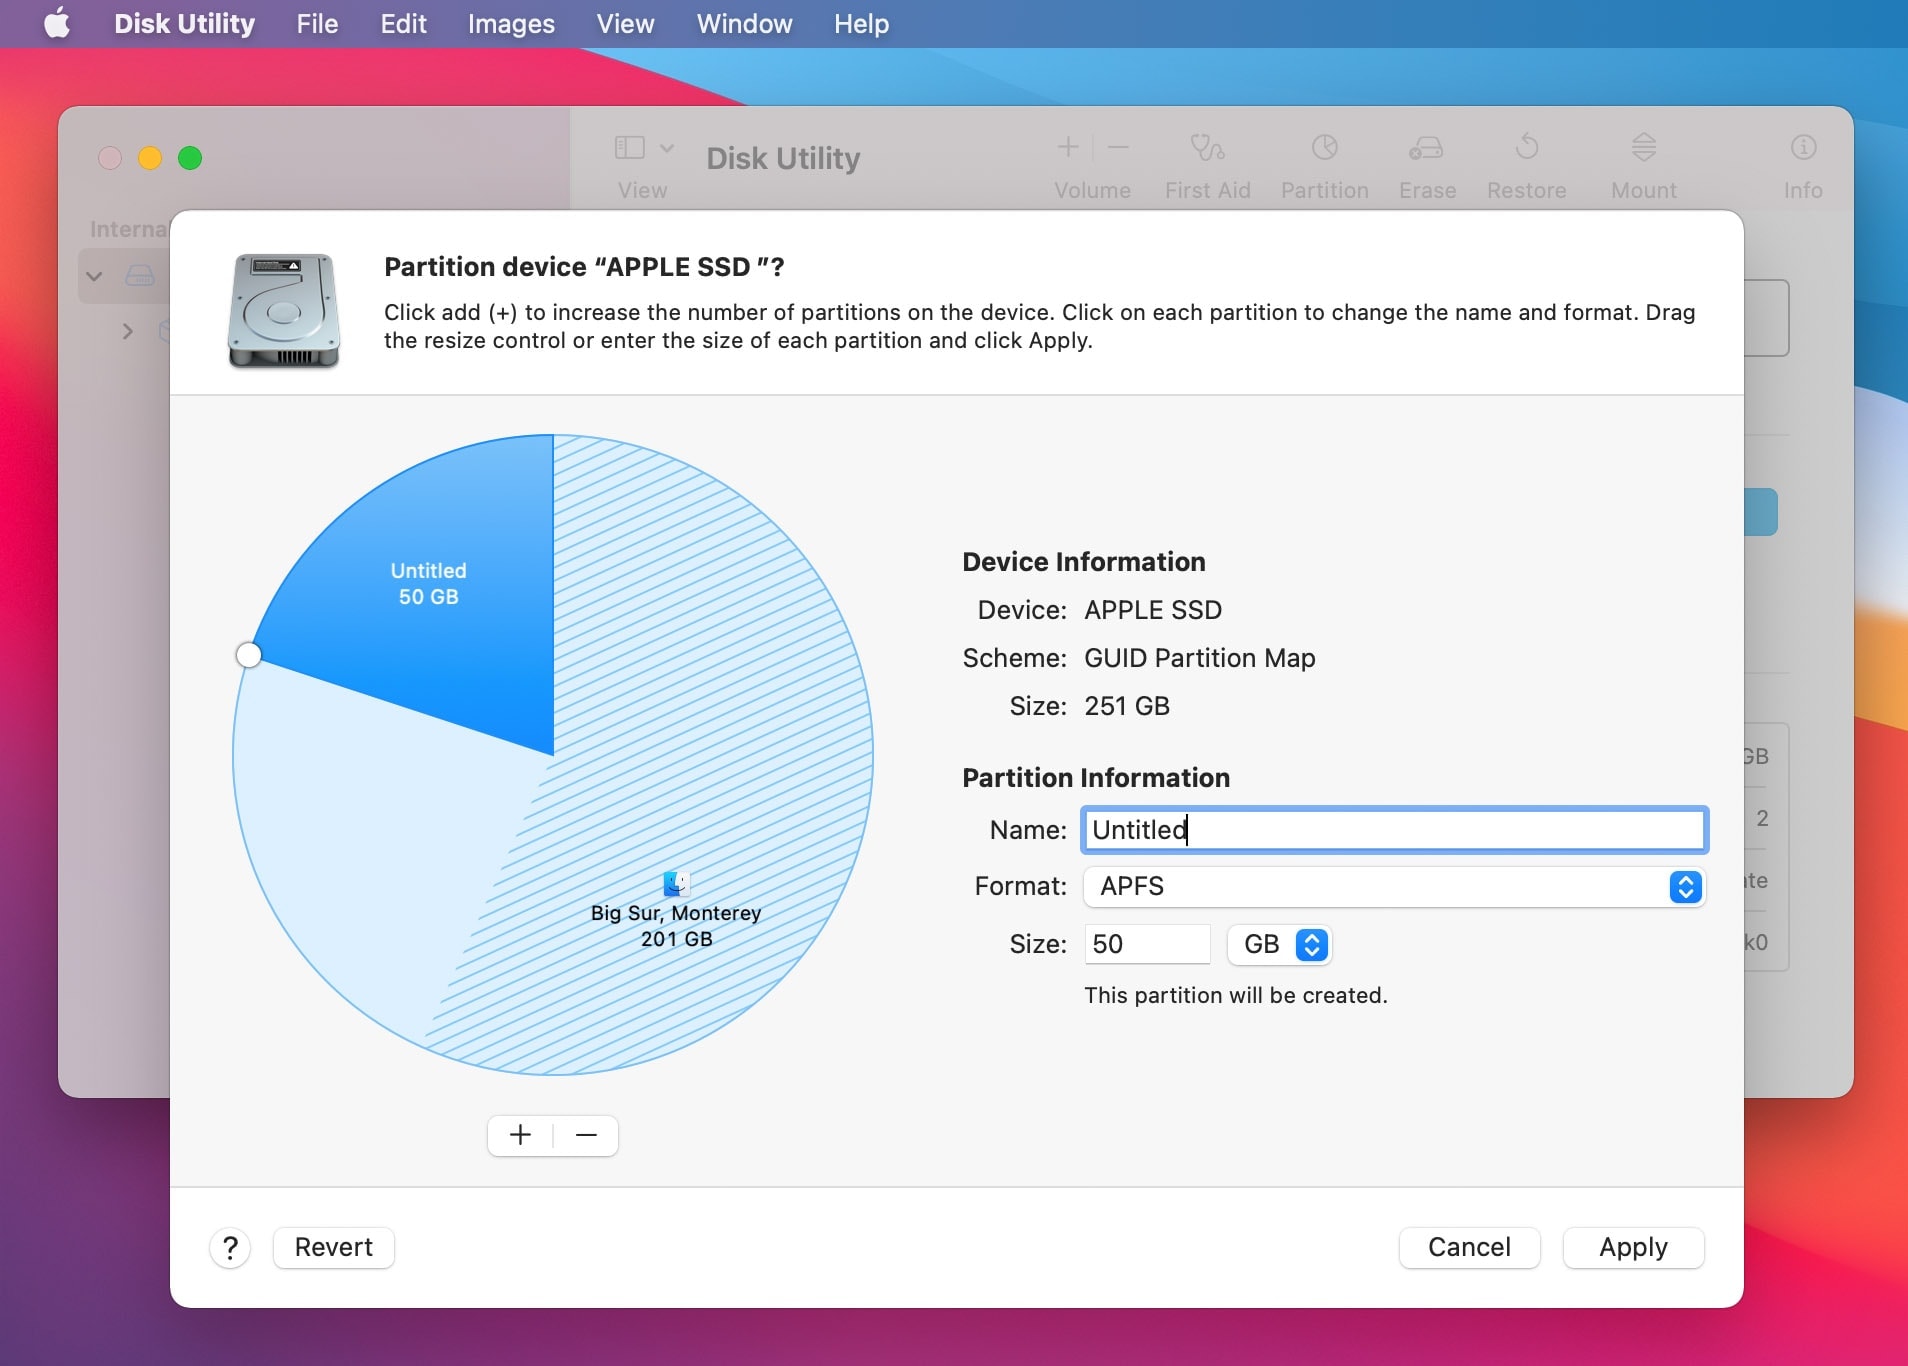
Step 2: Create a new Container disk with APFS Partition. You need 50 GB of space to install Windows.
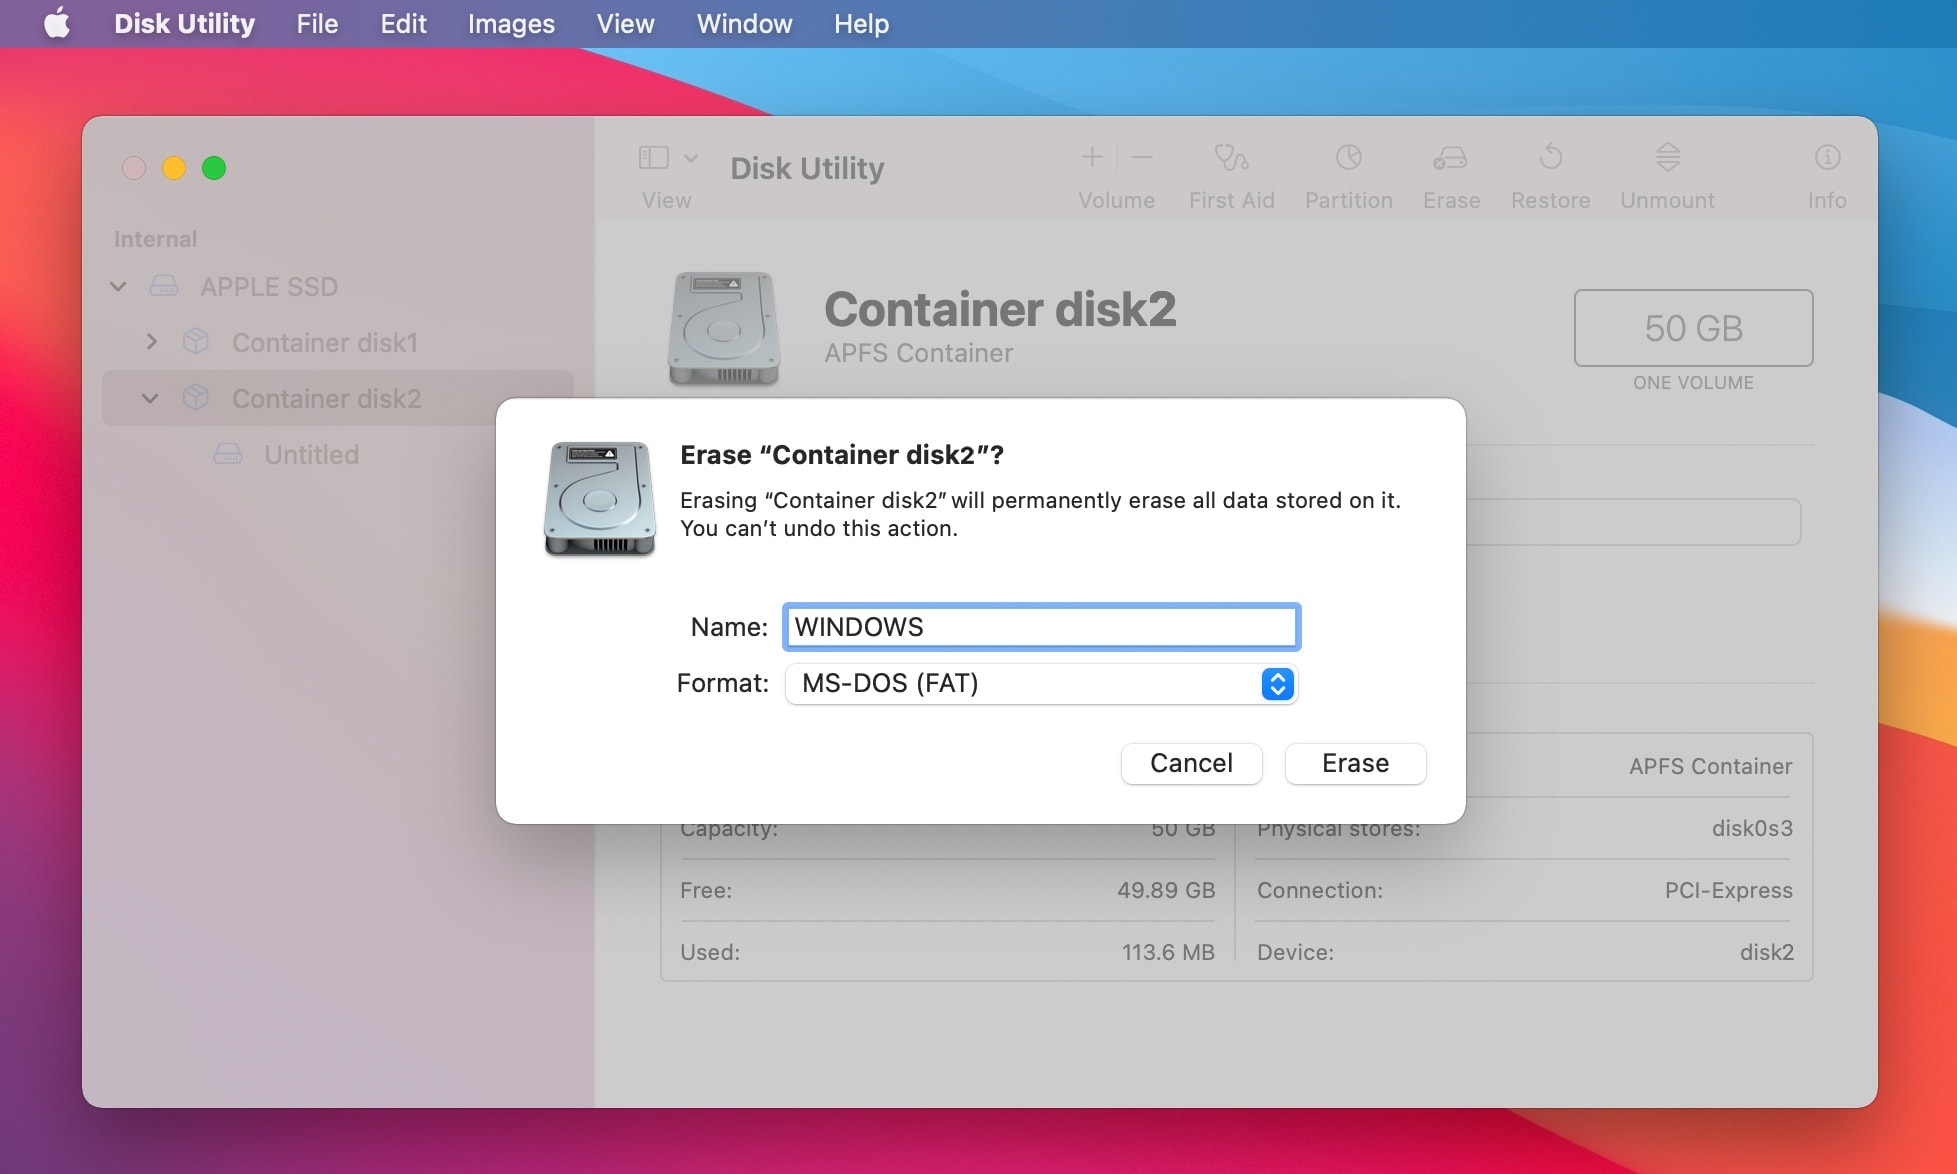
Step 3: Click on new Container disk, and select Erase button to format Container disk with MS-DOS (FAT) partition.
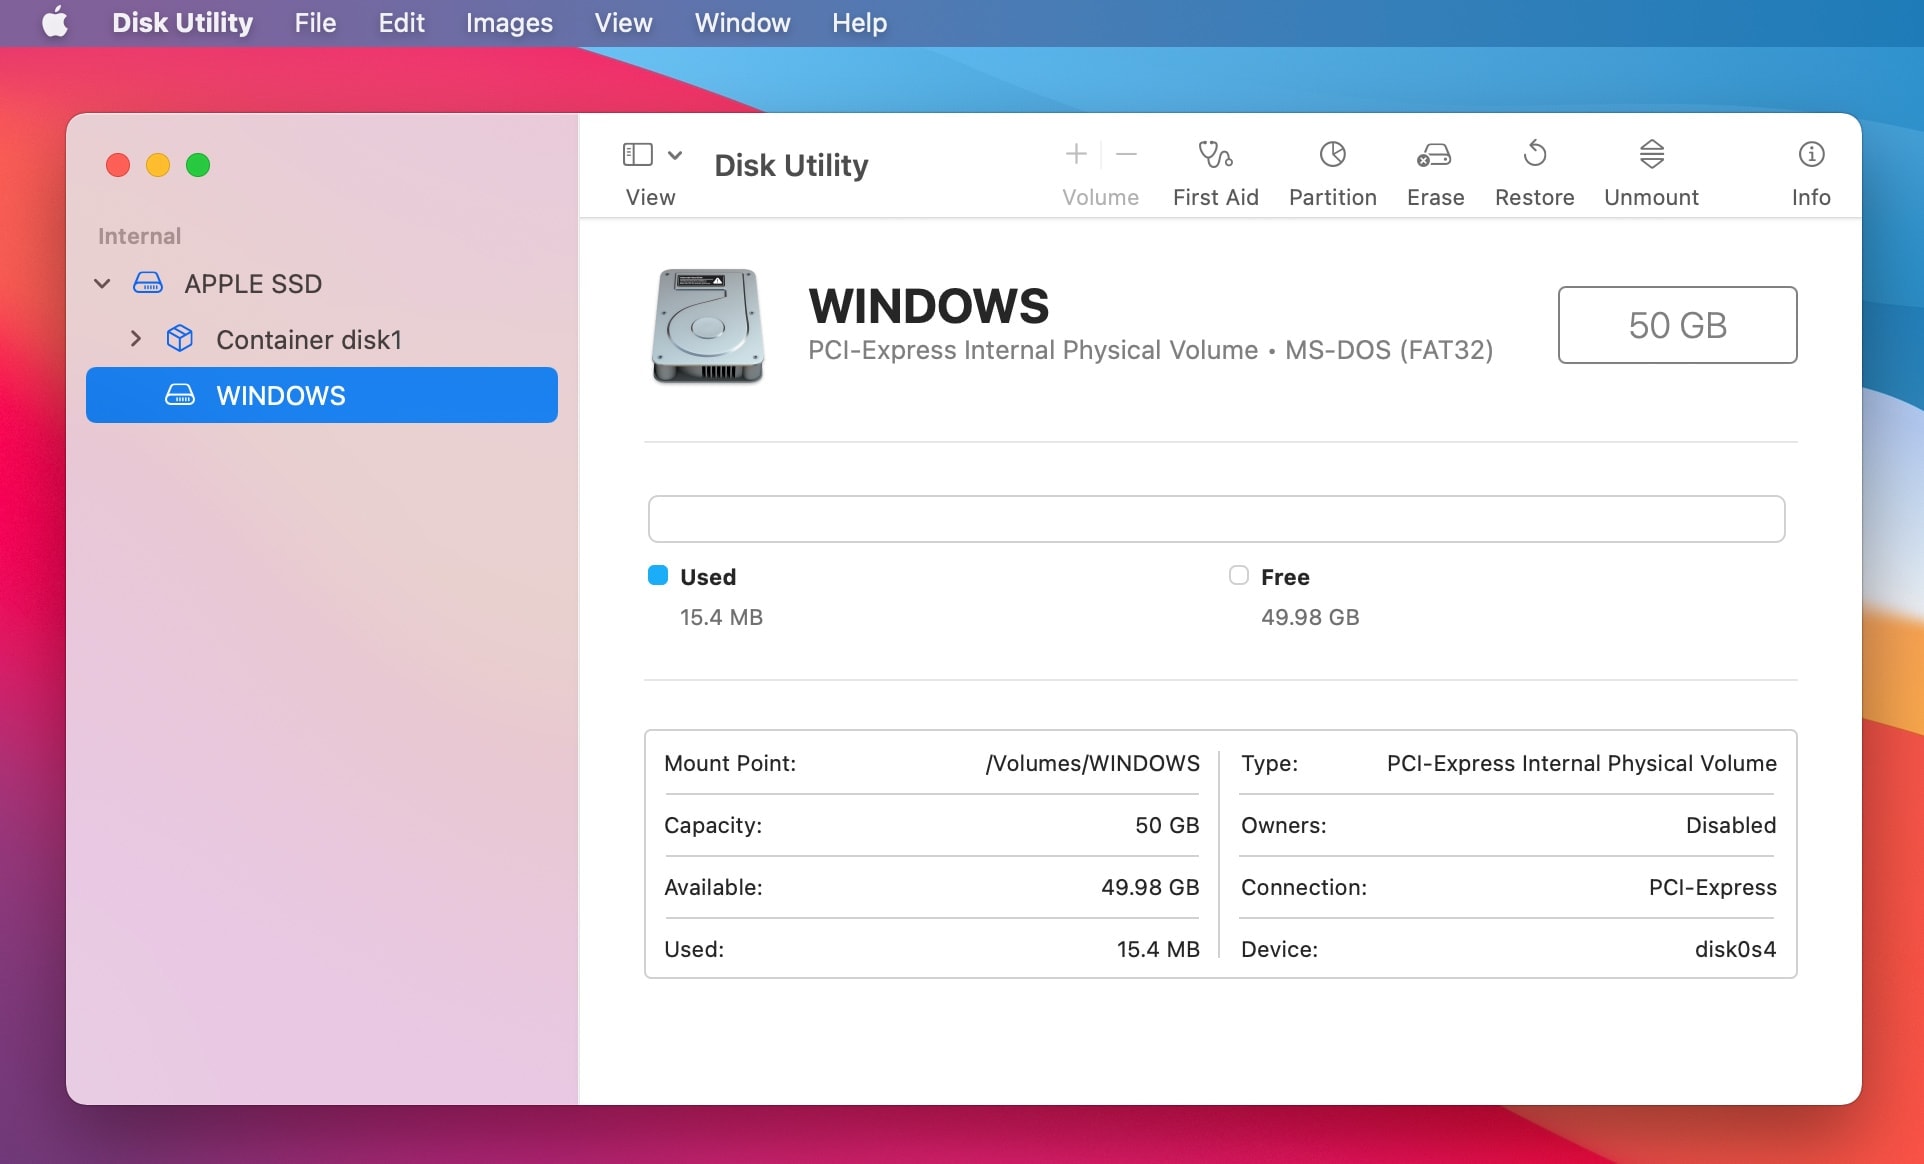
This is Windows partition on Mac.
3. Download Mac Driver for Windows
When you install Windows on Mac, you also need to download drivers for the hardware to work with the software. Since the Windows Installer does not support the keyboard and mouse on Mac, you need drivers to fix the issue.
Follow the steps below to download drivers for Mac:
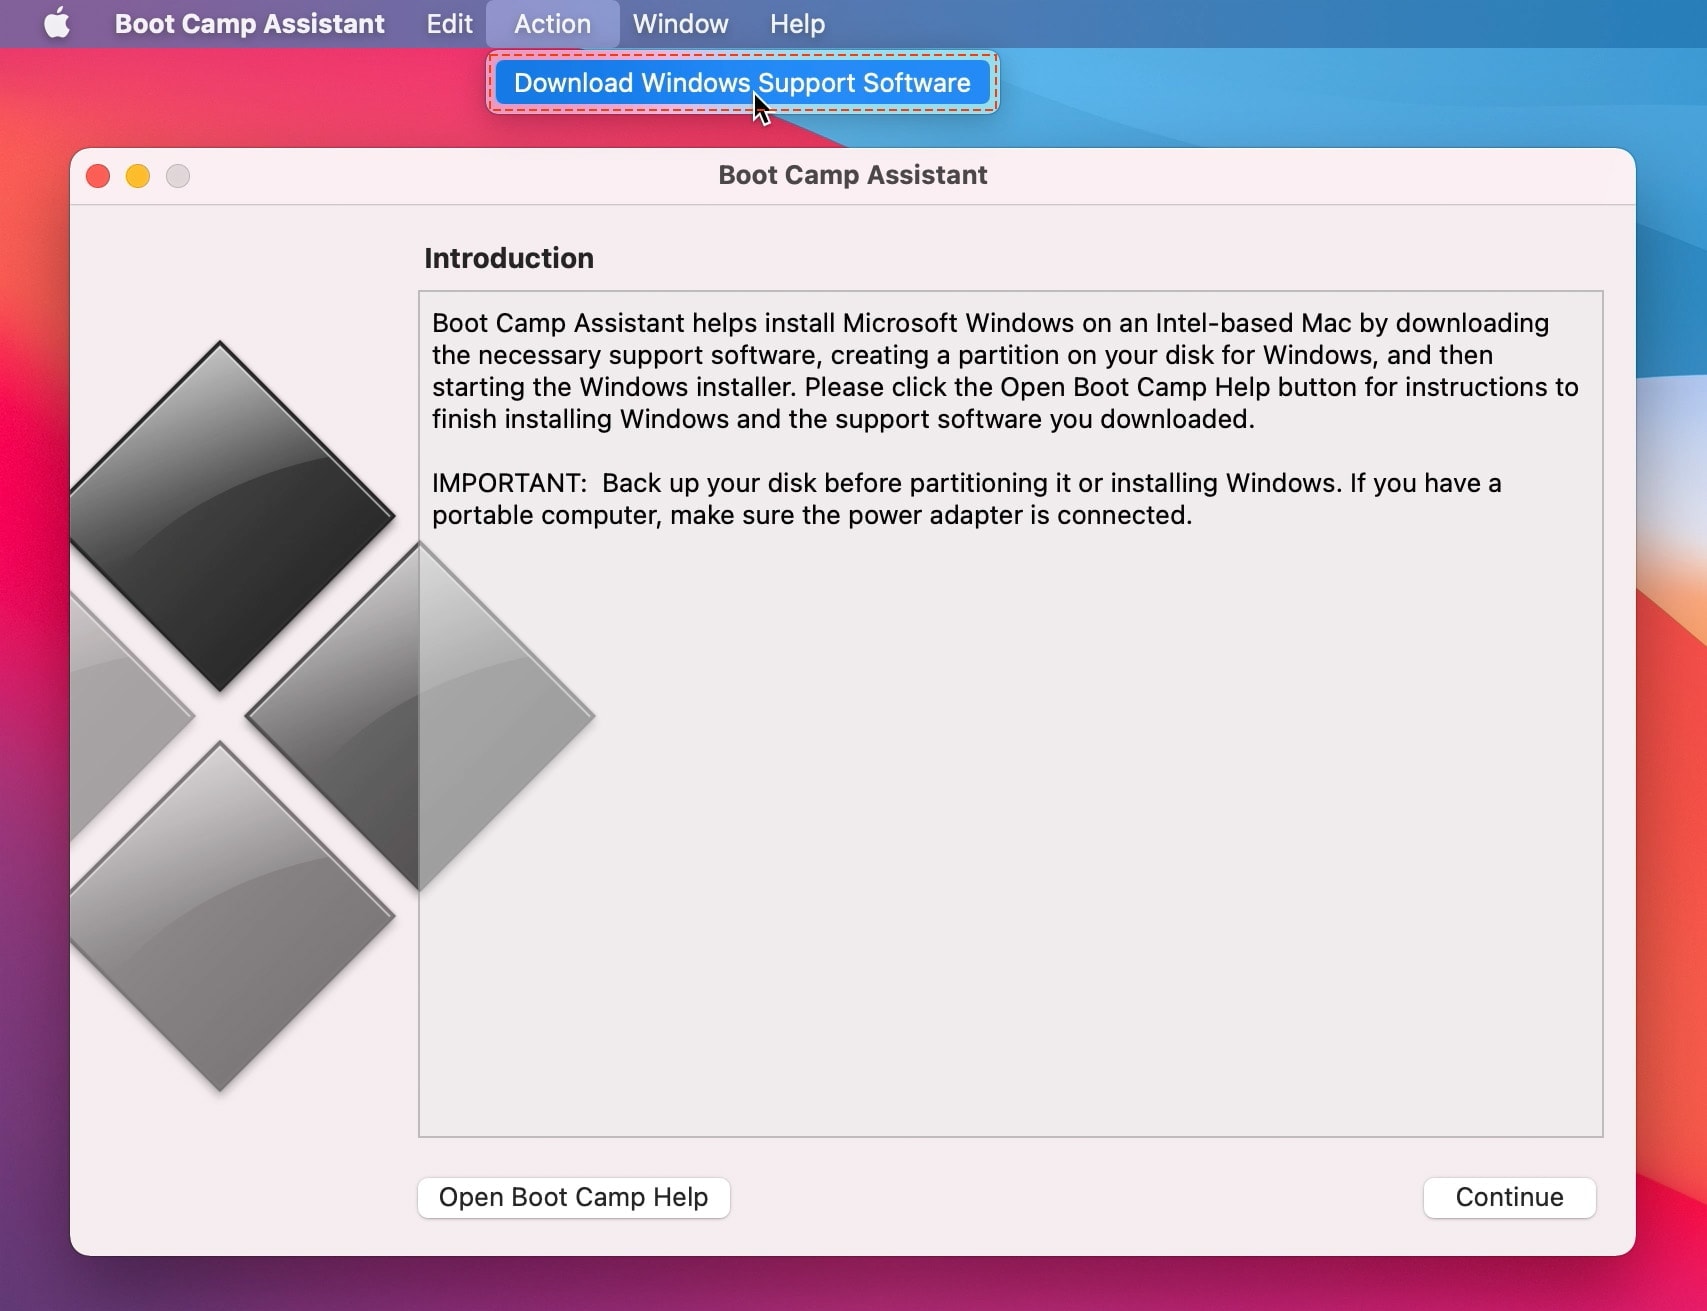
Step 1: Open Boot Camp Assistant from the Utilities folder
Step 2: From the top menu bar, select Action > Download Windows Support Software. Choose the Download folder as the save destination. You need to find the drivers in the Windows Support Software folder.
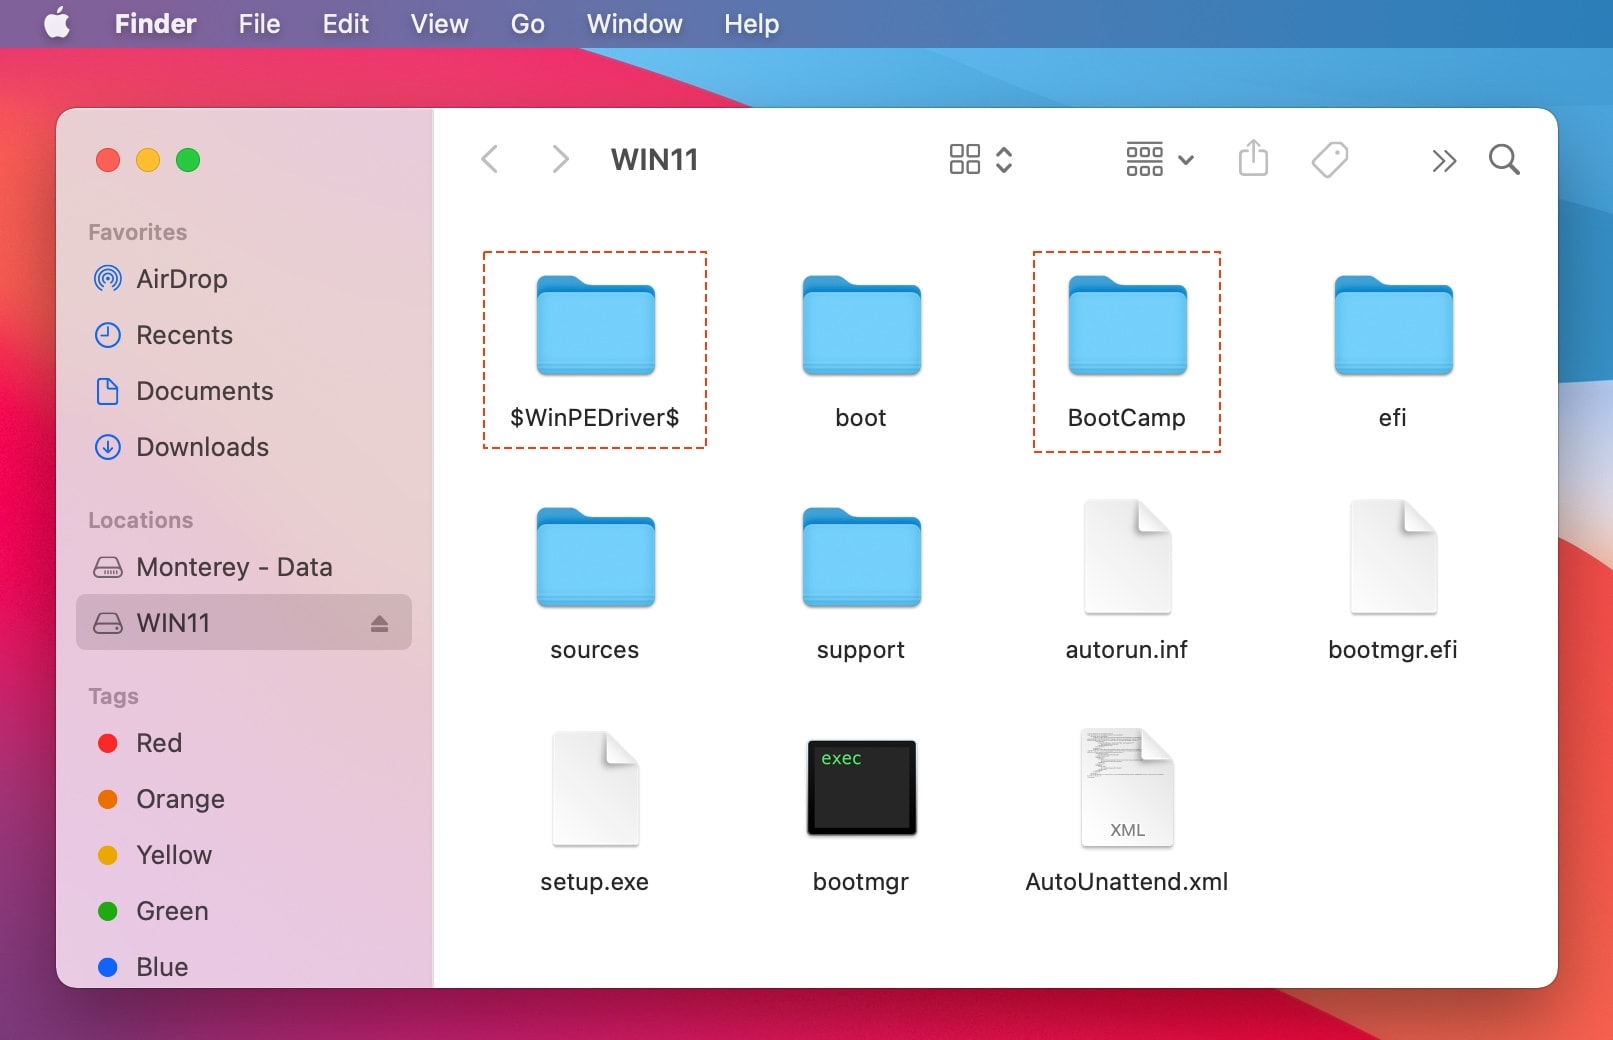
Step 3: Copy $WinPEDriver$ and Boocamp to your Windows USB Installer.
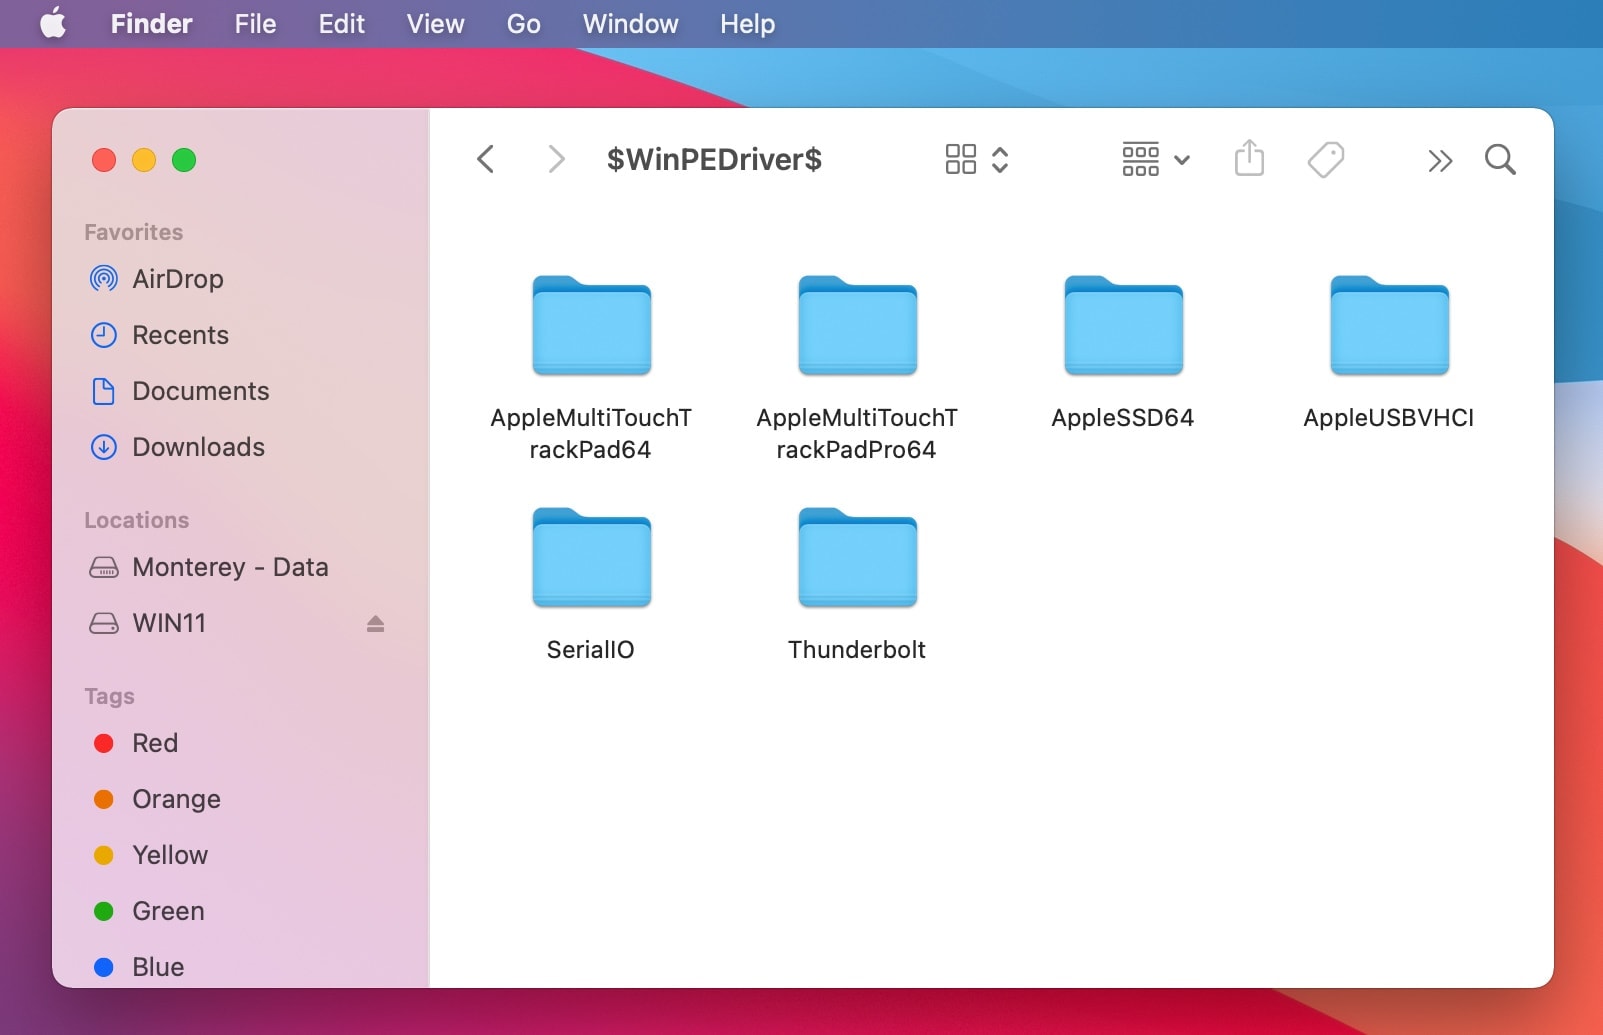
Step 4: Open $WinPEDriver$ folder and only keep this drivers “MultiTouch, SSD, USBVHCI, SerialIO, Thunderbolt” in WinPEDriver folder. Because Windows Installer has a problem with another drivers.
5. Add Mac Driver to Windows USB Installer
Since peripheral devices such as mouse and keyboard do not work with Windows on Mac, you need drivers to troubleshoot and resolve the issue.
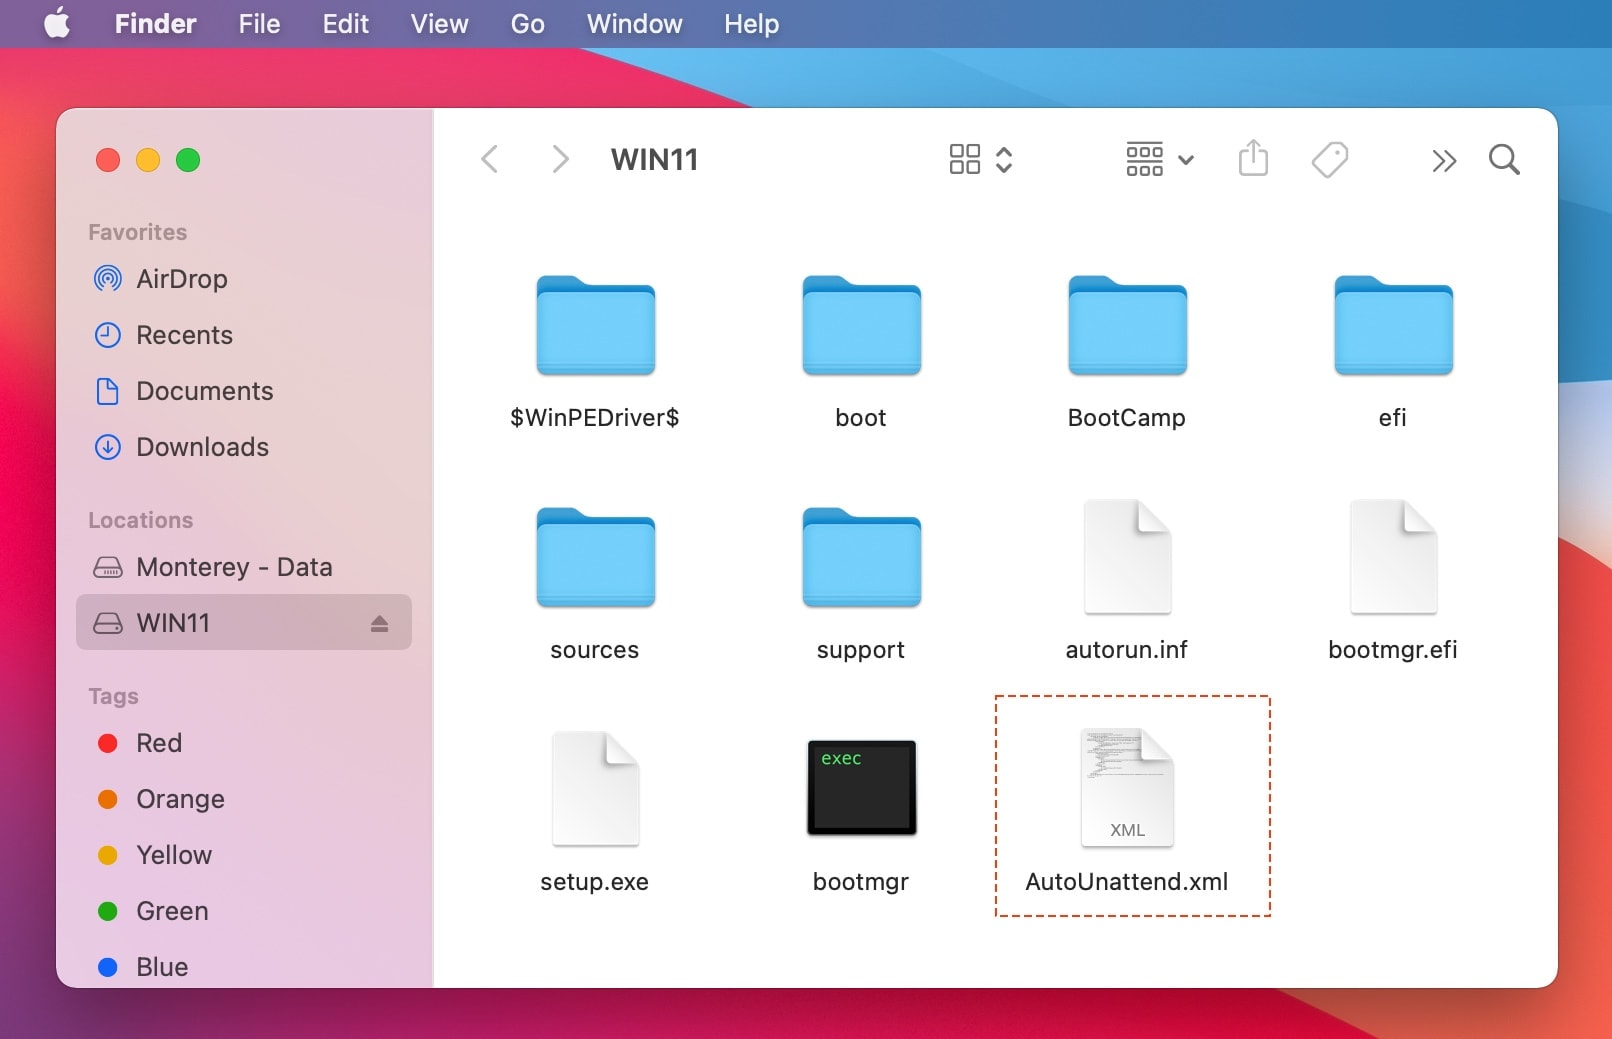
We need to download the required drivers ($WinPEDriver$) and add them to the Windows 11 bootable USB drive. To add drivers for mouse and keyboard, we will create a file called Autounattend.xml to enable the Windows installer to boot with the new drivers.
You can follow this tutorial to create a file for yourself.
How to Install Mac Drivers on Windows Bootable USB
It is easier to install all drivers needed to run Windows 11 on Mac. Hence, move the Autounattend.xml file to the root folder of the bootable USB. Now, when you install Windows from the bootable USB, the drivers will also be installed.
6. Install Windows 11 on Mac
Follow the steps below:
Step 1: Insert the Windows bootable USB into your Mac
Step 2: Restart your Mac and hold down the Option key.
Step 3: Select the EFI Boot from the Boot Assistant to start the Windows installation (Wait about 1~5 min to enter the Windows installation)
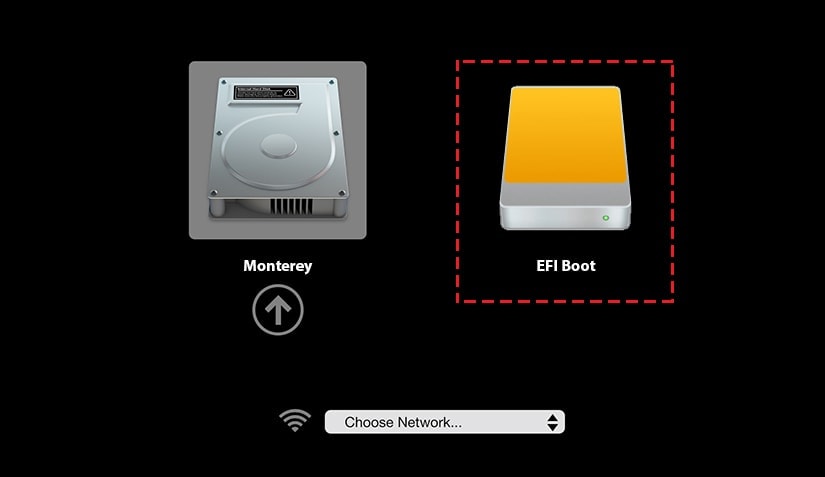
Step 4: Follow the on-screen instructions and proceed with the installation
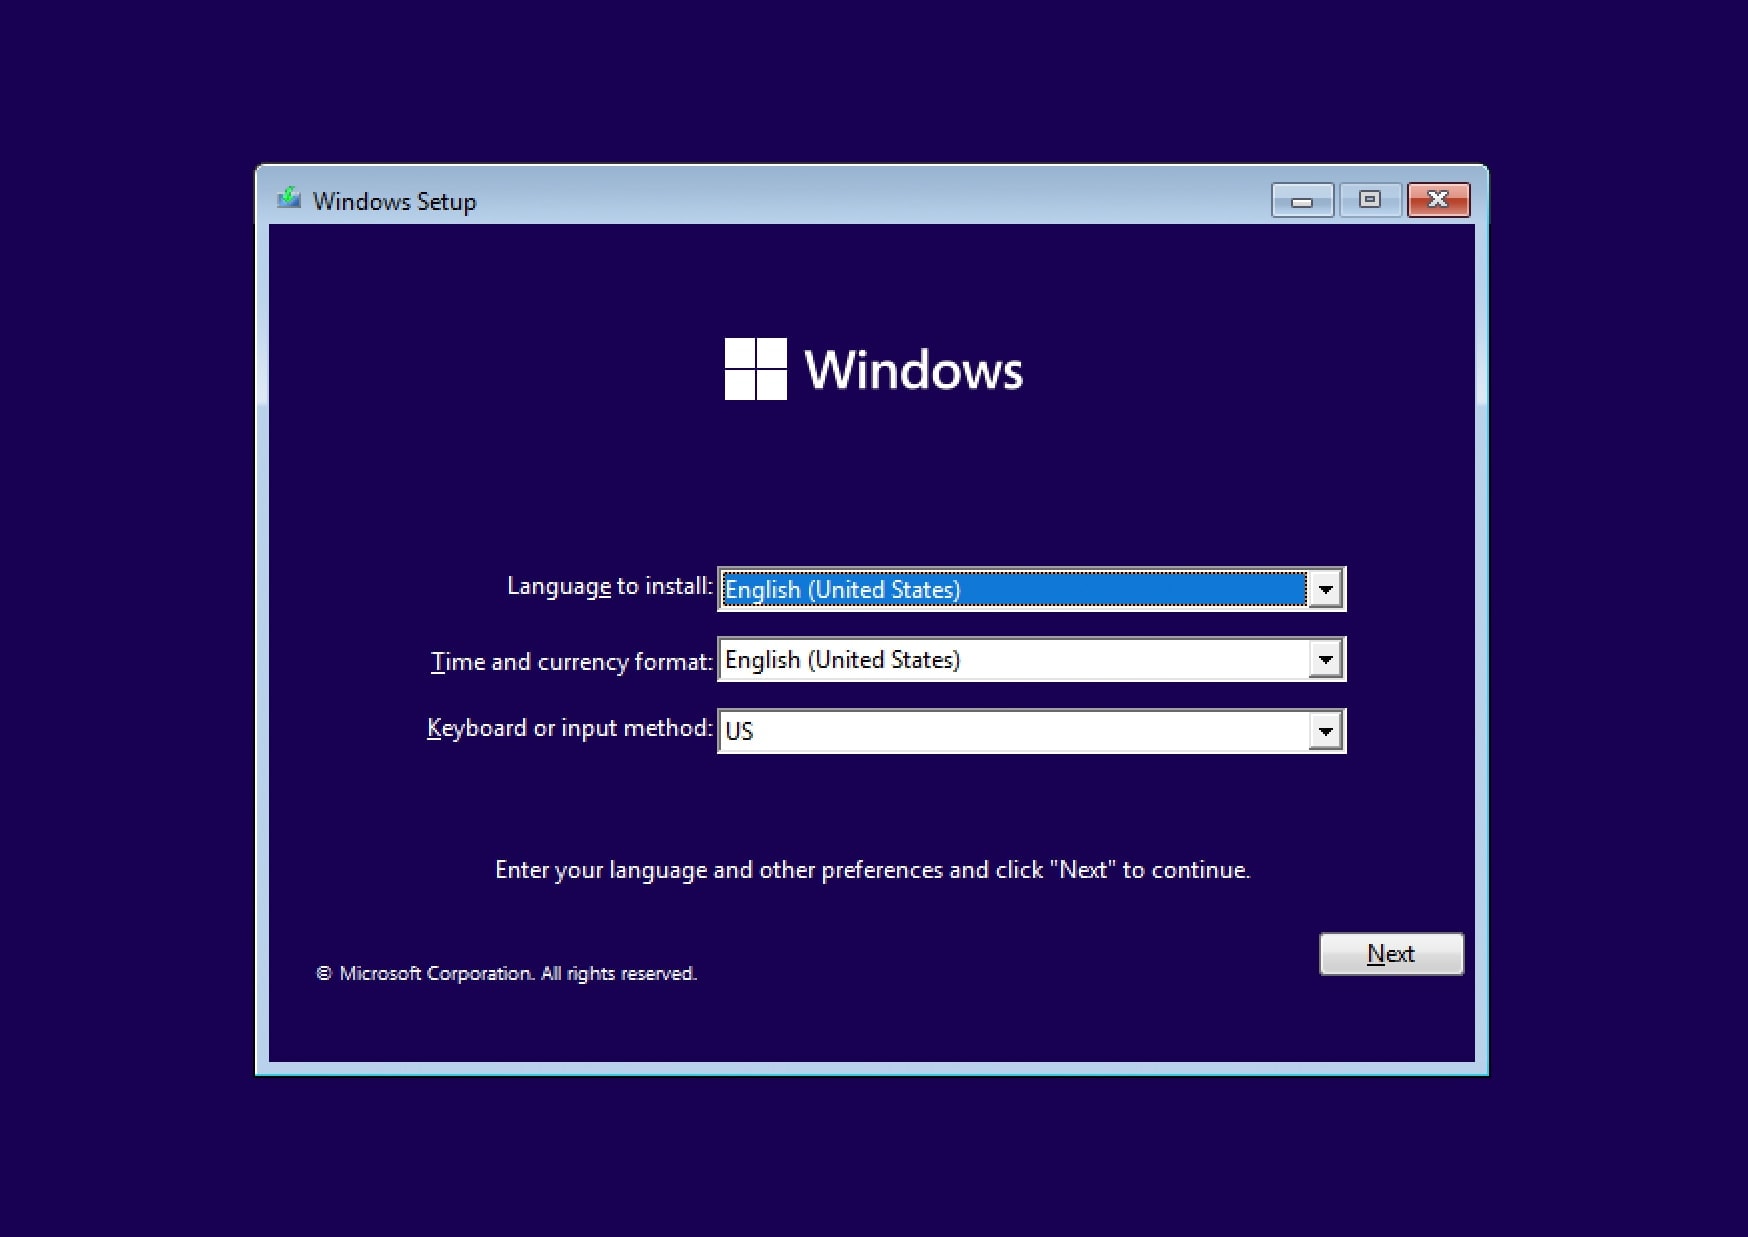
Step 5: Bypass TPM and Secure Boot
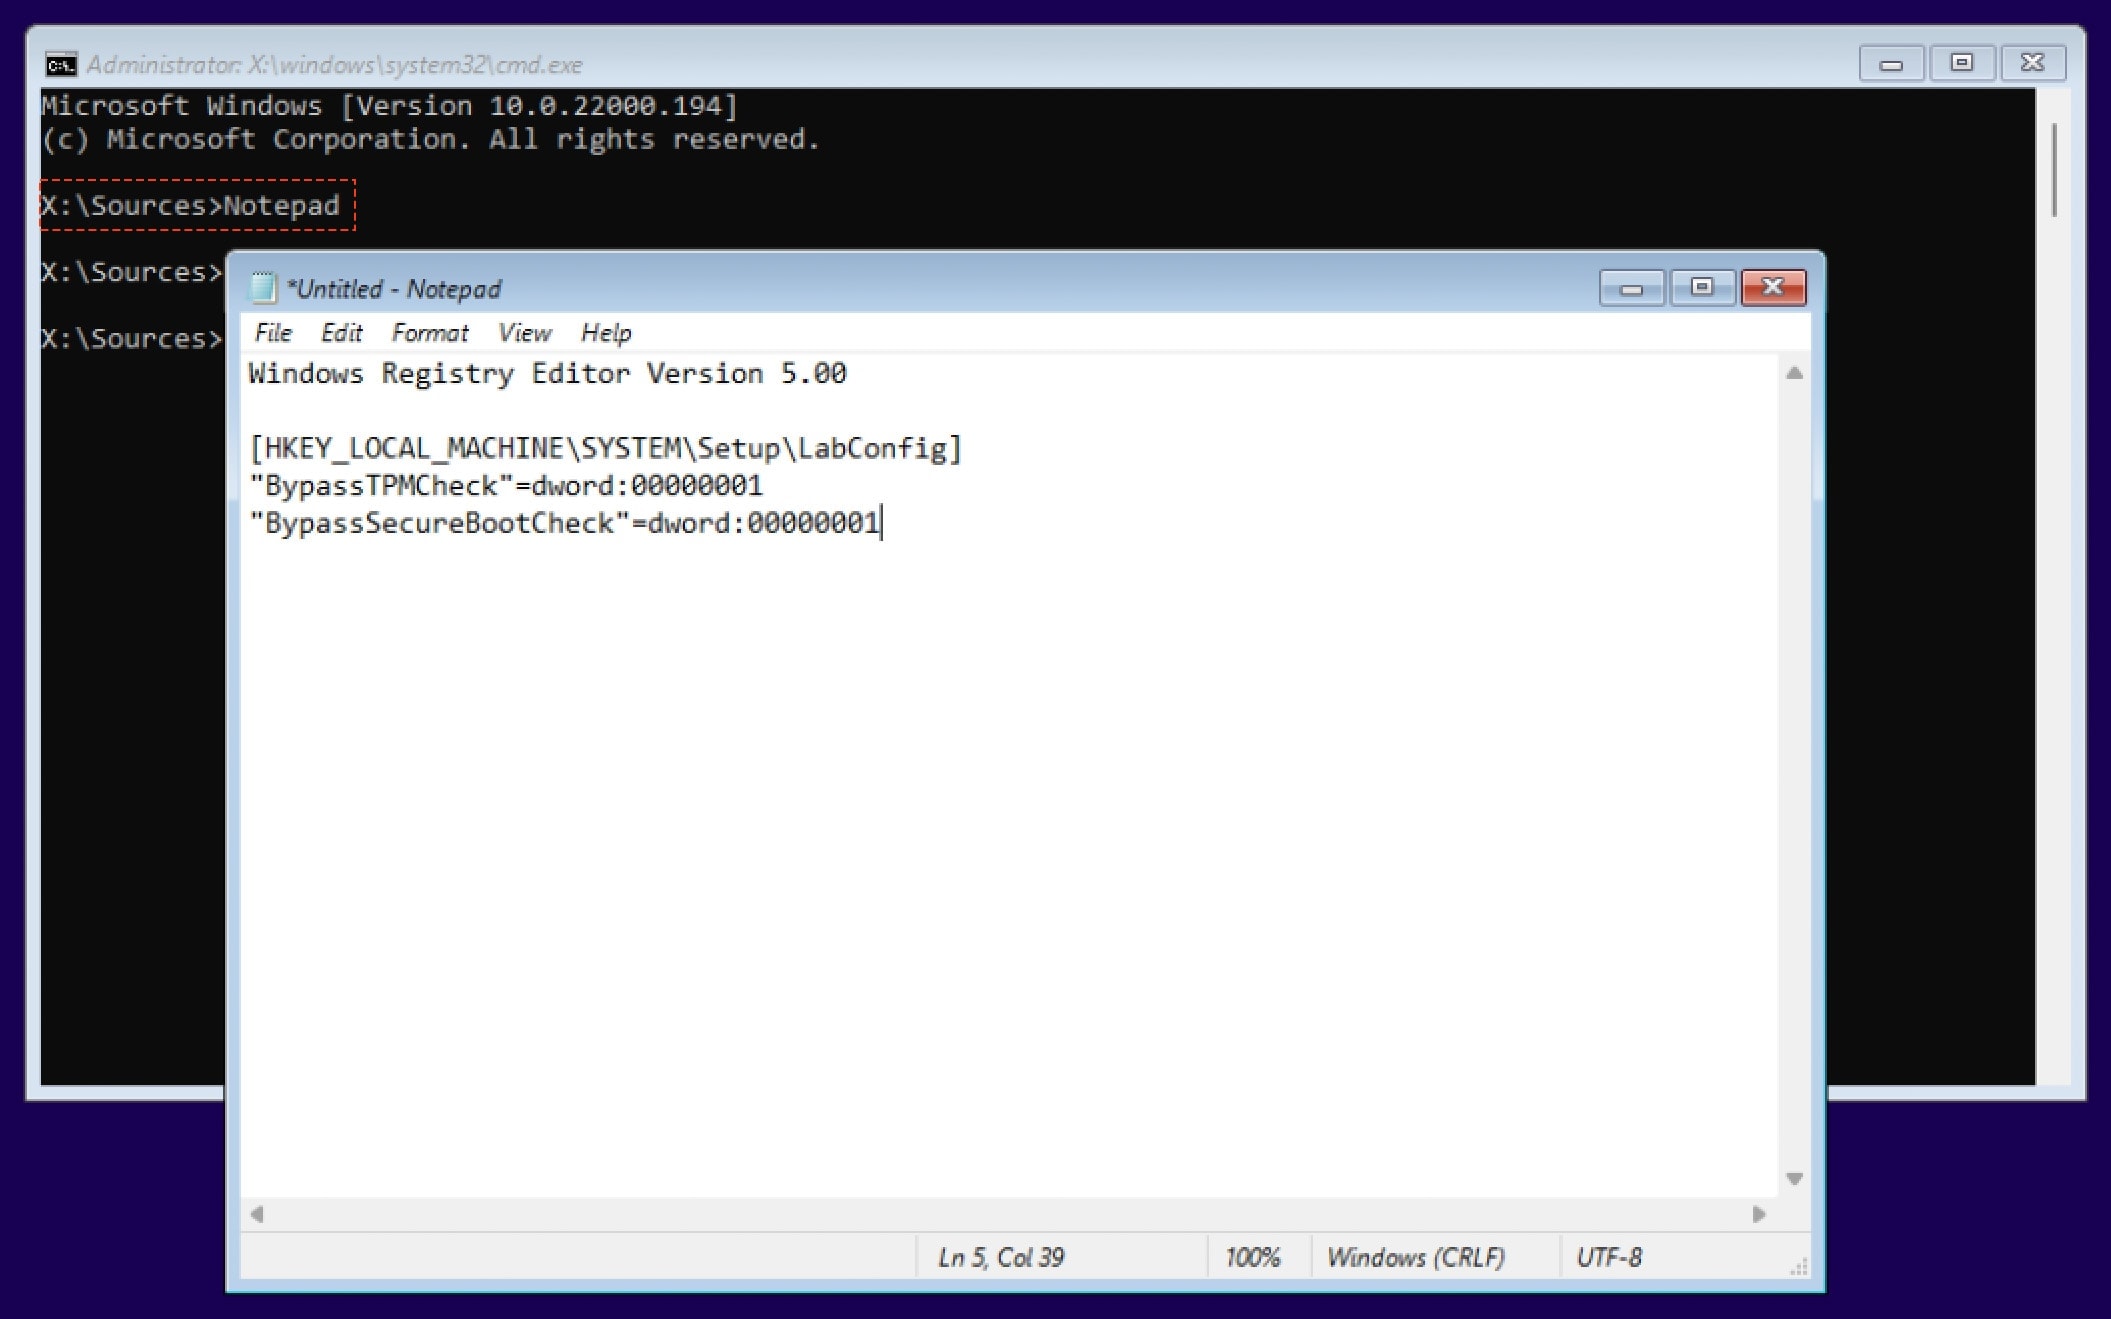
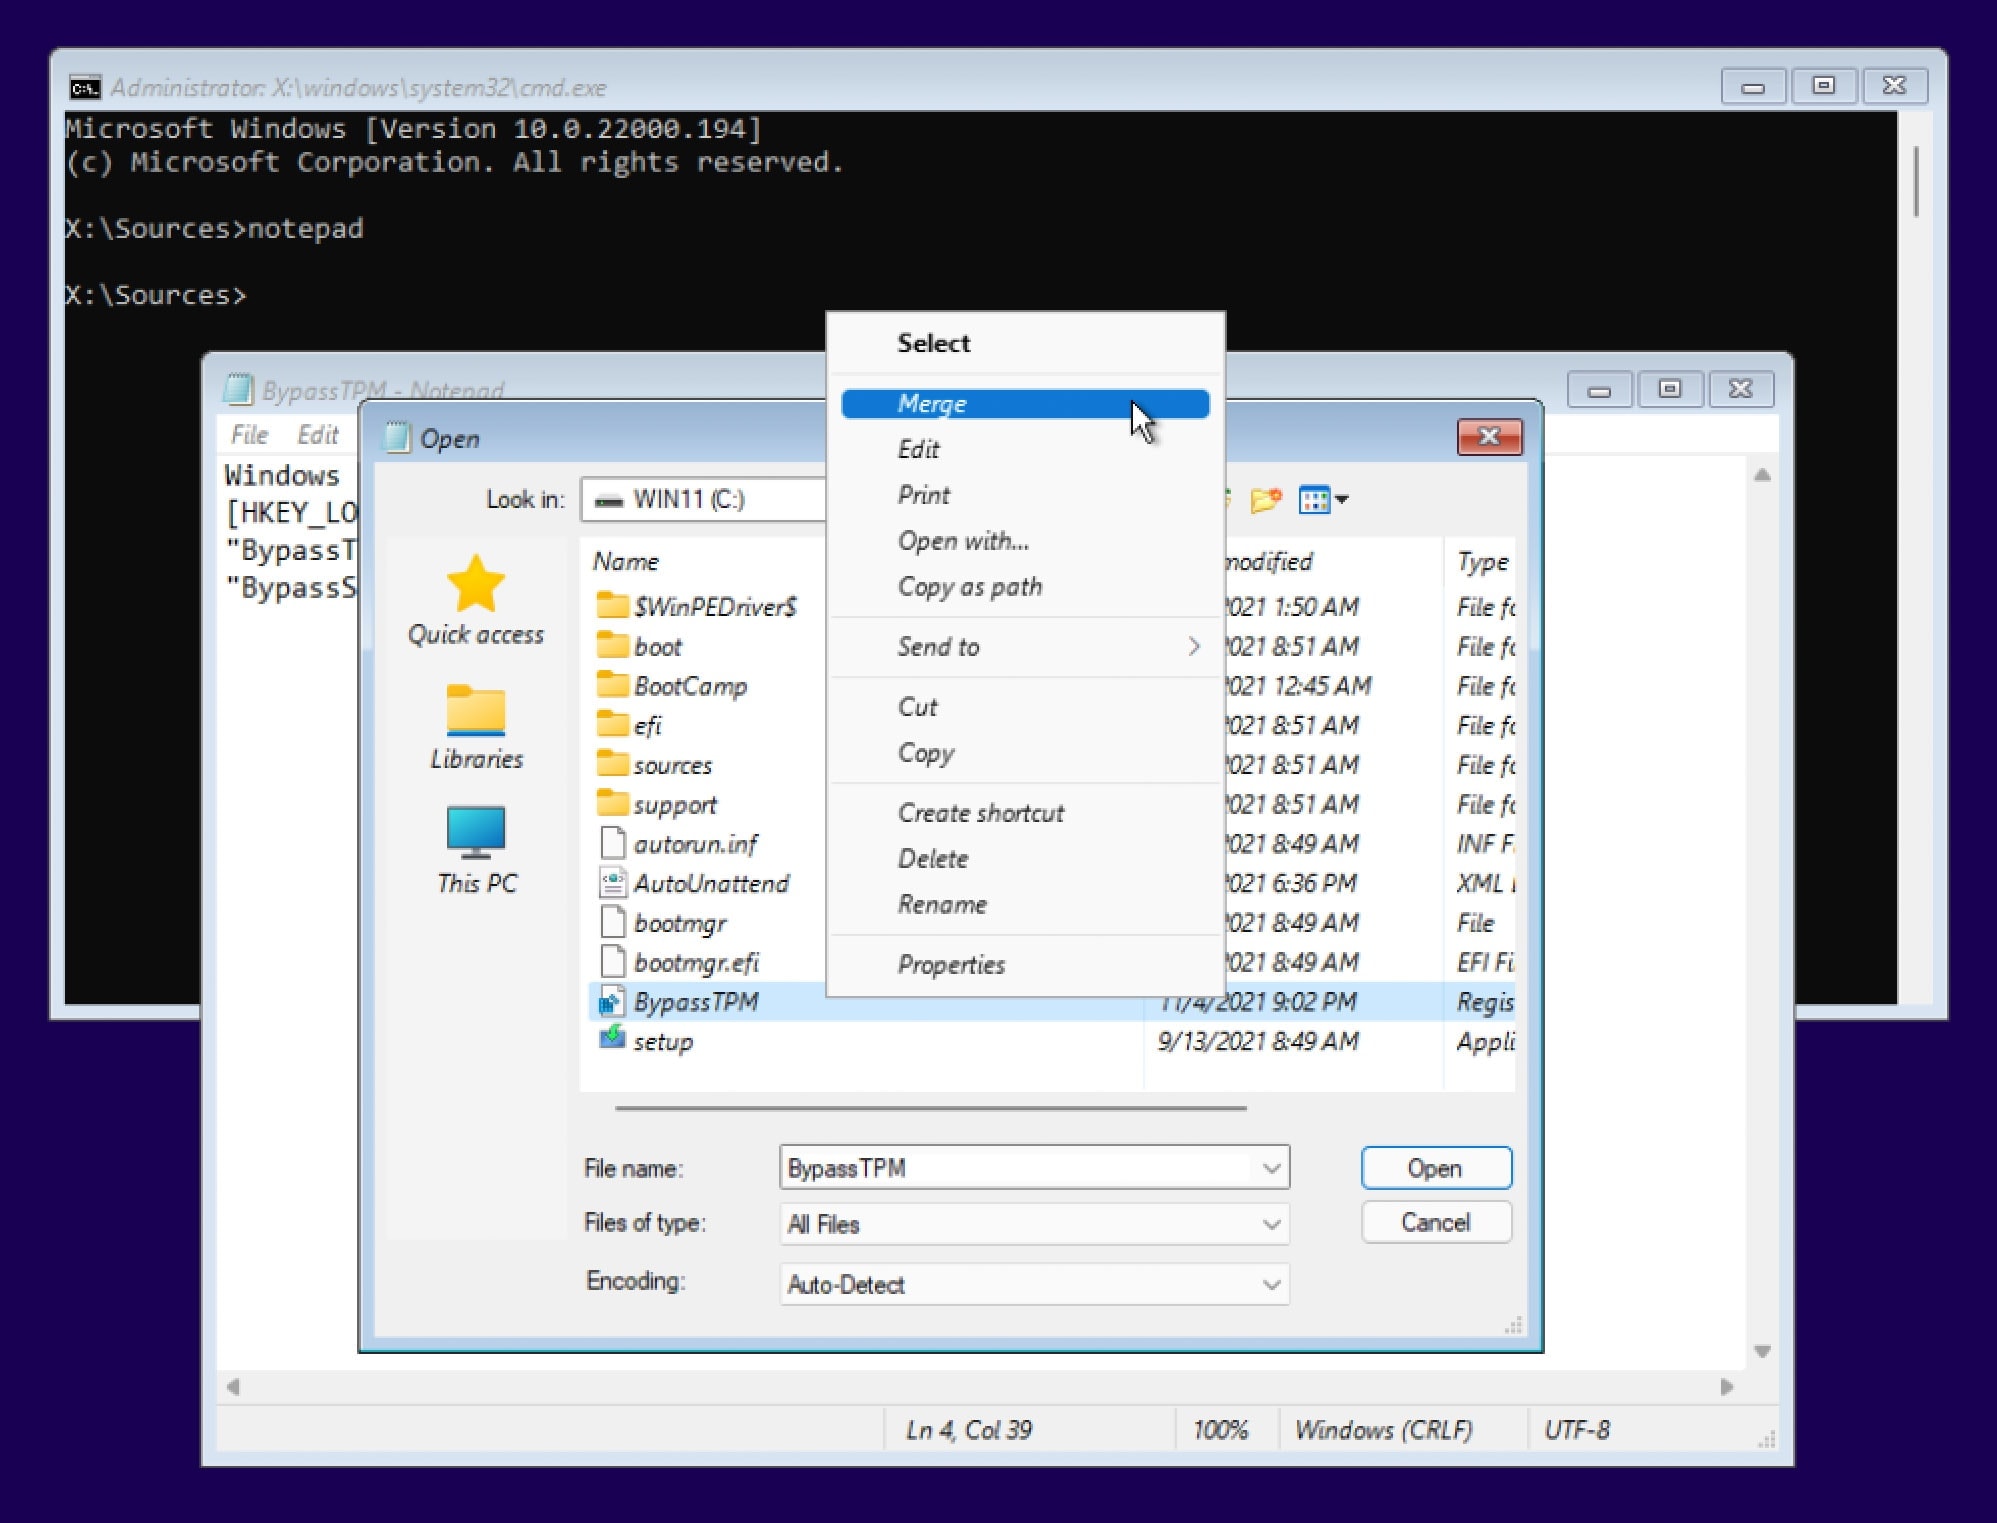
Press “Shift +F10” to open CMD, then type: Notepad to open Notepad editor. Create a Registry file follow this:
Windows Registry Editor Version 5.00
[HKEY_LOCAL_MACHINE\SYSTEM\Setup\LabConfig]
"BypassTPMCheck"=dword:00000001
"BypassSecureBootCheck"=dword:00000001
"BypassRAMCheck"=dword:00000001
Click on File and select “Save as” with “Save as type” is “All File” and File Name is “BypassTPM.reg”
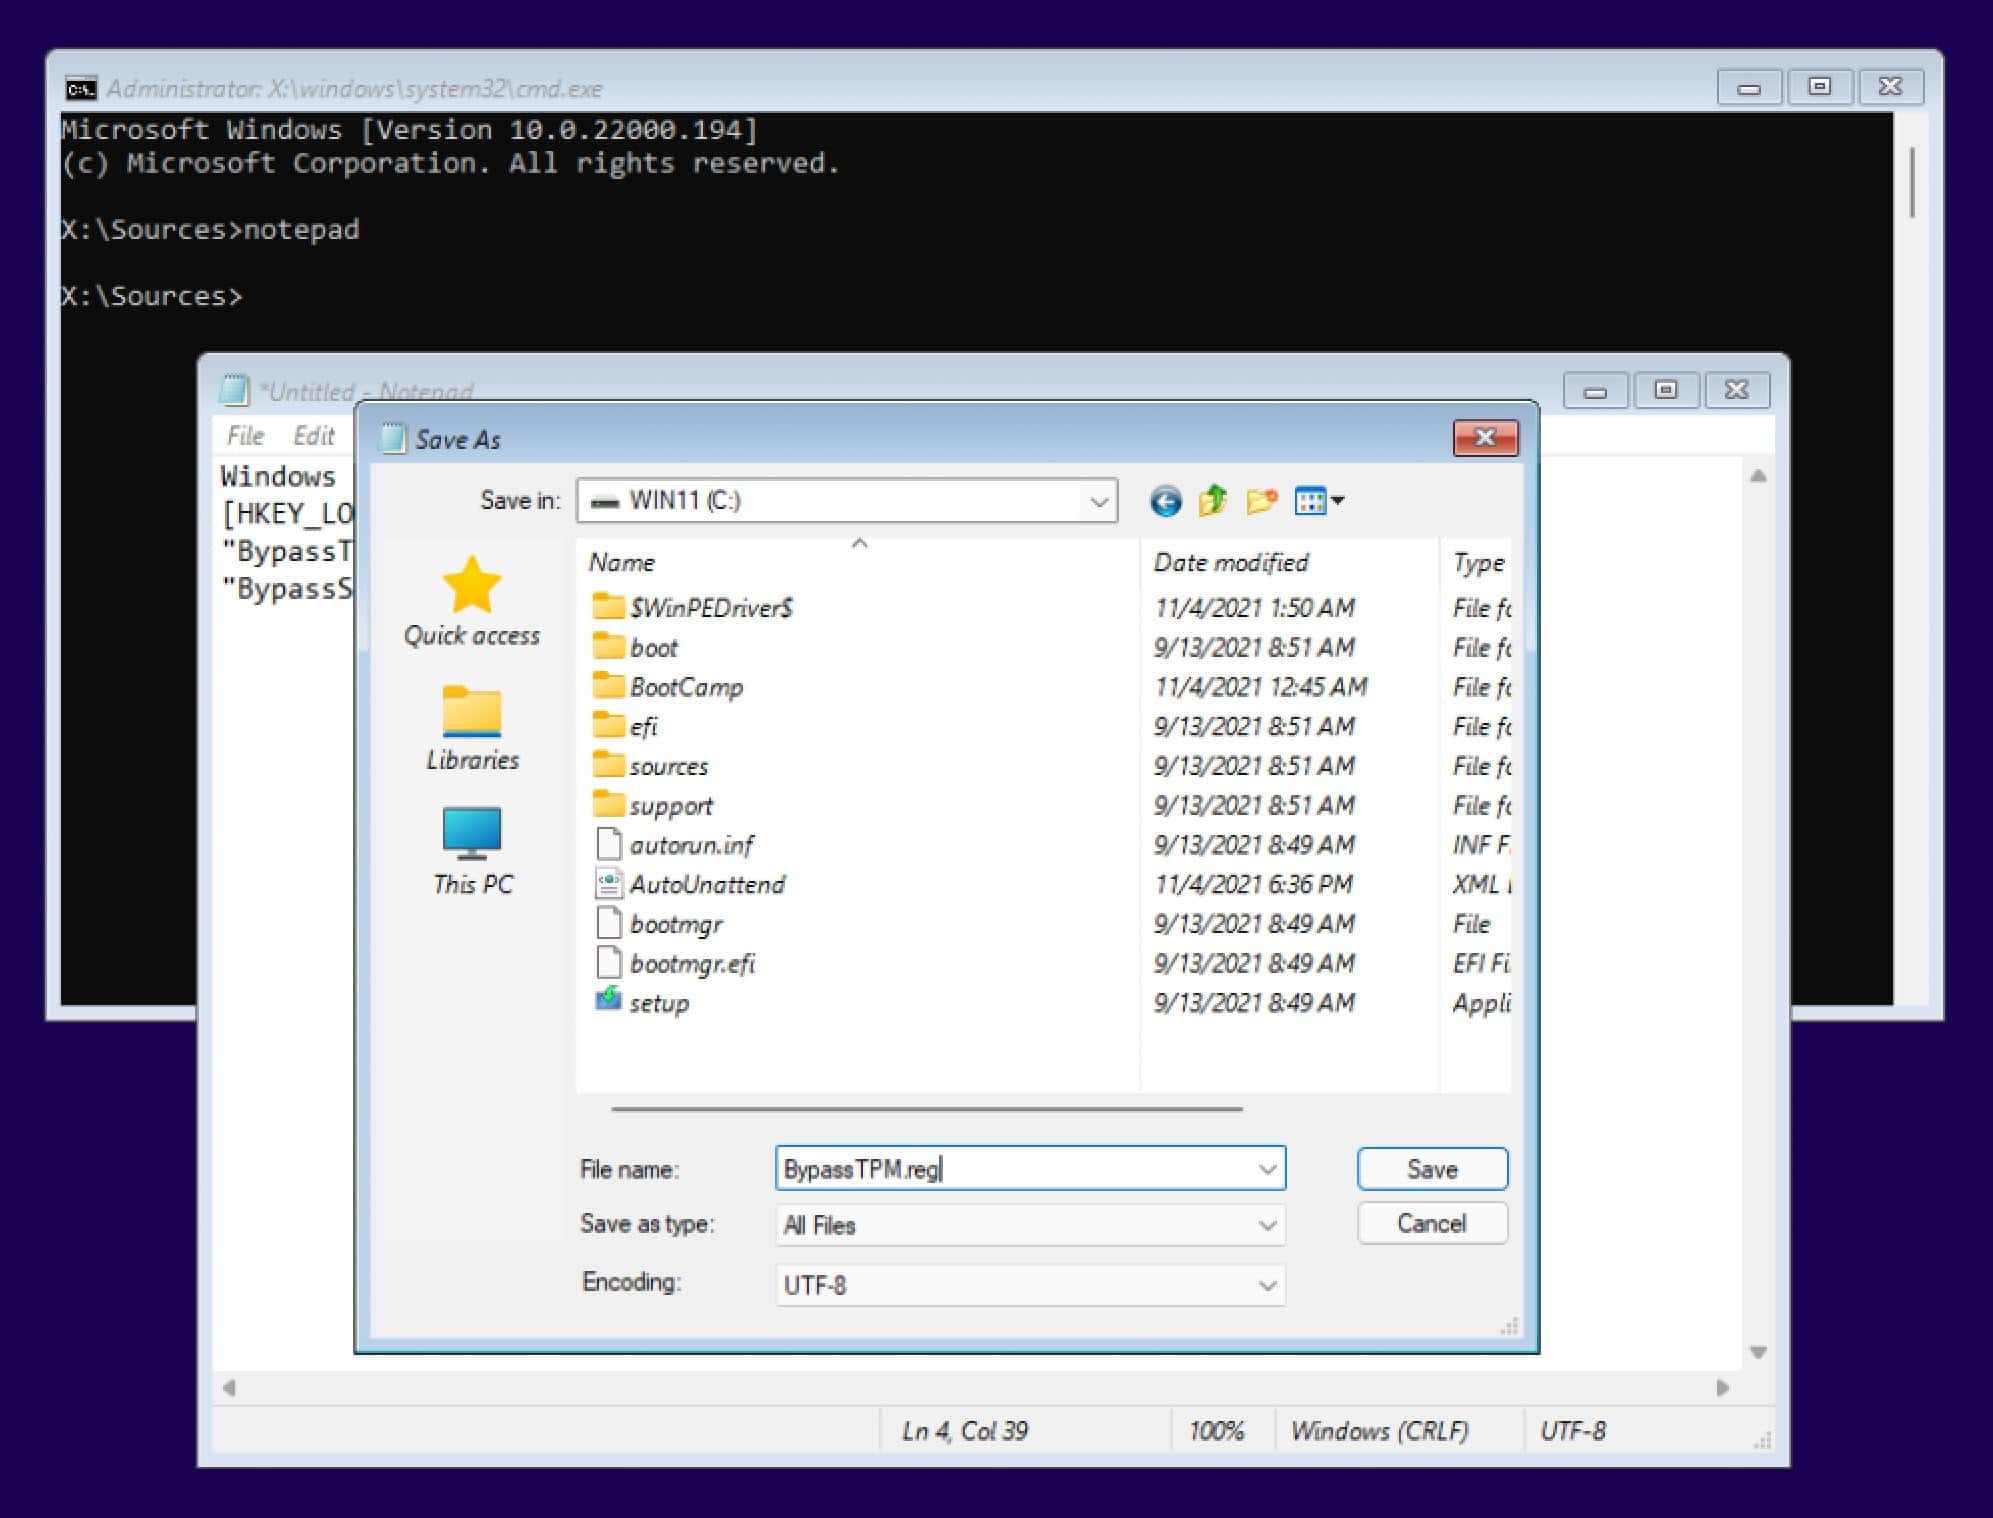
In Notepad, click on File and “Save as” again, right click on “BypassTPM.reg” and select “Merge”.
Step 5: Choose the partition you’ve created to install Windows when the setup prompts you
Step 6: You will see Windows installation ask you basic questions such as location, keyboard setup, network, username, password, diagnostic information, and others. Choose your preferences and continue.
You’ll now see a clean Windows 11 desktop on your Mac. However, don’t get excited just yet. We need to install the Mac drivers to have a seamless experience of working on Windows 11 on Mac.
To install the required drivers for Windows, navigate to the “Bootcamp” folder in the bootable Windows 11 USB drive. Launch setup.exe from the Boot Camp folder and proceed with the installation. When the installation is complete, restart your device.
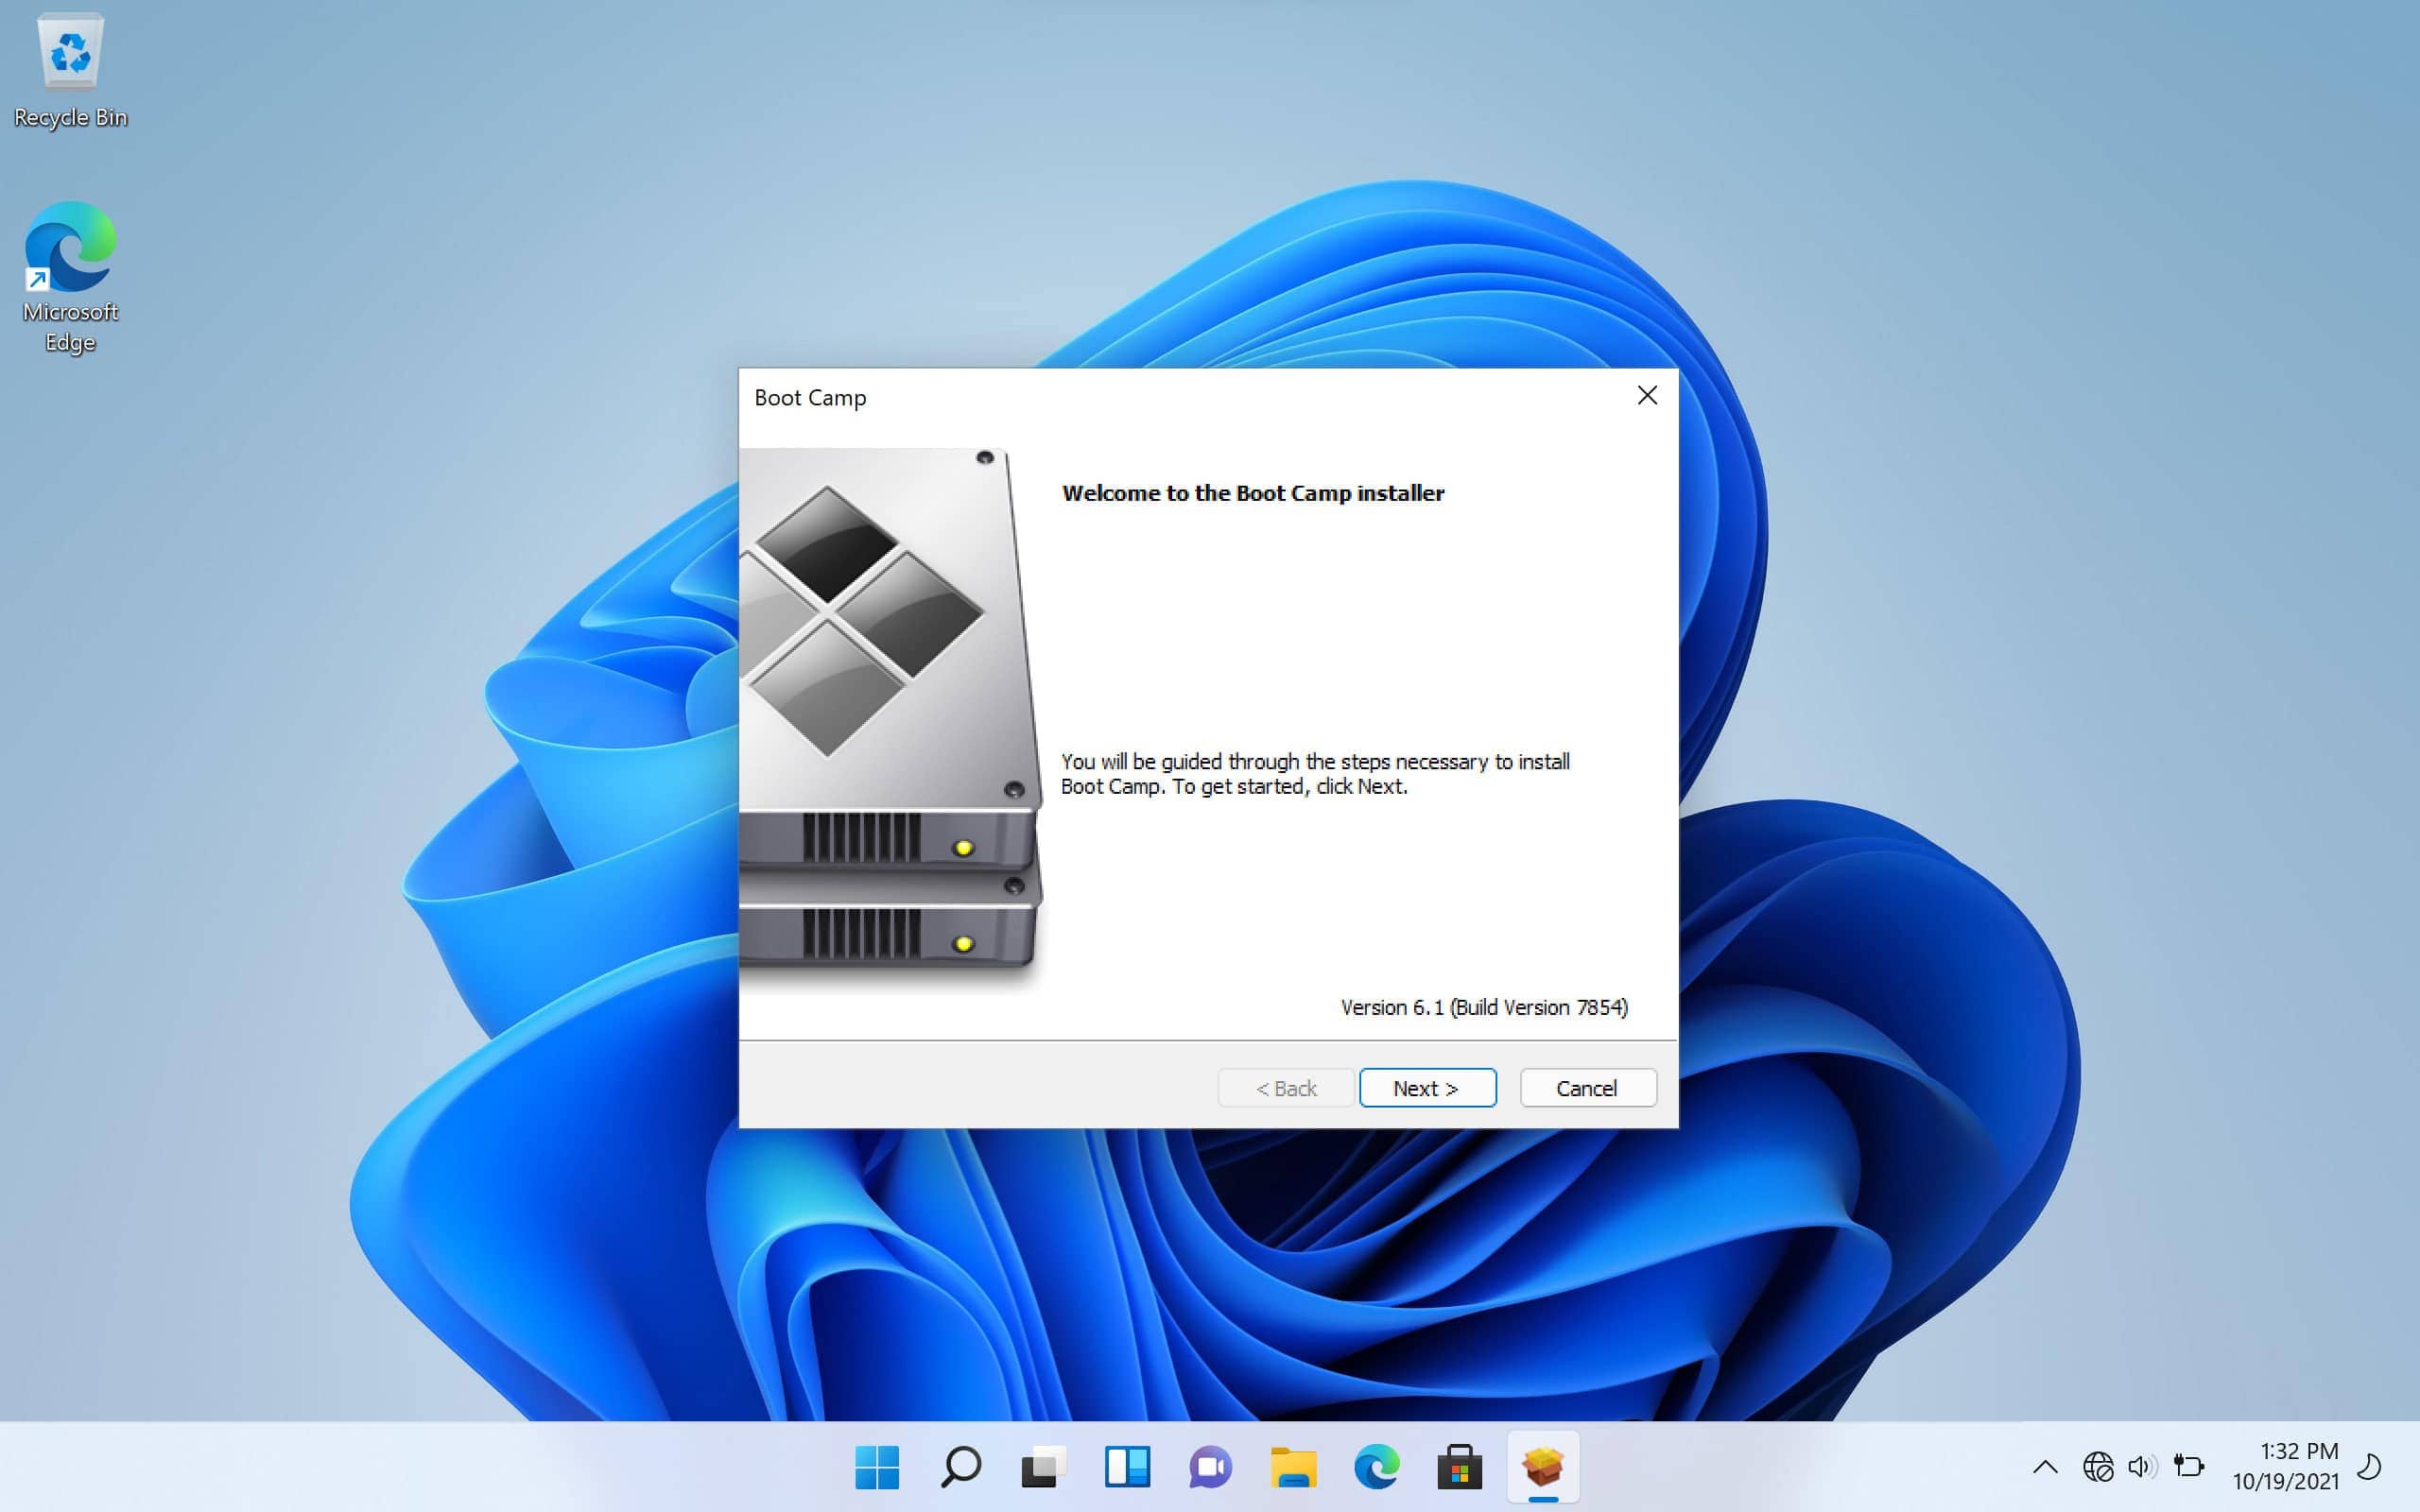
You’ll now have Windows 11 installed on your Mac that works without any problems. Your Mac drivers will ensure there aren’t any input or network issues when using Windows on Mac.
When you want back to macOS, restart your Mac and hold Option key and choose your macOS. macOS and Windows OS, you can install Windows on your Mac and set up dual boot so that you can conveniently switch between both operating systems, depending on your needs.



Leave a Comment