Installing macOS on a PC or laptop is an exhilarating journey for tech aficionados. As the latest version, macOS Ventura, presents increasingly challenging installation processes, it adds to the allure for enthusiasts. With the upcoming macOS versions only supporting ARM chips, macOS Ventura will be the final version supporting Intel users and Hackintosh lovers, making it all the more special.
There are various ways to install macOS Ventura on a PC or laptop, each with its unique benefits. For instance, Virtual Machine is user-friendly and customizable but falls short on graphics and CPU performance, leading to sluggish speeds. Conversely, installing macOS directly with Bootloaders or DSDT/SSDT can remedy Virtual Machine's shortcomings, but it's a complicated process that could discourage individuals with unsupported hardware.
When it comes to installing macOS on a PC, there are many bootloaders to choose from. Yet, OpenCore has emerged as a rising star thanks to its unparalleled benefits and impressive success rate. Unlike other bootloaders, OpenCore is a complete toolkit comprising various components that facilitate macOS functioning on a PC while supporting hardware through pre-customized Kext, APCI, SSDT, and DSDT. The customization options make it a breeze for users to select the perfect hardware and install macOS with ease. Whether you're a tech novice or a pro, OpenCore is a must-try.
OpenCore's installation guide can be quite complex, leaving beginners feeling overwhelmed and demotivated. That's why we've created this guide - to simplify the process of installing macOS on your PC or laptop. With our help, you'll be able to tackle any errors that may arise during your Hackintosh installation and have a smooth, successful experience.
How to install macOS Ventura on PC and Laptop
1. Download macOS Ventura
When it comes to downloading macOS Ventura, the options are endless. However, for the purpose of this guide, we recommend using a Virtual Machine. Why? Because it will allow us to make necessary edits to the bootloader after creating it. And trust us, there may be several rounds of editing needed before all the errors are fixed. But don't worry, we've got you covered with step-by-step instructions to make this process a breeze.
Our guide recommends using older macOS versions as they're faster and easier to install on Virtual Machines, with a download size of approximately 6GB. Specifically, you can follow our instructions to set up macOS on Virtual Machine. Once you've done that, you can then download any macOS installer you wish to use.
There are two ways to download macOS Ventura - either through the App Store or directly downloading the InstallAssistant.pkg file. Once downloaded, the installer will be waiting for you in the Applications folder. Now, let's move onto the next step and create a macOS installation drive to start enjoying all the features of Ventura!

2. Create macOS Ventura USB Installer
To create a macOS Ventura installation drive, we need a USB drive with at least 16GB of storage. You can easily find Disk Utility in your Spotlight search or go to the Applications>Utilities folder. Once you're there, you can change the format of your USB drive and move on to the next step.
After opening Disk Utility, select your USB Drive and click on "Unmount." Then, click on "Erase" and choose "Mac OS Extended" as the format and "GUID Partition Map" as the scheme. Finally, click "Erase" to change the format of your USB Drive.
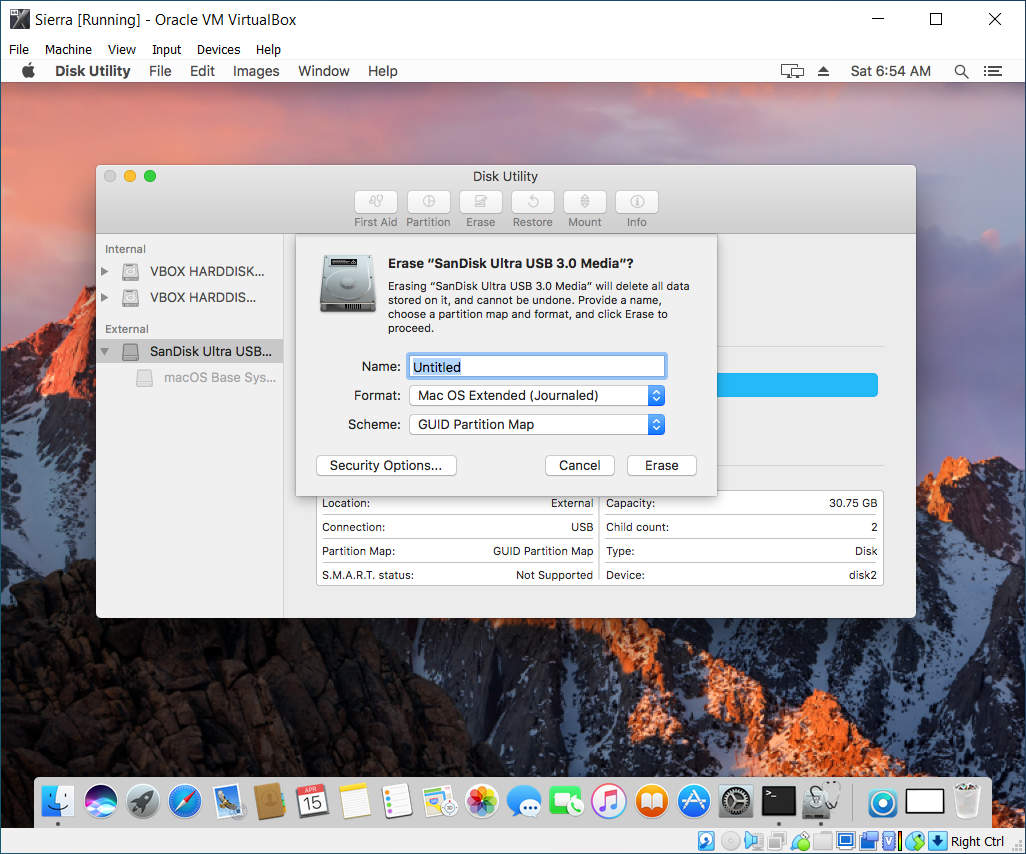
Next, open Terminal from the Spotlight search or the Applications > Utilities folder and create a macOS Ventura USB installer using the following commands:
sudo /Applications/Install\ macOS\ Ventura.app/Contents/Resources/createinstallmedia --volume /Volumes/[Your USB NAME]
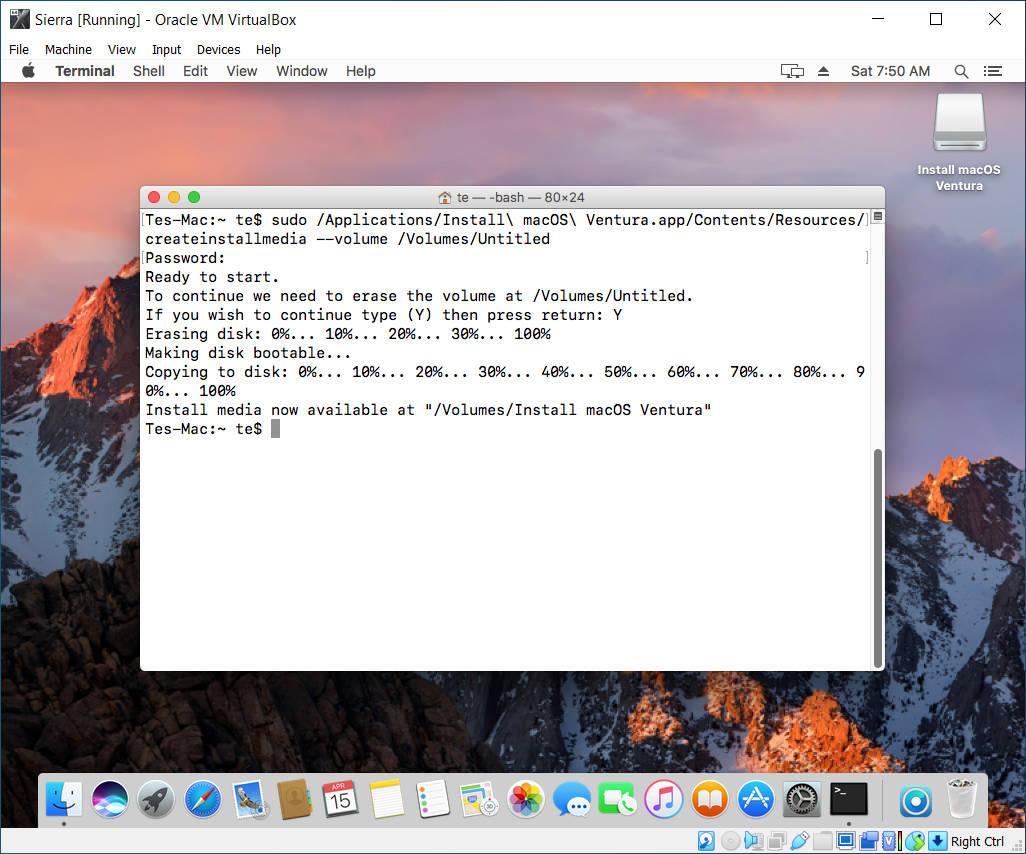
3. Mount EFI Partition and Install OpenCore Base EFI
Next, use the following commands in macOS Terminal to mount the EFI partition, which is where files related to OpenCore are stored. You can use the commands below to mount the EFI partition.
diskutil list
sudo diskutil mount disk2s1
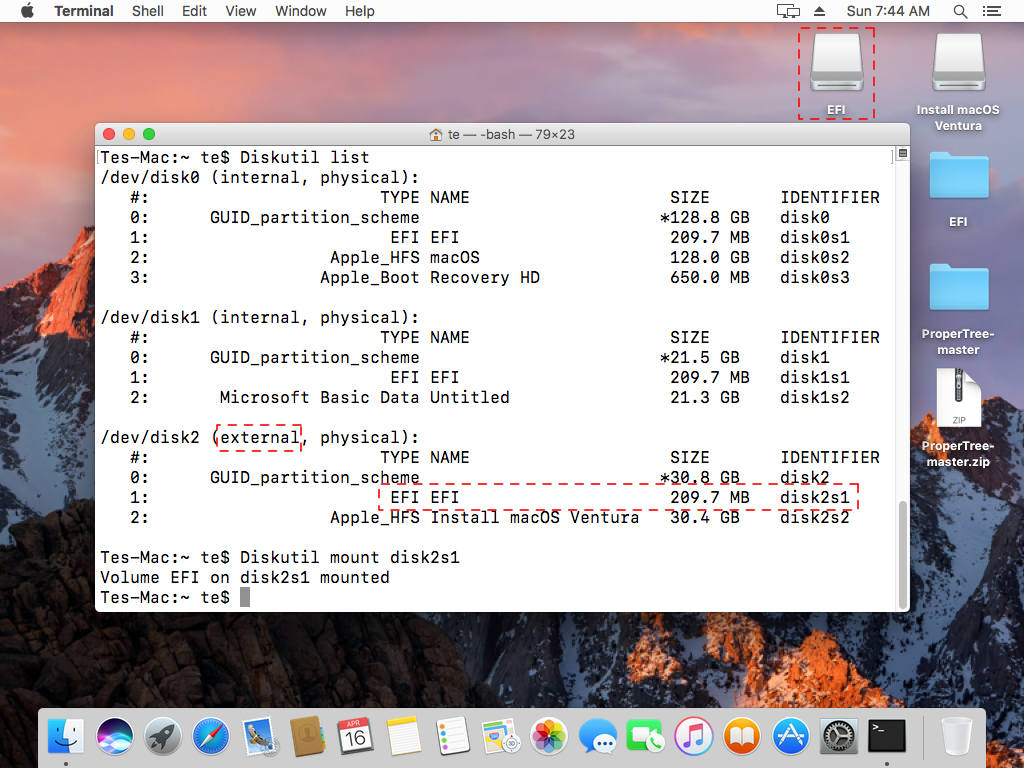
Next, you can use the OpenCore Custom EFI to create a bootloader specifically for your PC or laptop. Prebuilt EFI will save you a lot of time because we have made all the necessary customizations based on the new OpenCore and will help you avoid mistakes and save time.
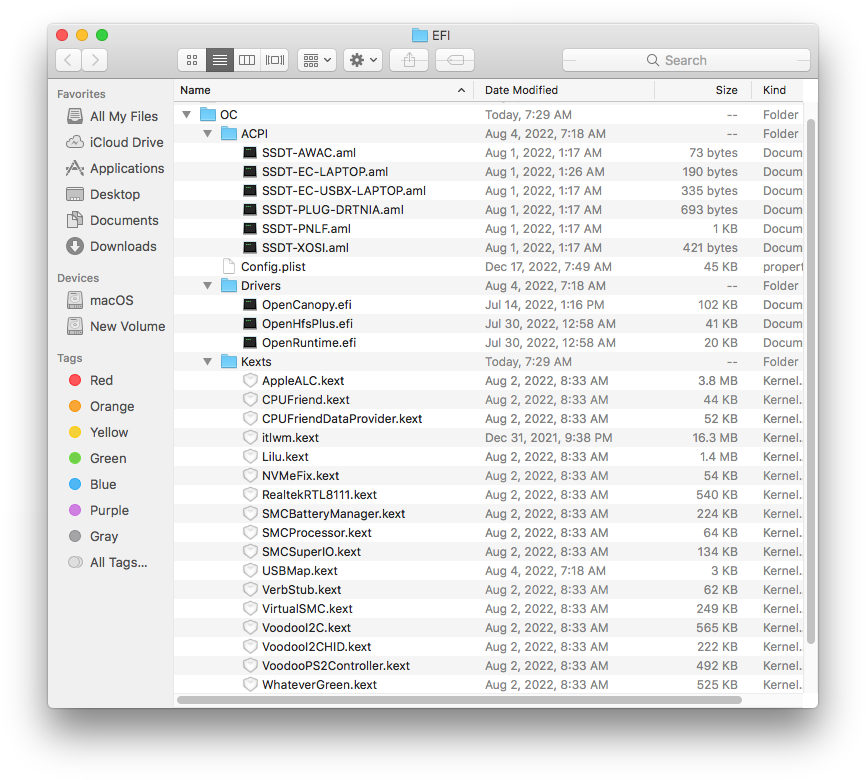
After obtaining the EFI folder with the Config.plist file, copy all the files to the EFI partition, and we can move on to the next step.
4. Edit Config.plist File
Next, we need to edit the Config.plist file which contains settings for OpenCore. This file needs to be adjusted and set up to troubleshoot errors that may arise during the process of installing macOS on Hackintosh. To edit Plist files such as Config.plist, we need to use the ProperTree app, which can be downloaded from the ProperTree App website.
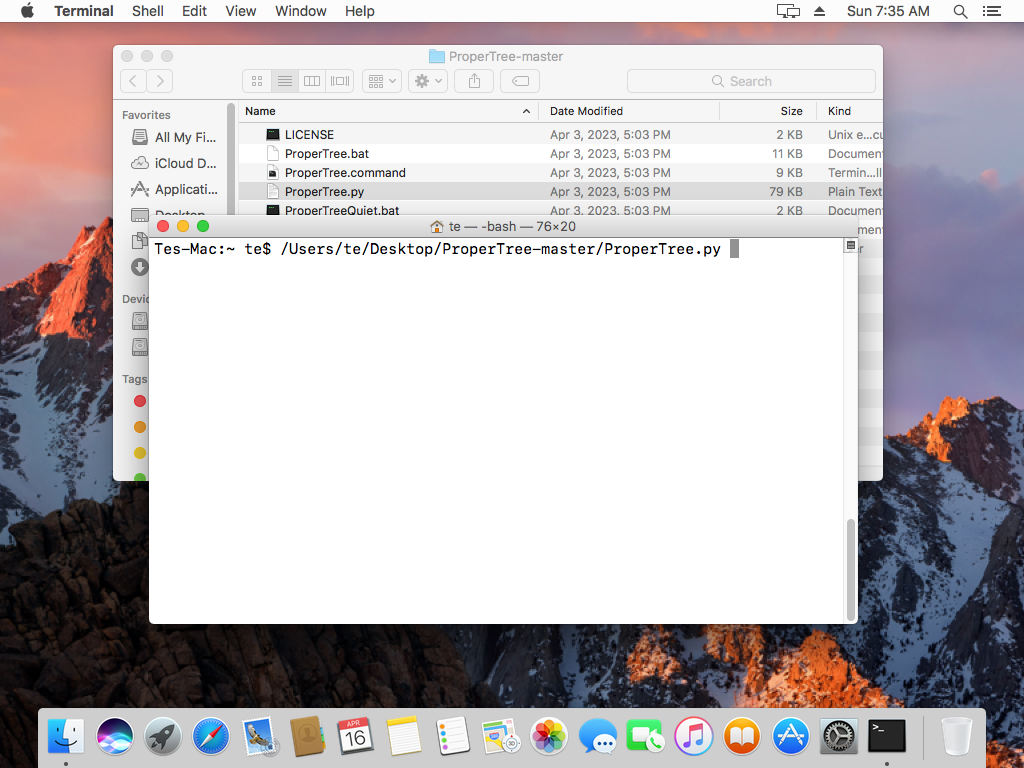
To run the ProperTree app, we need the help of the Terminal. After opening the Terminal, drag ProperTree.py onto it to launch the program.
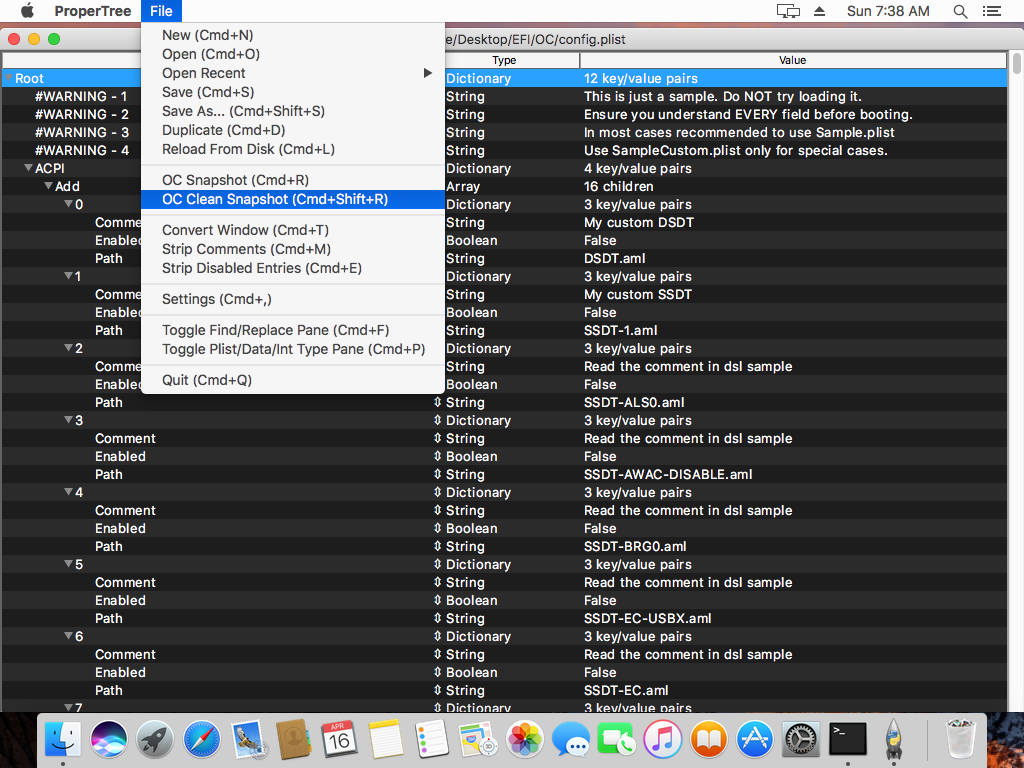
Next, go to File and Open or press (CMD+O) to open the Config.plist file in the EFI partition. Then, select File and choose "OC Clean Snapshot" to connect to the Config.plist file. Finally, save the file and proceed to run tests.
5. Testing and Troubleshooting Config.plist File
Firstly, connect the USB drive to your computer and restart your PC or laptop. Then, press the Boot key continuously to enter the boot menu. The boot key may differ for different machines, such as "F12, F9, or F10." Select the USB drive to start the testing process.
If OpenCore reports any errors, remain calm as we will fix numerous errors until we can successfully install macOS Ventura. Record any errors reported by OpenCore and search for solutions on the internet or leave a comment below, and we will assist you promptly.
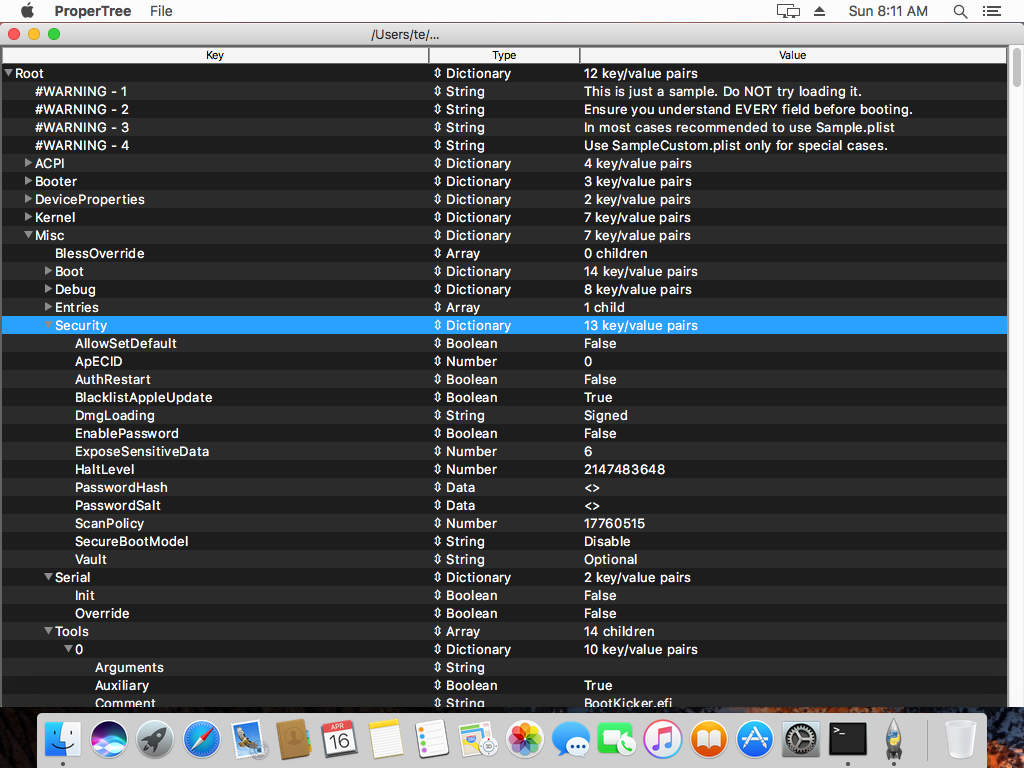
Next, you need to access the macOS virtual machine and modify the Config.plist file in the EFI partition on the USB drive. Open Propertree and adjust the settings until OpenCore reports no errors.
6. Install macOS Ventura
After fixing all the critical errors and being able to access the Ventura Install Assistant then go to Disk Utility to create a new partition for macOS, you can proceed with the installation of macOS Ventura. It's important to note that during the installation process, your computer will need to restart, so you will need to use the Boot key to return to the USB Installer. Also, an internet connection is not required for the installation process.
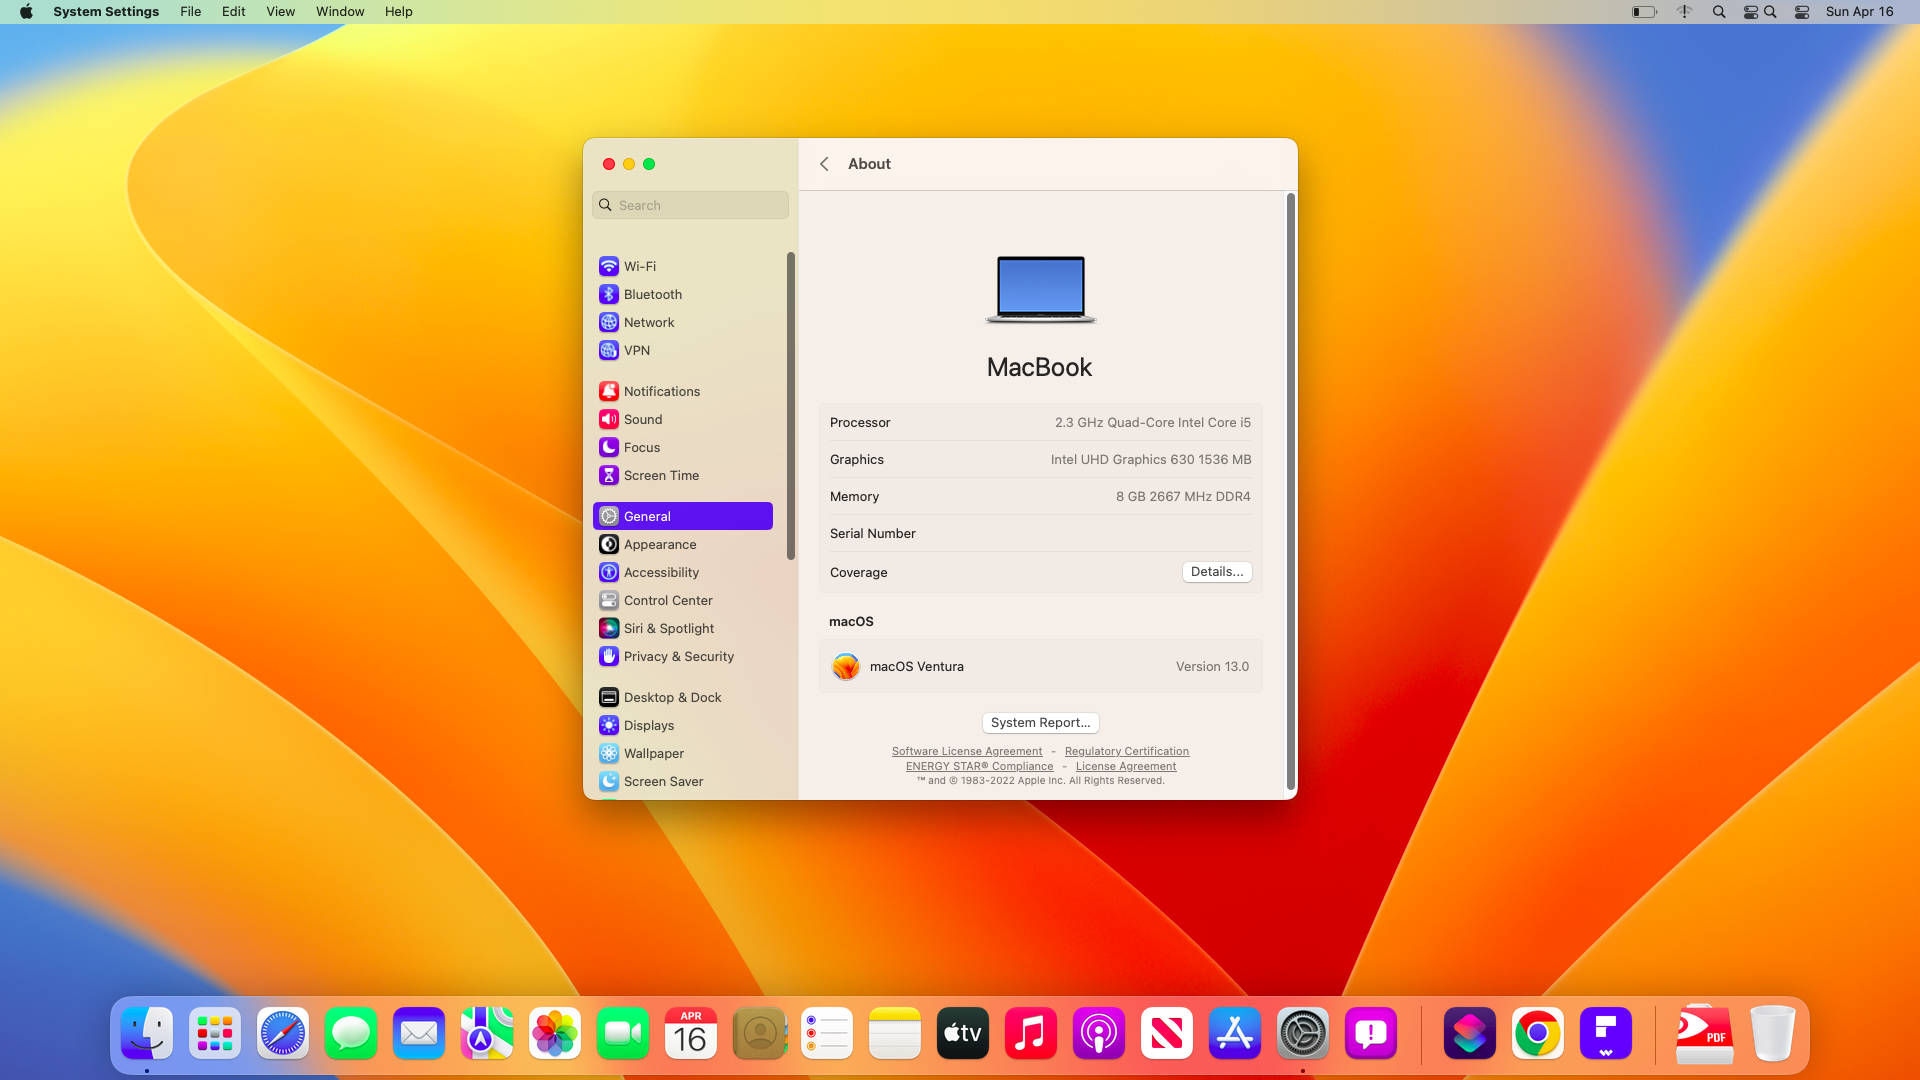
The installation process can take a lot of time and effort to fix all the errors, but the satisfaction of successfully installing macOS Ventura on your PC or laptop is worth it. If you encounter any issues during the installation process, feel free to leave a comment below, and we will help you.



Leave a Comment