Discover the wonders of macOS Sierra, the swift and efficient macOS operating system introduced by Apple in 2016 that remains a popular choice among users to this day. It boasts exceptional performance on Virtual Machines, especially on VMware, making it a top choice for many. With a download size of just 5GB and lightning-fast installation time on Virtual Machines, it's an excellent option for those who want to get up and running quickly. In this guide, we'll take a closer look at a new installation method that allows you to install macOS Sierra on VMware safely and without the need for pre-made installation files.
How to Install macOS Sierra 10.12 on Windows PC with VMware
1. Download macOS Sierra Recovery Image
Step into the world of macOS Sierra on your VMware with ease! In this tutorial, we'll guide you through the installation process with the help of Recovery mode. The best part? It will directly download the macOS Sierra installer from the internet and set it up on your Virtual Machine, saving you from the long, tedious wait for installation completion.
Firstly, we can use OpenCore to download the macOS Recovery Image. OpenCore is a collection of various tools that assist in installing macOS on a PC, and it includes tools that aid in downloading the Recovery Image. These tools are written in Python language, so it is necessary to install Python as well.
You can download OpenCore here, and we've got you covered with a guide on installing Python using this link. Once that's taken care of, open up CMD (Command Prompt) in Windows Search to initiate the Recovery Image download process using the following commands:
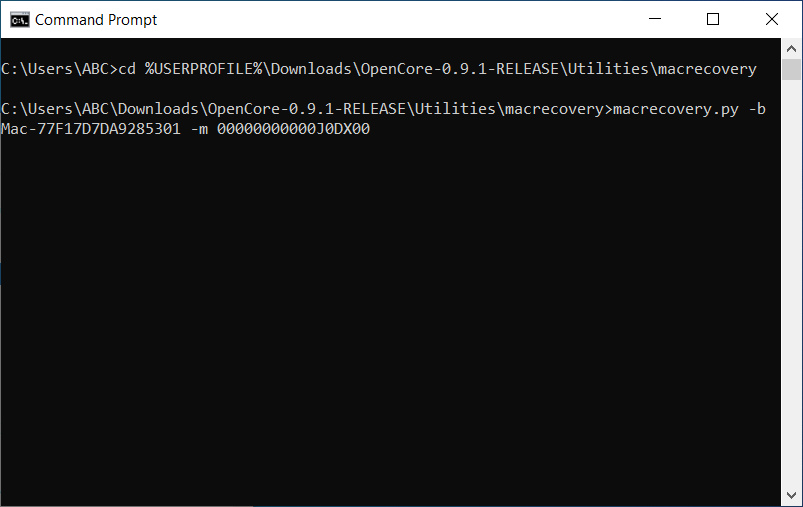
The first command is to navigate to the OpenCore folder in the Download folder. Depending on the version of OpenCore, you can customize the following command, which could be either 0.9.2 or 0.8.1
cd %USERPROFILE%\Downloads\OpenCore-0.9.1-RELEASE\Utilities\macrecovery
Next, use the following command to download the Recovery Image:
macrecovery.py -b Mac-77F17D7DA9285301 -m 00000000000J0DX00 download
Next go to OpenCore-0.9.1-RELEASE\Utilities\macrecovery folder and you will find the RecoveryImage.dmg file.
2. Create a bootable USB drive with Transmac
Let's move onto the next step! Before we can start installing macOS Sierra, we'll need to create a bootable USB drive with Transmac. To do this, you'll need a USB drive with a capacity of about 8GB.
Once you've downloaded and installed Transmac from the link here, open it up and right-click on your USB drive. From there, select "Format Disk for Mac." Once you've done that, right-click on the drive again and choose "Restore with Disk Image."
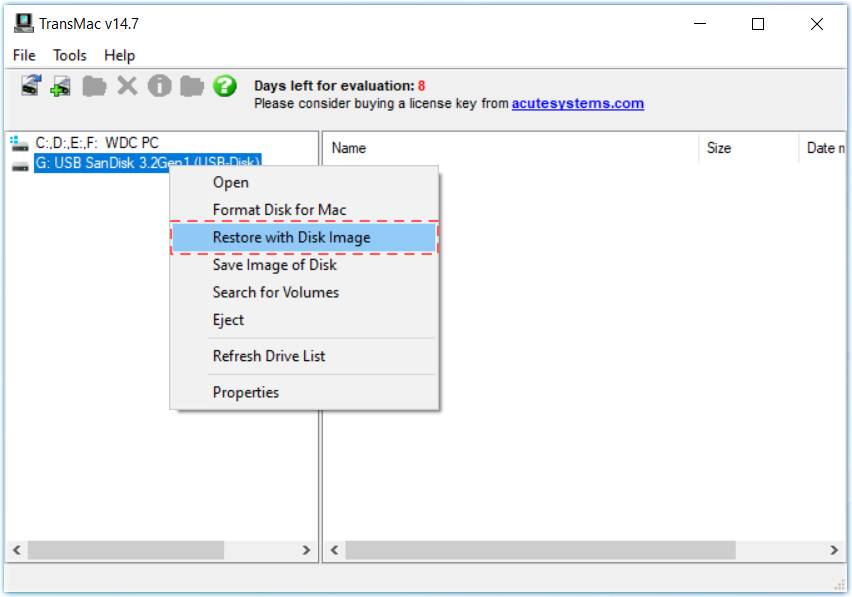
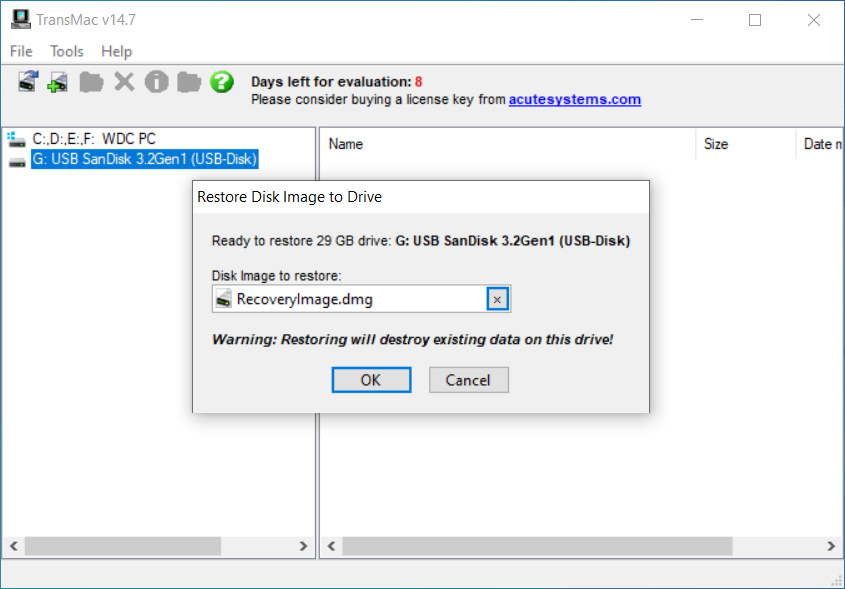
Now, navigate to the folder containing your Recovery Image and select the RecoveryImage.dmg file. Click OK and let Transmac work its magic to create your macOS Sierra installation drive on the USB drive
3. Create macOS 10.12 Sierra Virtual Machine on VMware Player
VMware Player is a software that lets you run a second operating system on your PC. First, download VMware Player and open it. Once you’ve installed it, follow the steps below:
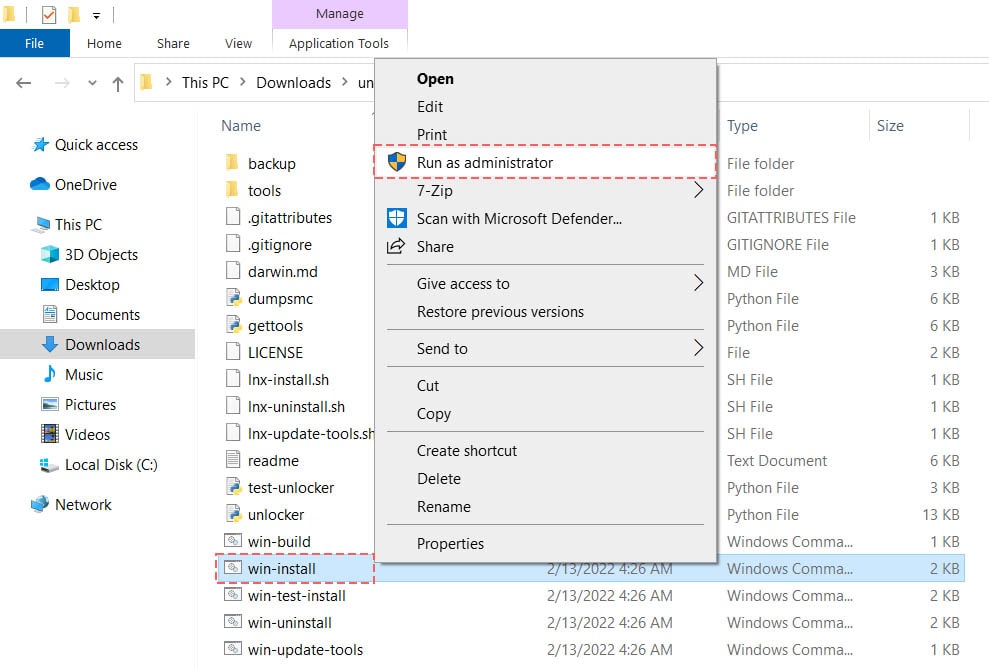
Download Patch Tool. Right click on the win-install.cmd file and click on Run as Administrator. This will patch VMware, a necessary step if you want to run macOS 10.12 Sierra.
- Open VMware and click Create a New Virtual Machine.
- Select Typical (Recommended) and then click on Next.
- Choose I will install the operating system later and click on Next.
- In the list of “Guest operating system,” choose Apple Mac OS X and click on Next.
- Give your virtual machine a name. This can be anything, but try to keep it simple and something you can easily remember like “macOS Sierra.” Leave the default location as it is. Click on Next.
- Set the disk size to 120 GB. Choose Store virtual disk as a single file and click on Next.
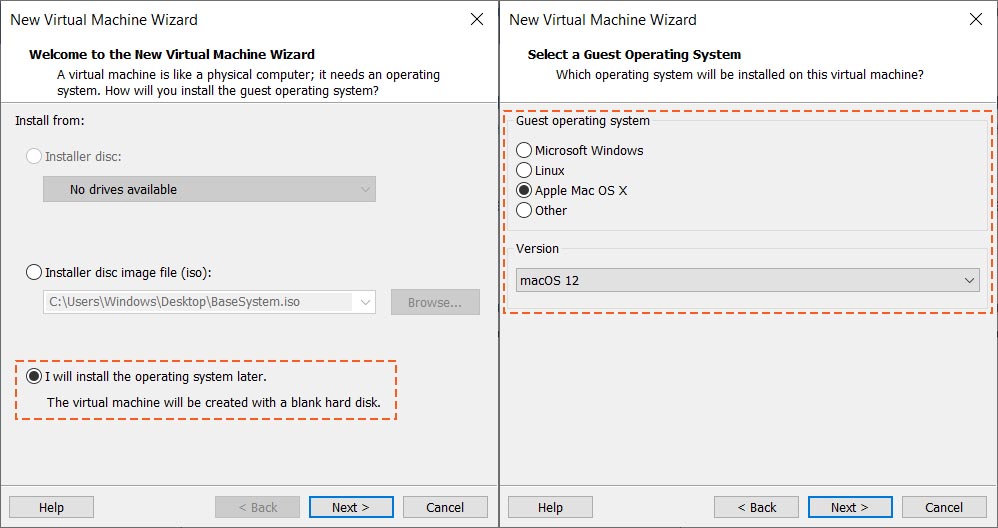
- In the next window, click on Customize Hardware.
- In the “Memory” settings, set the memory for the virtual machine to 4 GB. If you want even better performance, you can increase it, but make sure your PC has enough RAM.
- In the “Processors” menu, set the number of processors and number of cores per processor to 4
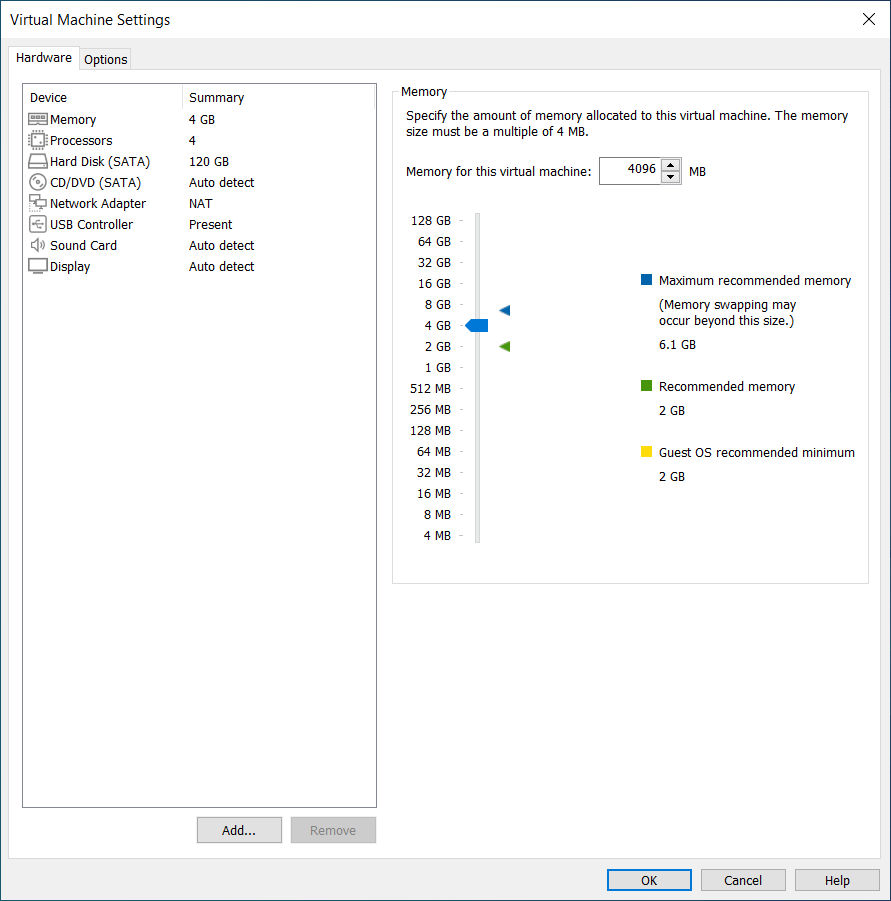
- In the “USB Controller” menu, change USB Controller to USB 3.0. Once you’re done, click on Close. Click on Finish.
4. Edit VMware VMX File
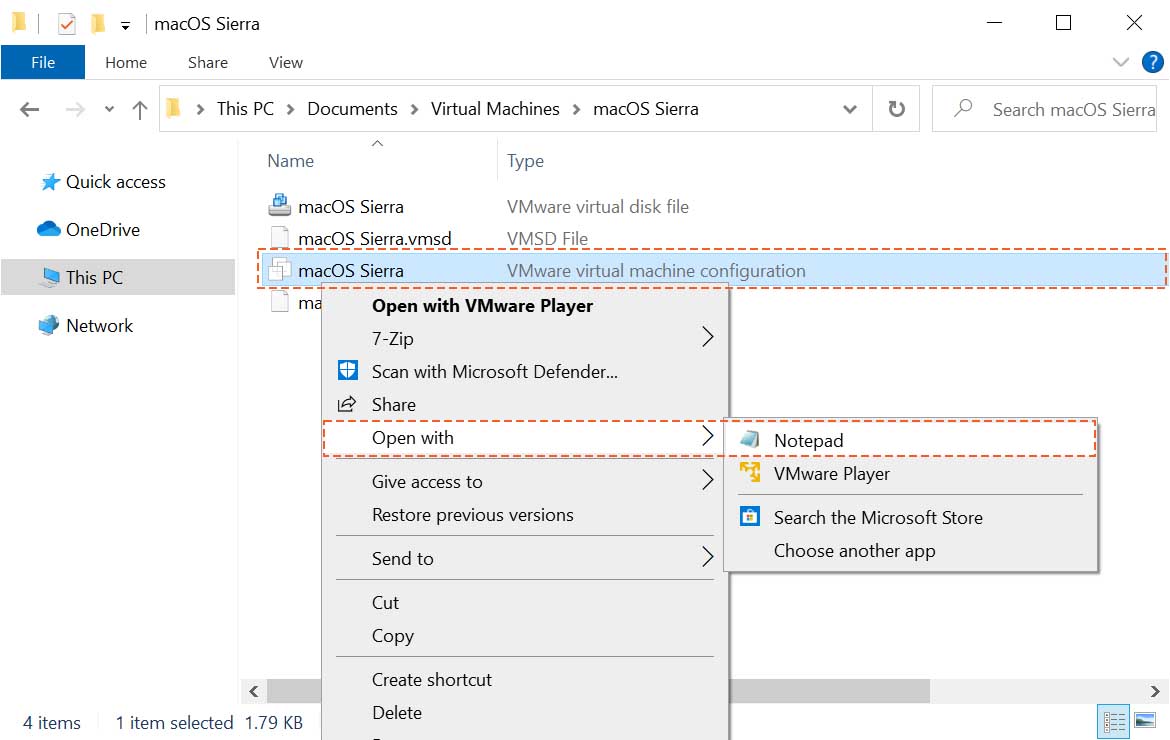
Go to the folder where the virtual machine files are located. This will be the default location you chose in the previous steps (Document > Virtual Machine > macOS Sierra). Right click on the macOS Sierra.vmx file and open it with Notepad.
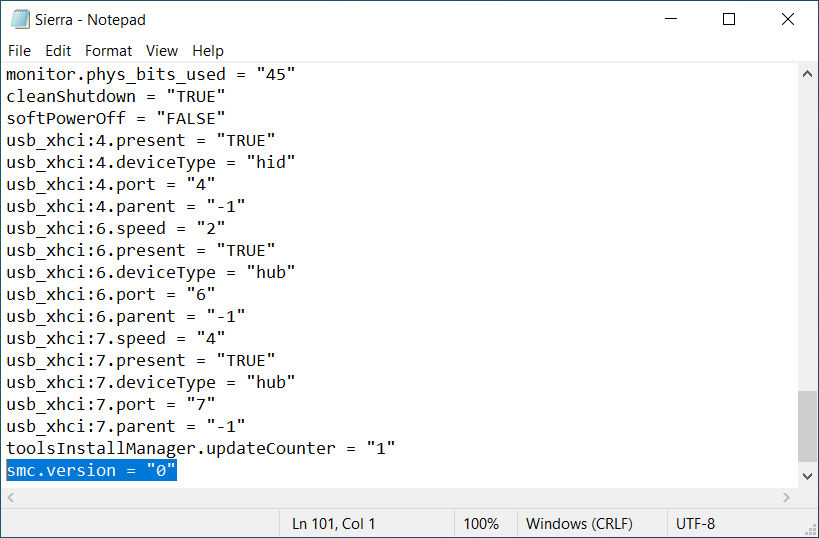
In the bottom of the text, copy and paste the following code: smc.version = "0". Close the Notepad file and click on Save.
5. Boot to USB Installer
After creating a Virtual Machine for Sierra, the next step is to open the Virtual Machine and select 'Player > Removable Devices'. Then, choose your USB Drive and select 'Connect'.
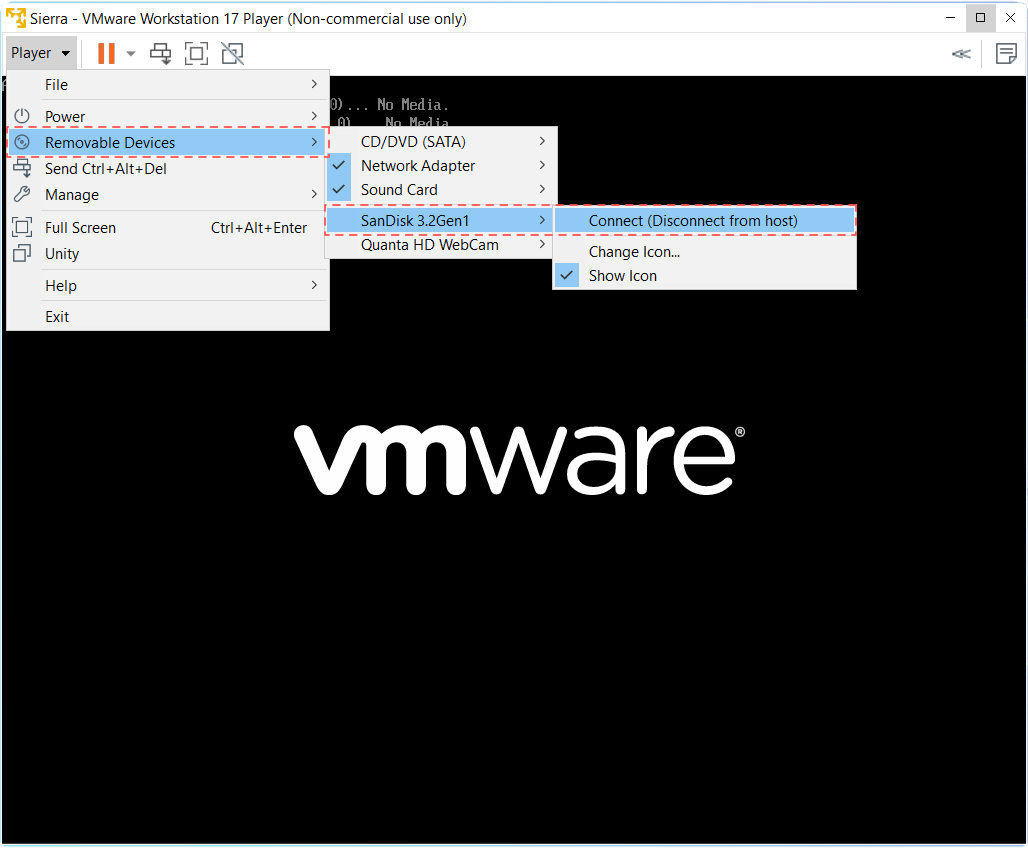
Wait for VMware to recognize the USB Installer. If it doesn't, simply restart VMware. Once you boot into Sierra Recovery Mode, you can follow the next steps to install macOS Sierra on VMware
6. Install macOS Sierra on VMware
Now you’ll be taken to the macOS 10.12 Sierra installation window. In the menu you see above, click on Disk Utility.
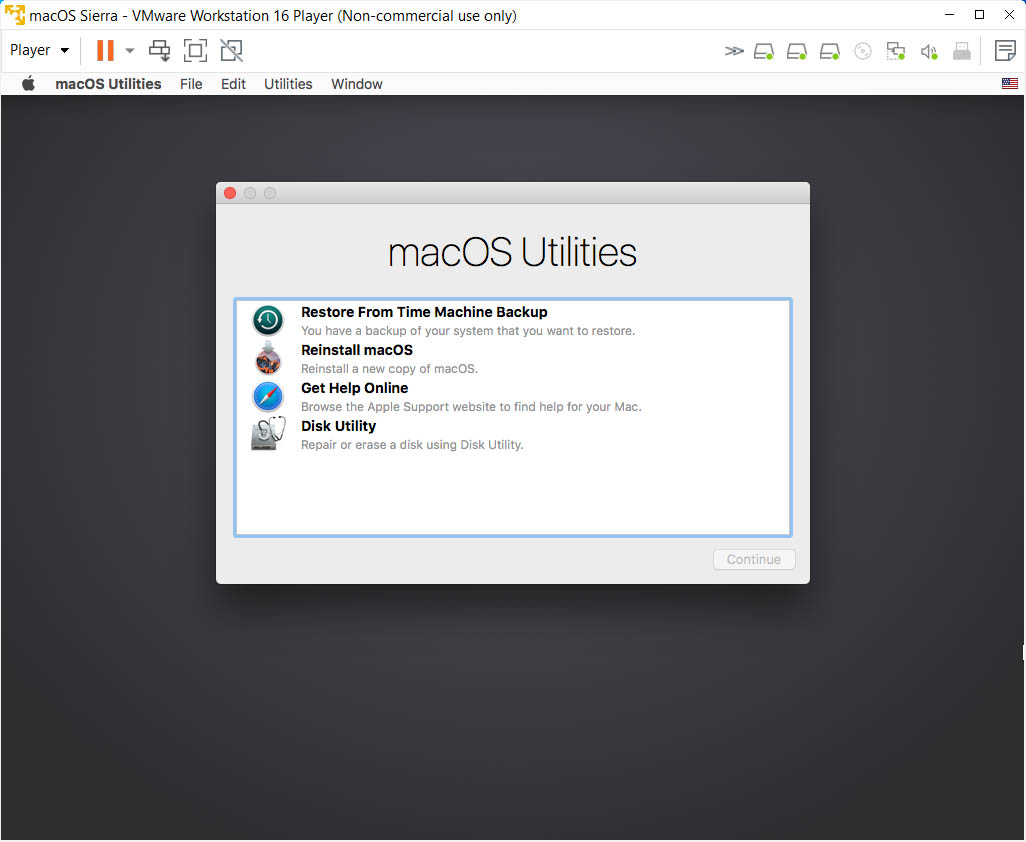
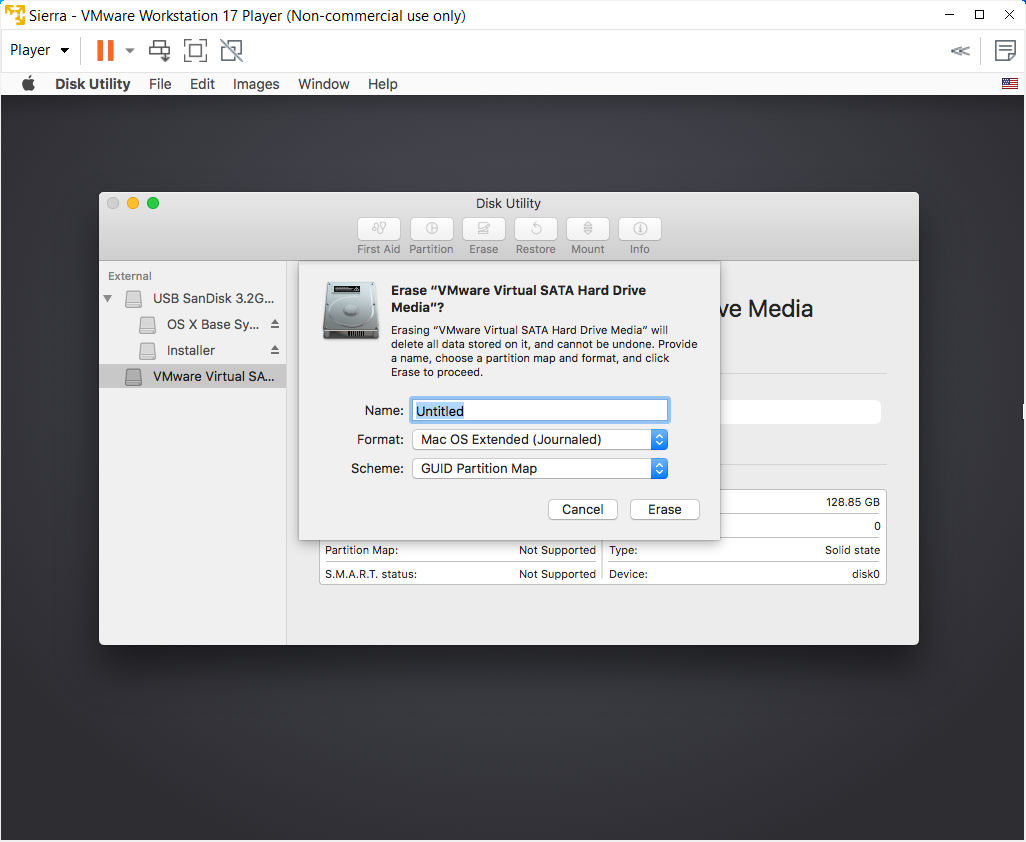
- Click on VMware Virtual SATA Hard Drive Media from the side menu. Click on Erase at the top and name the drive. You can call it “macOS.”
- In the “Format” field, select Mac OS Extended (Journaled) and in the “Scheme” field, choose GUID Partition Map. Click Erase.
- Close Disk Utility.
After successfully creating a virtual disk for the macOS Sierra installation process, close the Disk Utility and select the "Reinstall macOS Sierra" option from the macOS Utilities screen. It is important to keep the virtual machine connected to the internet during the installation process, as macOS will be downloaded and installed through the Recovery mode.
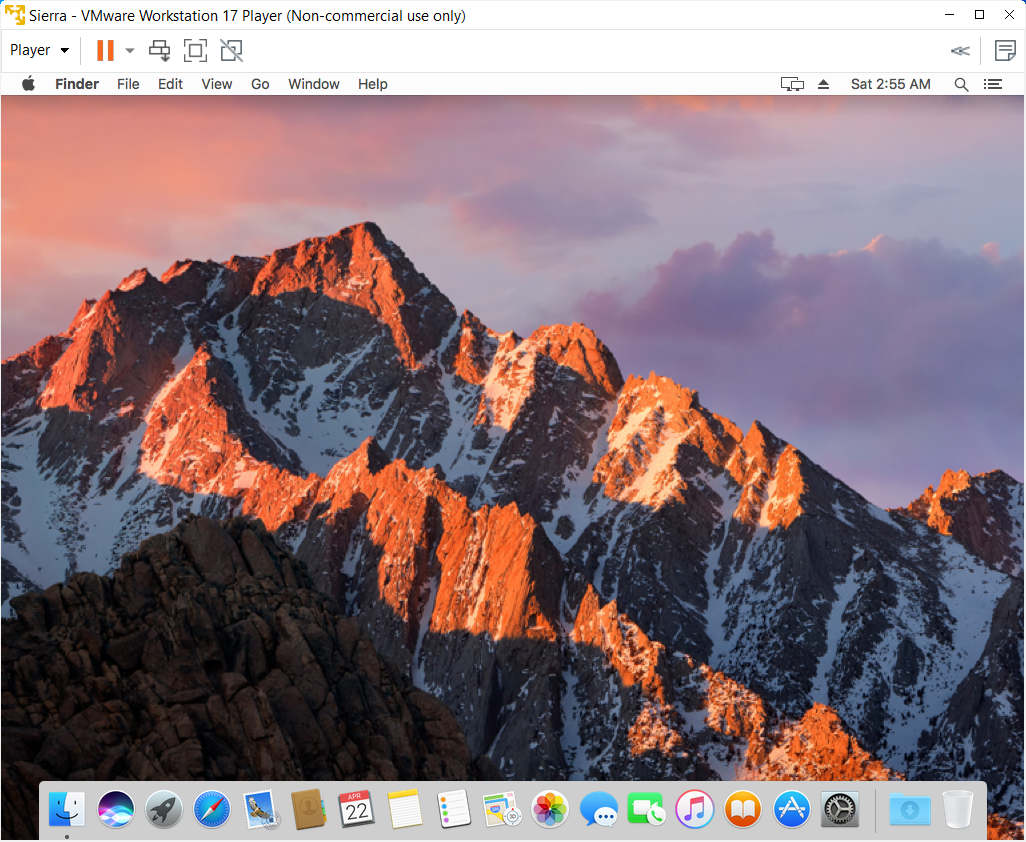
Now you have to set up macOS 10.12 Sierra in VMware. MacOS will begin to launch and all you have to do for now is wait for it to finish installing. Once it’s finished installing, VMware will restart automatically and when it reopens, you’ll see the macOS Welcome page. Choose your country and then click on Continue. Installing macOS 10.12 Sierra on your PC is easy and doesn’t take much time thanks to VMware.



Leave a Comment