The Shortcuts app on the new macOS Monterey and Ventura will allow you to set up a free HEIC to JPG converter. If you find yourself spending time manually converting image files, you can set up simple rules to instruct your Mac to convert HEIC to JPG. Once you have your rules set, all it takes is one click of a button and you can have the result you wanted. You don’t have to use any paid tools and use Shortcuts to free convert HEIC to JPG images.
With this tutorial, you can also convert multiple HEIC files into JPG files. The Shortcuts app is the ideal tool to use for Mac users looking to automate their regular manual tasks and save time.
JPG and JPEG - What’s the Difference?
There is no difference between JPG and JPEG image formats other than the number of characters and different extensions. The MS-DOS 8.3 and FAT-16 file systems that were used in the earlier versions of Windows had a maximum three-letter naming limit and hence JPG was used. However, macOS have no character naming limit. So, Mac systems, image files were saved as JPEGs with the .jpeg extension. Meanwhile, in Windows, image files were saved as JPGs with the .jpg extension.
How to Free Convert HEIC to JPG on Mac
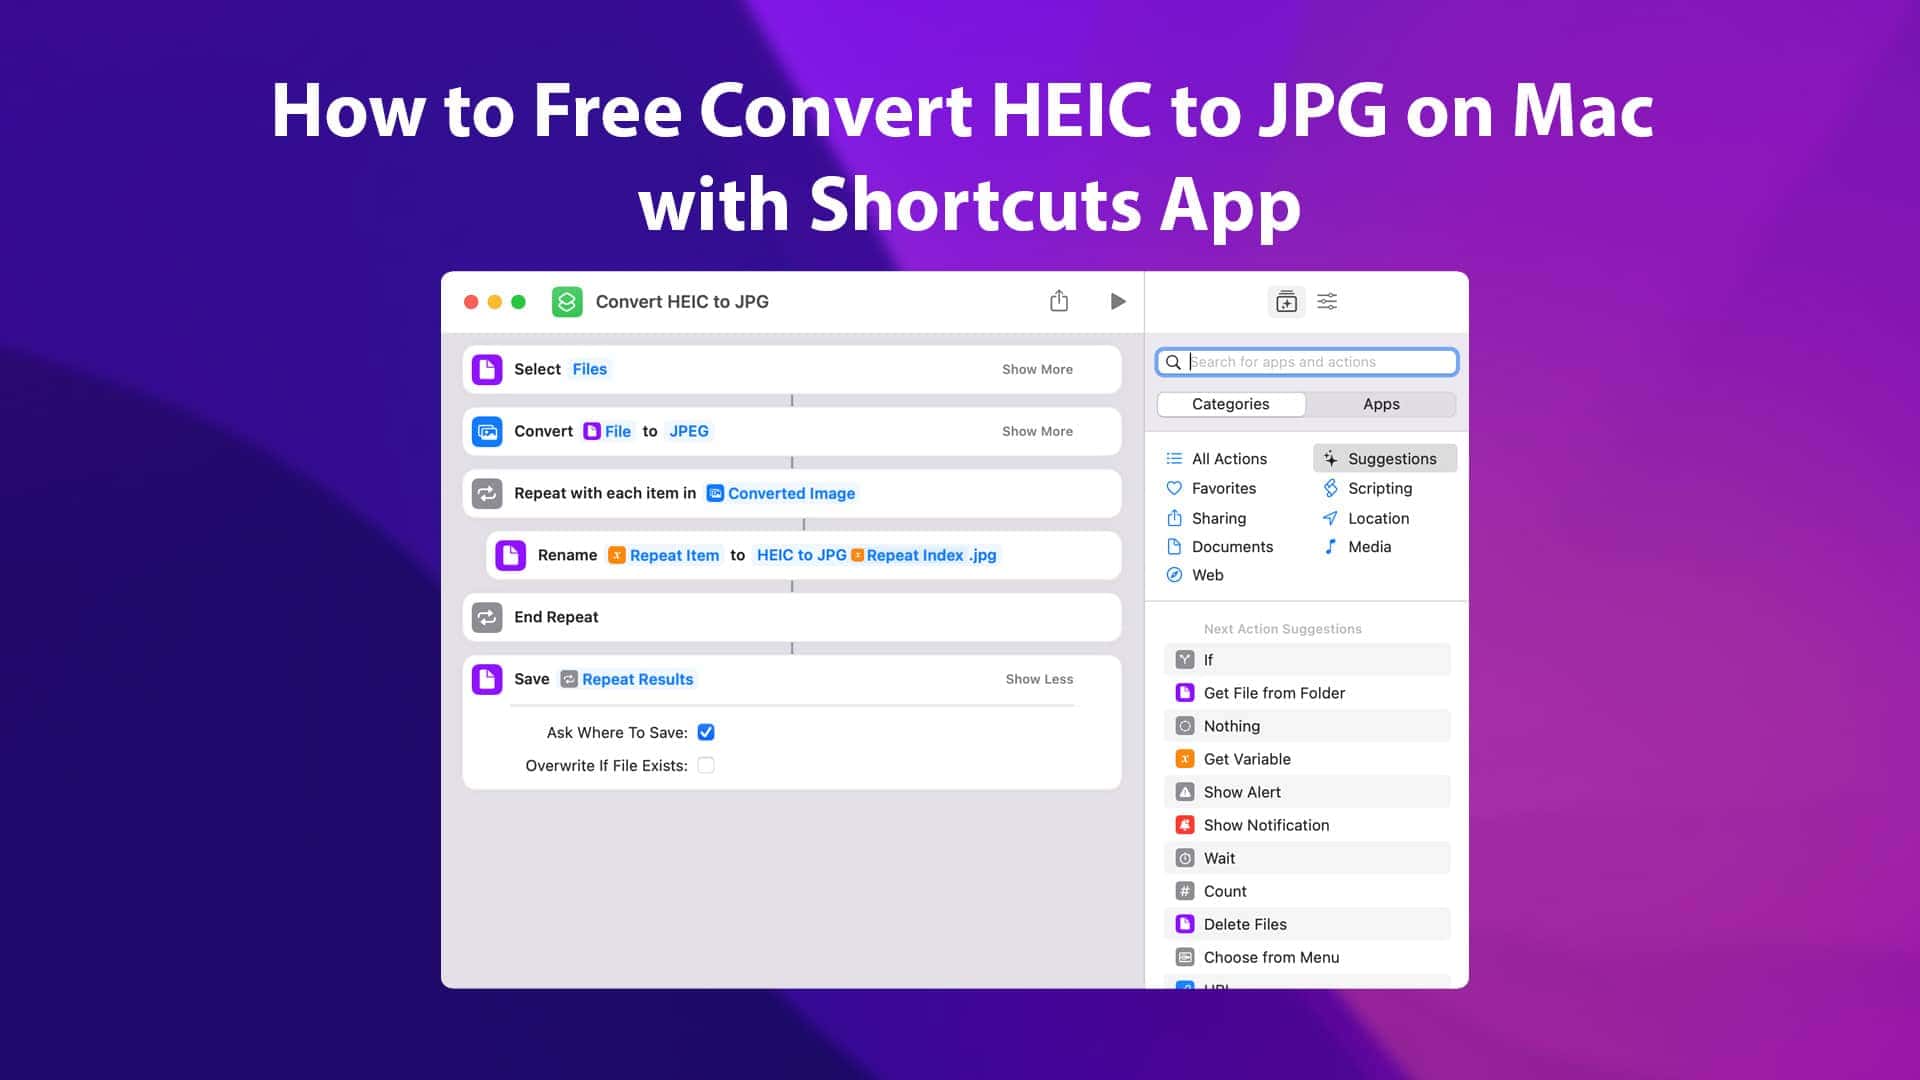
The process will involve setting up a HEIC to JPG converter shortcut and renaming the converted JPG image files. Set up Shortcuts for Converting HEIC to JPG on Mac.
Step 1: Launch the Shortcuts app in Application folder on your Mac. You can launch it from Spotlight. Click on the ‘+’ button on the top-right corner of the application to start creating a new shortcut.

Step 2: Enter ‘Select File’ in the search bar and drag the shortcut option to the left-side window to start building your shortcut. Click on ‘Show More’ and enable ‘Select Multiple’.

Step 3: Search ‘Convert Image’ and drag the shortcut option below the ‘Select Files’ action. Ensure that the action mentions ‘Convert File to JPEG’.

Step 4: Search for ‘Repeat with Each’ in the search box and drag the shortcut option below the ‘Convert File to JPEG’ action.

Step 5: Search ‘Rename File’ and drag the shortcut option above the ‘End Repeat’ action. Click on ‘Name’ and type ‘HEIC to JPG'. Right-click and choose Insert Variable > Repeat Index.

Step 6: Now add .jpg in the end. Your action should look like this:

Step 5: Search ‘Save File’ and drag the shortcut option below the ‘End Repeat’ action. Name your shortcut as ‘Convert HEIC to JPG’ and add an icon of your choice and color to identify it.

Now, click the ‘Play’ button and test your shortcut. You should see a prompt to select files. Choose one or multiple HEIC files to convert to JPG, click ‘OK’ on the Privacy access prompt, and choose the location to save the converted and renamed JPG files.
You’ve done it. Go to the destination folder where you saved the JPG files to find the renamed JPG files with index number. The Shortcuts app makes it possible to free convert HEIC to JPG with just one click of a button. There is no need to use third-party applications and go through many steps for converting HEIC to JPG on Mac.


Leave a Comment