After the WWDC23 event, Apple unveiled macOS Sonoma, showcasing numerous enhancements. These include the ability to place widgets on the main screen, new dynamic wallpapers exclusive to macOS, and notably, significant improvements to Safari. To explore the exciting new features of macOS Sonoma without disrupting your primary operating system, utilizing a virtual machine is the most logical solution.
To run macOS Sonoma on a virtual machine, you'll need to create a macOS 14 Sonoma installer in ISO image. An ISO file is a commonly used file type, similar to a DVD/CD format. This ISO image can then be used to install macOS Sonoma on various virtual machine software options like VMware, VirtualBox, Parallel Desktop, or QEMU. In this guide, we will delve into the process of downloading and creating the macOS Sonoma ISO image on Windows and Mac.
How to Download and Create macOS Sonoma ISO Image
1. Download macOS Sonoma Installer
To download macOS Sonoma, you can directly download it from the Apple Server using the InstallAssistant.pkg file. This file contains the macOS Sonoma installation package and is packaged as a PKG file. You can easily download it on Windows, Mac, or a Virtual Mac using the following link.
Download macOS Sonoma Final:
2. Create macOS Sonoma ISO Image
To create an ISO image for macOS Sonoma installation, you will need either a Mac or a Virtual Mac. In this guide, we will demonstrate the process using macOS Monterey on VMware. Setting up and installing macOS on VMware is a straightforward procedure, allowing you to start using macOS within minutes. Remember to install VMware Tools to facilitate seamless file transfer between Mac and Windows.
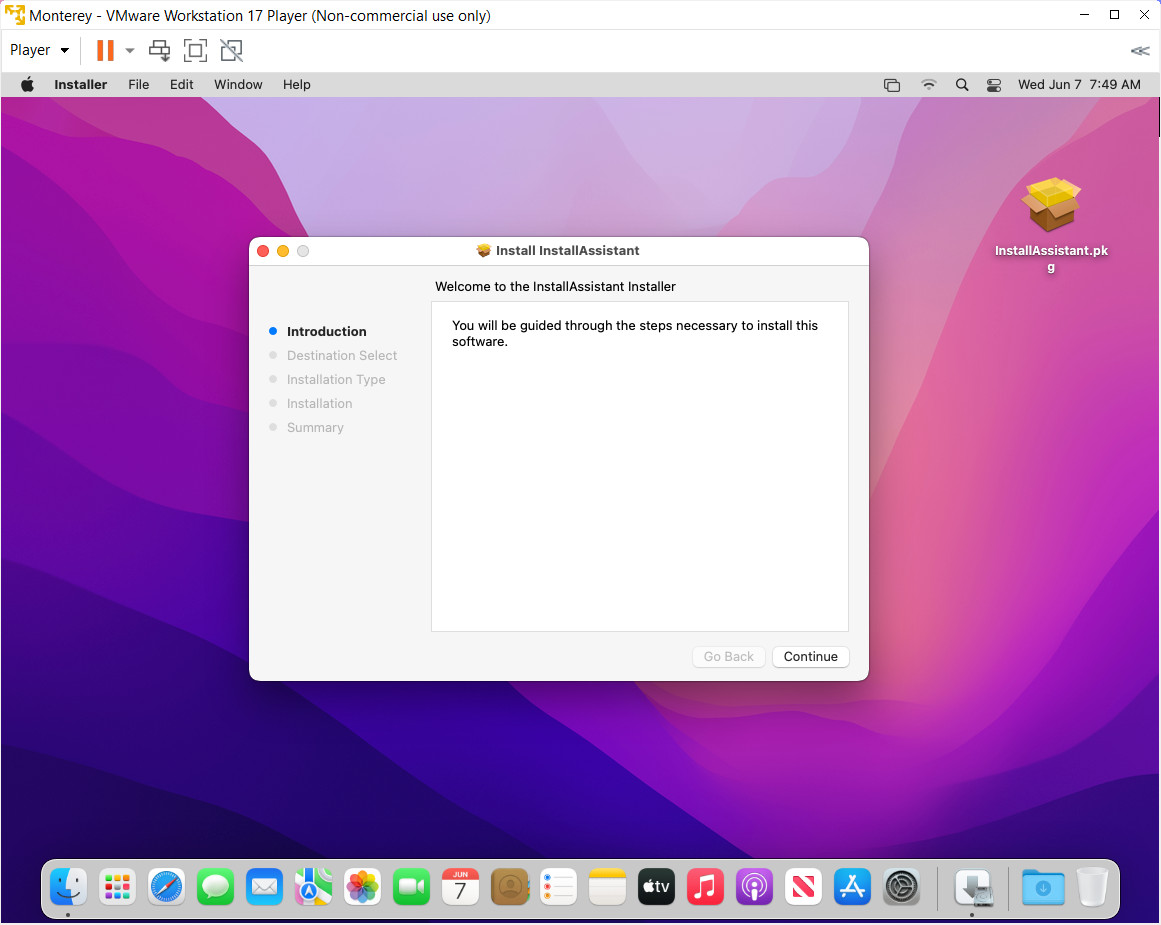
Once you have your Virtual Mac up and running, proceed by opening the InstallAssistant.pkg file and follow the provided instructions to extract the macOS Sonoma installation package.

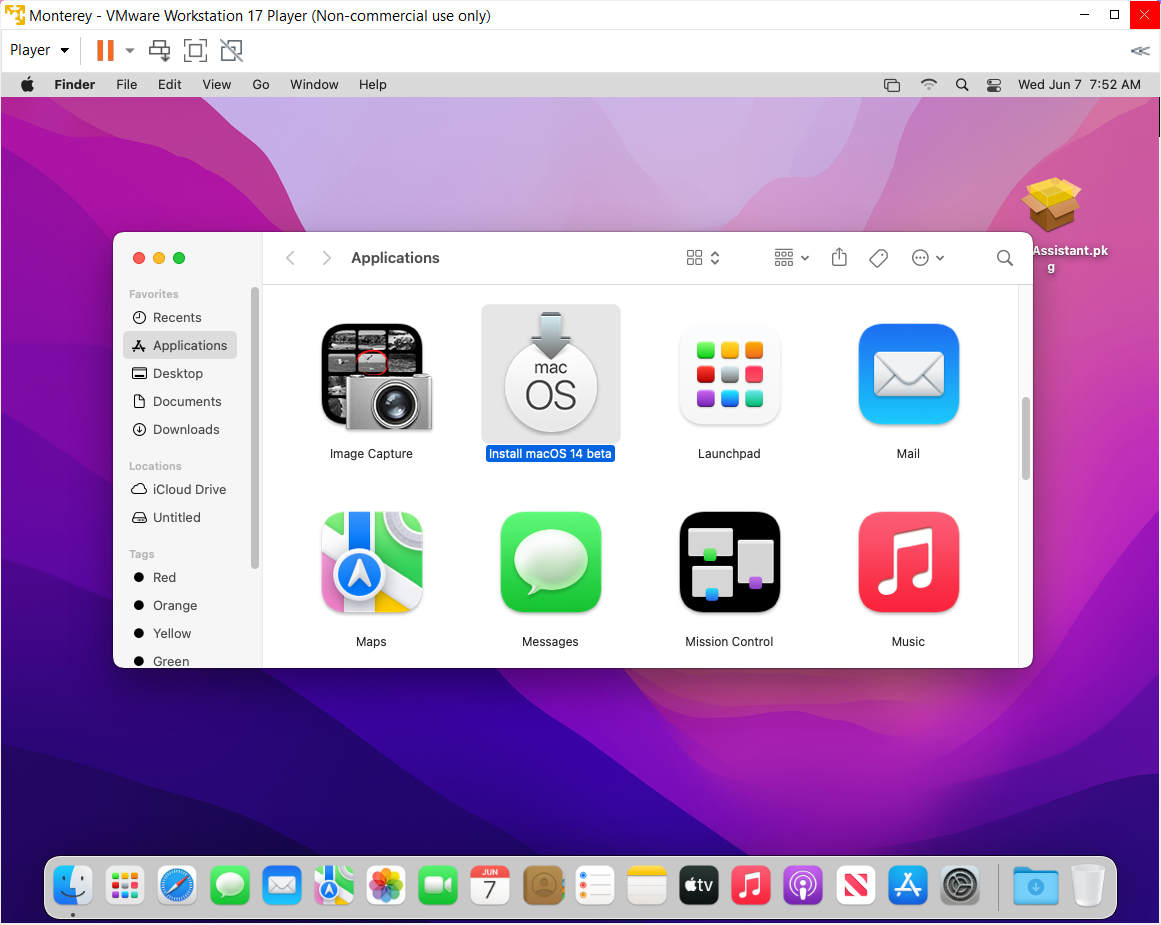
After successfully extracting the InstallAssistant.pkg file, you will locate the macOS Sonoma installation package in the Applications folder.

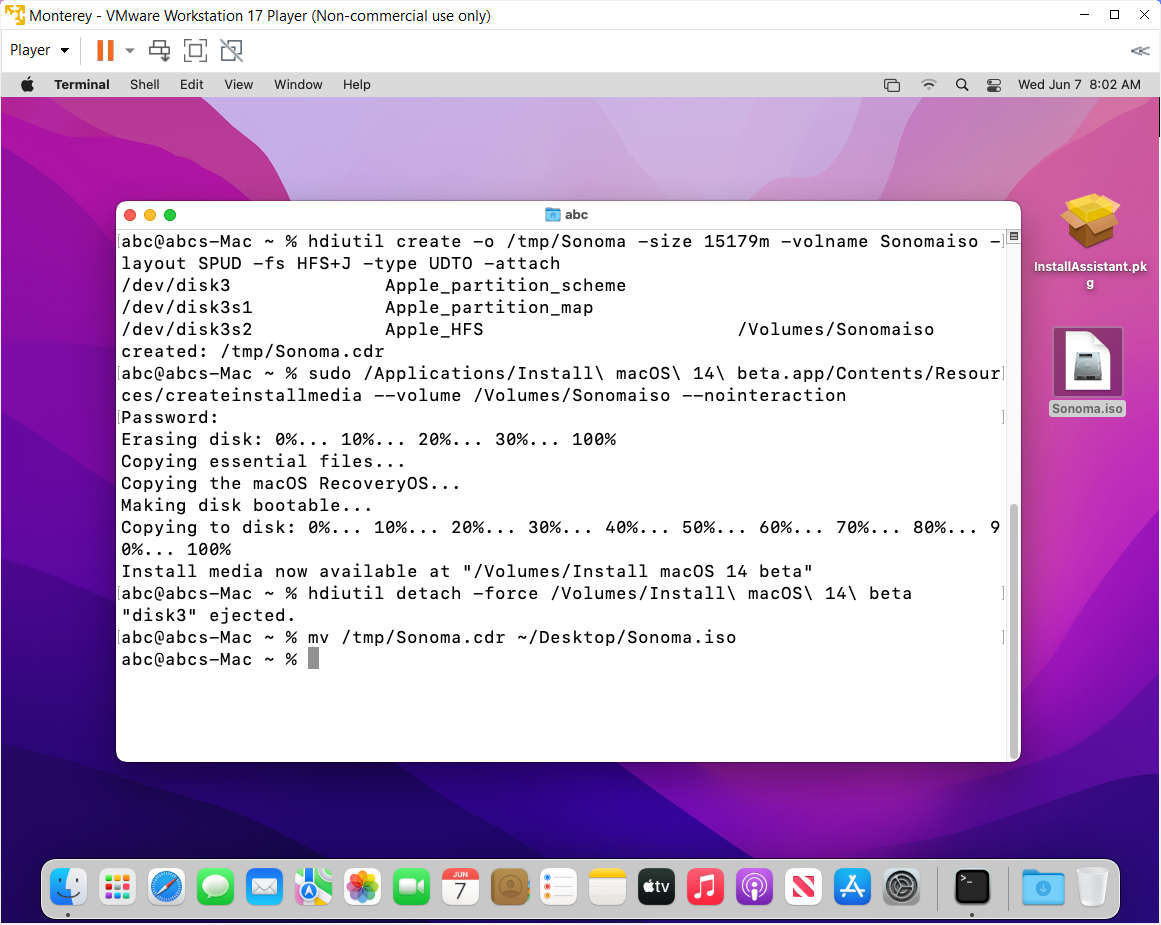
Next, we will use the Terminal application on macOS to create the installation package in the form of an ISO image. Start by accessing Terminal through Spotlight search or locate it in the Applications/Utilities folder. Then, execute the provided commands to generate a Sonoma ISO image.

Use the following command to create the ISO image:
hdiutil create -o /tmp/Sonoma -size 15979m -volname Sonomaiso -layout SPUD -fs HFS+J -type UDTO -attach
Here are some important parameters to consider:
- Size: Typically ranging from 15GB to 19GB.
- Volume name: It is recommended to keep the volume name as "Sonomasio" to avoid any potential errors during ISO file creation.
- Layout SPUD: This specifies a single partition with the Apple Partition Map layout.
- -fs HFS+: The file system option indicates the usage of Mac OS Extended for the macOS drive.
- Type: Selecting UDTO ensures that the file format is suitable for DVD/CD master.
- Attach: This flag ensures that the created volume is automatically mounted within macOS.
Use ‘createinstallmedia’ tool to create a macOS Sonoma Final Installer:
sudo /Applications/Install\ macOS\ Sonoma.app/Contents/Resources/createinstallmedia --volume /Volumes/Sonomaiso --nointeraction
Force Unmount "Install macOS Sonoma beta" Volume:
hdiutil detach -force /Volumes/Install\ macOS\ Sonoma
Move Sonoma.cdr file to Desktop and rename .cdr file to .iso file.
mv /tmp/Sonoma.cdr ~/Desktop/Sonoma.iso
Once you have successfully created the Sonoma.iso file, it will be located on your Desktop. You can utilize this Sonoma.iso installation package with any Virtual Machine of your choice. Additionally, the instructions provided below will assist you in effectively using and installing macOS Sonoma on a Virtual Machine.


Leave a Comment