Creating a bootable Windows 10 USB Installer while using macOS is not nearly as complicated as it seems. Depending on how you want to do it, and what version of macOS you are using, it is pretty straightforward.
If you are not familiar, Big Sur is the most recent macOS update that redefines ease of use and power in an operating system. Not only has the overall design been further refined and tweaked, but it offers a host of other improvements over previous versions. The sleek new dock design enables a smoother experience, as the app icons all now have a uniform shape while remaining visually unique. Toolbars and sidebars have been smoothed and streamlined, making sure the content you need is always readily available.
Before we jump into getting your bootable USB ready to run with uEFI or Legacy Mode, we need something for it to boot. To this end, you will need to download a Windows 10 ISO image. The only reliable place to get an official copy is, of course, the Microsoft site. Open in Safari, and it will take you directly to the Microsoft official Windows 10 page. From there:
1 Select the Windows 10 edition you want, and click confirm.
2. Choose the language for your ISO, and click confirm.
3. Lastly, choose whether you want a 32 or 64-bit version, depending on the hardware of the computer it will be installed on. Once you choose this, your download will begin automatically.
How to Create Windows 10 Bootable USB on Mac without Boot Camp
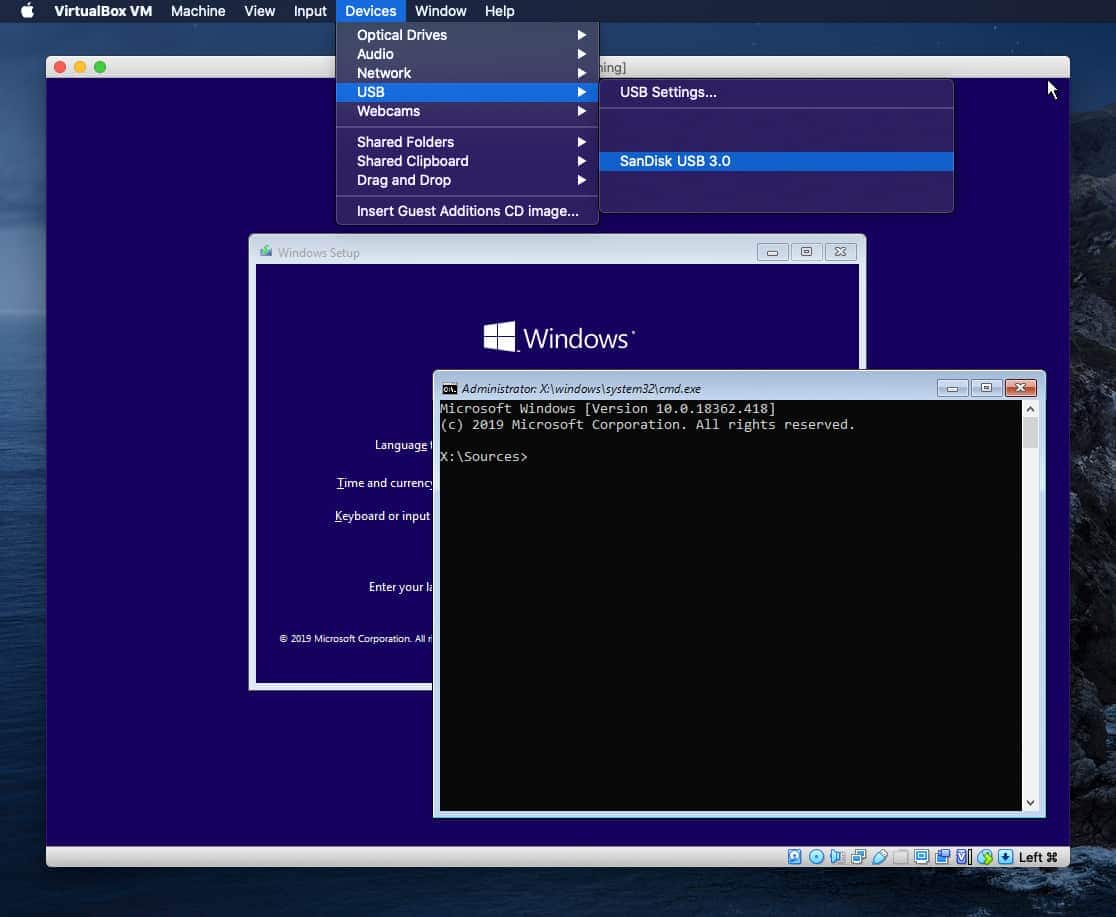
In this tutorial, we run windows 10 ISO image on VirtualBox and use CMD to create a Windows USB Installer on Mac. The CMD is Command Prompt on Windows. While it can be the most difficult to learn and master, it is also the most powerful method, as you can control nearly every aspect of certain functions by setting various command-line options. We recommend that if you are using CMD for things like formatting, be extremely careful. Using the wrong option or selecting the wrong drive by mistake can have disastrous consequences.
Step 1: Install a Virtual Machine Software (VirtualBox, VMware, Parallels Desktop).
1. Firstly, Install VirtualBox and Run Windows 10 Installer on VirtualBox.
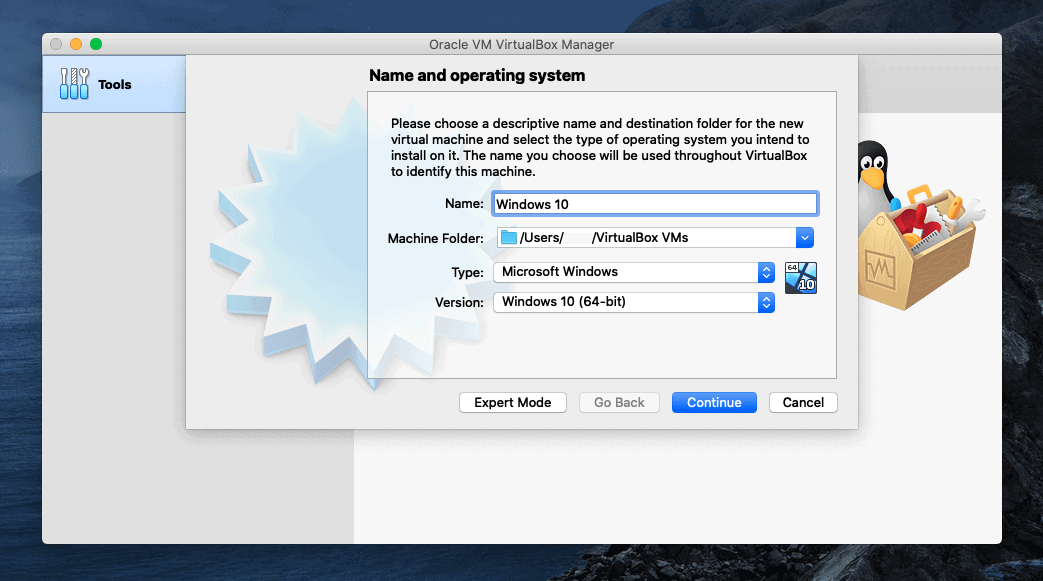
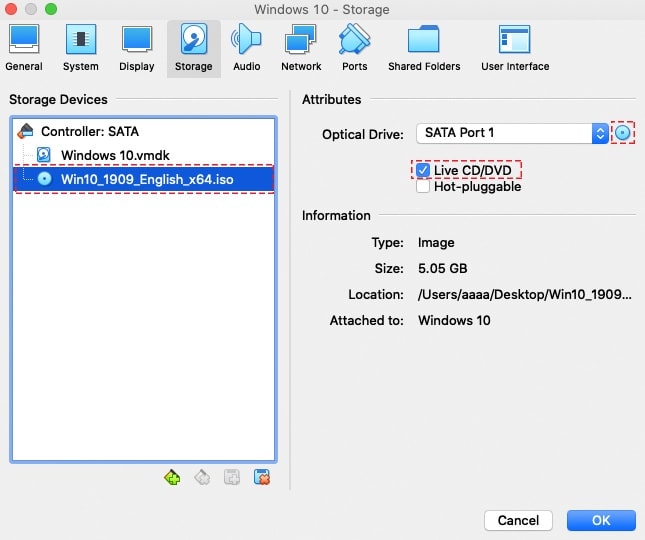
2. Add Windows 10 ISO Image to VirtualBox
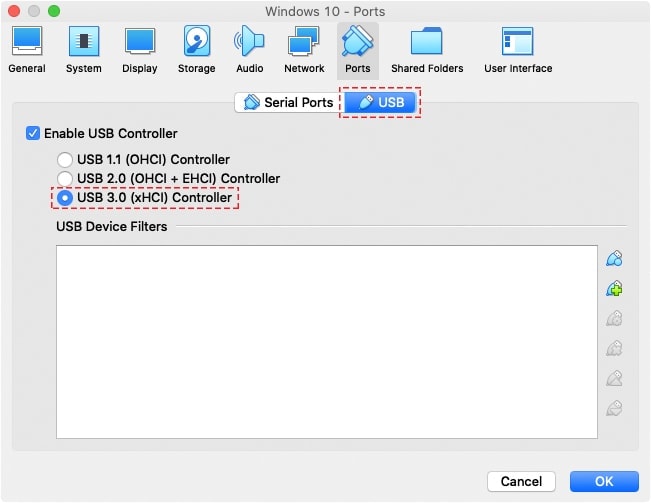
3. Install VirtualBox Extension and Enable USB 3.0 in VirtualBox.
You can download VirtualBox Extension in VirtualBox Site then open it.
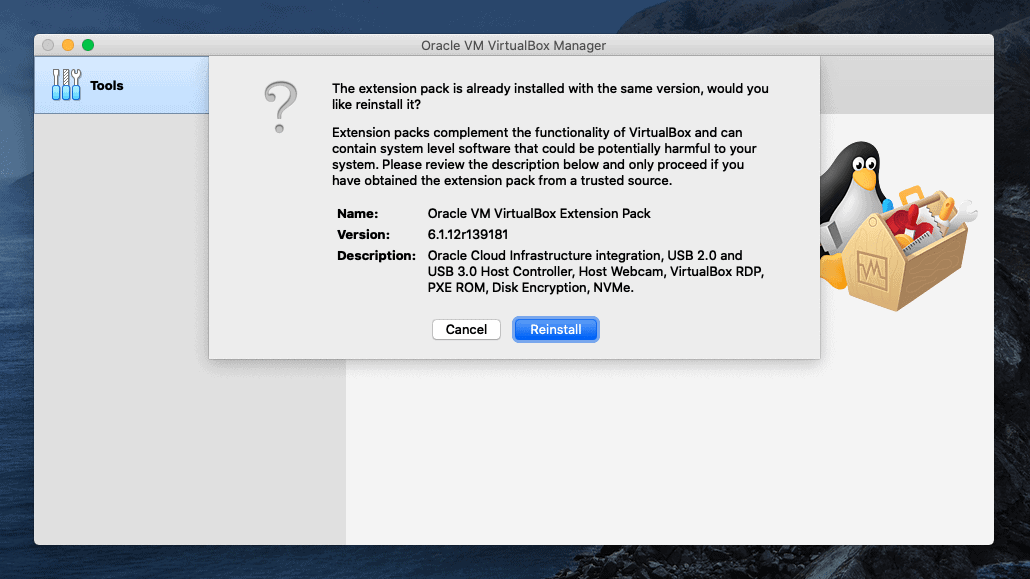
Go to Settings > Ports and enable USB 3.0 Controller.
4. Turn on your Windows 10 Virtual Machine, connect your USB drive to your VirtualBox, Press "Shift + F10" to open a CMD window.
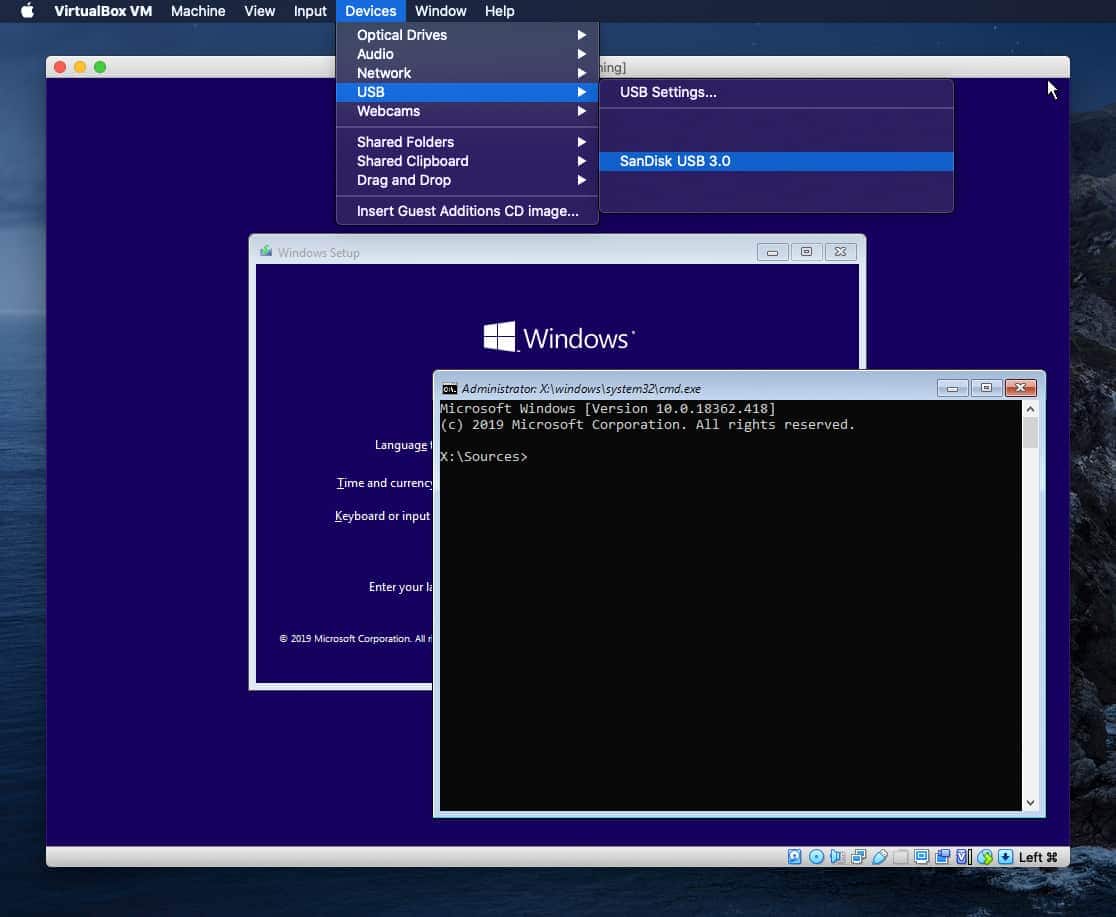
Step 2: Create Windows 10 USB Installer with GPT Format for uEFI Boot
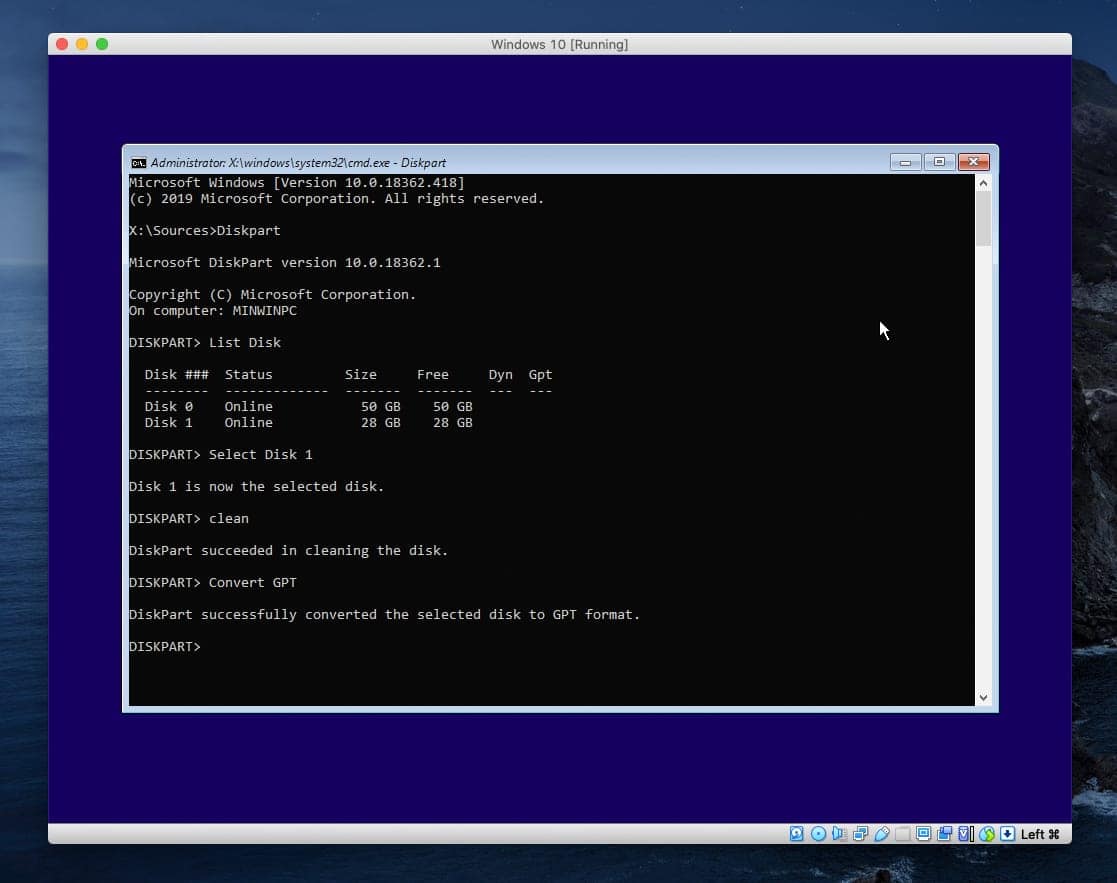
1. Use this commands to Clean and convert USB Drive to GPT Format (Erase your USB Drive Data).
> Diskpart
> List Disk
> Select Disk 1
> Clean
> Convert GPT
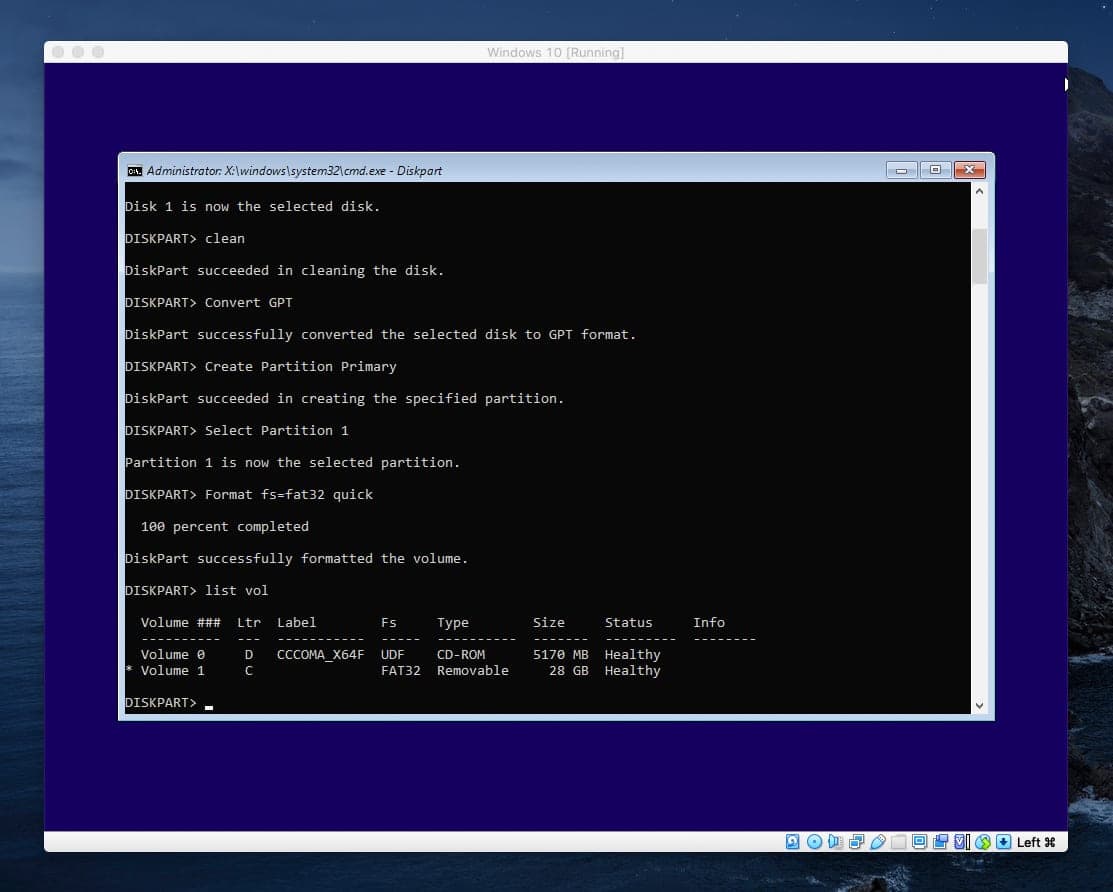
Create a New Partition and Format your USB Drive as FAT32 (uEFI Boot mode support FAT32 Format).
>Create Partition Primary
>Select Partition 1
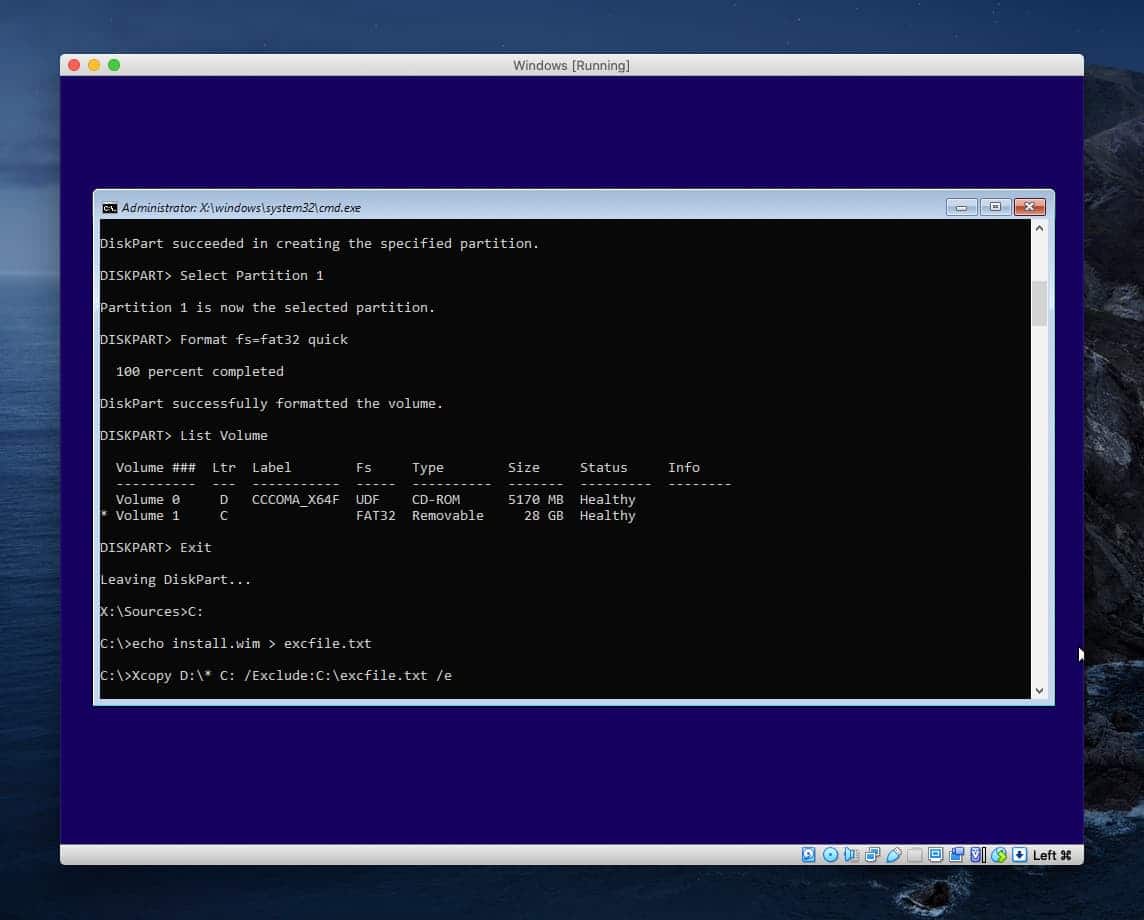
>Format fs=fat32 quick
>List Vol (Volume D: is Windows ISO Image, Volume C: is USB Drive Installer)
>Exit
Go to C: Drive (USB Drive)
>C:
Add the install.wim file into exclude list with this command:
>echo install.wim > excfile.txt
Copy Windows Installer File to USB Drive with exclude list (install.wim):
>Xcopy D:\* C: /Exclude:C:\excfile.txt /e
>Dism /Split-image /ImageFile:"D:\Sources\install.wim" /SWMFile:"C:\Sources\install.swm" /FileSize:3000
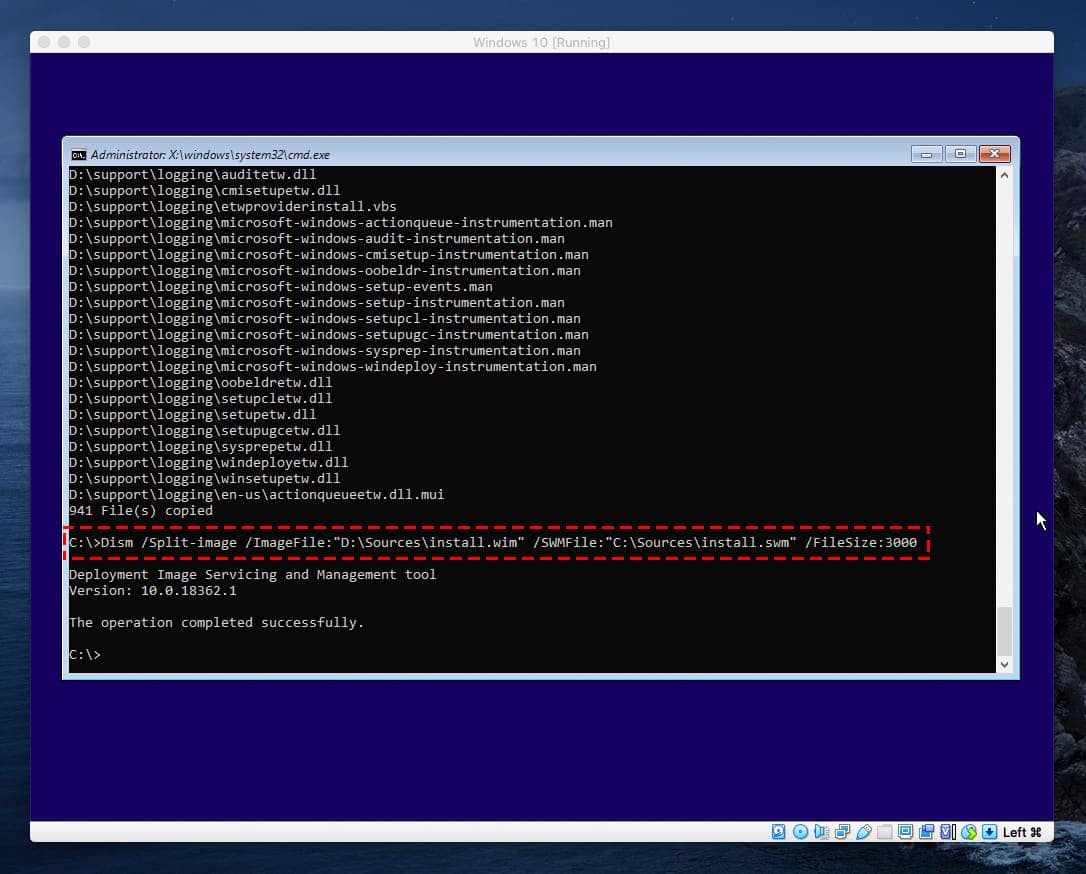
Once the copy is done and you have to turn of Virtual Machine, the USB is ready to go. Make sure the computer that needs it is set to boot from uEFI Mode, plug it in and power it up, and the installation will begin.
Bonus: Create a Windows 10 USB Installer for Legacy Mode
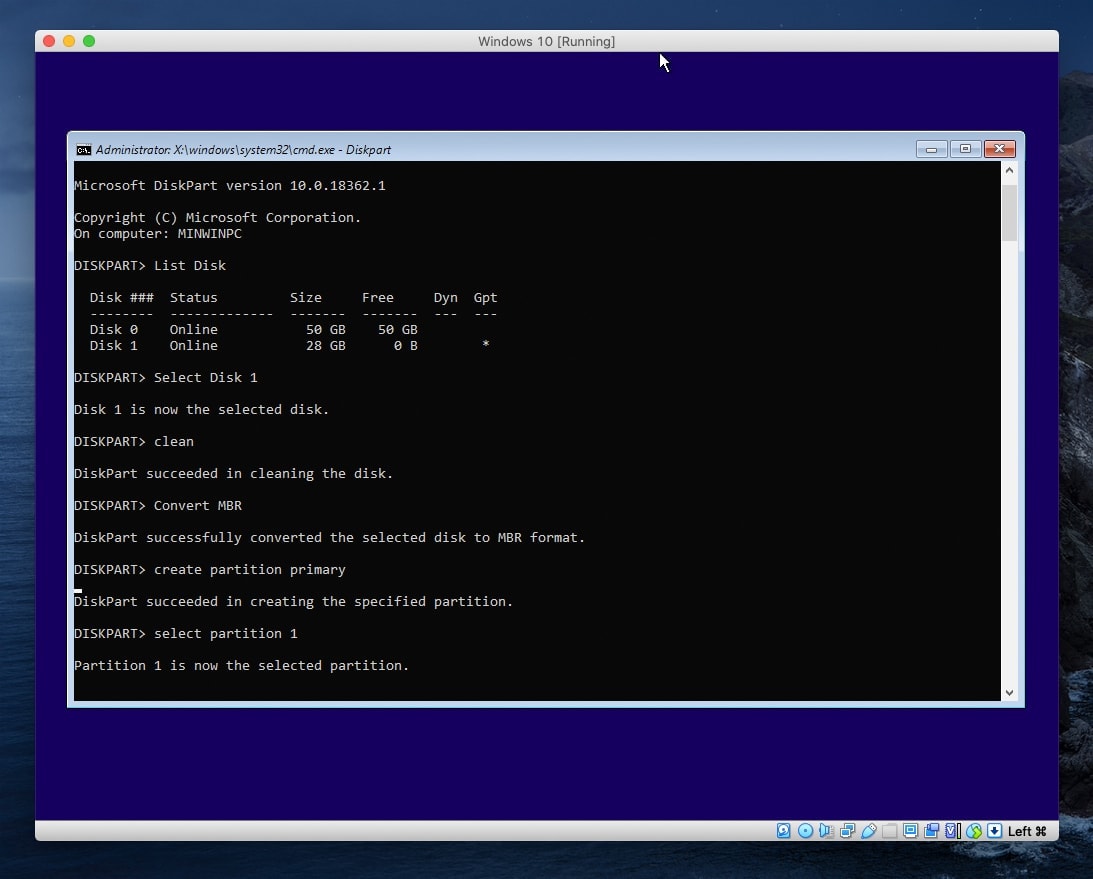
1. Convert your USB Drive to MBR Format and Create a new Partition
>Diskpart
>List Disk
>Select Disk 1
>Clean
>Convert MBR
>Create Partition Primary
>Select Partition 1
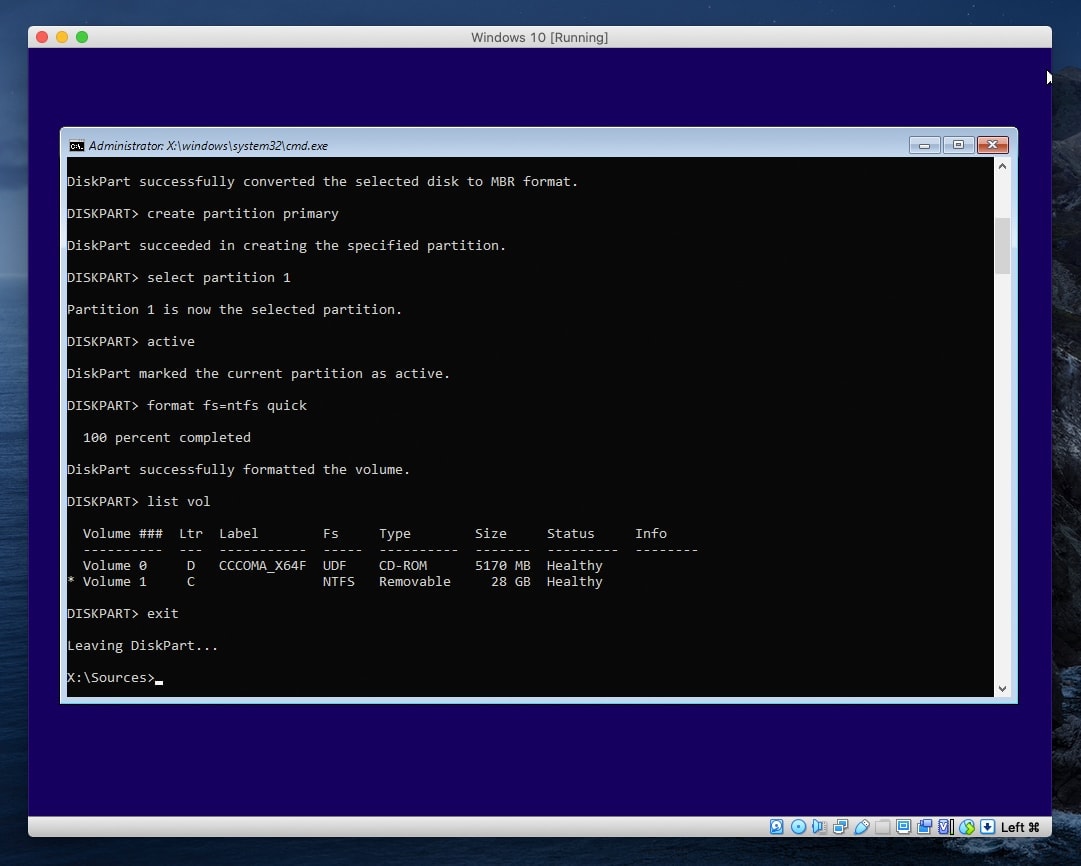
>Active
2. Format your USB Drive as NTFS Partition
>Format fs=ntfs quick
>List Vol
>Exit
3. Copy Windows Installer File to USB Drive with this command:
>Xcopy d:\* c: /e
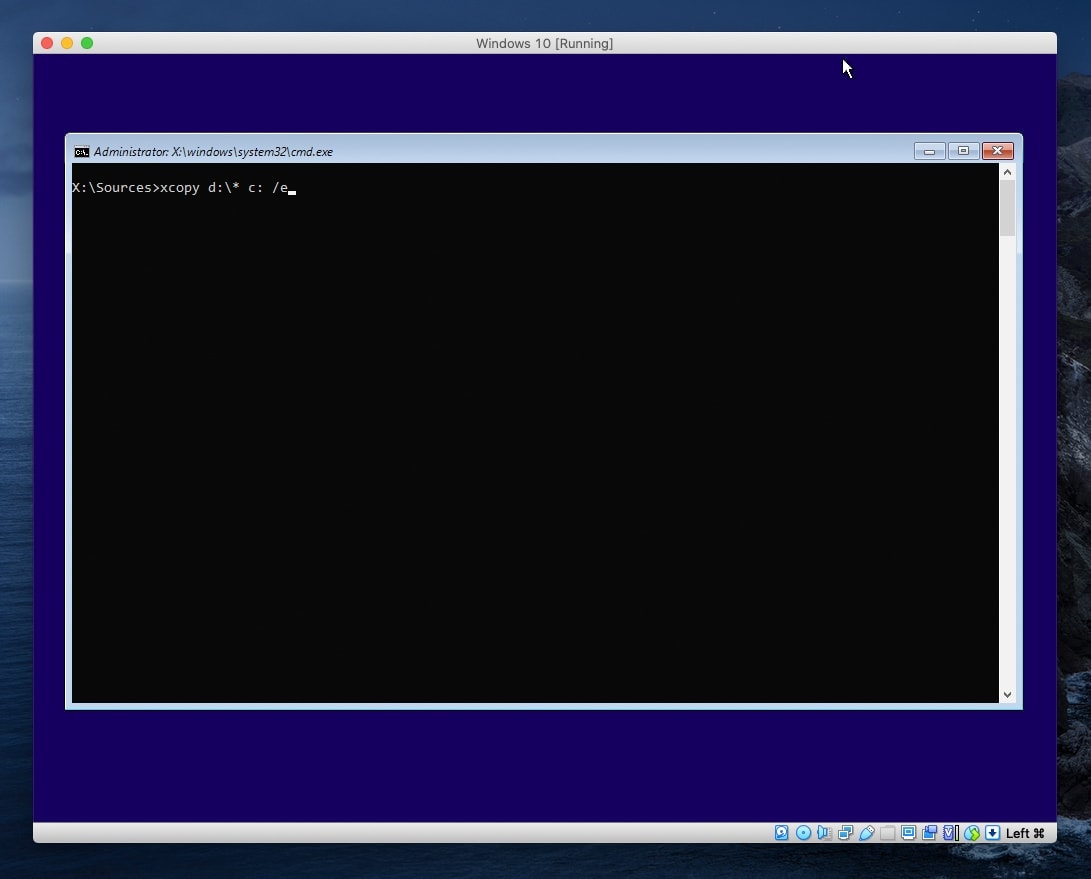
The Command prompt will likely never be dropped, so it is certainly handy to know how to use that to have supreme control over whatever tasks you need to do concerning low-level hardware operations. In this article, we have given you a step by step, command by command guide to getting your Windows 10 USB created and ready to install. For most of the commands we used, you can simply use your copy and paste keyboard shortcuts, and just fill in the one or two pieces of unique information by hand.
The other option is using third-party options. The upside of using apps like this is they will likely be supported as long as people find them useful and the programmers find them profitable. Just follow our step by step instructions, and you will be only a few clicks away from a piece of bootable Windows USB Drive, that will get your PC or Mac running with the latest version of Windows quickly and effortlessly. We do recommend that you obtain any third-party software from reliable sources, like the App Store, or trusted websites, to reduce the risk of using infected media that could pose a risk to your computer and your data.


Thank you! It worked. 🙂