At the latest worldwide Apple conference, the company introduced to the world the next generation of its famous operating system. The new macOS 13 Ventura interface is completely refreshed but it still has many things in common with the well-known design of iPadOS.
It packs a bundle of new fancy features such as a stage manager, shared tab groups, and a continuity camera among others. For programmers, Ventura comes with the XCode 14 - a complete developer toolset for creating apps for Mac, iPhone, iPad, Apple Watch, and Apple TV. The compact design with a new editor feature enables faster coding by up to 30% compared to the previous version.
But in order to try out new features without affecting your computer, you should use a virtual machine. To install macOS 13 Ventura on Virtual Machine you need to use macOS Ventura ISO Installer.
What is macOS 13 Ventura ISO Image?
In order to understand ISO Installer, you should know what is ISO file. This is an archive file that contains a copy of data found on an optical disc, such as a CD or DVD. This way you can store large amounts of data in just one downloadable file instead of physical DVD.
While the purpose of this file is to create backups for the optical disc, ISO files these days are used primarily for installer image such as operating systems. MacOS ISO Installer is an installation file that contains all the files and folders that would be on the installation ISO, thus making it easier for you to get the new macOS running on VirtualBox and VMware.
How to Create macOS Ventura ISO Installer Image
1. Download macOS 13 Ventura Final
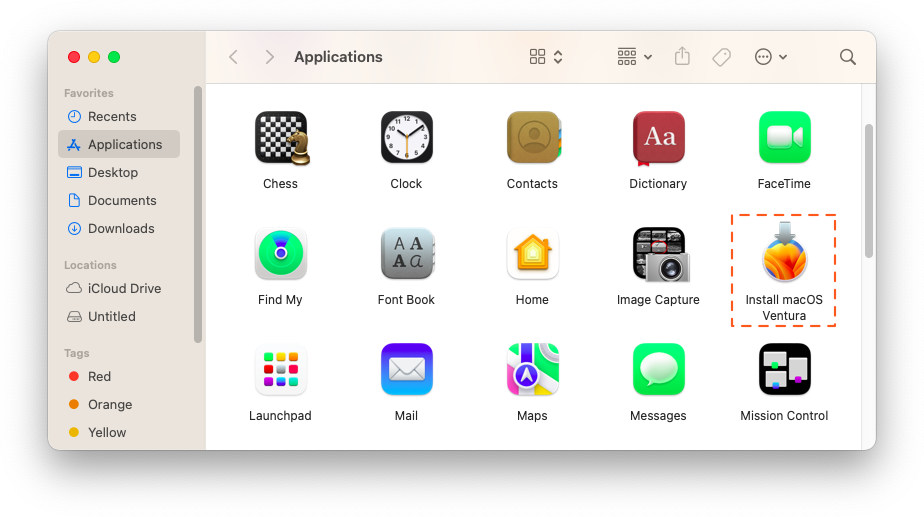
There are many ways to download macOS Ventura Final version, but the easiest is with a simple click of your mouse. Open up App Store on macOS and search for "macOS Ventura" in there then find out all available downloads that way! This macOS can be found under Software Update section once you've clicked “Get” button next too it - make sure not miss this chance because 12GB files take time to download. When downloading successfully complete look inside Applications folder after completion.
Click here to download the macOS Ventura Final with App Store

2. Create macOS Ventura ISO Installer Image
After this, you need to launch the Terminal from the Spotlight Search or open it directly from the Applications > Utility folder and there you will use the commands below to create a macOS ISO Image. Here is the step-by-step overview:

Create the ISO Installer Disk with hdiuti command:
hdiutil create -o /tmp/Ventura -size 14079m -volname Venturaiso -layout SPUD -fs HFS+J -type UDTO -attach
- Size: the size of Volume. You can change the size to match the version of macOS. Usually, your choice should range from 14GB to 19GB
- Volume name: For instance, in this case, volume name is Venturasio. To avoid errors during the creation of ISO file, we recommend that you do not change this parameter
- Layout SPUD: Single partition, Apple Partition Map
- -fs HFS+ : file system options. Mac OS Extended is the file system of the macOS drive
- Type: UDTO - DVD/CD master is the file for the ISO File
- Attach: means that this volume will be mounted to the macOS as soon as it is created
sudo /Applications/Install\ macOS\ Ventura.app/Contents/Resources/createinstallmedia --volume /Volumes/Venturaiso --nointeraction
hdiutil detach -force /Volumes/Install\ macOS\ Ventura
mv /tmp/Ventura.cdr ~/Desktop/Ventura.iso
After you have Ventura.ISO on your desktop, you can use this file to install macOS on any virtual machine (VM) without any problems. Now, you can install macOS on VirtualBox, VMware and Parallel Desktop. In case you would like to learn more about Mac Virtual Machine, check out the other Virtual Machine tutorials in the description of this guide. If you encounter any problems during the process of installation, please leave a comment below in the description.


Thanks, works for me!
Great instructions. Worked like a charm. You’d be surprised how many pages and tips and scripts out there don’t actually work on Ventura (or in any of the recent MacOS changes).
Thanks for sharing!