If as a Mac user, you run into system issues, you need to be able to safely clean install the latest operating system and continue your work. When you clean install macOS, you get a fresh start that can solve a lot of the issues related to user experience, connectivity, and security.
The reason why you want to clean install macOS can differ. You may want to sell it, clean up partitions, or troubleshoot issues. Reinstalling a Mac isn’t easy. Especially with the new the installation process with a bootable USB, you may encounter the “Installation cannot proceed because the installer is damaged” error. There are many reasons why you may encounter such an error. In this guide, we will guide you through the installation process so that you can avoid all the installation errors.
In this tutorial, we will use installassistant file to open macOS Installer in Recovery mode. An installassistant file is a built-in tool that manages the installation of macOS in Recovery Mode.
How to Clean Install macOS with Recovery Mode
1. Download macOS Installer
You have to download the macOS Monterey or macOS Ventura installer for the installation process. you need to download macOS Monterey installer from the Mac App Store. You can also search for ‘macOS Monterey’ on the Mac App Store to download the installer.
The macOS Monterey installer is 12.6 GB in size and hence can take time for the download to complete. When the download is complete, the macOS installer will launch automatically. However, we don’t need the installation process to start just yet and hence choose to not continue further.
2. Move macOS Installer to the Temporary Disk or Flash Drive
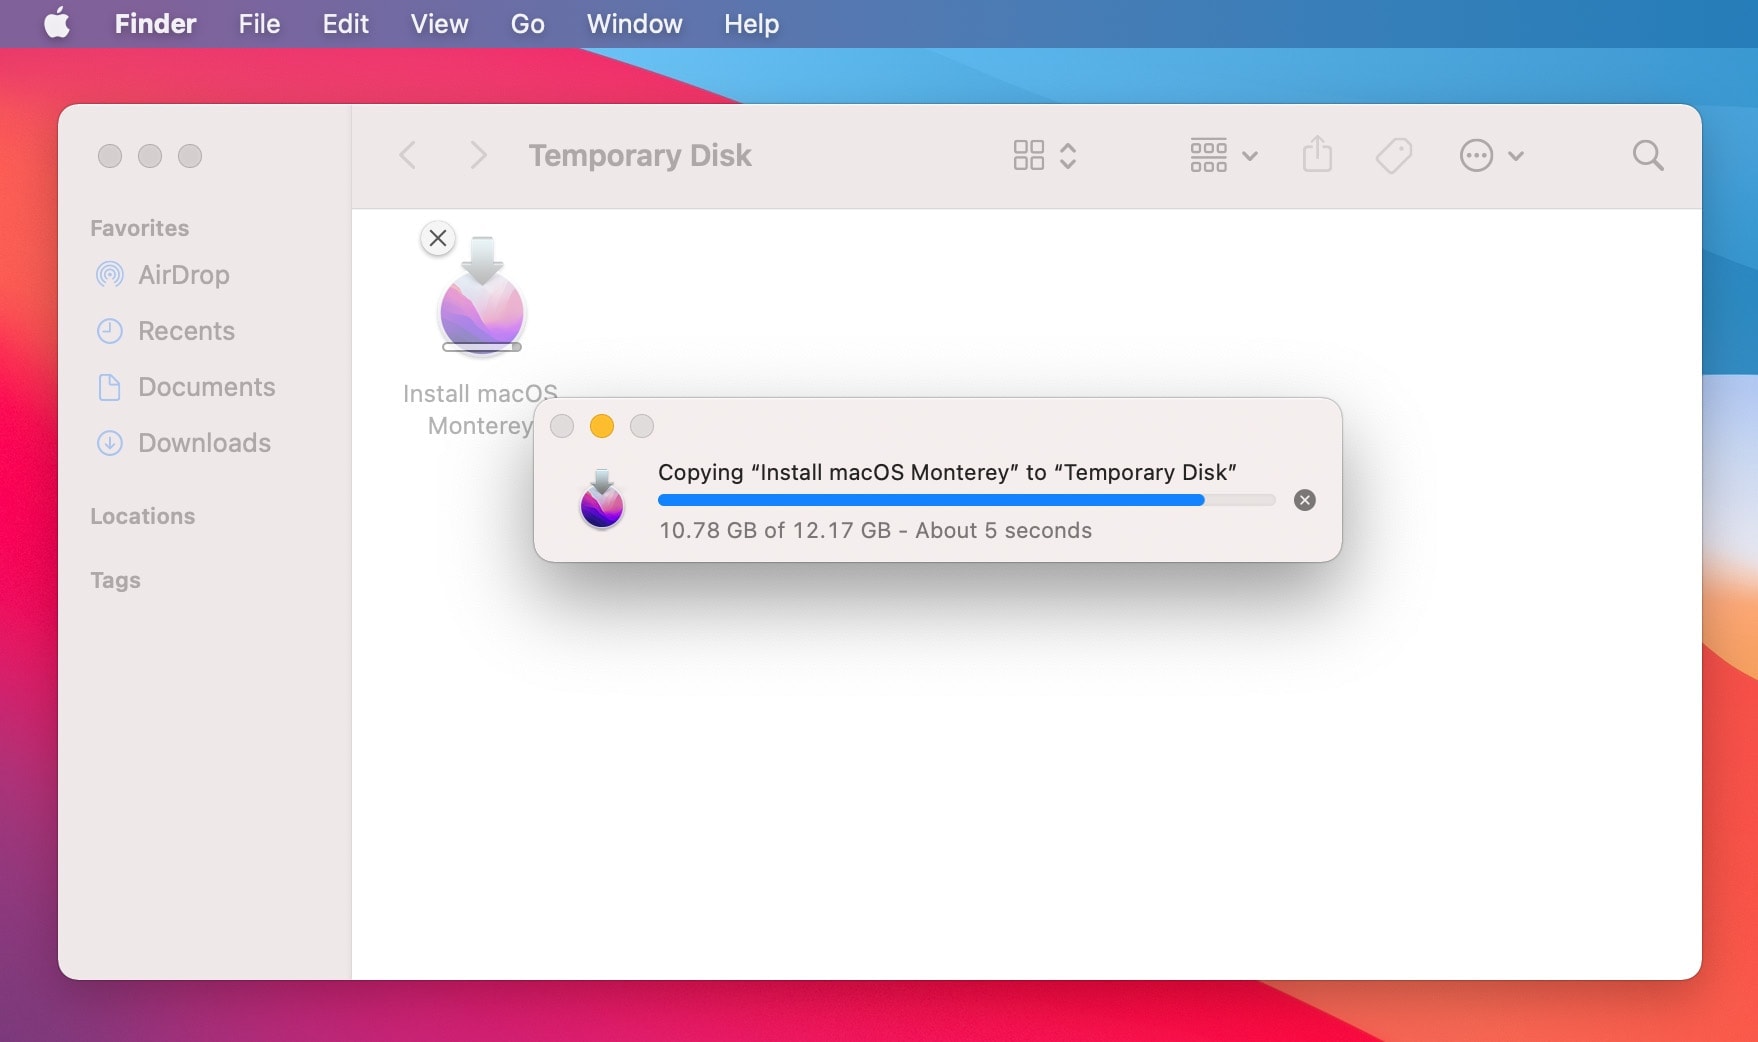
We will move the "Install macOS Monterey.app" or "Install macOS Ventura.app" to a temporary disk or USB external drive that we will be using for the clean installation. If you don't have a USB Drive, you can create a Temporary Disk.
Follow the steps below to create a Temporary Disk:
Step 1: Go to Applications > Utilities, Open Disk Utility, Click on "View > Show All Devices"
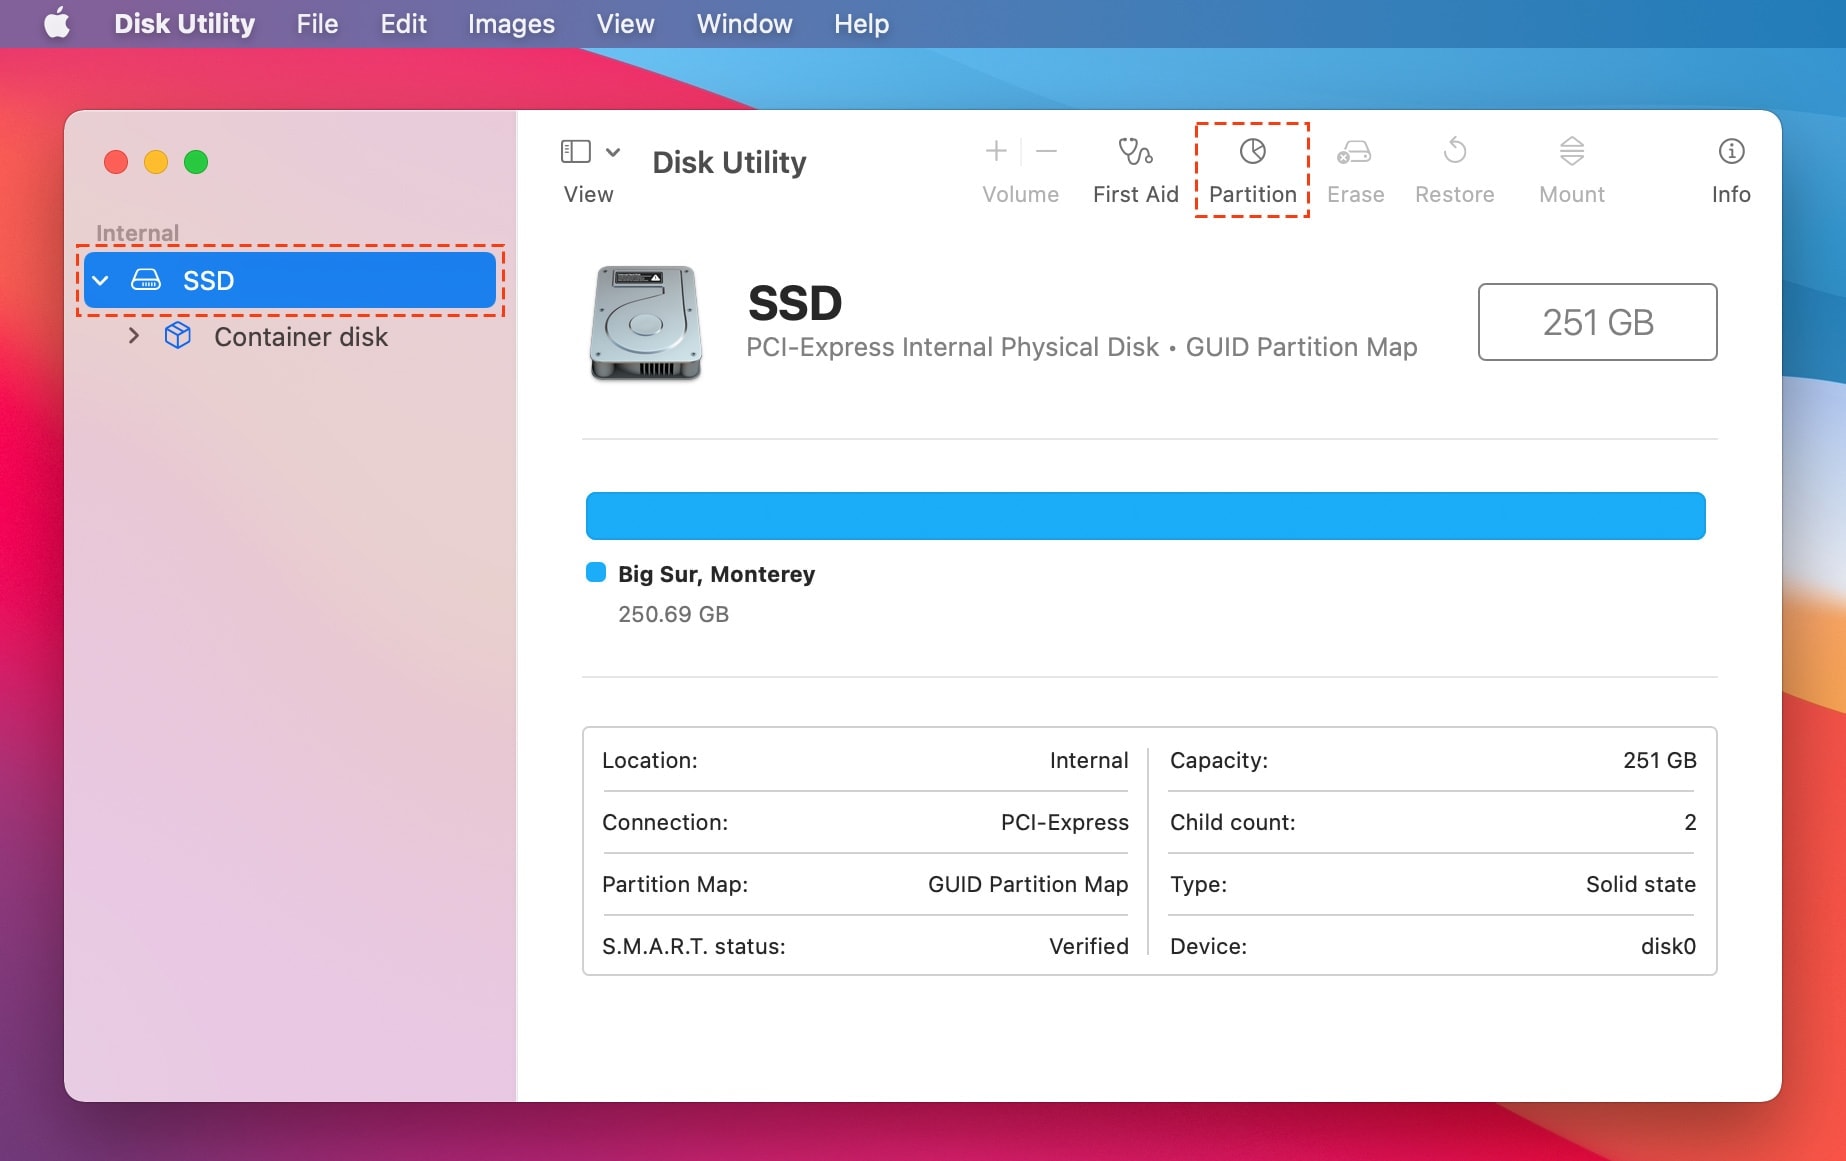
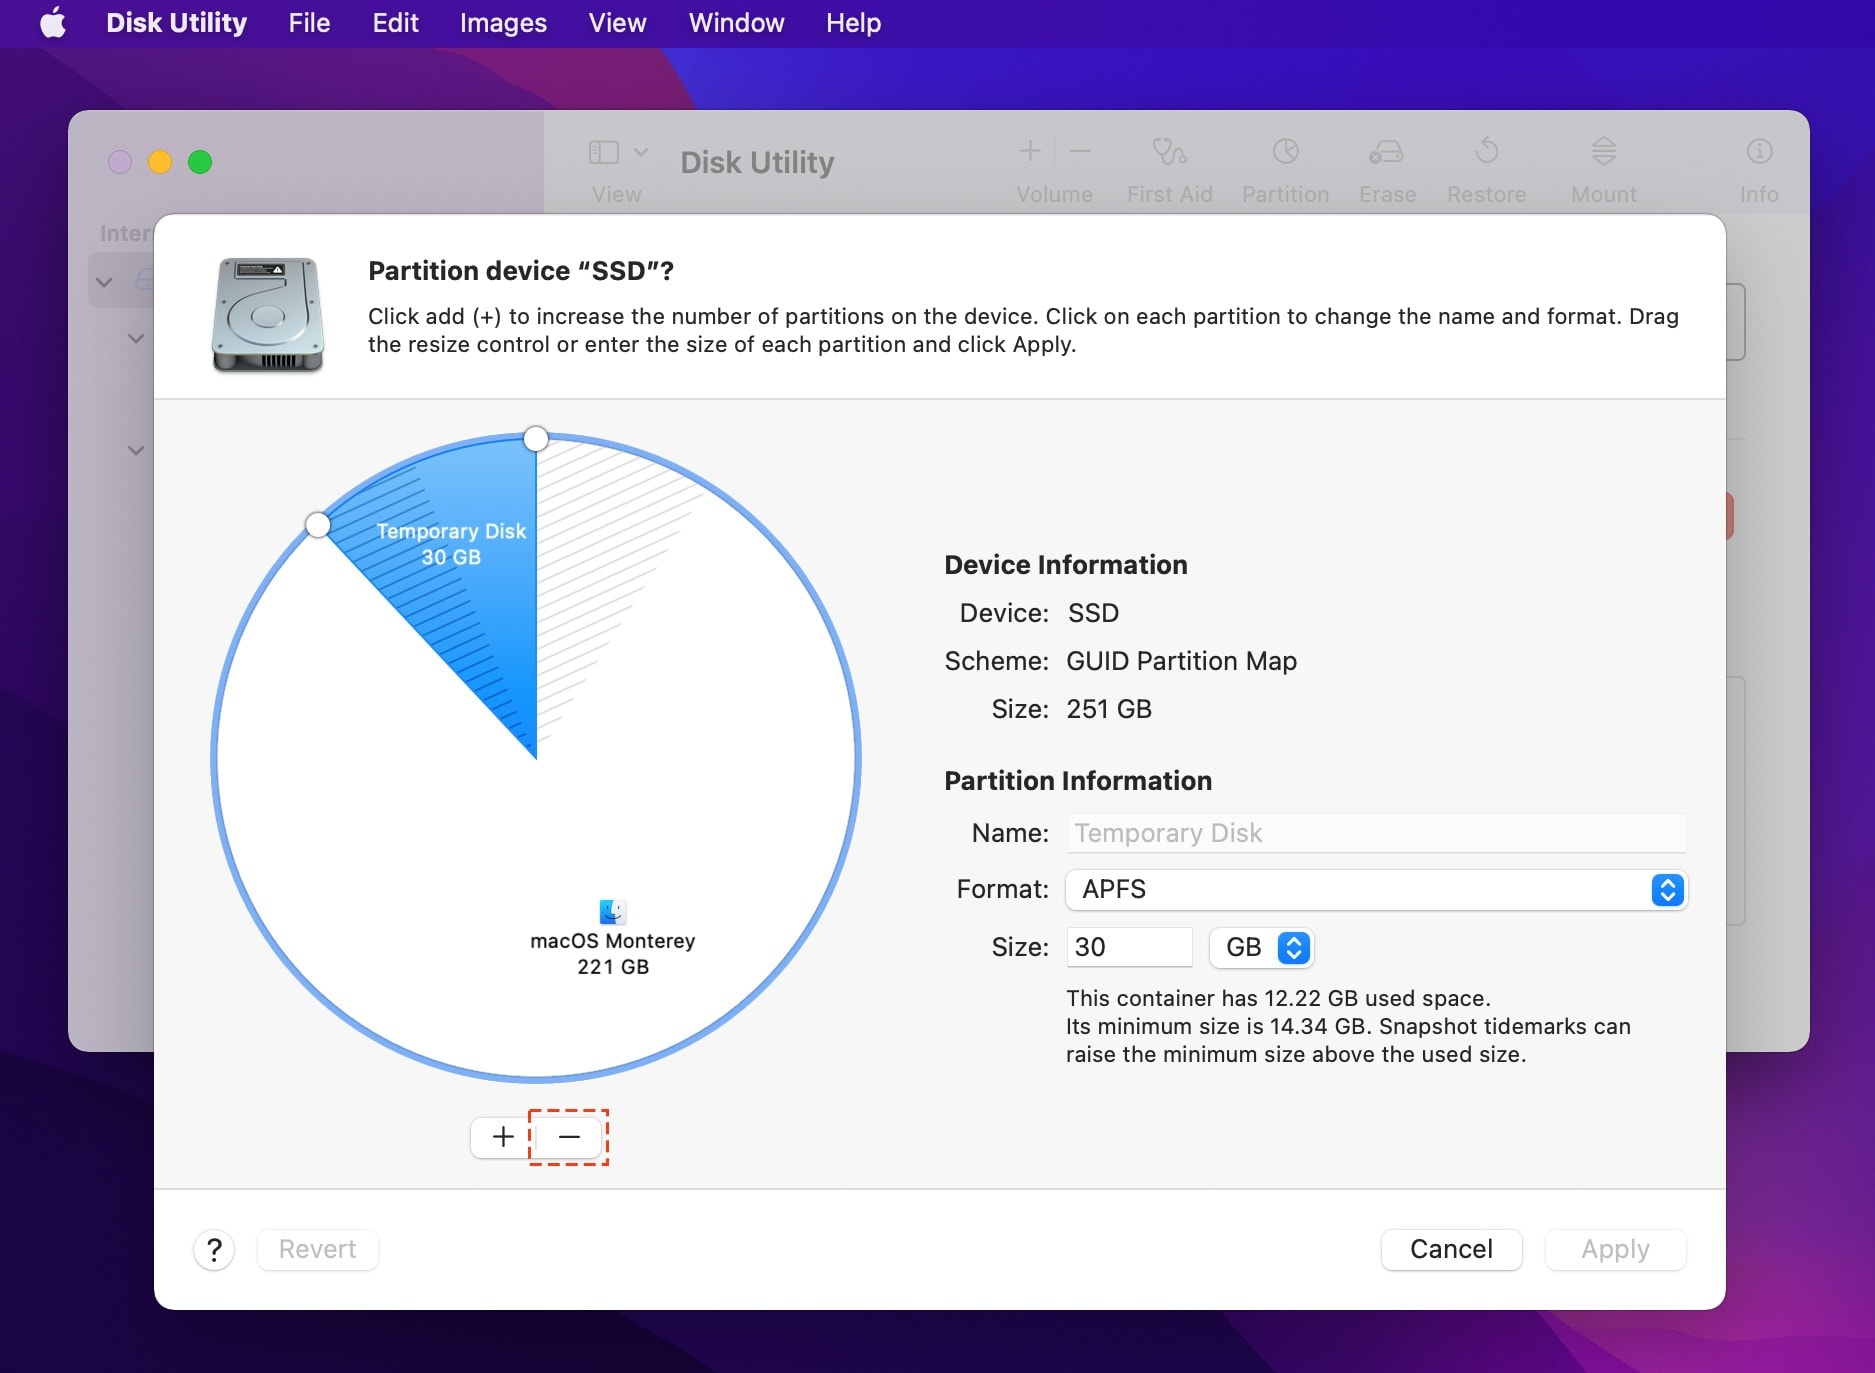
Step 2: Click on your Disk and select Partition, Click on "+" button to add new partition.
Name: Temporary Disk
Format: APFS
Size: 30 GB
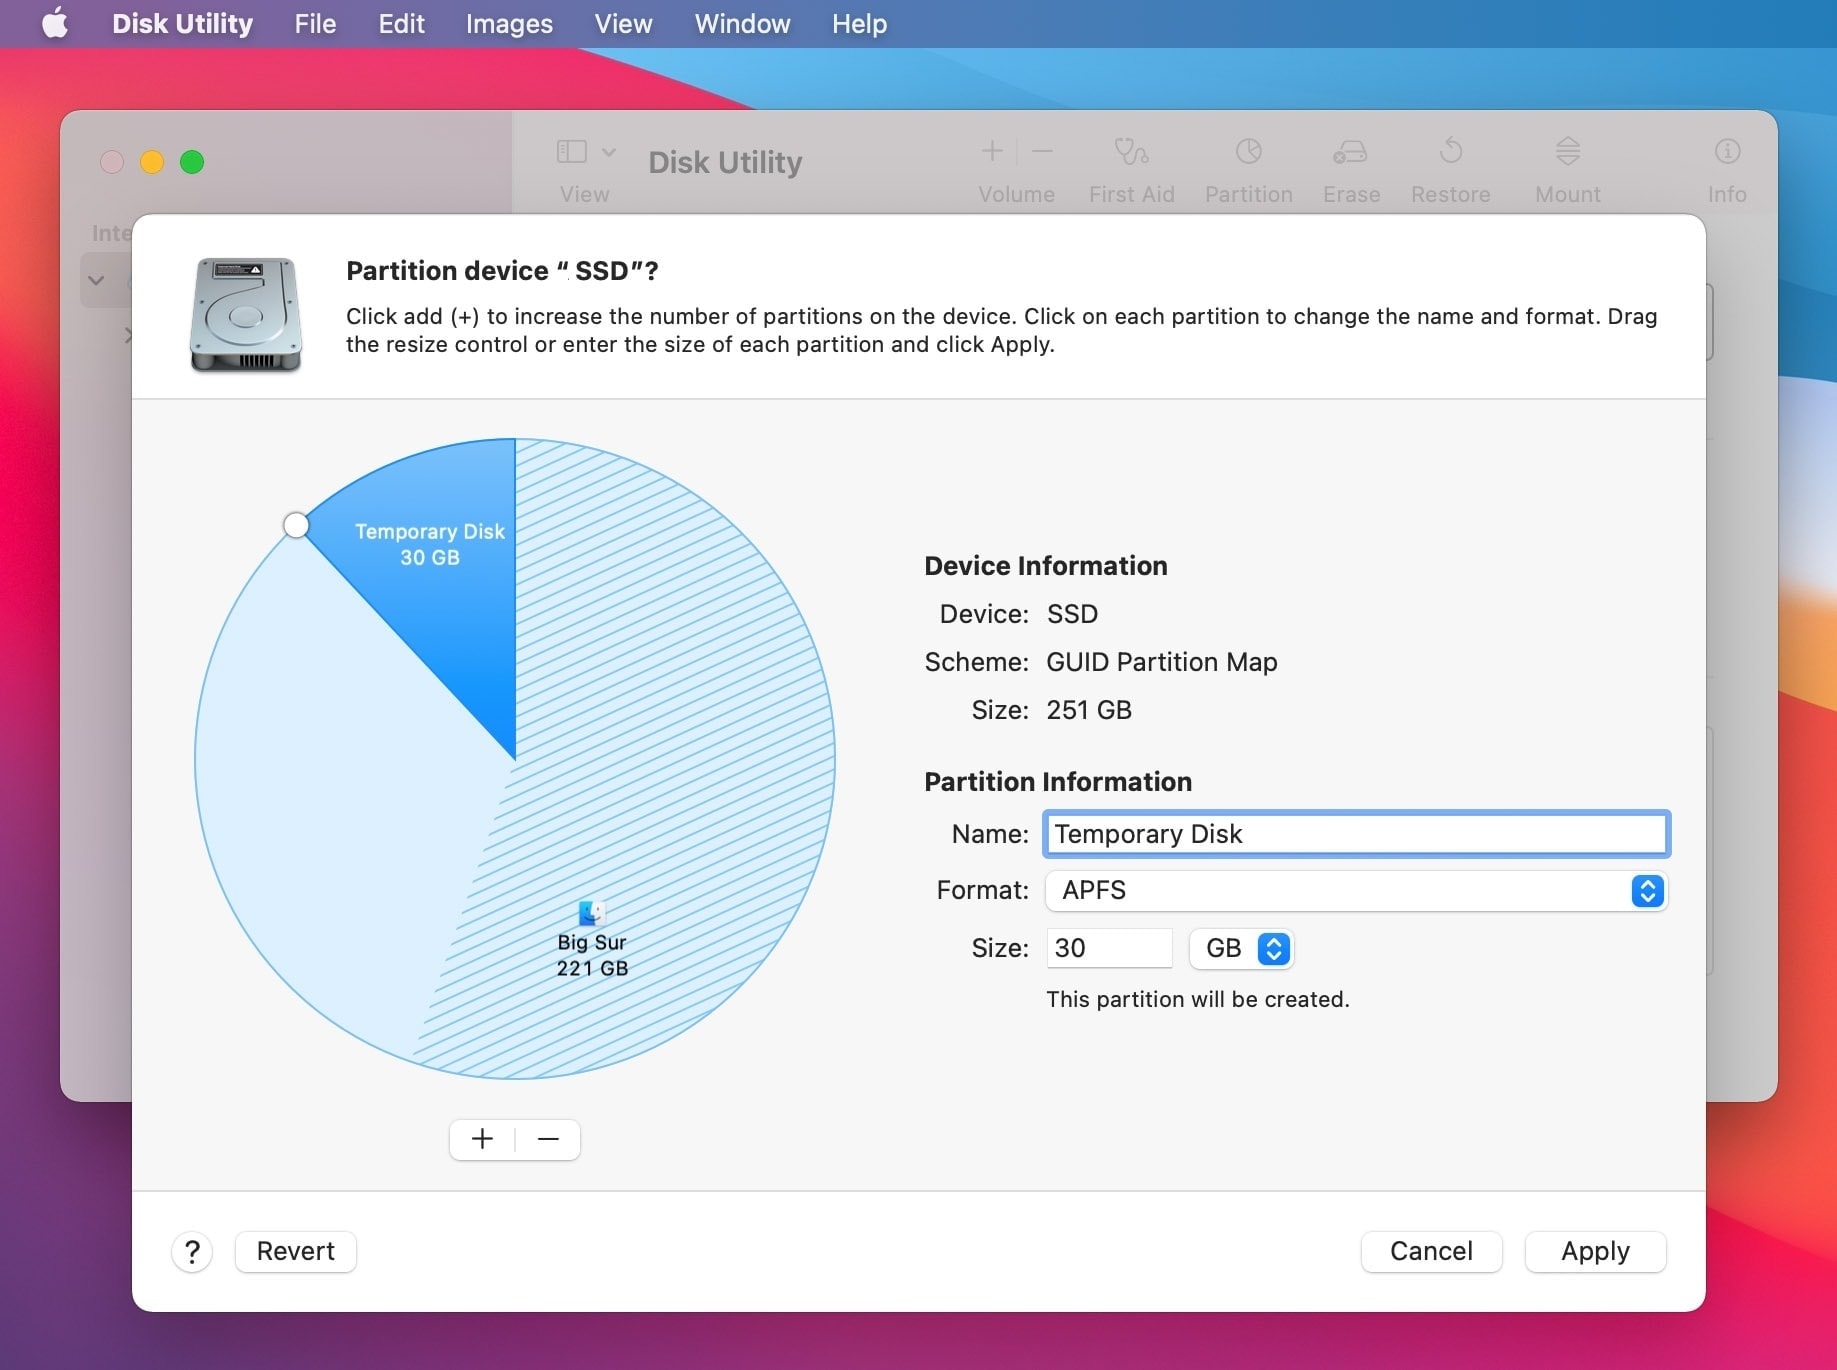
Disk Utility will create the partition. This process can take some time. When it is completed, click on Done.
All you need is a copy of the macOS installer to Temporary Disk or USB Drive.
3. Go to Recovery Mode
Intel Mac users need to press and hold the Command + R key combination during system startup to enter Recovery Mode. Alternatively, M1 Mac users need to hold down their Power button when they boot their computer to get into Recovery Mode.
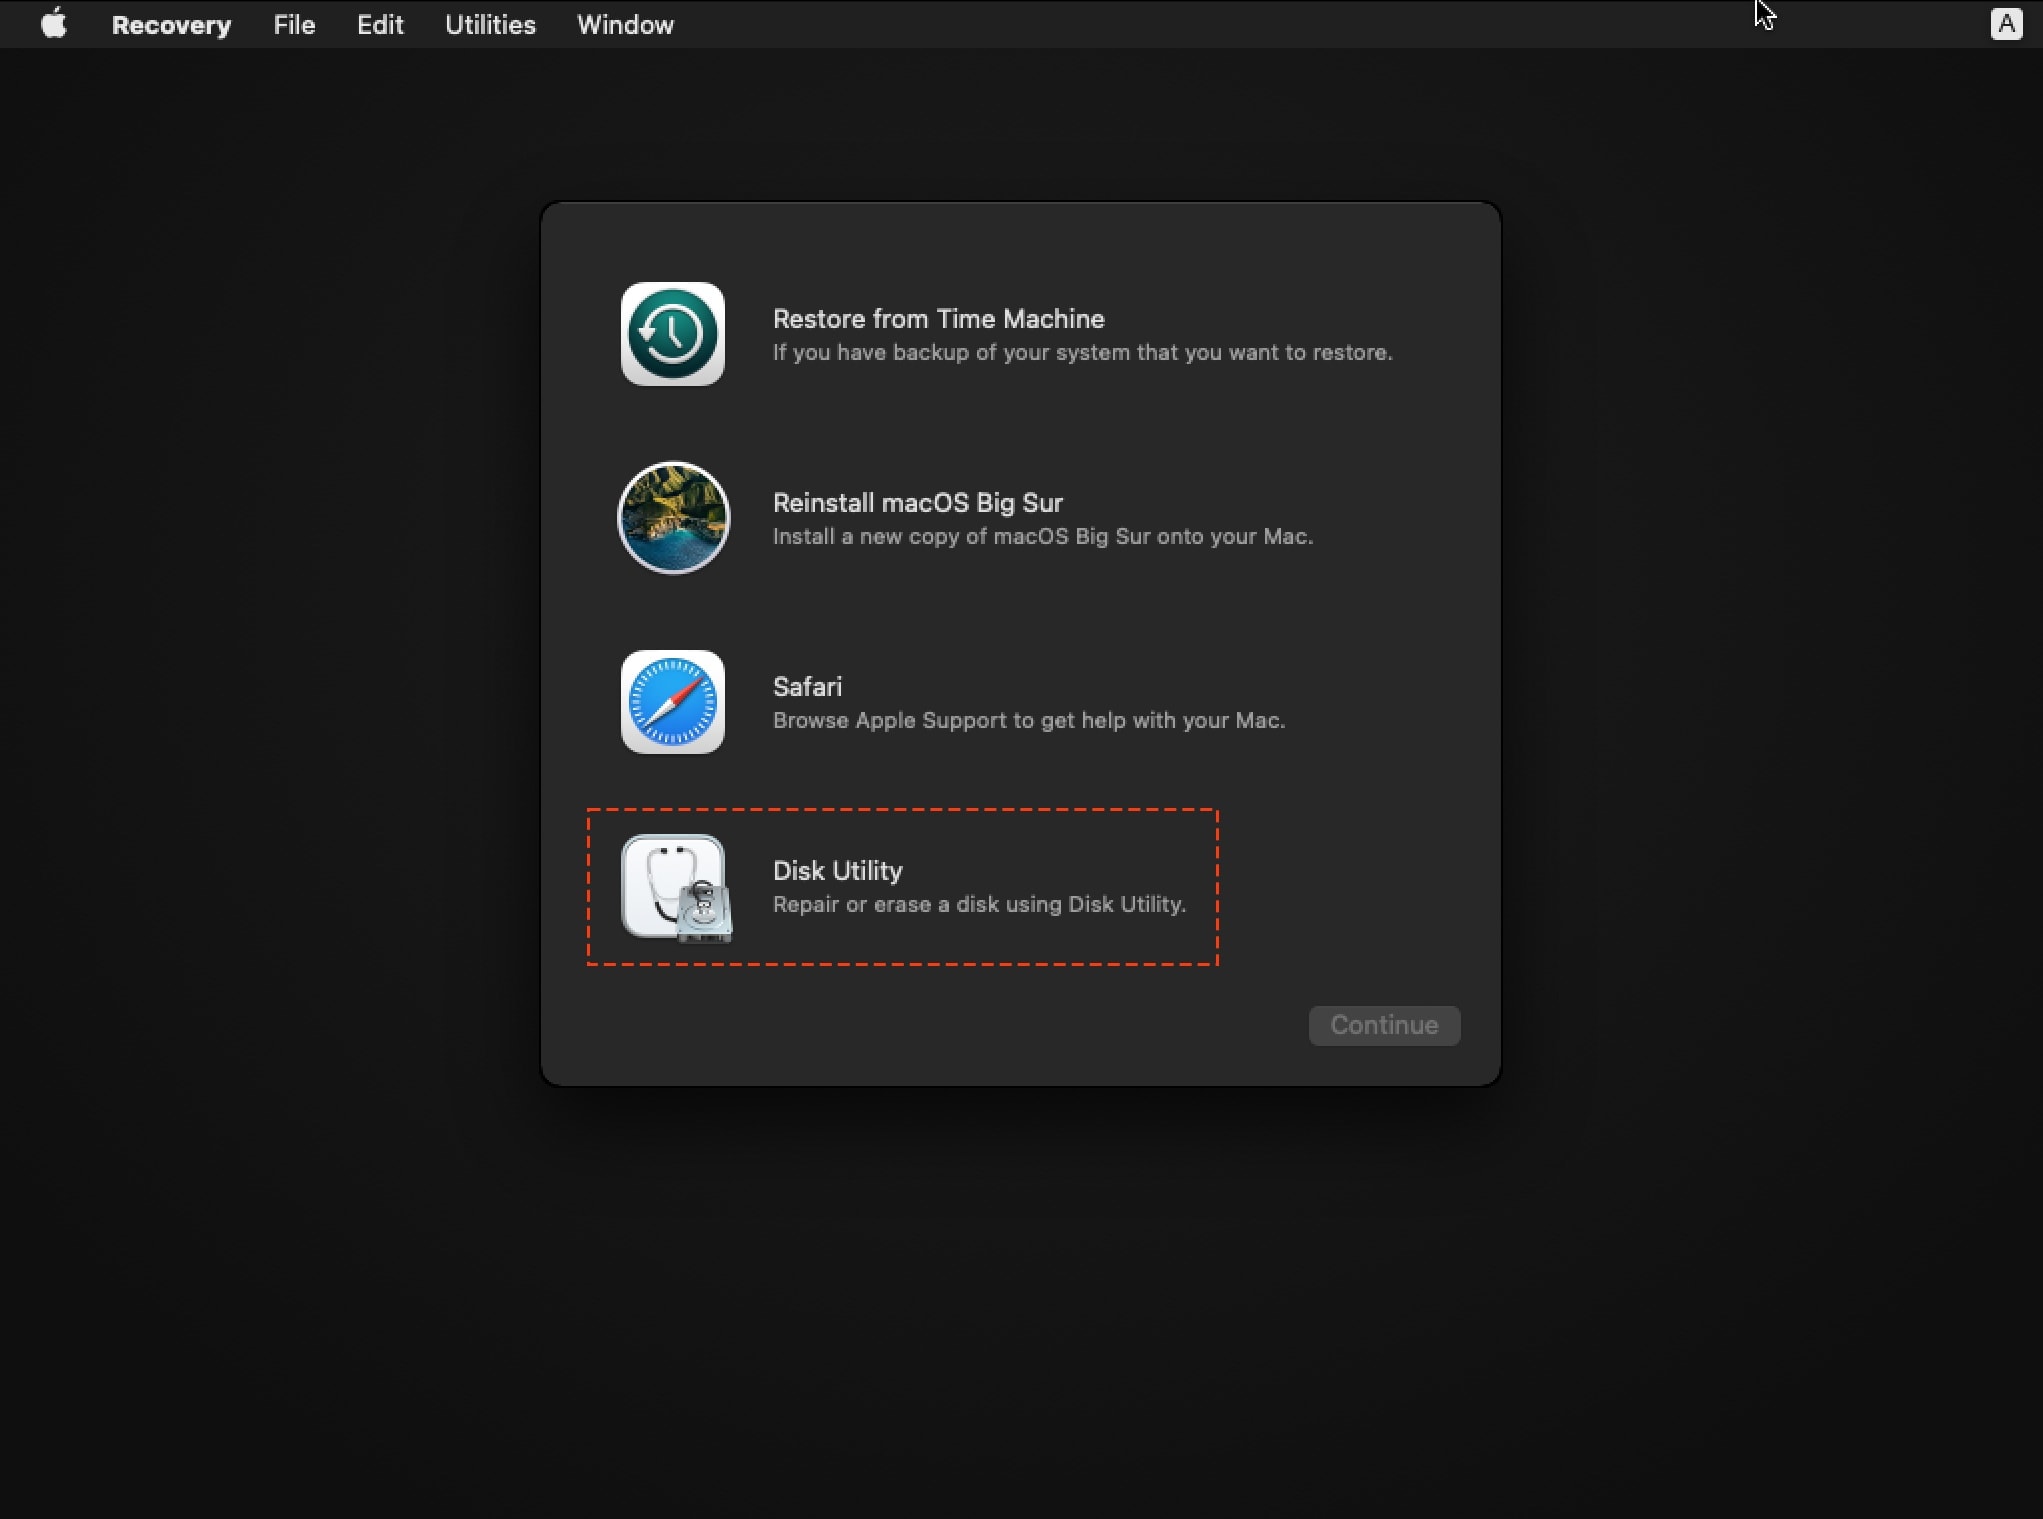
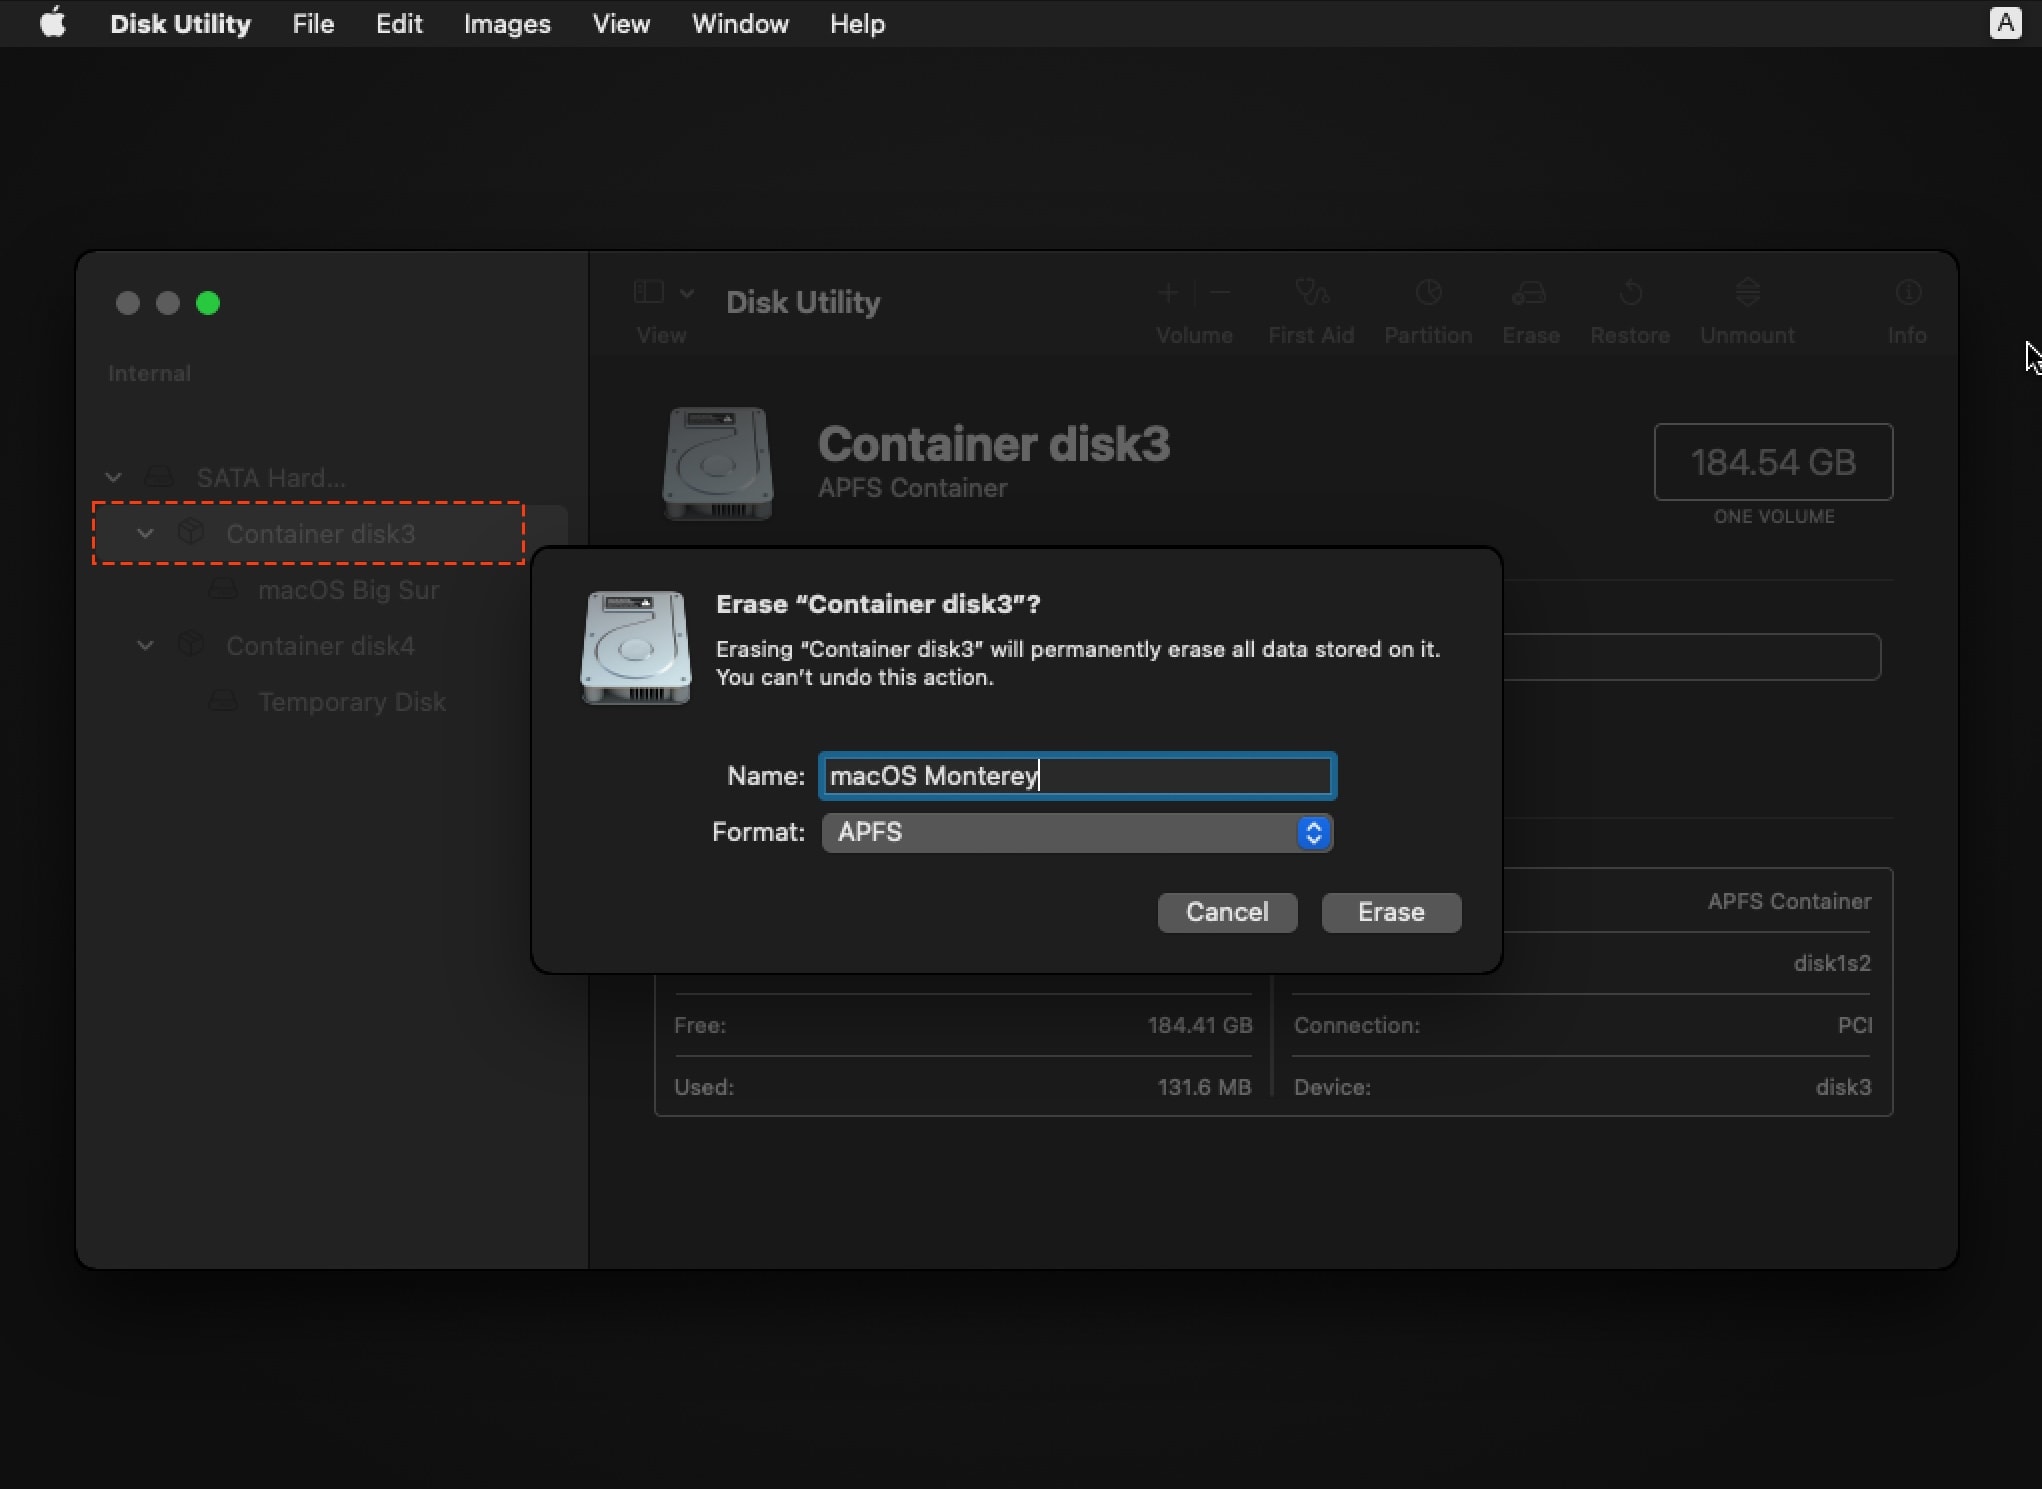
In the Recovery Mode screen, click on Disk Utility and erase the container disks by choosing them and clicking on the Erase option. Format the hard disk to APFS partition.
4. Use Terminal to Open InstallAssistant
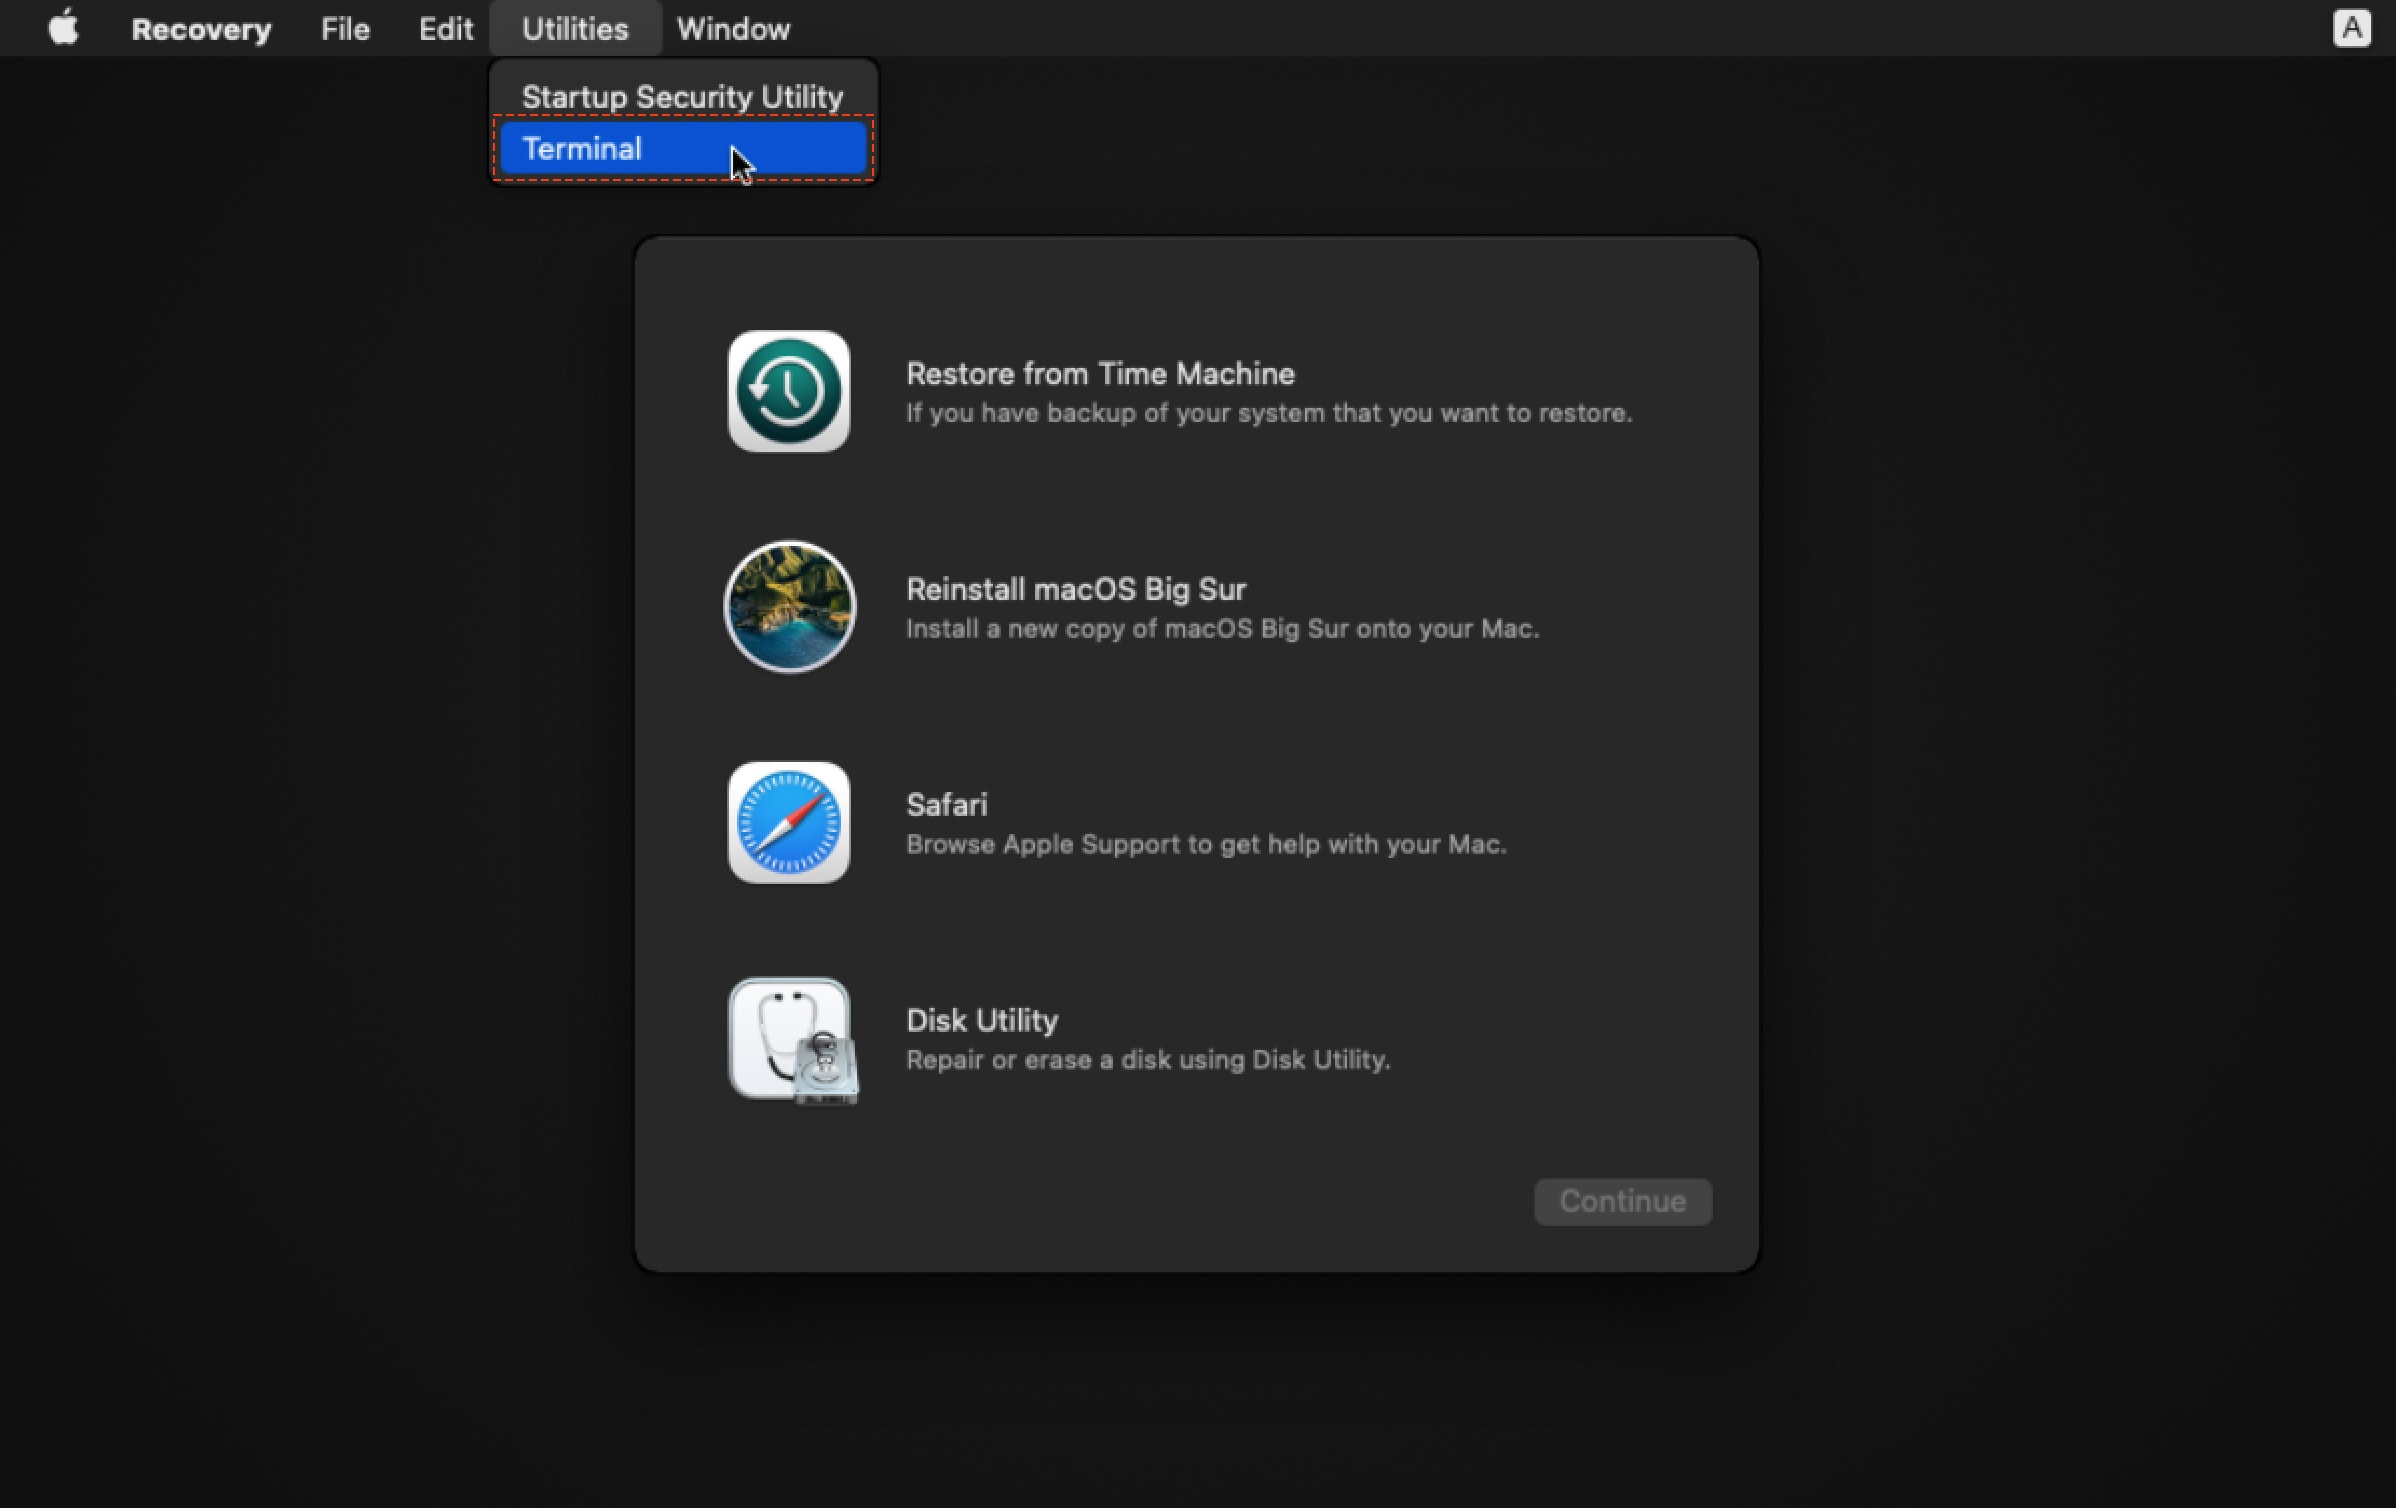
To clean install macOS Monterey after you’ve erased the internal storage, you need to use Terminal. In Recovery mode, select "Utilities > Terminal"
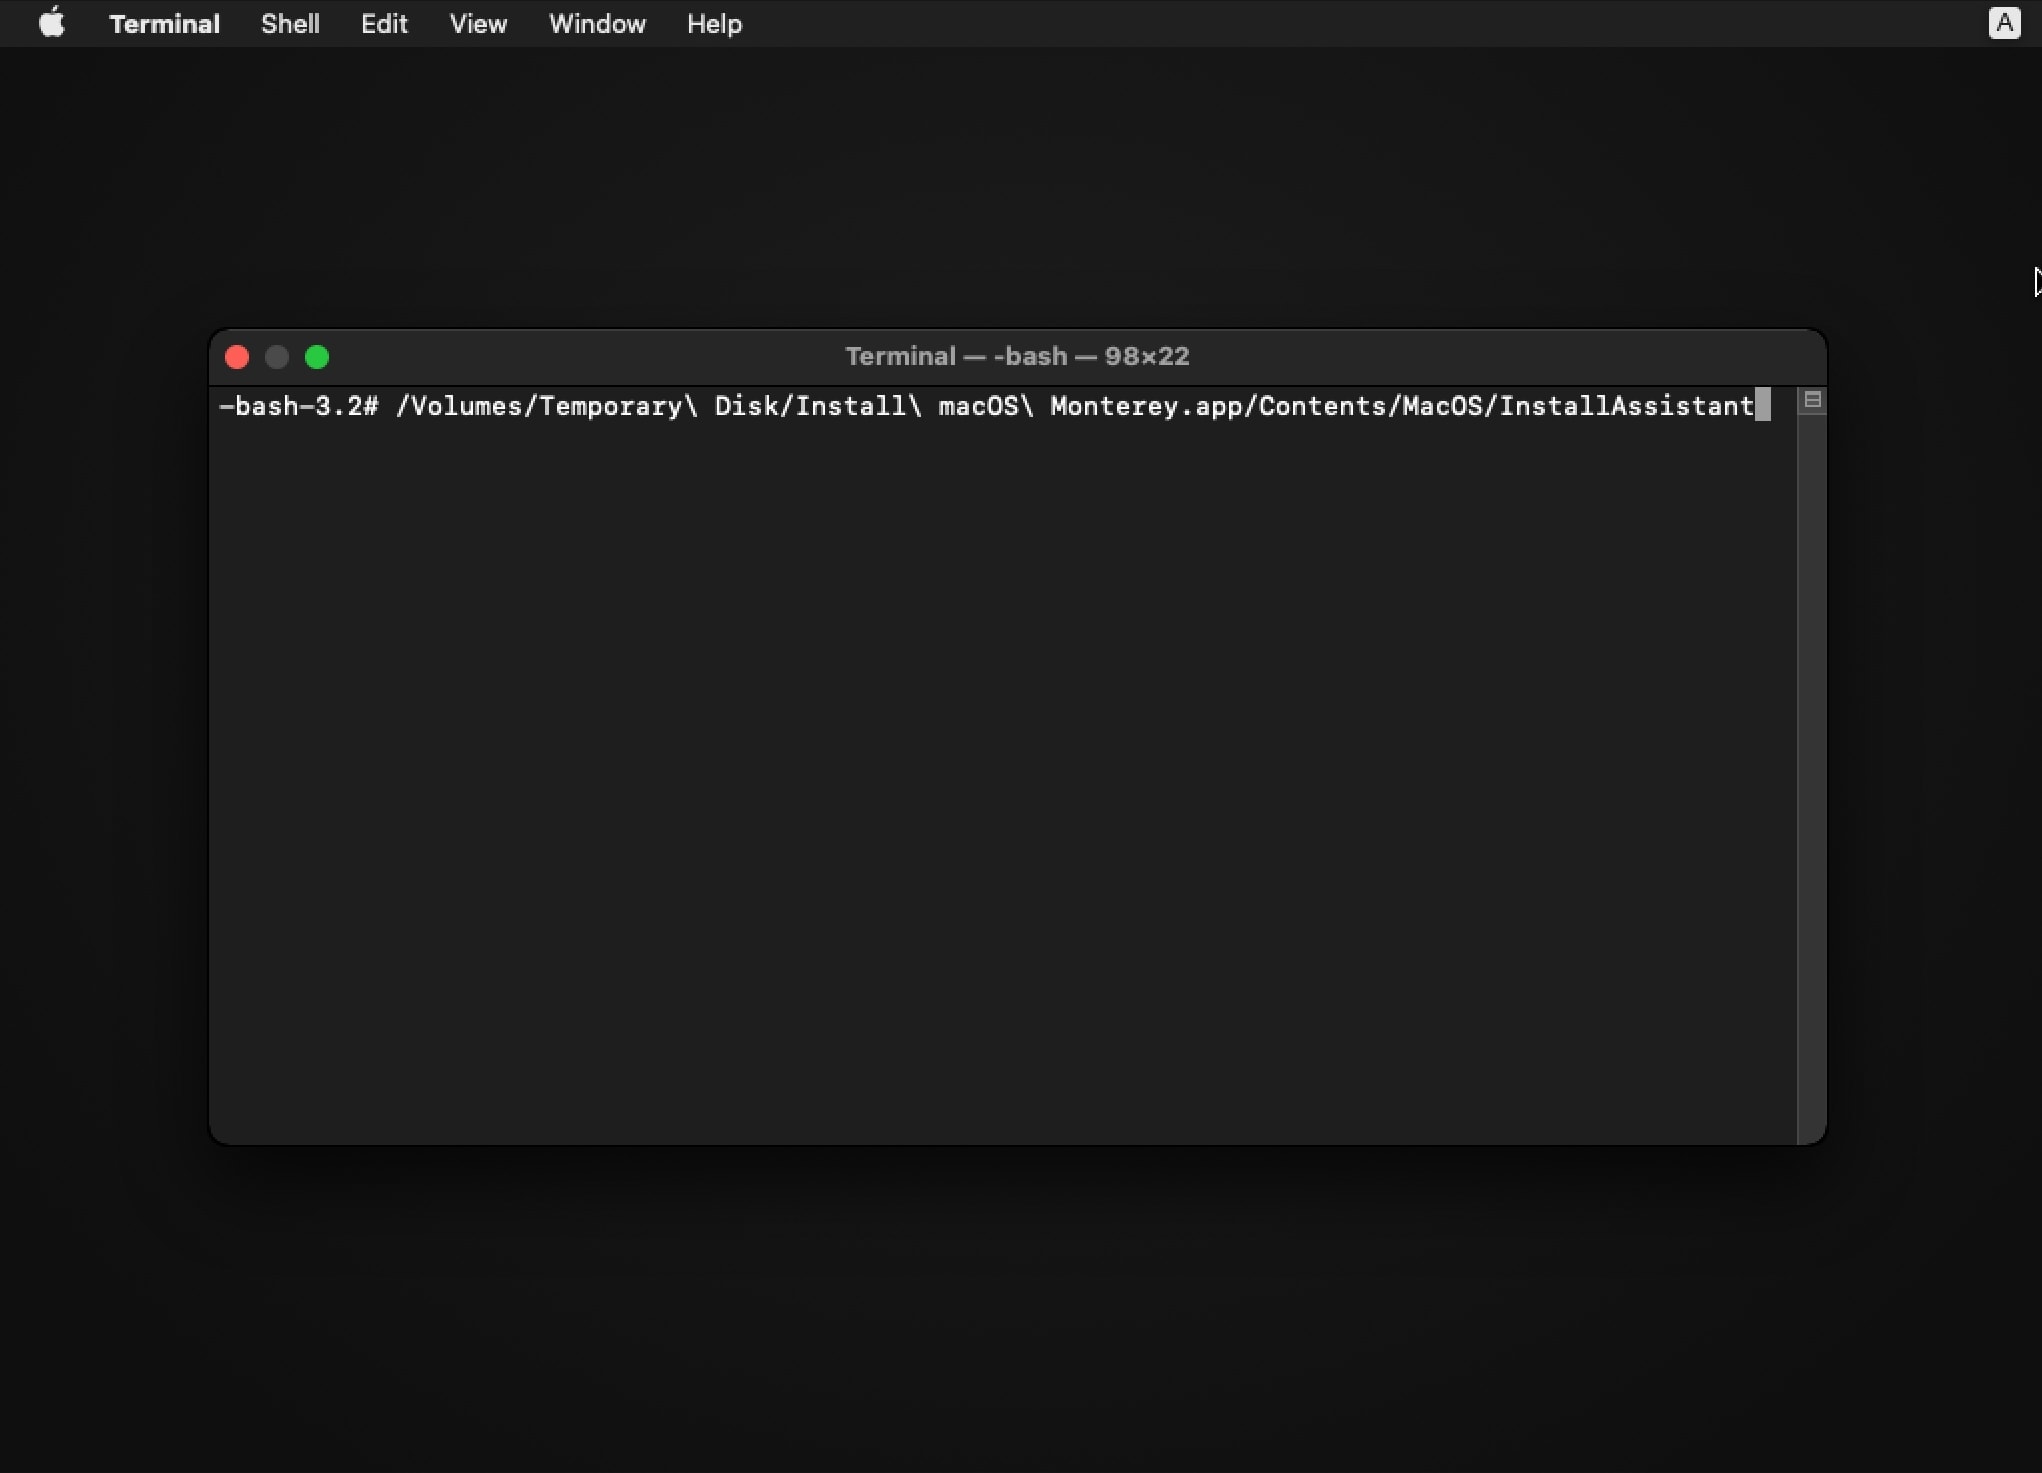
/Volumes/Temporary\ Disk/Install\ macOS\ Monterey.app/Contents/MacOS/InstallAssistant
/Volumes/Temporary\ Disk/Install\ macOS\ Ventura\ beta.app/Contents/MacOS/InstallAssistant
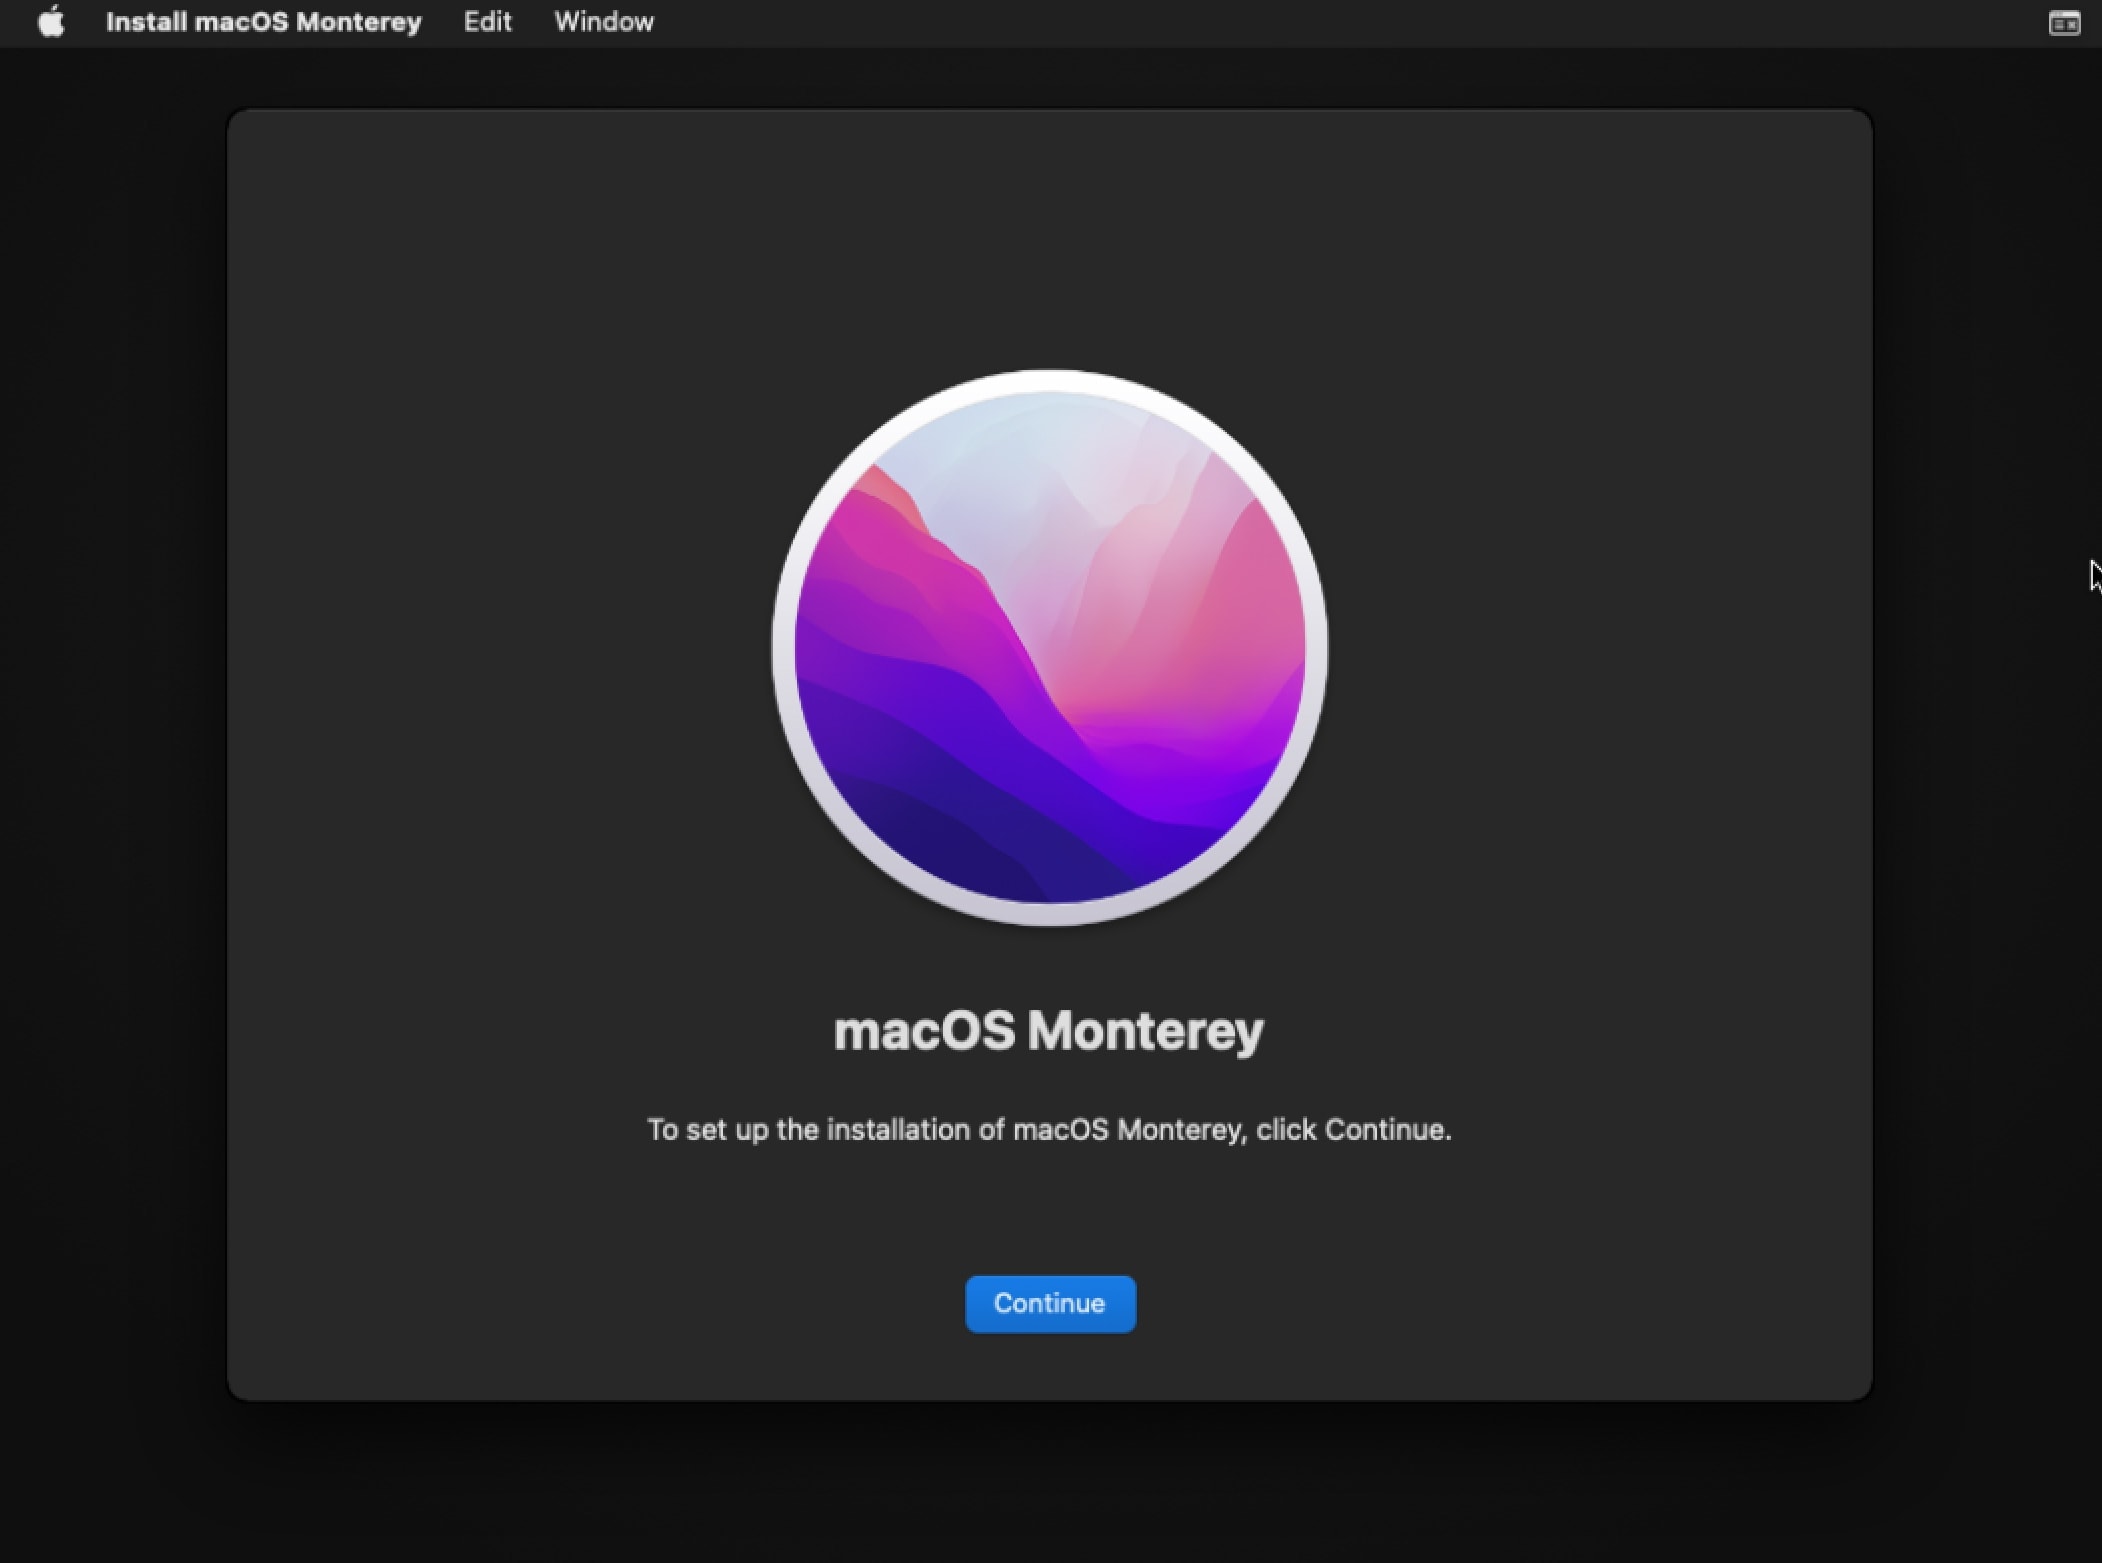
Follow the on-screen instructions to complete the clean install of macOS Monterey.
5. Delete Temporary Disk after macOS Installed
Open Disk Utility in Applications > Utilities. Click on Temporary Disk partition and select "-" to delete it.
That’s it. You now have a clean installation of macOS Monterey on your Mac.


Leave a Comment