macOS High Sierra has the reputation of being very fast. However, when you open many applications at the same time, you may encounter an unresponsive application. This means that you cannot do anything while the app is running. Any input command simply won’t work.
When you try to close the application so that you can relaunch it also becomes unresponsive. Sometimes even the mouse pointer refuses to navigate to the quit button. Disappointing, dreadful maybe? Well, no need to be scared. You can actually force quit on Mac with very easy steps. You can use the following prime.
Force quit on Mac OS High Sierra
Using the keyboard
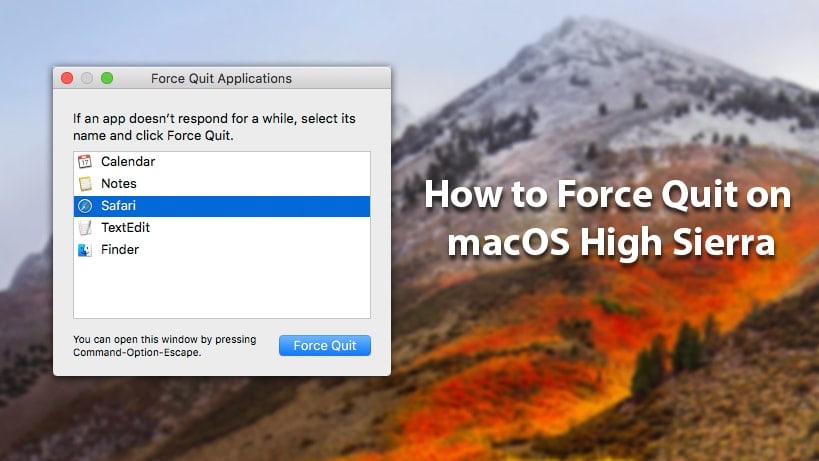
You’ve tried to move the mouse pointer, and it’s also not responding? Worry not. In case the mouse gets frozen together with your app; the keyboard is the mother of all shortcuts. To make the unresponsive app tab disappear, press and hold the Command – Option – Escape keys.
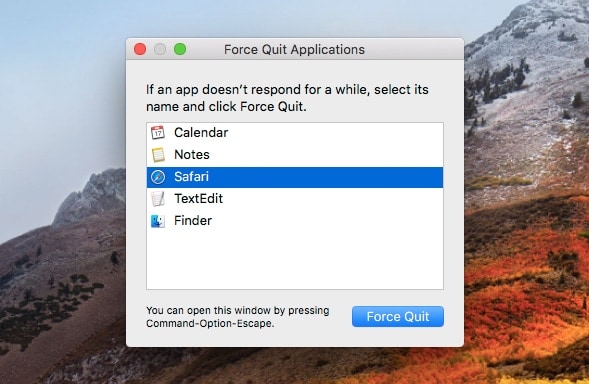
A list of the running apps will appear. To end the troublesome one completely, do this by clicking on its name followed by the “Force Quit” button. When you want to force quit on Mac OS X, this is the easiest process. Just a keystroke and you are done.
From the Dock
Most of the time an app has stopped responding, the menu bar at the top becomes unresponsive too. As a result, selecting the quit option is impossible as you will keep going back and forth trying to click it to no avail.
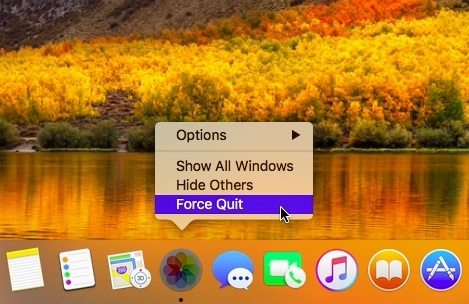
You probably lack the patience to keep clicking or waiting for the app to start responding, don’t you? The Dock at the bottom screen is another lifehack. It will help you close the app then reopen it and get back to what you were doing. Look for the app icon at the Dock, Press Option (Alt) and Right Click it then click on the Quit option button at the bottom.
Using the Activity Monitor
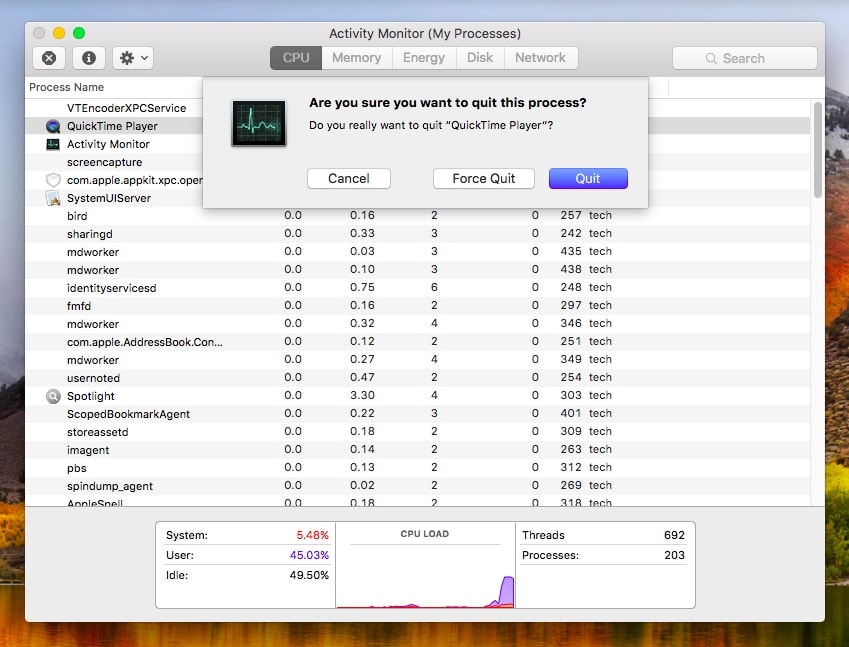
For this option, you have to open the Activity Monitor first. This is done by navigating to the top of the screen and click the Spotlight icon on the right side. For those who don’t know this icon, it’s the magnifying glass at the right hand of the screen. A text box will then appear. Type the word “Activity Monitor.”
This will pop up a task manager that you get to choose the unresponsive app from. This manager displays and gives information about everything that runs on your computer from the system unit, CPU, Memory, Disk to the Network connections. To end your frustrating app, click on the “Force a Process to Quit” button which appears on the top left side then clicking “Force Quit” or “Quit”.
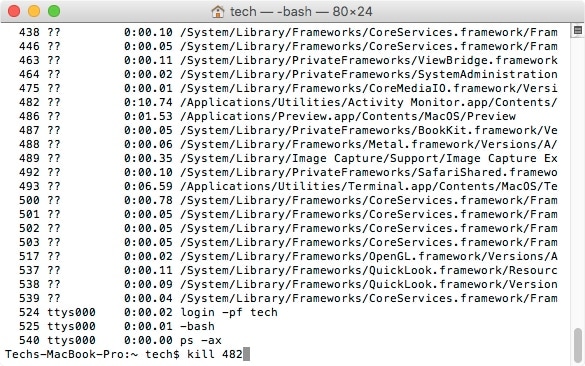
Using Terminal
To launch the terminal option, you first have to open the Applications folder followed by Utilities at the bottom. It will take time so patience should be a virtue over here. After some seconds, your username, as well as a tilde mark, will appear in a box. Type the word “ps -ax” press the Return key and voila! All your running applications will appear. Then find a “PID number”.
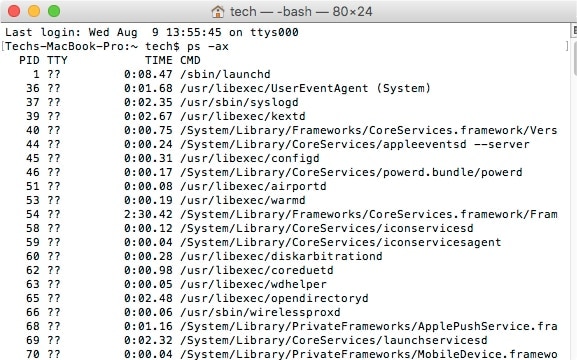
This is where you now get to command your Mac to close the running applications. To do this, you have to type the words “kill PID number” This will close the unresponsive application immediately. This is however not the best method since the command will take out everything, not just the troublesome application.
The above are easy tips to follow whenever you want to force a quit on Mac. This is helpful since waiting for the unresponsive applications can be quite disappointing. The only solution is always to close the application and open it again. This also becomes a problem since you can’t quit the app normally. As if not enough, it may also affect either the mouse or keyboard too. You may choose the process to use depending on what input works as well as master one of the four steps for the future.
However, force quitting an app on Mac is usually not safe as it may lose data in that application as well as other running applications when using the “kill command.” Only do it when data loss is not an issue.


Leave a Comment