Ubuntu is a great option if you would like to try Linux, the third force in the field of operating systems after Windows and macOS. Ubuntu is one of the Linux distros in the world and is loved by many people due to a great graphical user interface it has that makes it easy to use while the user still gets all the benefits of Linux. To enjoy the many benefits of Ubuntu, you do not have to leave the OS you are used to. You can give it a try before you make the ultimate decision. You can download Ubuntu, store it in a CD or USB drive and use this to run Linux without overwriting the original operating system. You can later decide to store the Ubuntu in the computer and use it as the main operating system or alongside Windows or macOS.
When you decide to try Ubuntu, the first step is to download it. To do this, go to the Ubuntu download page. Like many other Linux distributors, Ubuntu offers an ISO disc image file for download. This is what you get when the download is complete. To turn this ISO file into a bootable USB drive, also known as a live USB, you will need to use third-party software. The way to go about this will differ depending on the operating system the user currently has access to.
Creating Ubuntu Live USB Drive on Windows
The process is rather easy. Follow the steps below:
1. Find Rufus USB installer. Download this and double-click on the .exe file you receive.
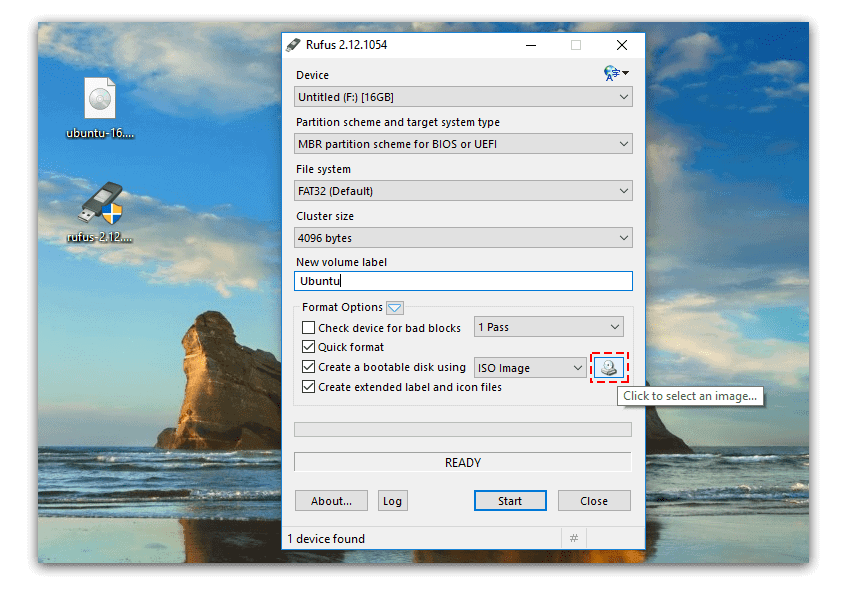
2. Select the USB Drive you want to use and click on “click to select an image…”
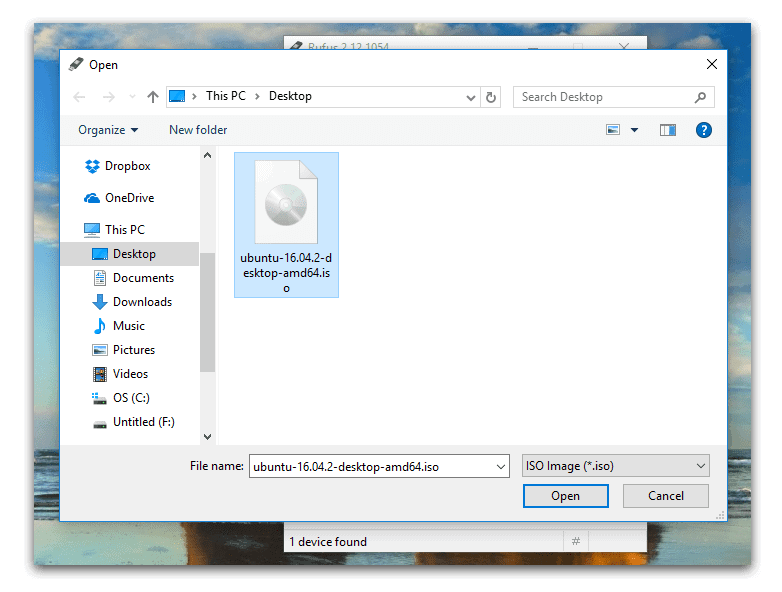
3. In the next window, navigate to where the Ubuntu.iso file was stored after the download. Select it and click on open.
4. In the next step, click on “Yes” to download Syslinux file

5. Click “Start” and select “write in ISO Image mode” to create your Ubuntu USB.
The Live USB drive will have been created and you can use it to access Ubuntu. To do this, reboot the computer and press the appropriate function key that allows you to select the drive to boot from. Select the USB drive and opt to try Ubuntu without installing.
Creating Ubuntu Live USB Drive on macOS Sierra
Mac users will need to use Terminal to create a live USB. To access Terminal go to Applications then select “Terminal”. To make this easier, transfer the downloaded iso file to the desktop then follow these steps:
1. Rename ISO Image file to “ubuntu.iso” and move your file to Desktop.
2. Open terminal and type this command:
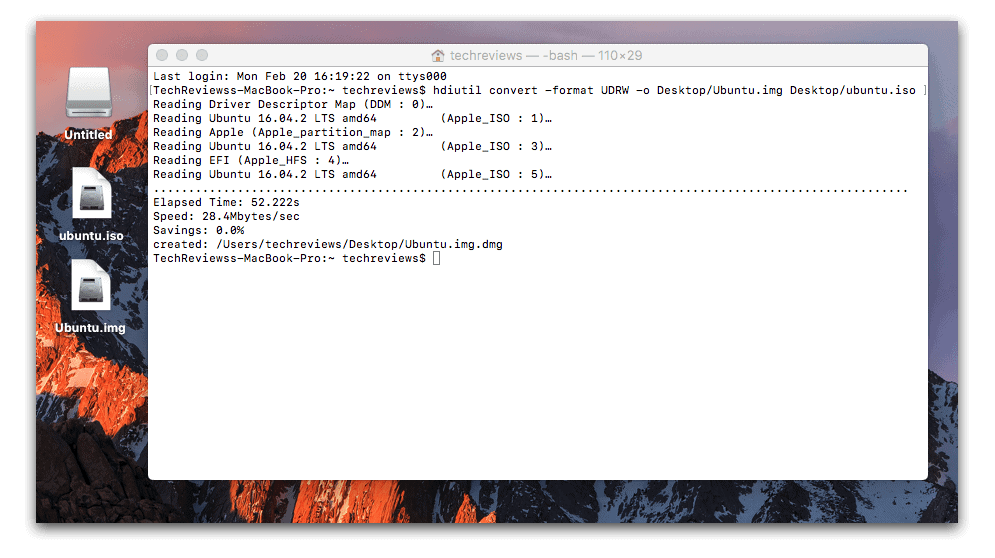
hdiutil convert -format UDRW -o Desktop/Ubuntu.img Desktop/ubuntu.iso
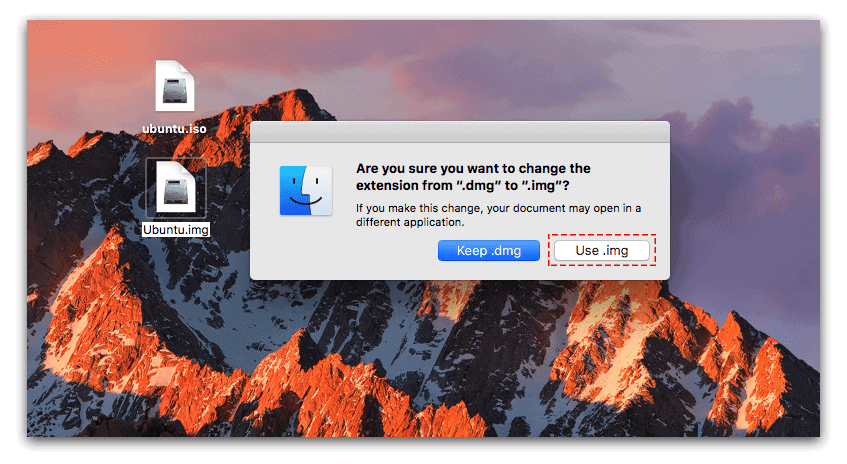
This changes the file format from .iso to .img. The output file will have a .dmg extension. Rename “ubuntu.img.dmg” to Ubuntu.img.
3. Plug the USB flash drive in and type the command:
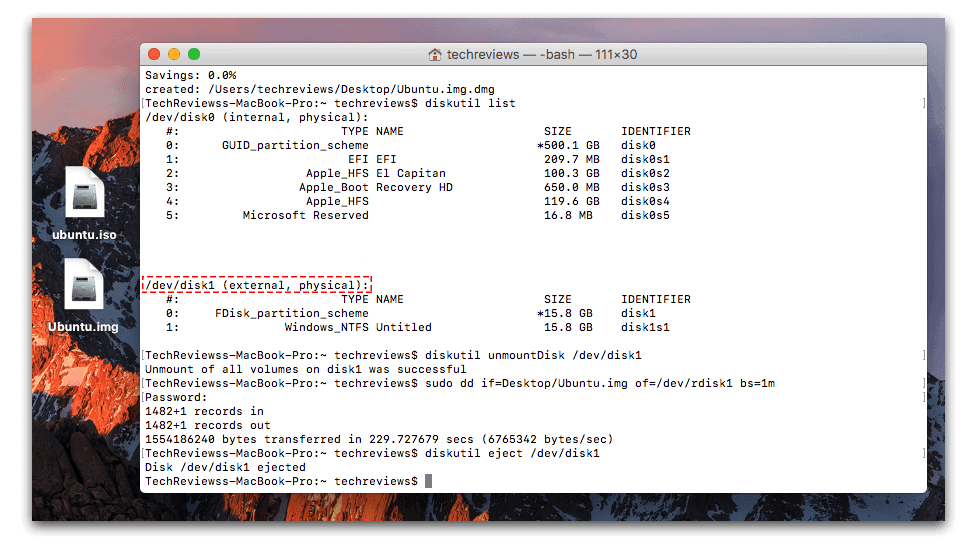
diskutil list
Press Enter and you will see a list of the devices attached to the Mac. Look for the USB device you would like to use and note its device node. This is shown by dev/disk followed by a number. In the commands that follow we will use # as the number so be sure to substitute this with the number you see.
diskutil unmountDisk /dev/disk#
sudo dd if=Desktop/Ubuntu.img of=/dev/rdisk# bs=1m
diskutil eject /dev/disk#
This makes the USB drive a bootable device and copies the Ubuntu software. You may be required to enter the Mac’s administrator password so as to execute this command do so and press enter. Once the process is over the USB drive will be ejected and can now be used to run Ubuntu in your Mac. Reboot macOS and press Option key then select your Ubuntu USB Drive.


Can I boot a Windows PC with a USB drive that I created using the MacOS process?
Thanks for your clear directions!
Can you explain?